Migrate devices to Azure IoT Hub
If you decide to migrate from an IoT Central-based solution to an IoT Hub-based solution, you need to change the configuration of all the devices currently connected to your application. The IoTC Migrator tool automates this device migration process.
The migrator tool:
- Creates device registrations in your IoT hub for the devices that currently connect to your IoT Central application.
- Uses a command to send the ID scope of the Device Provisioning Service (DPS) instance associated with your IoT hub to your devices.
The tool requires your connected devices to implement a DeviceMove command that's defined in the device template in your IoT Central application. The command payload is the ID scope of the target DPS instance. When a device receives this command, it should:
- Stop sending telemetry and disconnect from the IoT Central application.
- Provision itself with DPS by using the new ID scope in the command payload.
- Use the provisioning result to connect to the destination IoT hub and start sending telemetry again.
Tip
You can also use the migrator tool to migrate devices between IoT Cental applications, or from an IoT hub to an IoT Central application.
Minimize disruption
To minimize disruption, you can migrate your devices in phases. The migrator tool uses device groups to move devices from IoT Central to your IoT hub. Divide your device fleet into device groups such as devices in Texas, devices in New York, and devices in the rest of the US. Then migrate each device group independently.
Warning
You can't add unassigned devices to a device group. Therefore you can't currently use the migrator tool to migrate unassigned devices.
Minimize business impact by following these steps:
Create the PaaS solution and run it in parallel with the IoT Central application.
Set up continuous data export in IoT Central application and appropriate routes to the PaaS solution IoT hub. Transform both data channels and store the data into the same data lake.
Migrate the devices in phases and verify at each phase. If something doesn't go as planned, fail the devices back to IoT Central.
When you've migrated all the devices to the PaaS solution and fully exported your data from IoT Central, you can remove the devices from the IoT Central solution.
After the migration, devices aren't automatically deleted from the IoT Central application. These devices continue to be billed as IoT Central charges for all provisioned devices in the application. When you remove these devices from the IoT Central application, you're no longer billed for them. Eventually, remove the IoT Central application.
Move existing data out of IoT Central
You can configure IoT Central to continuously export telemetry and property values. Export destinations are data stores such as Azure Data Lake, Event Hubs, and Webhooks. You can export device templates using either the IoT Central UI or the REST API. The REST API lets you export the users in an IoT Central application.
Prerequisites
You need the following prerequisites to complete the device migration steps:
- The source IoT Central application where your devices currently connect.
- The destination IoT hub where you want to move the devices to. This IoT hub must be linked to a DPS instance.
- node.js and npm installed on the local machine where you run the migrator tool.
Device requirements
The devices that you want to migrate must implement the DeviceMove command in a component called migration. The command payload contains the ID scope of the destination DPS instance. The migrator tool repository includes an example DTDL component model that defines the DeviceMove command. You can add this component to your existing device templates.
The tool assumes that the component name is migration and that the interface ID is dtmi:azureiot:DeviceMigration;1:
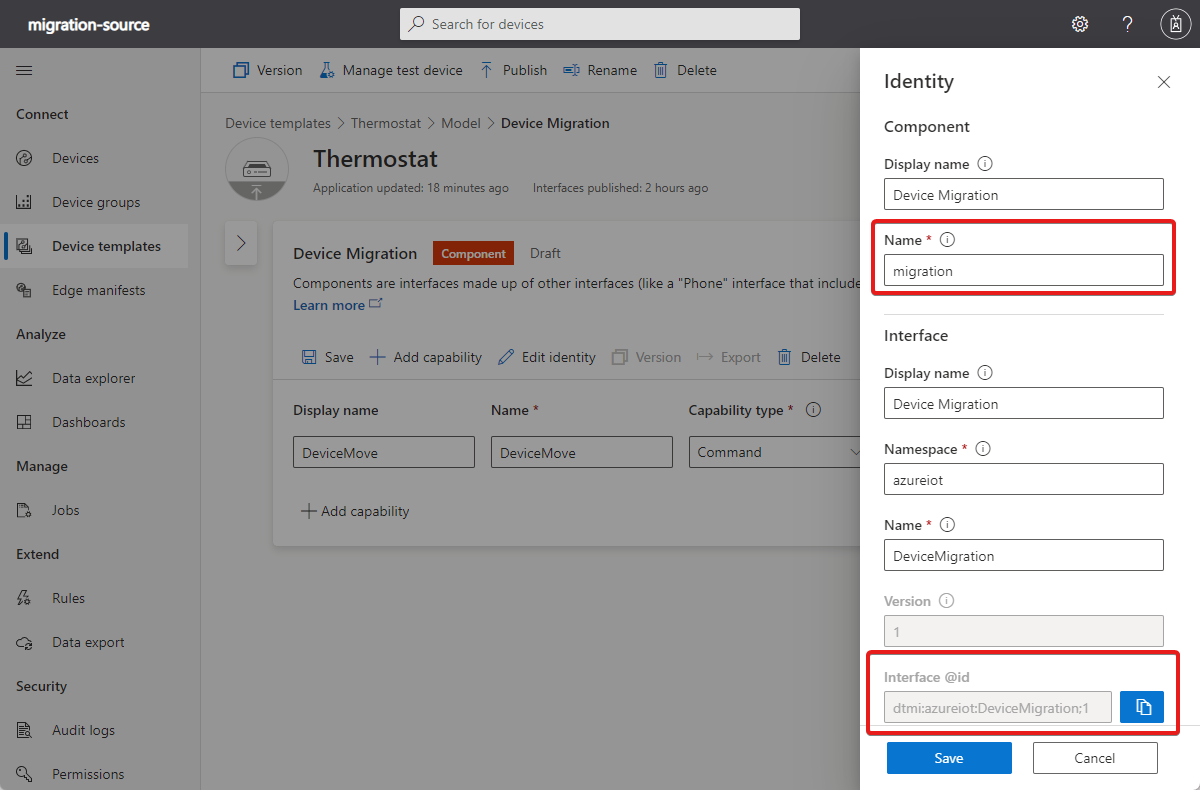
The tool repository also includes sample code that shows you how a device should implement the DeviceMove command.
Tool setup
Complete the following setup tasks to prepare for the migration:
Microsoft Entra application
The migrator tool requires a Microsoft Entra application registration to enable it to authenticate with your Azure subscription:
Navigate to Azure portal > Microsoft Entra ID > App registrations.
Select New Registration.
Enter a name such as "IoTC Migrator app".
Select Accounts in any organizational directory (Any Microsoft Entra directory - Multitenant) and personal Microsoft accounts (e.g. Skype, Xbox).
Select Single page application (SPA).
Enter
http://localhost:3000as the redirect URI. You add this value to the migrator app configuration later.Select Register.
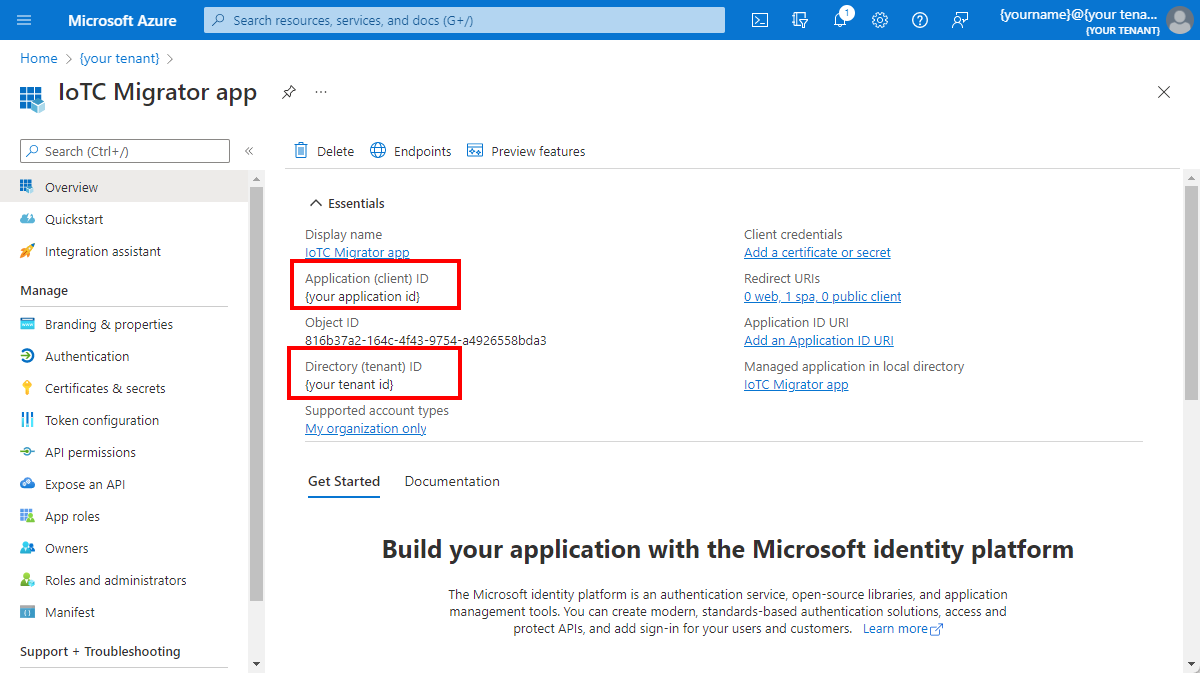
Make a note of the Application (client) ID and Directory (tenant) ID values. You use these values later to configure the migrator app:
Navigate to the Manifest page in the registration and replace the contents of the
requiredResourceAccesswith the following configuration:[ { "resourceAppId": "9edfcdd9-0bc5-4bd4-b287-c3afc716aac7", "resourceAccess": [ { "id": "73792908-5709-46da-9a68-098589599db6", "type": "Scope" } ] }, { "resourceAppId": "797f4846-ba00-4fd7-ba43-dac1f8f63013", "resourceAccess": [ { "id": "41094075-9dad-400e-a0bd-54e686782033", "type": "Scope" } ] }, { "resourceAppId": "00000003-0000-0000-c000-000000000000", "resourceAccess": [ { "id": "e1fe6dd8-ba31-4d61-89e7-88639da4683d", "type": "Scope" } ] } ]Save the changes.

Add the device keys to DPS
Add the shared access signature keys or X.509 certificates from your IoT Central application to your DPS allocation group.
If your devices use shared access signatures to authenticate to your IoT Central application:
- In your IoT Central application, navigate to Permissions > Device connection groups.
- Select the enrollment group your devices use.
- Make a note of the primary and secondary keys.
- In the Azure portal, navigate to your DPS instance.
- Select Manage enrollments.
- Create a new enrollment and set the attestation type to Symmetric Key, unselect Auto-generate keys, and then add the primary and secondary keys you made a note of.
- Select Save.
If your devices use X.509 certificates to authenticate to your IoT Central application:
- In the Azure portal, navigate to your DPS instance.
- Select Certificates and then select Add.
- Upload and verify the root or intermediate X.509 certificates you use in your IoT Central application.
- Select Manage enrollments.
- Create a new enrollment and set the attestation type to Certificate, then select the primary and secondary certificates you uploaded.
- Select Save.
Download and configure the migrator tool
Download or clone a copy of the migrator tool to your local machine:
git clone https://github.com/Azure/iotc-migrator.git
In the root of the downloaded repository, create a .env file. Update the REACT_APP_AAD_APP_CLIENT_ID, REACT_APP_AAD_APP_TENANT_ID, and REACT_APP_AAD_APP_REDIRECT_URI values with the values from the Microsoft Entra application registration you created previously. Then save the changes:
PORT=3000
REACT_APP_AAD_APP_CLIENT_ID=<your-AAD-Application-(client)-ID>
REACT_APP_AAD_APP_TENANT_ID=<your-AAD-Directory-(tenant)-ID>
REACT_APP_AAD_APP_REDIRECT_URI=http://localhost:3000
Tip
Make sure the REACT_APP_AAD_APP_REDIRECT_URI matches the redirect URI you used in your Microsoft Entra application registration.
In your command-line environment, navigate to the root of the iotc-migrator repository. Then run the following commands to install the required node.js packages and then run the tool:
npm install
npm start
After the migrator app starts, navigate to http://localhost:3000 to view the tool. Sign in when you're prompted.
Migrate devices
Use the tool to migrate your devices in batches. Enter the migration details on the New migration page:
- Enter a name for the migration.
- Select a device group from your IoT Central application.
- Select a device template that includes the DeviceMove command definition.
- Select Move to your own Azure IoT Hub.
- Select the DPS instance linked to your target IoT hub.
- Select Migrate. The tool prompts you to copy the keys from your IoT Central application to the DPS enrollment group. You previously completed this step in the Add the device keys to DPS step.

The tool now registers all the connected devices that matched the target device filter in the destination IoT hub. The tool then creates a job in your IoT Central application to call the DeviceMove method on all those devices. The command payload contains the ID scope of the destination DPS instance.
Verify migration
Use the Migration status page in the migrator tool to monitor the progress:
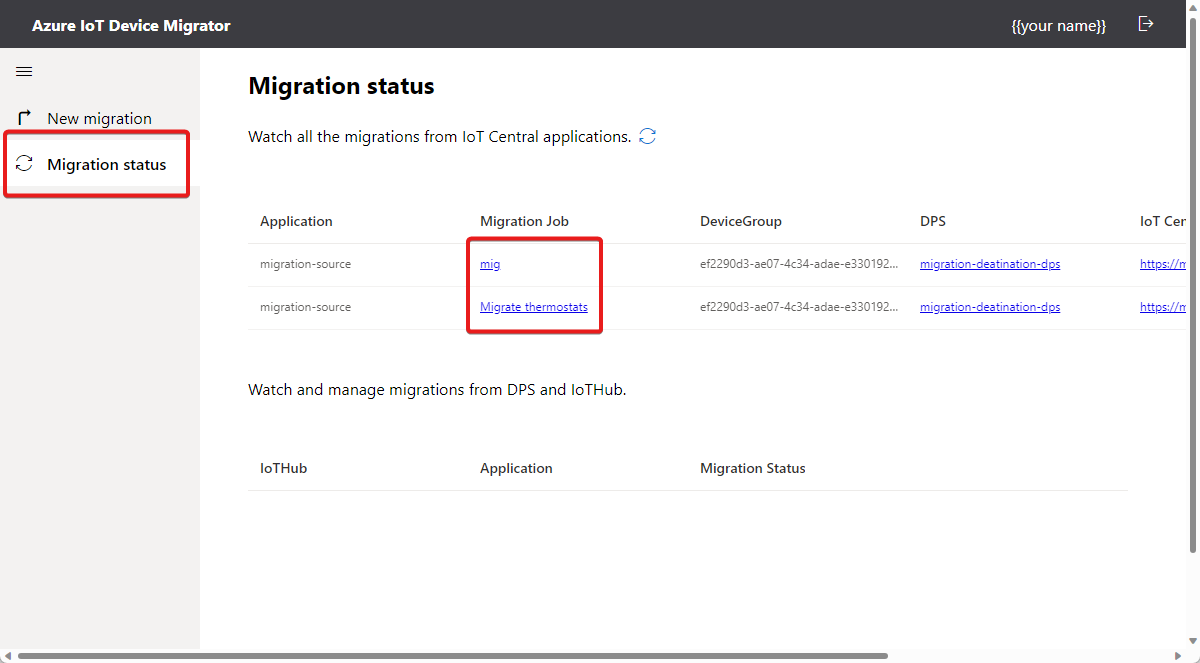
Select a job on the Migration status page to view the job status in your IoT Central application. Use this page to view the status of the individual devices in the job:

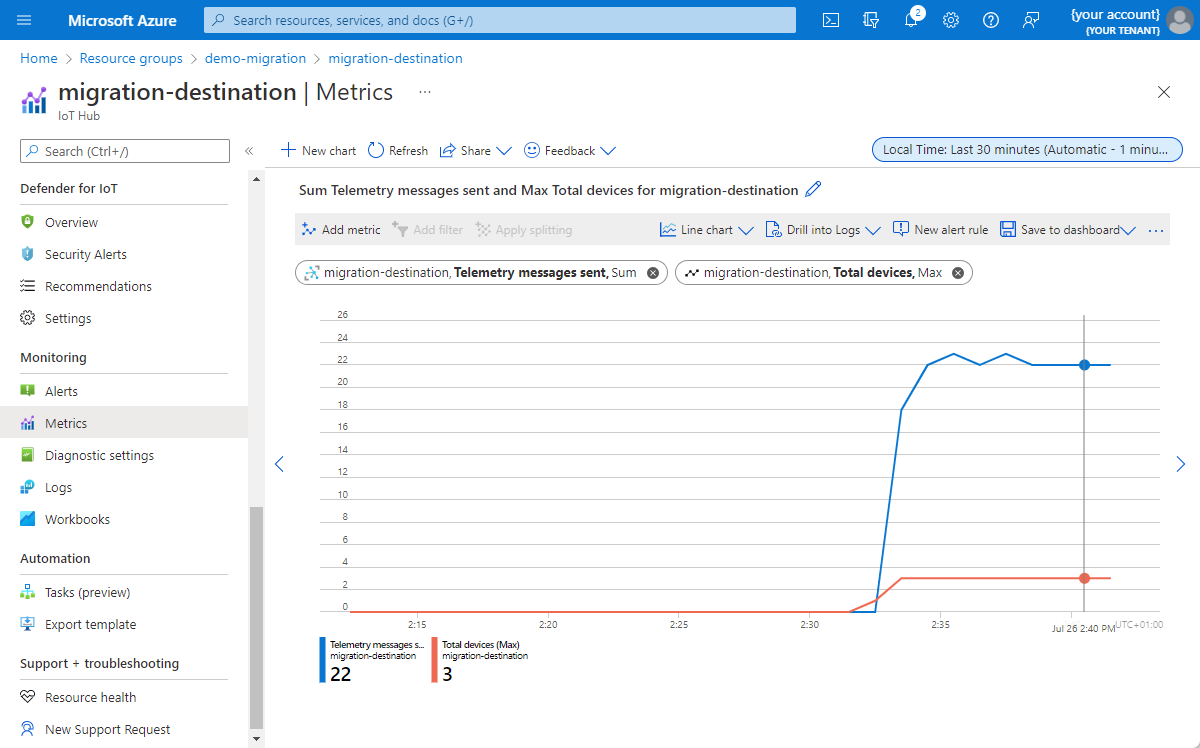
Devices that migrated successfully:
Show as Disconnected on the devices page in your IoT Central application.
Show as registered and provisioned in your IoT hub:

Are now sending telemetry to your IoT hub


Feedback
Coming soon: Throughout 2024 we will be phasing out GitHub Issues as the feedback mechanism for content and replacing it with a new feedback system. For more information see: https://aka.ms/ContentUserFeedback.
Submit and view feedback for