Use properties in an Azure IoT Central solution
This how-to guide shows you how to use device properties that are defined in a device template in your Azure IoT Central application.
Properties represent point-in-time values. For example, a device can use a property to report the target temperature it's trying to reach. By default, device properties are read-only in IoT Central. Writable properties let you synchronize state between your device and your Azure IoT Central application.
You can also define cloud properties in an Azure IoT Central application. Cloud property values are never exchanged with a device and are out of scope for this article.
To learn about the IoT Pug and Play property conventions, see IoT Plug and Play conventions.
To learn more about the property data that a device exchanges with IoT Central, see Telemetry, property, and command payloads.
To learn how to manage properties by using the IoT Central REST API, see How to use the IoT Central REST API to control devices..
To learn how to implement properties in a device without using the device SDKs, see Communicate with an IoT hub using the MQTT protocol.
Define your properties
Properties are data fields that represent the state of your device. Use properties to represent the durable state of the device, such as the on/off state of a device. Properties can also represent basic device properties, such as the software version of the device. You declare properties as read-only or writable.
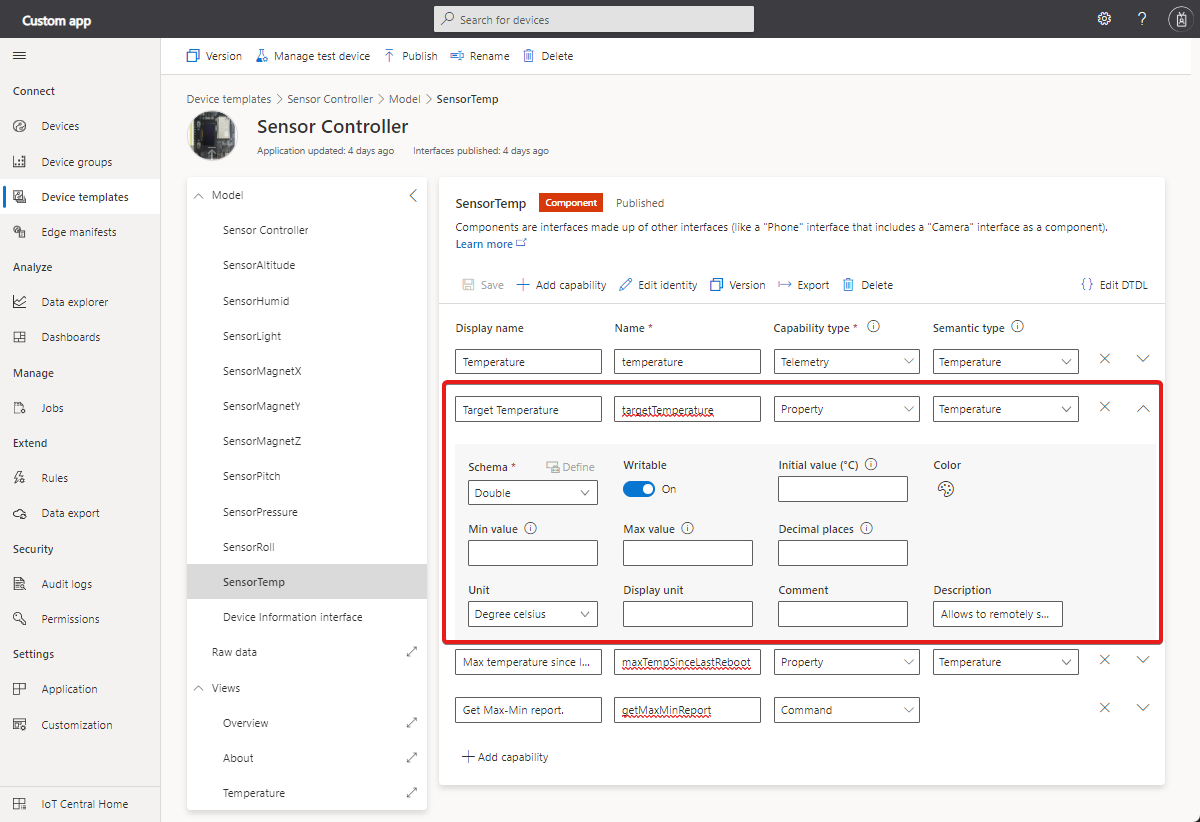
The following screenshot shows a property definition in an Azure IoT Central application.
The following table shows the configuration settings for a property capability.
| Field | Description |
|---|---|
| Display name | The display name for the property value used on dashboard tiles and device forms. |
| Name | The name of the property. Azure IoT Central generates a value for this field from the display name, but you can choose your own value if necessary. This field must be alphanumeric. The device code uses this Name value. |
| Capability type | Property. |
| Semantic type | The semantic type of the property, such as temperature, state, or event. The choice of semantic type determines which of the following fields are available. |
| Schema | The property data type, such as double, string, or vector. The semantic type determines the available choices. Schema isn't available for the event and state semantic types. |
| Writable | If the property isn't writable, the device can report property values to Azure IoT Central. If the property is writable, the device can report property values to Azure IoT Central. Then Azure IoT Central can send property updates to the device. |
| Severity | Only available for the event semantic type. The severities are Error, Information, or Warning. |
| State values | Only available for the state semantic type. Define the possible state values, each of which has display name, name, enumeration type, and value. |
| Unit | A unit for the property value, such as mph, %, or °C. |
| Display unit | A display unit for use on dashboards tiles and device forms. |
| Comment | Any comments about the property capability. |
| Description | A description of the property capability. |
To learn about the Digital Twin Definition Language (DTDL) that Azure IoT Central uses to define properties in a device template, see IoT Plug and Play conventions > Read-only properties.
Optional fields, such as display name and description, let you add more details to the interface and capabilities.
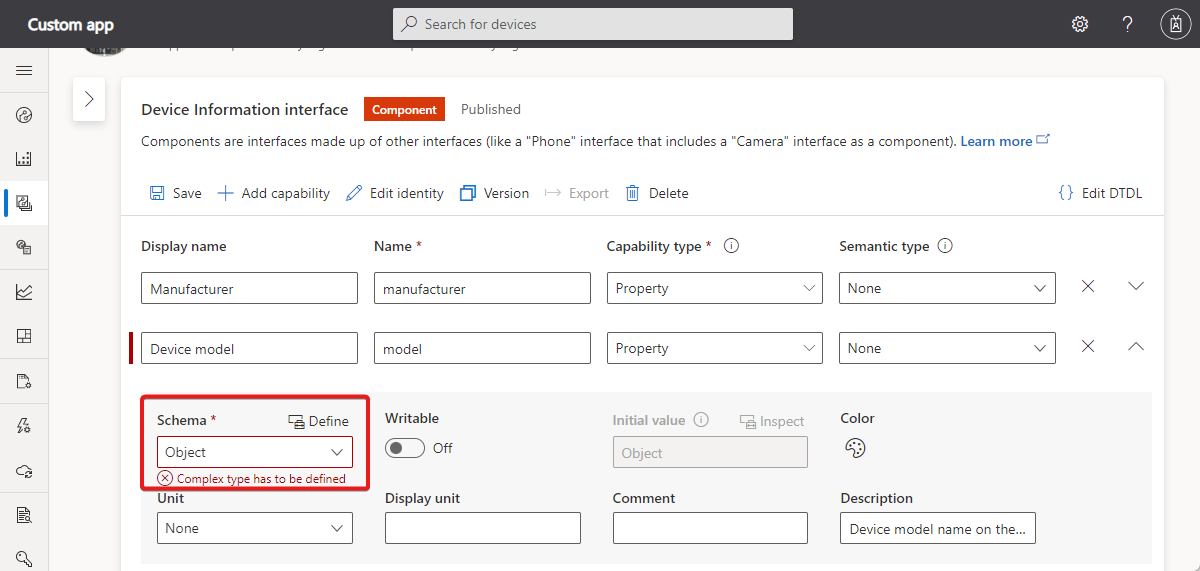
When you create a property, you can specify complex schema types such as Object and Enum.
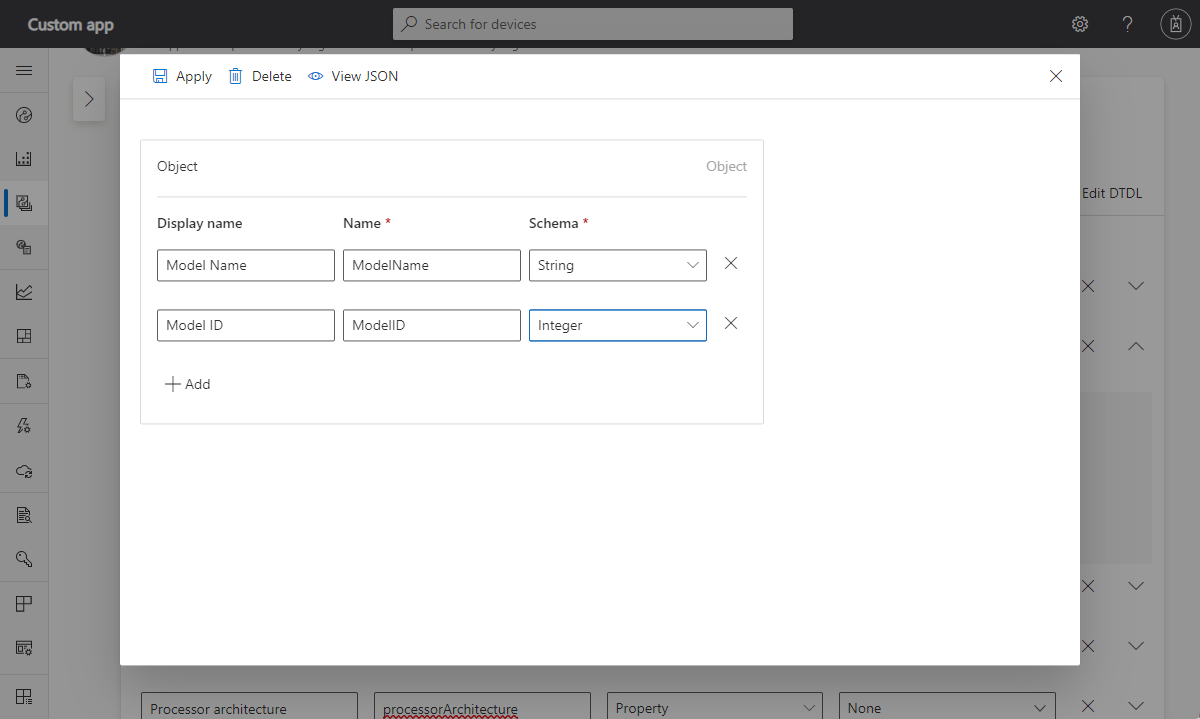
When you select the complex Schema, such as Object, you need to define the object schema.
Implement read-only properties
By default, properties are read-only. Read-only properties let a device report property value updates to your Azure IoT Central application. Your Azure IoT Central application can't set the value of a read-only property.
Azure IoT Central uses device twins to synchronize property values between the device and the Azure IoT Central application. Device property values use device twin reported properties. For more information, see device twins.
A device sends property updates as a JSON payload. For more information, see Telemetry, property, and command payloads.
You can use the Azure IoT device SDK to send a property update to your Azure IoT Central application.
For example implementations in multiple languages, see Create and connect a client application to your Azure IoT Central application.
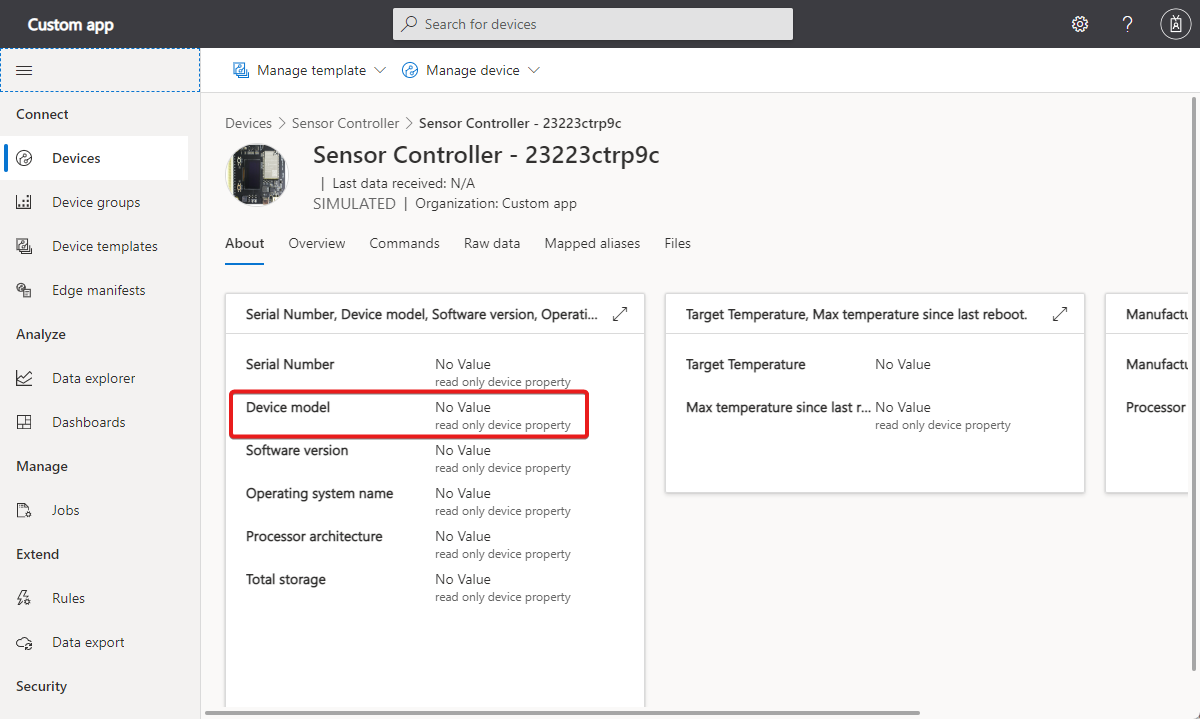
The following view in Azure IoT Central application shows the device read-only properties:
Implement writable properties
An IoT Central operator sets writable properties on a form. Azure IoT Central sends the property to the device. Azure IoT Central expects an acknowledgment from the device.
For example implementations in multiple languages, see Create and connect a client application to your Azure IoT Central application.
The response message should include the ac and av fields. The ad field is optional. To learn more, see IoT Plug and Play conventions > Writable properties.
When the operator sets a writable property in the Azure IoT Central UI, the application uses a device twin desired property to send the value to the device. The device then responds by using a device twin reported property. When Azure IoT Central receives the reported property value, it updates the property view with a status of Accepted.
When you enter the value and select Save, the initial status is Pending. When the device accepts the change, the status changes to Accepted.
Use properties on unassigned devices
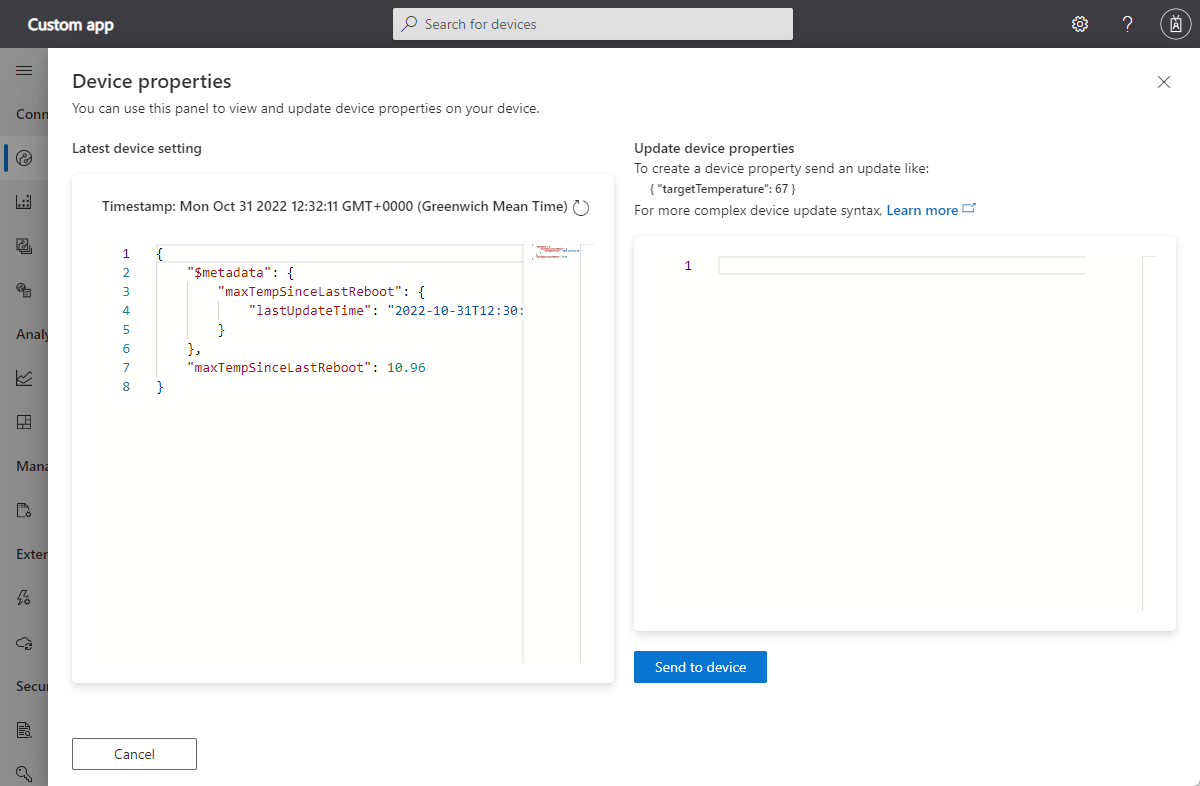
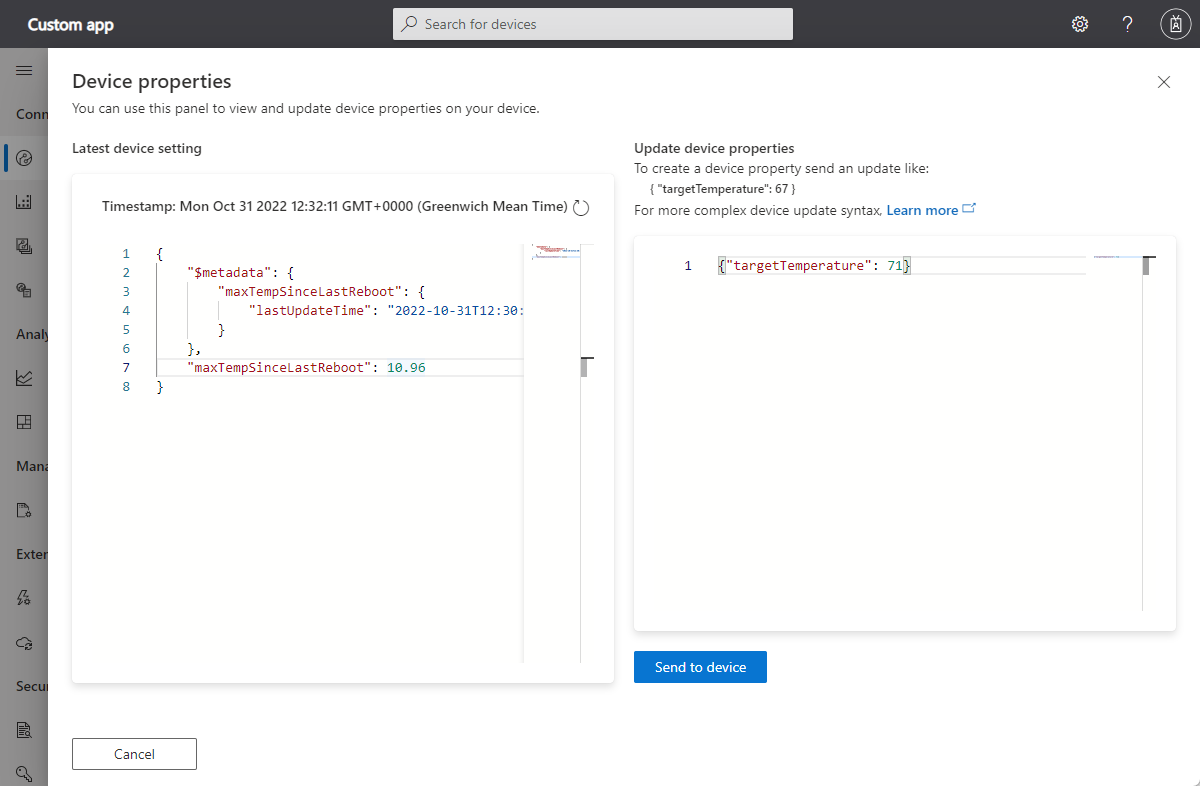
You can view and update writable properties on a device that isn't assigned to a device template.
To view existing properties on an unassigned device, navigate to the device in the Devices section, select Manage device, and then Device Properties:
You can update the writable properties in this view:
Next steps
Now that you've learned how to use properties in your Azure IoT Central application, see:
Feedback
Coming soon: Throughout 2024 we will be phasing out GitHub Issues as the feedback mechanism for content and replacing it with a new feedback system. For more information see: https://aka.ms/ContentUserFeedback.
Submit and view feedback for
