Quickstart - Use your smartphone as a device to send telemetry to an IoT Central application
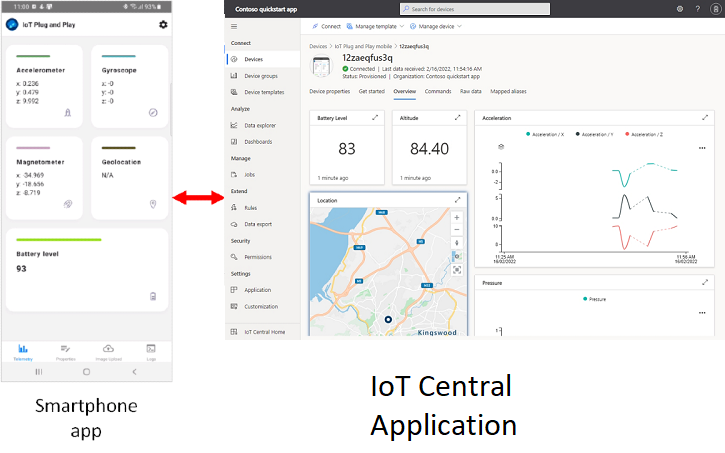
In this quickstart, you create an Azure IoT Central application and connect your first device. To get you started quickly, you install an app on your smartphone to act as the device. The app sends telemetry, reports properties, and responds to commands:
In this quickstart, you:
- Create an IoT Central application.
- Register a new device in the application.
- Connect a device to the application and view the telemetry it sends.
- Control the device from your application.
Prerequisites
An Azure account with an active subscription. Create an account for free.
You should have at least Contributor access in your Azure subscription. If you created the subscription yourself, you're automatically an administrator with sufficient access. To learn more, see What is Azure role-based access control?.
An Android or iOS smartphone on which you're able to install a free app from one of the official app stores.
Create an application
IoT Central provides various industry-focused application templates to help you get started. This quickstart uses the Custom application template to create an application from scratch:
Navigate to the Create IoT Central Application page in the Azure portal. If prompted, sign in with your Azure account.
Enter the following information:
Field Description Subscription The Azure subscription you want to use. Resource group The resource group you want to use. You can create a new resource group or use an existing one. Resource name A valid Azure resource name such as my-contoso-app. Application URL A URL subdomain for your application such as my-contoso-app. The URL for an IoT Central application looks like https://my-contoso-app.azureiotcentral.com.Template Custom application Region The Azure region you want to use. Pricing plan Standard 2 Select Review + create. Then select Create.
When the app is ready, you can navigate to it from the Azure portal:
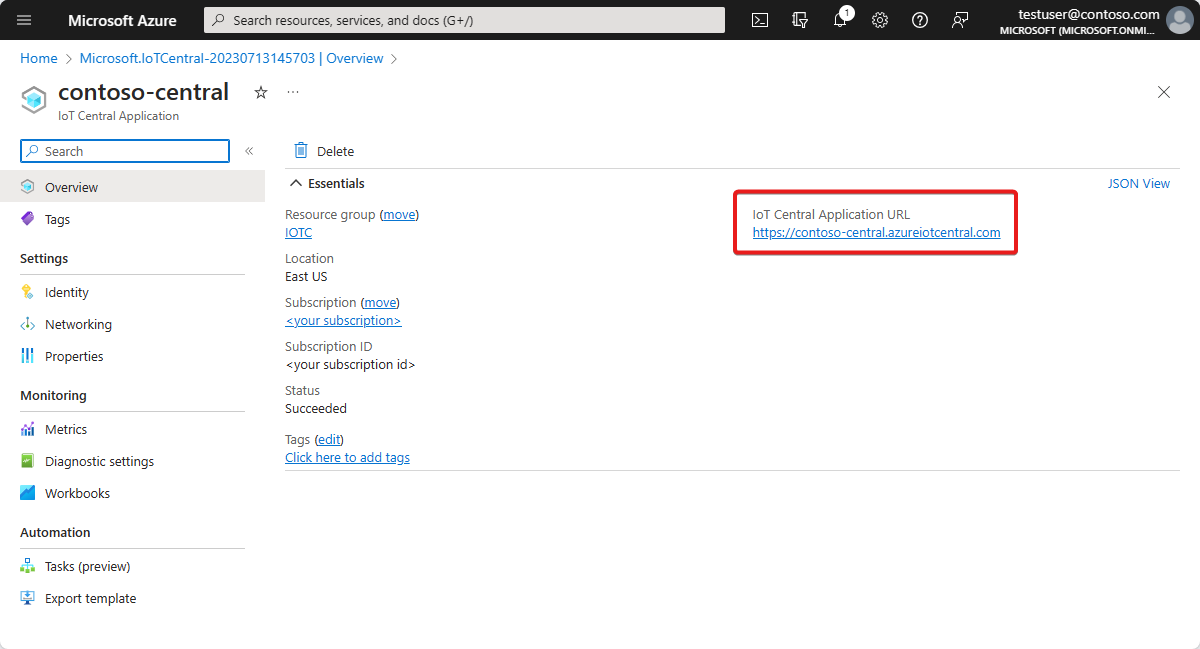
To learn more, see Create an Azure IoT Central application.
Register a device
To connect a device to your IoT Central application, you need some connection information. An easy way to get this connection information is to register your device.
To register your device:
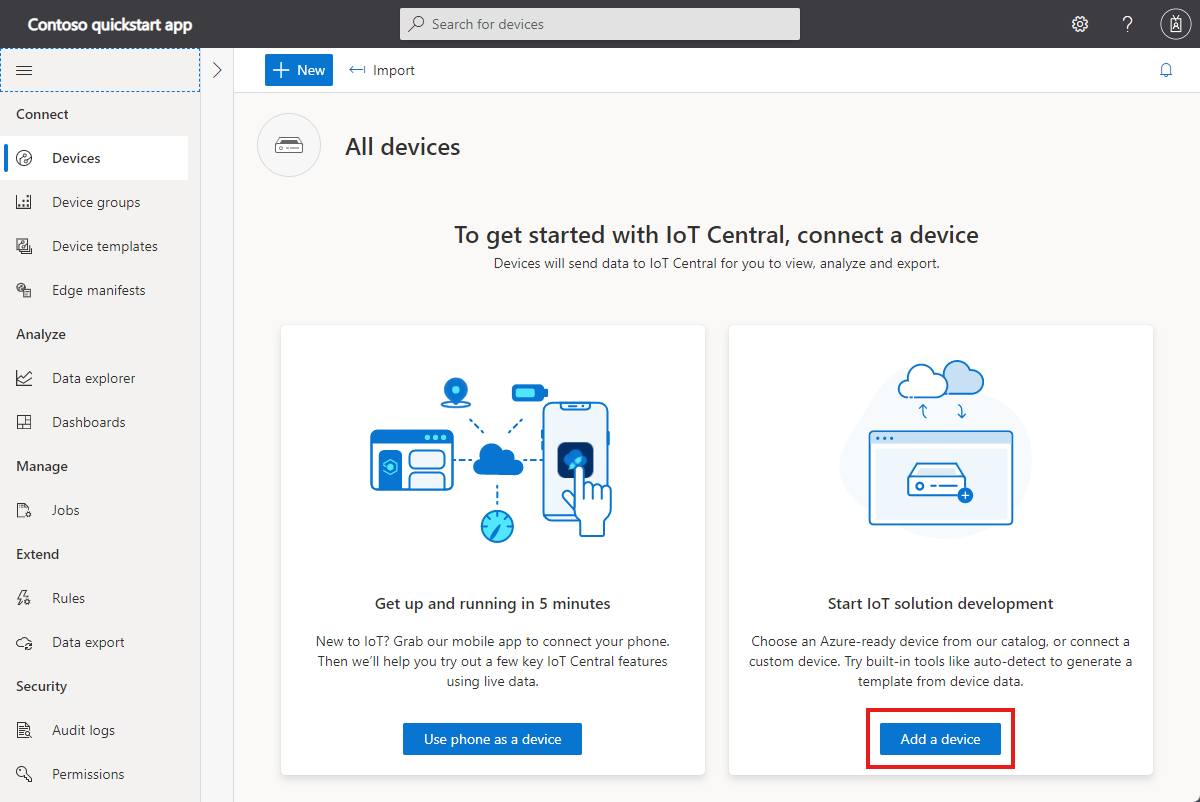
In IoT Central, navigate to the Devices page and select Add a device:
On the Create a new device page, accept the defaults, and then select Create.
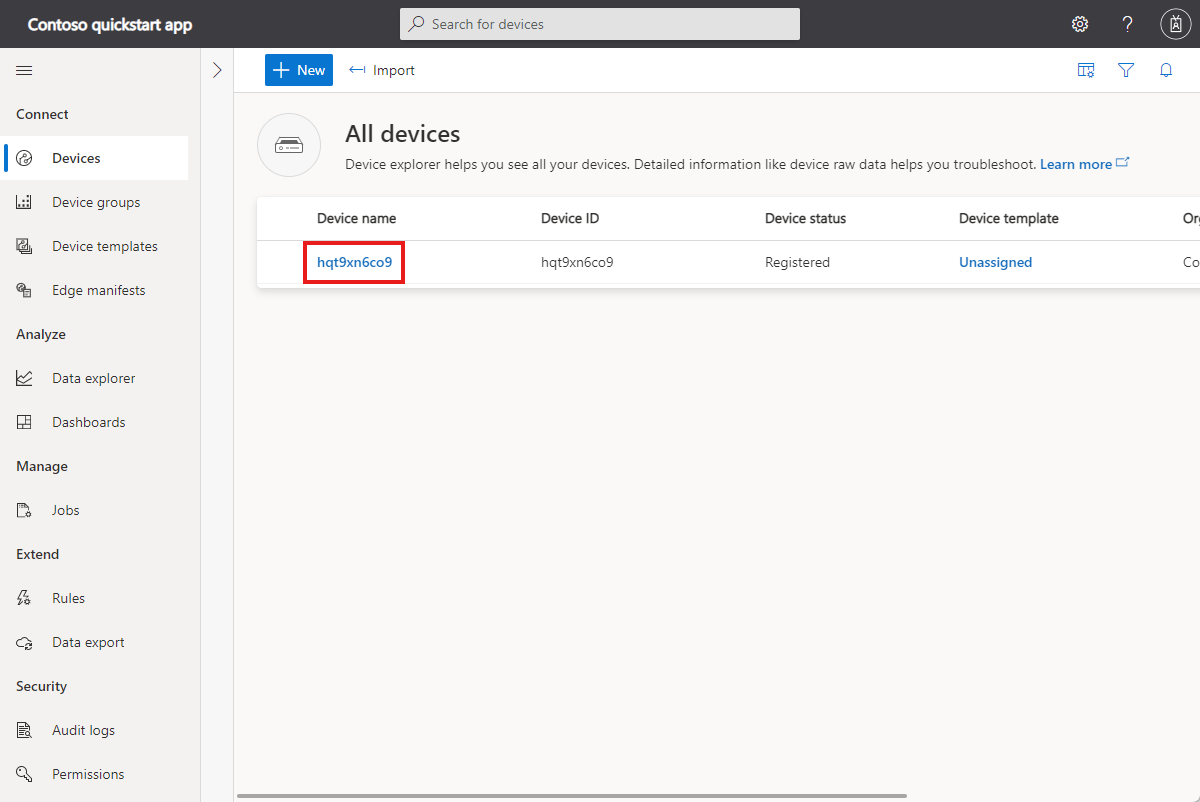
In the list of devices, click on the device name:
On the device page, select Connect and then QR Code:
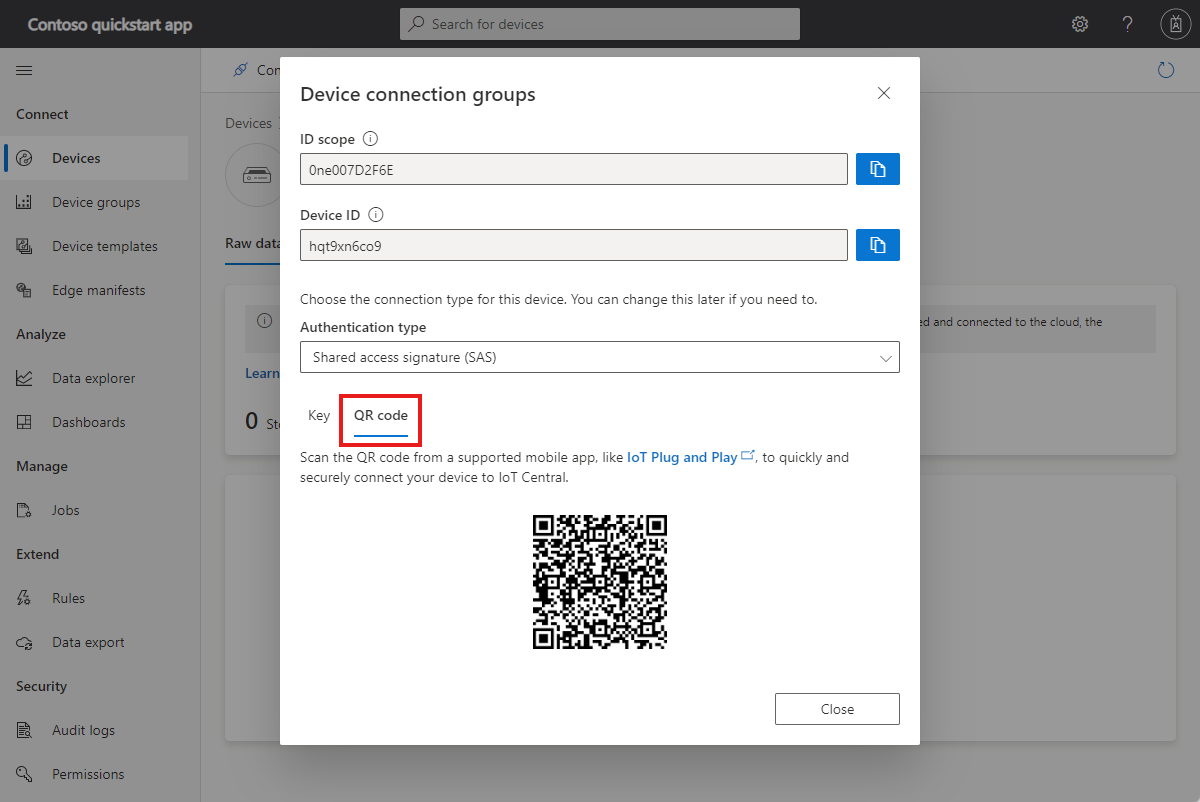


Keep this page open. In the next section, you scan this QR code using the smartphone app to connect it to IoT Central.
Tip
The QR code contains the information, such as the registered device ID, that your device needs to establish a connection to your IoT Central application. It saves you from the need to enter the connection information manually.
Connect your device
To get you started quickly, this article uses the IoT Plug and Play smartphone app as an IoT device. The app sends telemetry collected from the smartphone's sensors, responds to commands invoked from IoT Central, and reports property values to IoT Central.
Install the app on your smartphone from one of the app stores:
![]()
![]()
To connect the IoT Plug and Play app to your Iot Central application:
Open the IoT PnP app on your smartphone.
On the welcome page, select Scan QR code. Point the smartphone's camera at the QR code. Then wait for a few seconds while the connection is established.
On the telemetry page in the app, you can see the data the app is sending to IoT Central. On the logs page, you can see the device connecting and several initialization messages.
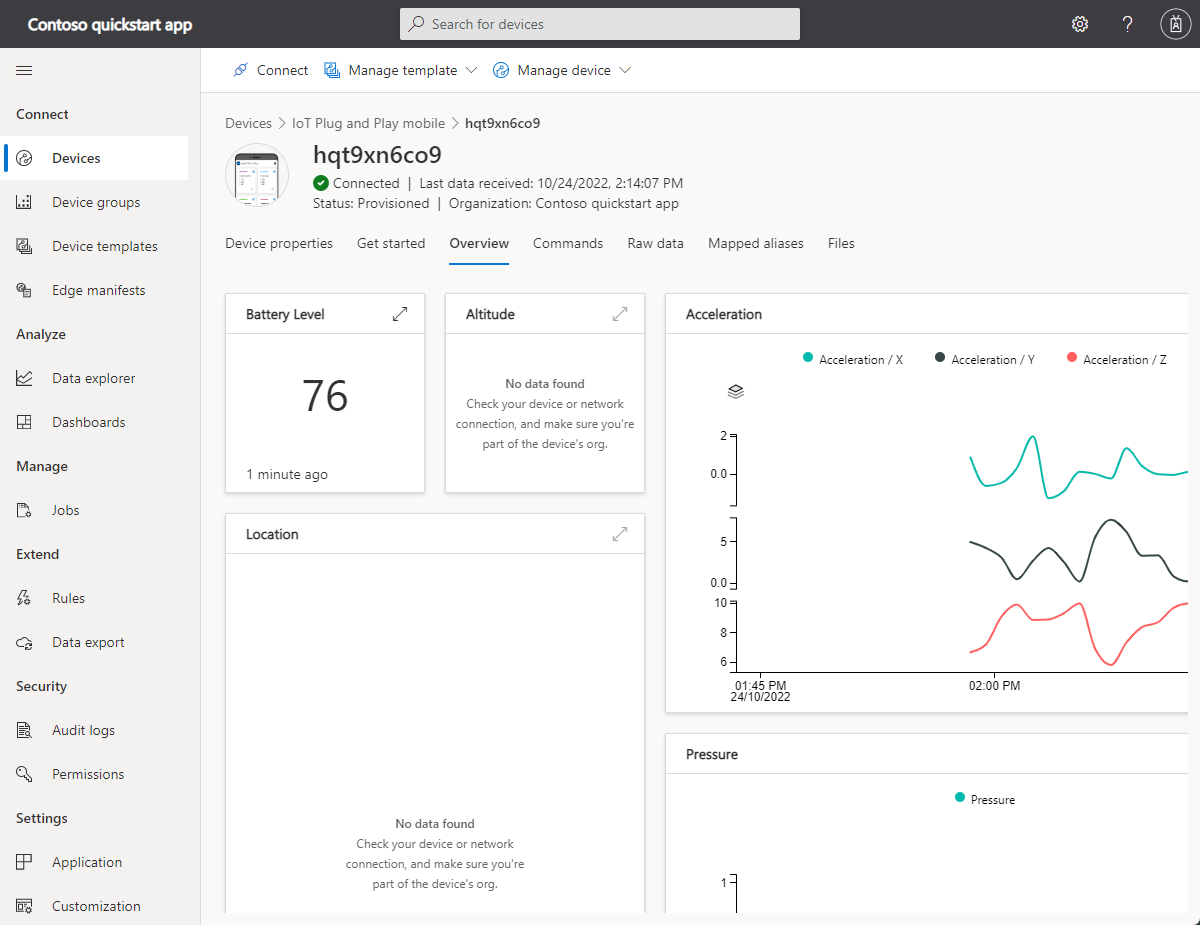
To view the telemetry from the smartphone app in IoT Central:
In IoT Central, navigate to the Devices page.
In the list of devices, click on the device name, then select Overview:

Tip
The smartphone app only sends data when the screen is on.
Control your device
To send a command from IoT Central to your device, select the Commands view for your device. The smartphone app can respond to three commands:

To make the light on your smartphone flash, use the LightOn command. Set the duration to three seconds, the pulse interval to five seconds, and the number of pulses to two. Select Run to send the command to the smartphone app. The light on your smartphone app flashes twice.
To see the acknowledgment from the smartphone app, select command history.
Clean up resources
If you don't plan to complete any further IoT Central quickstarts or tutorials, you can delete your IoT Central application:
- In your IoT Central application, navigate to Application > Management.
- Select Delete and then confirm your action.
Next step
In this quickstart, you created an IoT Central application and connected device that sends telemetry. Then you used a smartphone app as the IoT device that connects to IoT Central. Here's the suggested next step to continue learning about IoT Central:
Feedback
Coming soon: Throughout 2024 we will be phasing out GitHub Issues as the feedback mechanism for content and replacing it with a new feedback system. For more information see: https://aka.ms/ContentUserFeedback.
Submit and view feedback for