How to verify X.509 CA certificates with your Device Provisioning Service
A verified X.509 certificate authority (CA) certificate is a CA certificate that has been uploaded and registered to your provisioning service and then verified, either automatically or through proof-of-possession with the service.
Verified certificates play an important role when using enrollment groups. Verifying certificate ownership provides an additional security layer by ensuring that the uploader of the certificate is in possession of the certificate's private key. Verification prevents a malicious actor sniffing your traffic from extracting an intermediate certificate and using that certificate to create an enrollment group in their own provisioning service, effectively hijacking your devices. By proving ownership of the root or an intermediate certificate in a certificate chain, you're proving that you have permission to generate leaf certificates for the devices that will be registering as a part of that enrollment group. For this reason, the root or intermediate certificate configured in an enrollment group must either be a verified certificate or must roll up to a verified certificate in the certificate chain a device presents when it authenticates with the service. To learn more about X.509 certificate attestation, see X.509 certificates and Controlling device access to the provisioning service with X.509 certificates.
Prerequisites
Before you begin the steps in this article, have the following prerequisites prepared:
- A DPS instance created in your Azure subscription.
- A .cer or .pem certificate file.
Automatic verification of intermediate or root CA through self-attestation
If you are using an intermediate or root CA that you trust and know you have full ownership of the certificate, you can self-attest that you have verified the certificate.
To add an auto-verified certificate, follow these steps:
In the Azure portal, navigate to your provisioning service and select Certificates from the left-hand menu.
Select Add to add a new certificate.
Enter a friendly display name for your certificate.
Browse to the .cer or .pem file that represents the public part of your X.509 certificate. Click Upload.
Check the box next to Set certificate status to verified on upload.
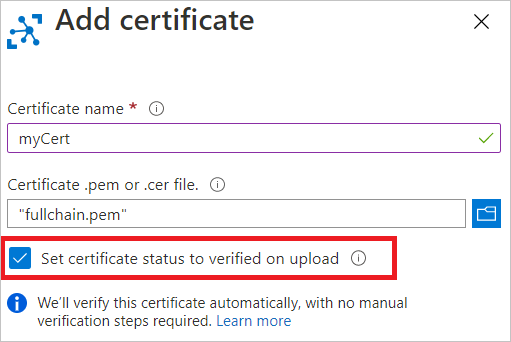
Select Save.
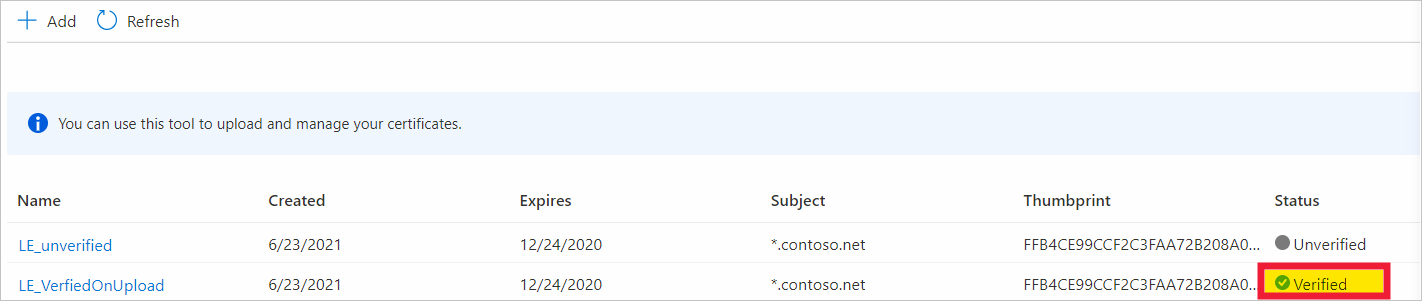
Your certificate is show in the certificate tab with a status Verified.
Manual verification of intermediate or root CA
Automatic verification is recommended when you upload new intermediate or root CA certificates to DPS. However, you can still perform proof-of-possession if it makes sense for your IoT scenario.
Proof-of-possession involves the following steps:
- Get a unique verification code generated by the provisioning service for your X.509 CA certificate. You can do this from the Azure portal.
- Create an X.509 verification certificate with the verification code as its subject and sign the certificate with the private key associated with your X.509 CA certificate.
- Upload the signed verification certificate to the service. The service validates the verification certificate using the public portion of the CA certificate to be verified, thus proving that you are in possession of the CA certificate's private key.
Register the public part of an X.509 certificate and get a verification code
To register a CA certificate with your provisioning service and get a verification code that you can use during proof-of-possession, follow these steps.
In the Azure portal, navigate to your provisioning service and open Certificates from the left-hand menu.
Select Add to add a new certificate.
Enter a friendly display name for your certificate in the Certificate name field.
Select the folder icon, then browse to the .cer or .pem file that represents the public part of your X.509 certificate. Select Open.
Once you get a notification that your certificate is successfully uploaded, select Save.
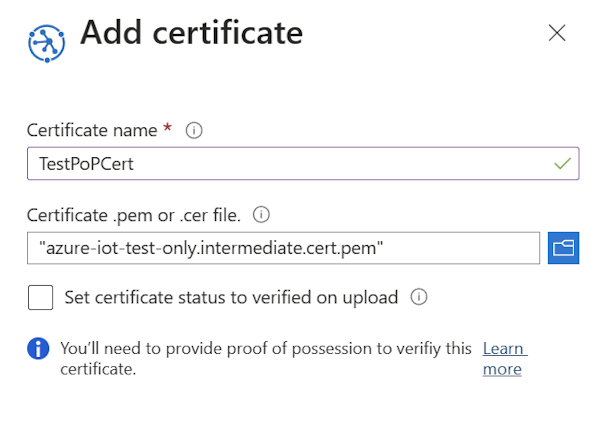
Your certificate will show in the Certificate Explorer list. Note that the status of this certificate is Unverified.
Select on the certificate that you added in the previous step to open its details.
In the certificate details, notice that there's an empty Verification code field. Select the Generate verification code button.

The provisioning service creates a Verification code that you can use to validate the certificate ownership. Copy the code to your clipboard.
Digitally sign the verification code to create a verification certificate
Now, you need to sign the verification code from DPS with the private key associated with your X.509 CA certificate, which generates a signature. This step is known as Proof of possession and results in a signed verification certificate.
Microsoft provides tools and samples that can help you create a signed verification certificate:
- The Azure IoT Hub C SDK provides PowerShell (Windows) and Bash (Linux) scripts to help you create CA and leaf certificates for development and to perform proof-of-possession using a verification code. You can download the files relevant to your system to a working folder and follow the instructions in the Managing CA certificates readme to perform proof-of-possession on a CA certificate.
- The Azure IoT Hub C# SDK contains the Group certificate verification sample, which you can use to do proof-of-possession.
The PowerShell and Bash scripts provided in the documentation and SDKs rely on OpenSSL. You may also use OpenSSL or other third-party tools to help you do proof-of-possession. For an example using tooling provided with the SDKs, see Create an X.509 certificate chain.
Upload the signed verification certificate
Upload the resulting signature as a verification certificate to your provisioning service in the Azure portal.
In the certificate details on the Azure portal, where you copied the verification code from, select the folder icon next to the Verification certificate .pem or .cer file field. Browse to the signed verification certificate from your system and select Open.
Once the certificate is successfully uploaded, select Verify. The status of your certificate changes to Verified in the Certificates list. Select Refresh if it does not update automatically.
Next steps
- To learn about how to use the portal to create an enrollment group, see Managing device enrollments with Azure portal.
- To learn about how to use the service SDKs to create an enrollment group, see Managing device enrollments with service SDKs.
Feedback
Coming soon: Throughout 2024 we will be phasing out GitHub Issues as the feedback mechanism for content and replacing it with a new feedback system. For more information see: https://aka.ms/ContentUserFeedback.
Submit and view feedback for