Create and provision an IoT Edge for Linux on Windows device using X.509 certificates
Applies to: ![]() IoT Edge 1.4
IoT Edge 1.4
Important
IoT Edge 1.4 is the supported release. If you are on an earlier release, see Update IoT Edge.
This article provides end-to-end instructions for registering and provisioning an IoT Edge for Linux on Windows device.
Every device that connects to an IoT hub has a device ID that's used to track cloud-to-device or device-to-cloud communications. You configure a device with its connection information, which includes the IoT hub hostname, the device ID, and the information the device uses to authenticate to IoT Hub.
The steps in this article walk through a process called manual provisioning, where you connect a single device to its IoT hub. For manual provisioning, you have two options for authenticating IoT Edge devices:
Symmetric keys: When you create a new device identity in IoT Hub, the service creates two keys. You place one of the keys on the device, and it presents the key to IoT Hub when authenticating.
This authentication method is faster to get started, but not as secure.
X.509 self-signed: You create two X.509 identity certificates and place them on the device. When you create a new device identity in IoT Hub, you provide thumbprints from both certificates. When the device authenticates to IoT Hub, it presents one certificate and IoT Hub verifies that the certificate matches its thumbprint.
This authentication method is more secure and recommended for production scenarios.
This article covers using X.509 certificates as your authentication method. If you want to use symmetric keys, see Create and provision an IoT Edge for Linux on Windows device using symmetric keys.
Note
If you have many devices to set up and don't want to manually provision each one, use one of the following articles to learn how IoT Edge works with the IoT Hub device provisioning service:
Prerequisites
This article covers registering your IoT Edge device and installing IoT Edge for Linux on Windows. These tasks have different prerequisites and utilities used to accomplish them. Make sure you have all the prerequisites covered before proceeding.
Device management tools
You can use the Azure portal, Visual Studio Code, or Azure CLI for the steps to register your device. Each utility has its own prerequisites or may need to be installed:
A free or standard IoT hub in your Azure subscription.
Device requirements
A Windows device with the following minimum requirements:
System Requirements
- Windows 101/11 (Pro, Enterprise, IoT Enterprise)
- Windows Server 20191/2022
1 Windows 10 and Windows Server 2019 minimum build 17763 with all current cumulative updates installed.
Hardware requirements
- Minimum Free Memory: 1 GB
- Minimum Free Disk Space: 10 GB
Virtualization support
- On Windows 10, enable Hyper-V. For more information, see Install Hyper-V on Windows 10.
- On Windows Server, install the Hyper-V role and create a default network switch. For more information, see Nested virtualization for Azure IoT Edge for Linux on Windows.
- On a virtual machine, configure nested virtualization. For more information, see nested virtualization.
Networking support
- Windows Server does not come with a default switch. Before you can deploy EFLOW to a Windows Server device, you need to create a virtual switch. For more information, see Create virtual switch for Linux on Windows.
- Windows Desktop versions come with a default switch that can be used for EFLOW installation. If needed, you can create your own custom virtual switch.
Tip
If you want to use GPU-accelerated Linux modules in your Azure IoT Edge for Linux on Windows deployment, there are several configuration options to consider.
You will need to install the correct drivers depending on your GPU architecture, and you may need access to a Windows Insider Program build. To determine your configuration needs and satisfy these prerequisites, see GPU acceleration for Azure IoT Edge for Linux on Windows.
Make sure you take the time to satisfy the prerequisites for GPU acceleration now. You will need to restart the installation process if you decide you want GPU acceleration during installation.
Developer tools
Prepare your target device for the installation of Azure IoT Edge for Linux on Windows and the deployment of the Linux virtual machine:
Set the execution policy on the target device to
AllSigned. You can check the current execution policy in an elevated PowerShell prompt using the following command:Get-ExecutionPolicy -ListIf the execution policy of
local machineis notAllSigned, you can set the execution policy using:Set-ExecutionPolicy -ExecutionPolicy AllSigned -Force
For more information on the Azure IoT Edge for Linux on Windows PowerShell module, see the PowerShell functions reference.
Generate device identity certificates
Manual provisioning with X.509 certificates requires IoT Edge version 1.0.10 or newer.
When you provision an IoT Edge device with X.509 certificates, you use what's called a device identity certificate. This certificate is only used for provisioning an IoT Edge device and authenticating the device with Azure IoT Hub. It's a leaf certificate that doesn't sign other certificates. The device identity certificate is separate from the certificate authority (CA) certificates that the IoT Edge device presents to modules or downstream devices for verification.
For X.509 certificate authentication, each device's authentication information is provided in the form of thumbprints taken from your device identity certificates. These thumbprints are given to IoT Hub at the time of device registration so that the service can recognize the device when it connects.
For more information about how the CA certificates are used in IoT Edge devices, see Understand how Azure IoT Edge uses certificates.
You need the following files for manual provisioning with X.509:
Two device identity certificates with their matching private key certificates in .cer or .pem formats. You need two device identity certificates for certificate rotation. A best practice is to prepare two different device identity certificates with different expiration dates. If one certificate expires, the other is still valid and gives you time to rotate the expired certificate.
One set of certificate and key files is provided to the IoT Edge runtime. When you create device identity certificates, set the certificate common name (CN) with the device ID that you want the device to have in your IoT hub.
Thumbprints taken from both device identity certificates. IoT Hub requires two thumbprints when registering an IoT Edge device. You can use only one certificate for registration. To use a single certificate, set the same certificate thumbprint for both the primary and secondary thumbprints when registering the device.
Thumbprint values are 40-hex characters for SHA-1 hashes or 64-hex characters for SHA-256 hashes. Both thumbprints are provided to IoT Hub at the time of device registration.
One way to retrieve the thumbprint from a certificate is with the following openssl command:
openssl x509 -in <certificate filename>.pem -text -fingerprintThe thumbprint is included in the output of this command. For example:
SHA1 Fingerprint=D2:68:D9:04:9F:1A:4D:6A:FD:84:77:68:7B:C6:33:C0:32:37:51:12
If you don't have certificates available, you can Create demo certificates to test IoT Edge device features. Follow the instructions in that article to set up certificate creation scripts, create a root CA certificate, and create a IoT Edge device identity certificate. For testing, you can create a single device identity certificate and use the same thumbprint for both primary and secondary thumbprint values when registering the device in IoT Hub.
Register your device
You can use the Azure portal, Visual Studio Code, or Azure CLI to register your device, depending on your preference.
In your IoT hub in the Azure portal, IoT Edge devices are created and managed separately from IoT devices that aren't edge enabled.
Sign in to the Azure portal and navigate to your IoT hub.
In the left pane, select Devices from the menu, then select Add Device.
On the Create a device page, provide the following information:
- Create a descriptive device ID. Make a note of this device ID, as you use it later.
- Check the IoT Edge Device checkbox.
- Select X.509 Self-Signed as the authentication type.
- Provide the primary and secondary identity certificate thumbprints. Thumbprint values are 40-hex characters for SHA-1 hashes or 64-hex characters for SHA-256 hashes. The Azure portal supports hexadecimal values only. Remove column separators and spaces from the thumbprint values before entering them in the portal. For example,
D2:68:D9:04:9F:1A:4D:6A:FD:84:77:68:7B:C6:33:C0:32:37:51:12is entered asD268D9049F1A4D6AFD8477687BC633C032375112.
Tip
If you are testing and want to use one certificate, you can use the same certificate for both the primary and secondary thumbprints.
Select Save.
Now that you have a device registered in IoT Hub, retrieve the information that you use to complete installation and provisioning of the IoT Edge runtime.
View registered devices and retrieve provisioning information
Devices that use X.509 certificate authentication need their IoT hub name, their device name, and their certificate files to complete installation and provisioning of the IoT Edge runtime.
The edge-enabled devices that connect to your IoT hub are listed on the Devices page. You can filter the list by device type IoT Edge devices.
Install IoT Edge
Deploy Azure IoT Edge for Linux on Windows on your target device.
Note
The following PowerShell process outlines how to deploy IoT Edge for Linux on Windows onto the local device. To deploy to a remote target device using PowerShell, you can use Remote PowerShell to establish a connection to a remote device and run these commands remotely on that device.
In an elevated PowerShell session, run either of the following commands depending on your target device architecture to download IoT Edge for Linux on Windows.
X64/AMD64
$msiPath = $([io.Path]::Combine($env:TEMP, 'AzureIoTEdge.msi'))
$ProgressPreference = 'SilentlyContinue'
Invoke-WebRequest "https://aka.ms/AzEFLOWMSI_1_4_LTS_X64" -OutFile $msiPath
ARM64
$msiPath = $([io.Path]::Combine($env:TEMP, 'AzureIoTEdge.msi'))
$ProgressPreference = 'SilentlyContinue'
Invoke-WebRequest "https://aka.ms/AzEFLOWMSI_1_4_LTS_ARM64" -OutFile $msiPath
Install IoT Edge for Linux on Windows on your device.
Start-Process -Wait msiexec -ArgumentList "/i","$([io.Path]::Combine($env:TEMP, 'AzureIoTEdge.msi'))","/qn"You can specify custom IoT Edge for Linux on Windows installation and VHDX directories by adding
INSTALLDIR="<FULLY_QUALIFIED_PATH>"andVHDXDIR="<FULLY_QUALIFIED_PATH>"parameters to the install command. For example, if you want to use the D:\EFLOW folder for installation and the D:\EFLOW-VHDX for the VHDX, you can use the following PowerShell cmdlet.Start-Process -Wait msiexec -ArgumentList "/i","$([io.Path]::Combine($env:TEMP, 'AzureIoTEdge.msi'))","/qn","INSTALLDIR=D:\EFLOW", "VHDXDIR=D:\EFLOW-VHDX"Set the execution policy on the target device to
AllSignedif it is not already. See the PowerShell prerequisites for commands to check the current execution policy and set the execution policy toAllSigned.Create the IoT Edge for Linux on Windows deployment. The deployment creates your Linux virtual machine and installs the IoT Edge runtime for you.
Deploy-EflowTip
By default, the
Deploy-Eflowcommand creates your Linux virtual machine with 1 GB of RAM, 1 vCPU core, and 16 GB of disk space. However, the resources your VM needs are highly dependent on the workloads you deploy. If your VM does not have sufficient memory to support your workloads, it will fail to start.You can customize the virtual machine's available resources using the
Deploy-Eflowcommand's optional parameters. This is required to deploy EFLOW on a device with the minimum hardware requirements.For example, the command below creates a virtual machine with 1 vCPU core, 1 GB of RAM (represented in MB), and 2 GB of disk space:
Deploy-Eflow -cpuCount 1 -memoryInMB 1024 -vmDataSize 2For information about all the optional parameters available, see PowerShell functions for IoT Edge for Linux on Windows.
Warning
By default, the EFLOW Linux virtual machine has no DNS configuration. Deployments using DHCP will try to obtain the DNS configuration propagated by the DHCP server. Please check your DNS configuration to ensure internet connectivity. For more information, see AzEFLOW-DNS.
You can assign a GPU to your deployment to enable GPU-accelerated Linux modules. To gain access to these features, you will need to install the prerequisites detailed in GPU acceleration for Azure IoT Edge for Linux on Windows.
To use a GPU passthrough, add the gpuName, gpuPassthroughType, and gpuCount parameters to your
Deploy-Eflowcommand. For information about all the optional parameters available, see PowerShell functions for IoT Edge for Linux on Windows.Warning
Enabling hardware device passthrough may increase security risks. Microsoft recommends a device mitigation driver from your GPU's vendor, when applicable. For more information, see Deploy graphics devices using discrete device assignment.
Enter 'Y' to accept the license terms.
Enter 'O' or 'R' to toggle Optional diagnostic data on or off, depending on your preference.
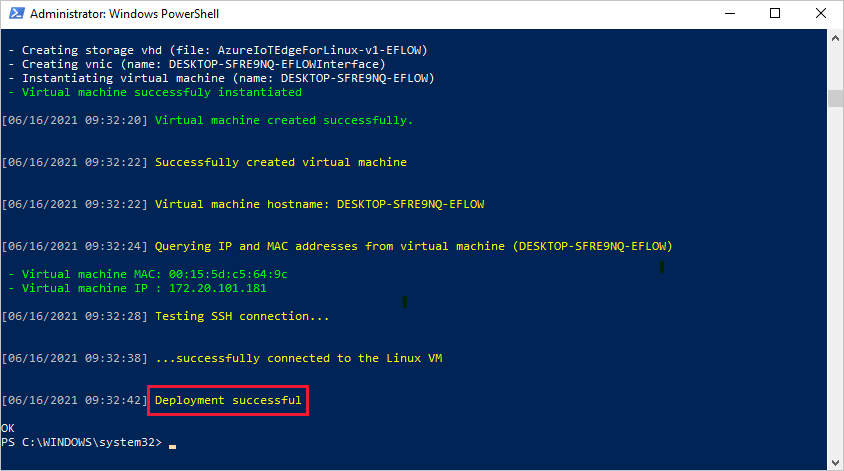
Once the deployment is complete, the PowerShell window reports Deployment successful.
After a successful deployment, you are ready to provision your device.
Provision the device with its cloud identity
You're ready to set up your device with its cloud identity and authentication information.
To provision your device using X.509 certificates, you will need your IoT hub name, device ID, and the absolute paths to your identity certificate and private key on your Windows host machine.
Have the device identity certificate and its matching private key ready on your target device. Know the absolute path to both files.
Run the following command in an elevated PowerShell session on your target device. Replace the placeholder text with your own values.
Provision-EflowVm -provisioningType ManualX509 -iotHubHostname "HUB_HOSTNAME_HERE" -deviceId "DEVICE_ID_HERE" -identityCertPath "ABSOLUTE_PATH_TO_IDENTITY_CERT_HERE" -identityPrivKeyPath "ABSOLUTE_PATH_TO_PRIVATE_KEY_HERE"
For more information about the Provision-EflowVM command, see PowerShell functions for IoT Edge for Linux on Windows.
Verify successful configuration
Verify that IoT Edge for Linux on Windows was successfully installed and configured on your IoT Edge device.
Log in to your IoT Edge for Linux on Windows virtual machine using the following command in your PowerShell session:
Connect-EflowVmNote
The only account allowed to SSH to the virtual machine is the user that created it.
Once you are logged in, you can check the list of running IoT Edge modules using the following Linux command:
sudo iotedge listIf you need to troubleshoot the IoT Edge service, use the following Linux commands.
Retrieve the service logs.
sudo iotedge system logsUse the
checktool to verify configuration and connection status of the device.sudo iotedge check
Note
On a newly provisioned device, you may see an error related to IoT Edge Hub:
× production readiness: Edge Hub's storage directory is persisted on the host filesystem - Error
Could not check current state of edgeHub container
This error is expected on a newly provisioned device because the IoT Edge Hub module isn't running. To resolve the error, in IoT Hub, set the modules for the device and create a deployment. Creating a deployment for the device starts the modules on the device including the IoT Edge Hub module.
When you create a new IoT Edge device, it will display the status code 417 -- The device's deployment configuration is not set in the Azure portal. This status is normal, and means that the device is ready to receive a module deployment.
Uninstall IoT Edge for Linux on Windows
If you want to remove the Azure IoT Edge for Linux on Windows installation from your device, use the following commands.
- Open Settings on Windows
- Select Add or Remove Programs
- Select Azure IoT Edge app
- Select Uninstall
Next steps
- Continue to deploy IoT Edge modules to learn how to deploy modules onto your device.
- Learn how to manage certificates on your IoT Edge for Linux on Windows virtual machine and transfer files from the host OS to your Linux virtual machine.
- Learn how to configure your IoT Edge devices to communicate through a proxy server.
Feedback
Coming soon: Throughout 2024 we will be phasing out GitHub Issues as the feedback mechanism for content and replacing it with a new feedback system. For more information see: https://aka.ms/ContentUserFeedback.
Submit and view feedback for