Tutorial: Import a certificate in Azure Key Vault
Azure Key Vault is a cloud service that provides a secure store for secrets. You can securely store keys, passwords, certificates, and other secrets. Azure key vaults may be created and managed through the Azure portal. In this tutorial, you create a key vault, then use it to import a certificate. For more information on Key Vault, review the Overview.
The tutorial shows you how to:
- Create a key vault.
- Import a certificate in Key Vault using the portal.
- Import a certificate in Key Vault using the CLI.
- Import a certificate in Key Vault using PowerShell.
Before you begin, read Key Vault basic concepts.
If you don't have an Azure subscription, create a free account before you begin.
Sign in to Azure
Sign in to the Azure portal.
Create a key vault
Create a key vault using one of these three methods:
- Create a key vault using the Azure portal
- Create a key vault using the Azure CLI
- Create a key vault using Azure PowerShell
Import a certificate to your key vault
Note
By default, imported certificates have exportable private keys. You can use the SDK, Azure CLI, or PowerShell to define policies that prevent the private key from being exported.
To import a certificate to the vault, you need to have a PEM or PFX certificate file to be on disk. If the certificate is in PEM format, the PEM file must contain the key as well as x509 certificates. This operation requires the certificates/import permission.
Important
In Azure Key Vault, supported certificate formats are PFX and PEM.
- .pem file format contains one or more X509 certificate files.
- .pfx file format is an archive file format for storing several cryptographic objects in a single file i.e. server certificate (issued for your domain), a matching private key, and may optionally include an intermediate CA.
In this case, we will create a certificate called ExampleCertificate, or import a certificate called ExampleCertificate with a path of **/path/to/cert.pem". You can import a certificate with the Azure portal, Azure CLI, or Azure PowerShell.
- On the page for your key vault, select Certificates.
- Click on Generate/Import.
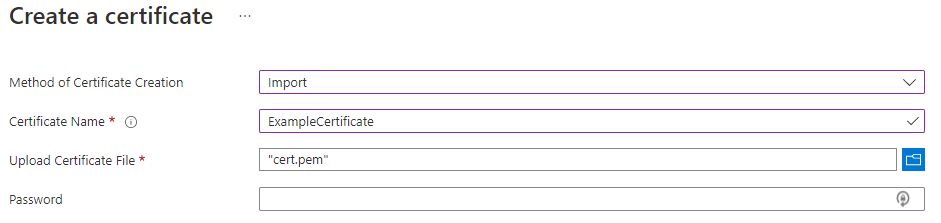
- On the Create a certificate screen choose the following values:
- Method of Certificate Creation: Import.
- Certificate Name: ExampleCertificate.
- Upload Certificate File: select the certificate file from disk
- Password : If you are uploading a password protected certificate file, provide that password here. Otherwise, leave it blank. Once the certificate file is successfully imported, key vault will remove that password.
- Click Create.
When importing a .pem file, check if the format is the following:
-----BEGIN CERTIFICATE-----
MIID2TCCAsGg...
-----END CERTIFICATE-----
-----BEGIN PRIVATE KEY-----
MIIEvQIBADAN...
-----END PRIVATE KEY-----
When importing a certificate, Azure Key vault will automatically populate certificate parameters (i.e. validity period, Issuer name, activation date etc.).
Once you receive the message that the certificate has been successfully imported, you may click on it on the list to view its properties.
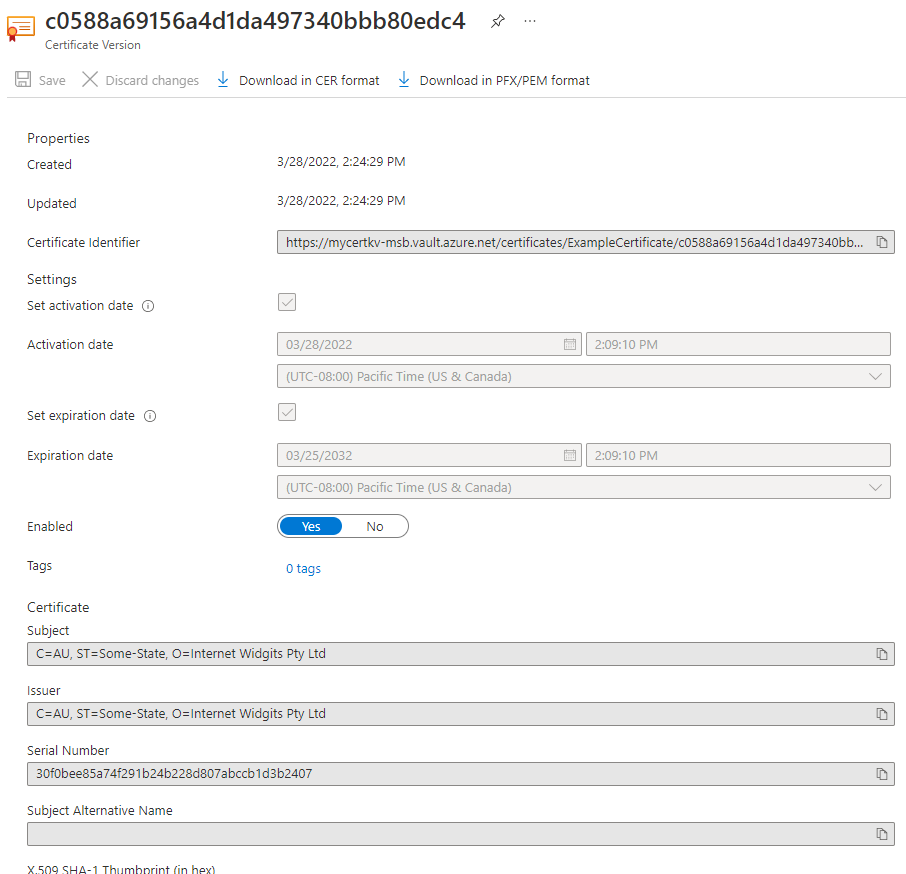
Now, you have created a Key vault, imported a certificate and viewed a certificate's properties.
Clean up resources
Other Key Vault quickstarts and tutorials build upon this quickstart. If you plan to continue on to work with subsequent quickstarts and tutorials, you may wish to leave these resources in place. When no longer needed, delete the resource group, which deletes the Key Vault and related resources. To delete the resource group through the portal:
- Enter the name of your resource group in the Search box at the top of the portal. When you see the resource group used in this quickstart in the search results, select it.
- Select Delete resource group.
- In the TYPE THE RESOURCE GROUP NAME: box type in the name of the resource group and select Delete.
Next steps
In this tutorial, you created a Key Vault and imported a certificate in it. To learn more about Key Vault and how to integrate it with your applications, continue on to the articles below.
- Read more about Managing certificate creation in Azure Key Vault
- See examples of Importing Certificates Using REST APIs
- Review the Key Vault security overview
Feedback
Coming soon: Throughout 2024 we will be phasing out GitHub Issues as the feedback mechanism for content and replacing it with a new feedback system. For more information see: https://aka.ms/ContentUserFeedback.
Submit and view feedback for