Manage lab users in Azure Lab Services
This article describes how to manage lab users in Azure Lab Services. Learn how to add users to a lab, manage their registration status, and how to specify the number of hours they can use the virtual machine (VM).
Azure Lab Services supports different options for managing the list of lab users:
- Add users manually to the lab by specifying their email address. Optionally, you can upload a CSV file with email addresses.
- Synchronize the list of users with a Microsoft Entra group.
- Integrate with Microsoft Teams or Canvas and synchronize the user list with the team (Teams) or course (Canvas) membership.
When you add users to a lab based on their email address, lab users will first need to register for the lab by using a lab registration link. This registration process is a one-time operation. After a lab users registers for the lab, they can access their lab in the Azure Lab Services website.
When you use Teams, Canvas, or a Microsoft Entra group, Azure Lab Services automatically grants users access to the lab and assigns a lab VM based on their membership in Microsoft or Canvas. In this case, you don't have to specify the lab user list, and users don't have to register for the lab.
By default, access to a lab is restricted. Only users that are in the list of lab users can register for a lab, and get access to the lab virtual machine (VM). You can disable restricted access for a lab, which lets any user register for a lab if they have the registration link.
Azure Lab Services supports up to 400 users per lab.
Prerequisites
- An Azure account with an active subscription. If you don't have an Azure subscription, create a free account before you begin.
- An Azure account with permission to manage a lab, such as the Lab Creator, Owner, Contributor, or Lab Services Contributor Azure RBAC role. Learn more about the Azure Lab Services built-in roles and assignment scopes.
- An Azure lab plan. If you don't have a lab plan yet, follow the steps in Quickstart: Set up resources to create labs.
Manage lab users
Add users
You can add lab users manually by providing their email address in the lab configuration or by uploading a CSV file.
Azure Lab Services supports different email account types when registering for a lab:
- An organizational email account that's provided by your Microsoft Entra instance.
- A Microsoft-domain email account, such as outlook.com, hotmail.com, msn.com, or live.com.
- A non-Microsoft email account, such as one provided by Yahoo! or Google. You need to link your account with a Microsoft account.
- A GitHub account. You need to link your account with a Microsoft account.
Learn more about the supported account types.
Add users by email address
In the Azure Lab Services website, select the lab you want to work with.
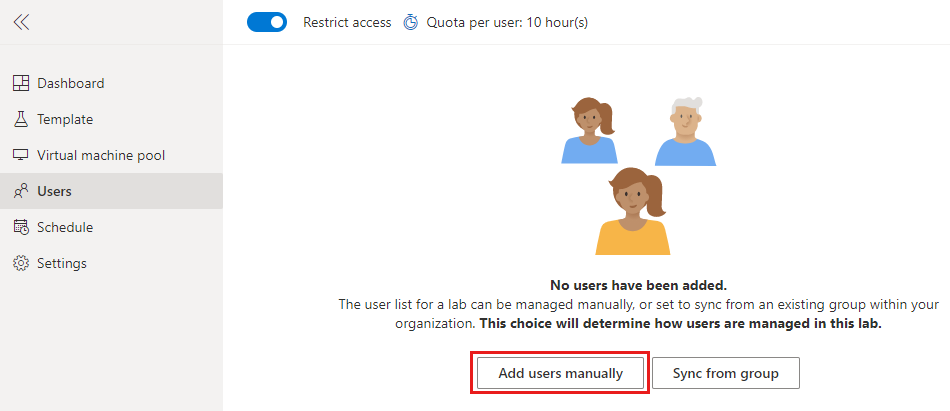
Select Users, and then select Add users manually.
Select Add by email address, enter the users' email addresses on separate lines or on a single line separated by semicolons.
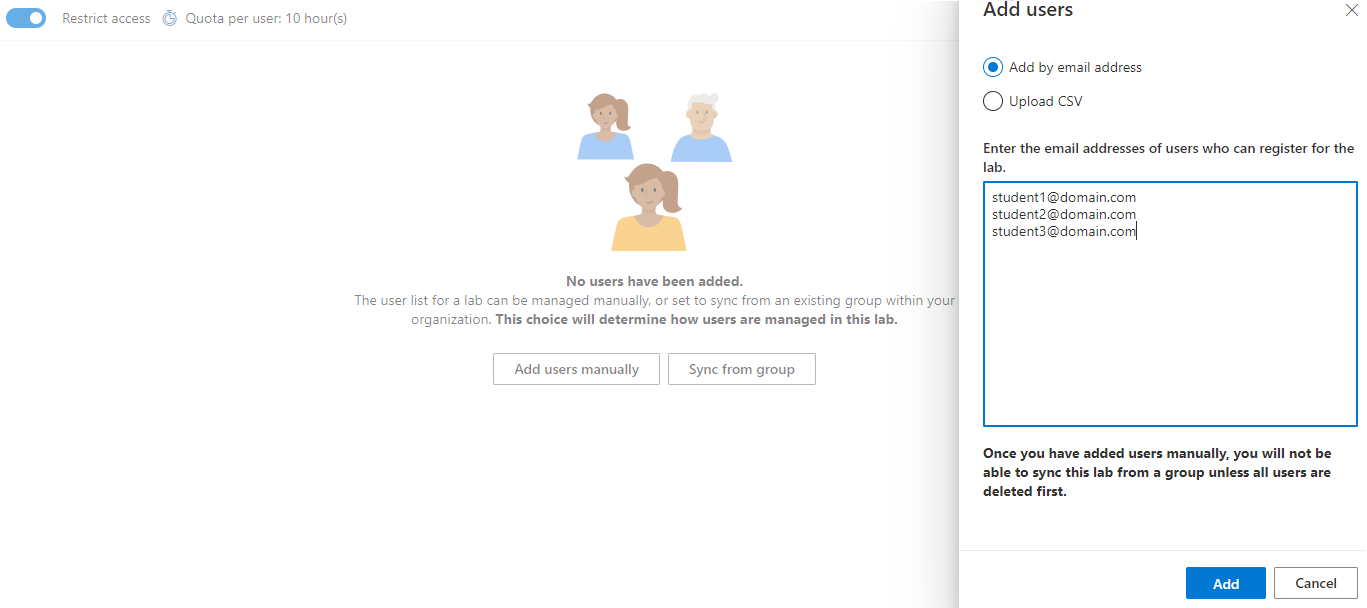
Select Add.
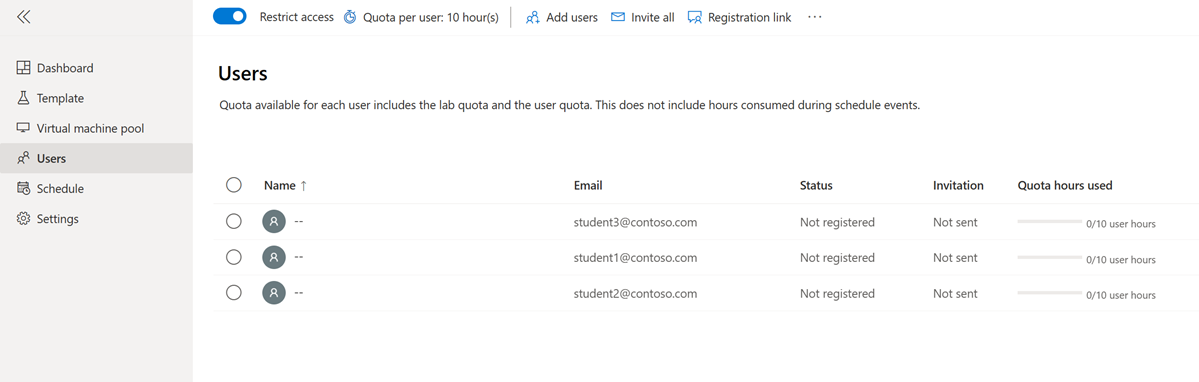
The list displays the email addresses and registration status of the lab users. After a user registers for the lab, the list also displays the user's name.


Add users by uploading a CSV file
You can also add users by uploading a CSV file that contains their email addresses.
You use a CSV text file to store comma-separated (CSV) tabular data (numbers and text). Instead of storing information in columns fields (such as in spreadsheets), a CSV file stores information separated by commas. Each line in a CSV file has the same number of comma-separated fields. You can use Microsoft Excel to easily create and edit CSV files.
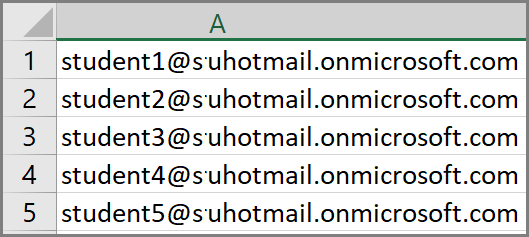
Use Microsoft Excel or a text editor of your choice, to create a CSV file with the users' email addresses in one column.
In the Azure Lab Services website, select the lab you want to work with.
Select Users, select Add users, and then select Upload CSV.
Select the CSV file with the users' email addresses, and then select Open.
The Add users page shows the email address list from the CSV file.
Select Add.
The Users page now shows the list of lab users you uploaded.
Send invitations to users
If the Restrict access option is enabled for the lab, only listed users can use the registration link to register to the lab. This option is enabled by default.
To send a registration link to new users, use one of the methods in the following sections.
Invite all users
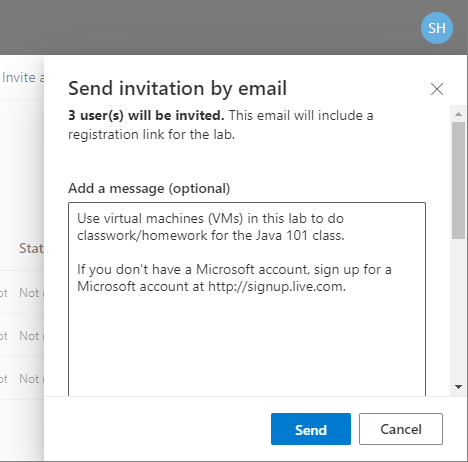
You can invite all users to the lab by sending an email via the Azure Lab Services website. The email contains the lab registration link, and an optional message.
Tip
When you register for a lab, you aren't given the option to create a new Microsoft account. It's recommended that you include this sign-up link, https://signup.live.com, in the lab registration email when you invite users who have non-Microsoft accounts.
To invite all users:
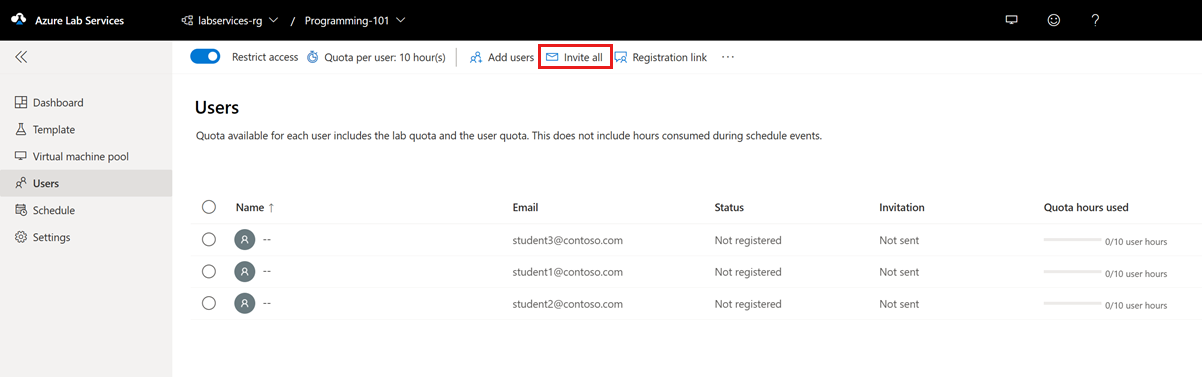
In the Azure Lab Services website, select the lab you want to work with.
Select Users, and then select Invite all.
In the Send invitation by email window, enter an optional message, and then select Send.
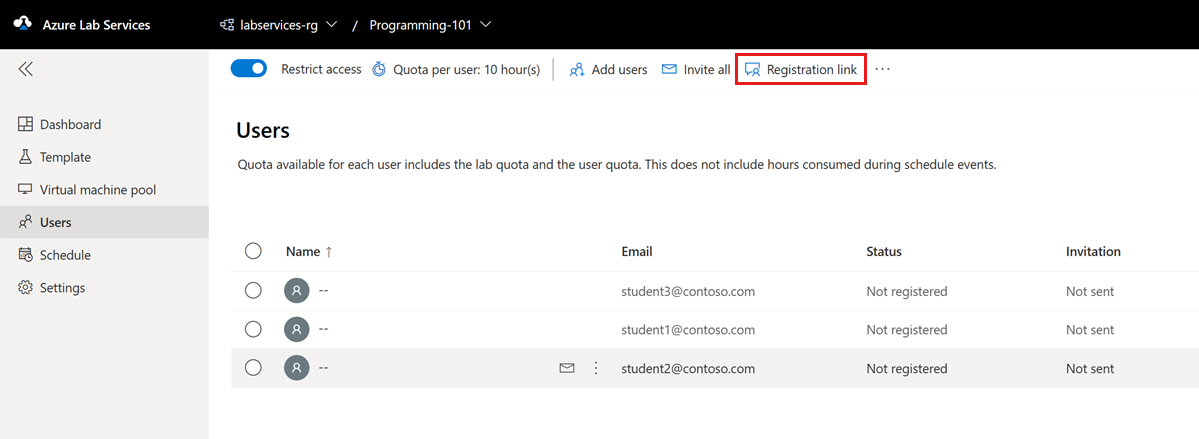
The email automatically includes the registration link. To get and save the registration link separately, select the ellipsis (...) at the top of the Users pane, and then select Registration link.
The Invitation column of the Users list displays the invitation status for each added user. The status should change to Sending and then to Sent on <date>.


Invite selected users
To invite selected users and send them a lab registration link:
In the Azure Lab Services website, select the lab you want to work with.
Select Users, and then select one or more users from the list.
In the row for the user you selected, select the envelope icon or, on the toolbar, select Invite.

In the Send invitation by email window, enter an optional message, and then select Send.

The Users pane displays the status of this operation in the Invitation column of the table. The invitation email includes the registration link that users can use to register with the lab.


Get the registration link
You can get the lab registration link from the Azure Lab Services website, and send it by using your own email application.
In the Azure Lab Services website, select the lab you want to work with.
Select Users, and then select Registration link.
In the User registration window, select Copy, and then select Done.
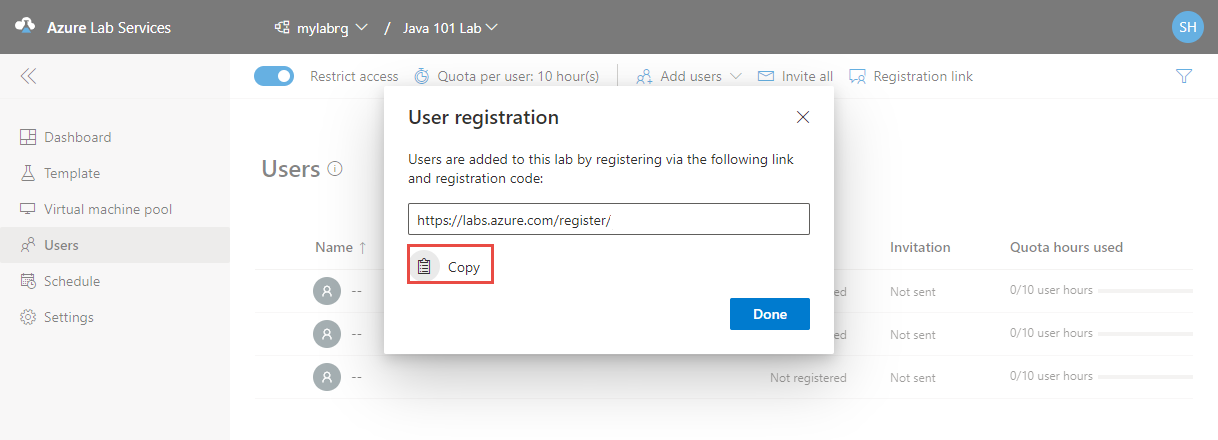
The link is copied to the clipboard. In your email application, paste the registration link, and then send the email to a user so that they can register for the class.


View registered users
To view the list of lab users that have already registered for the lab by using the lab registration link:
In the Azure Lab Services website, select the lab you want to work with.
Select Users to view the list of lab users.
The list shows the list of lab users with their registration status. The user status should show Registered, and their name should also be available after registration.
Note
If you republish a lab or Reimage VMs, the users remain registered for the labs' VMs. However, the contents of the VMs will be deleted and the VMs will be recreated with the template VM's image.

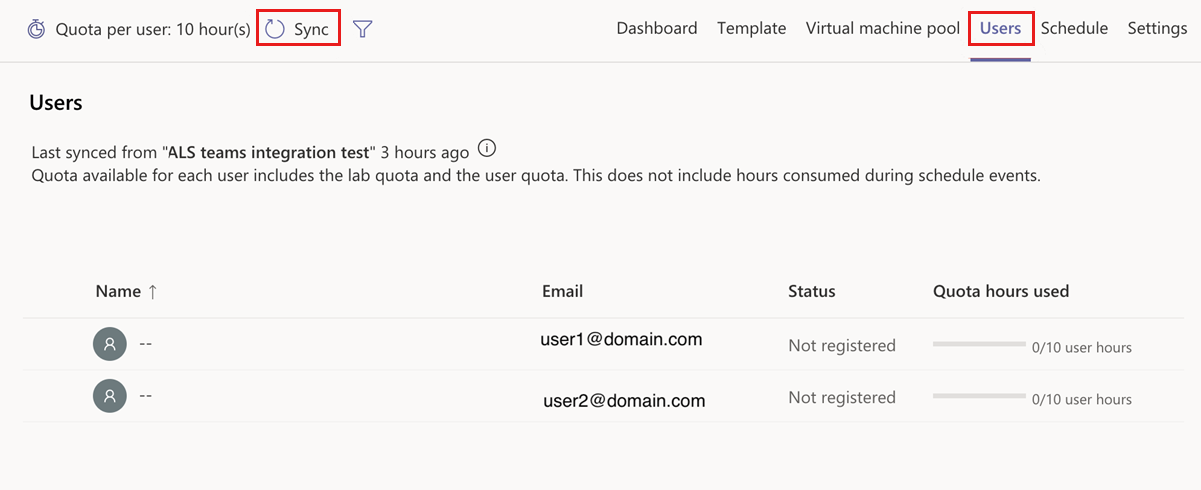
Set quotas for users
Quota hours enable lab users to use the lab for a number of hours outside of scheduled lab times. For example, users might access the lab to complete their homework. Learn more about quota hours.
You can set an hour quota for a user in one of two ways:
In the Users pane, select Quota per user: <number> hour(s) on the toolbar.
In the Quota per user window, specify the number of hours you want to give to each user outside the scheduled time.

Important
The scheduled running time of VMs does not count against the quota that's allotted to a user. The quota is for the time outside of scheduled hours that a user spends on VMs.

Set additional quotas for specific users
You can specify extra quota hours for individual users, beyond the quotas you define at the lab level. For example, if you set the quota for all users to 10 hours and set an additional quota of 5 hours for a specific user, that user gets 15 (10 + 5) hours of quota. If you change the common quota later to, say, 15, the user gets 20 (15 + 5) hours of quota.
Remember that this overall quota is outside the scheduled time. The time that a user spends on a lab VM during the scheduled time doesn't count against this quota.
To set additional quotas for a user:
In the Users pane, select one or more users from the list, and then select Adjust quota on the toolbar.
In the Adjust quota window, enter the number of additional lab hours you want to grant to the selected users, and then select Apply.
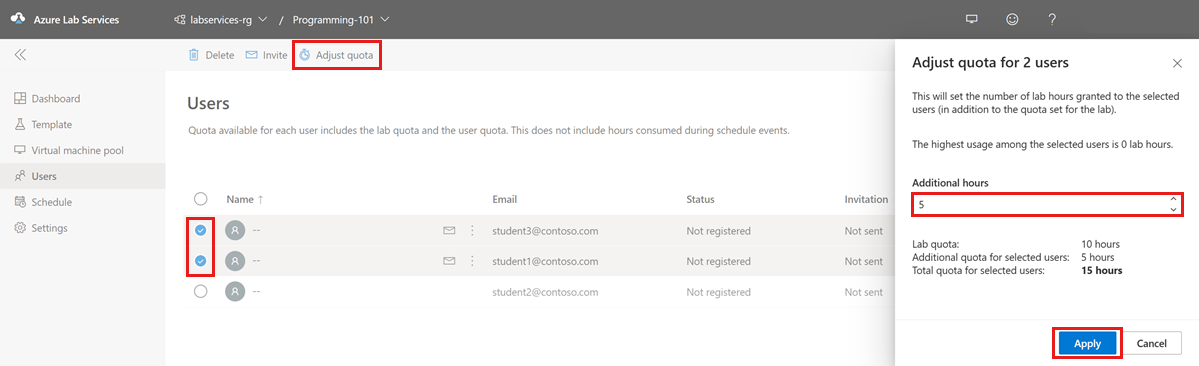
Select Apply to save the changes.
Notice that the user list shows the updated quota hours for the users you selected.

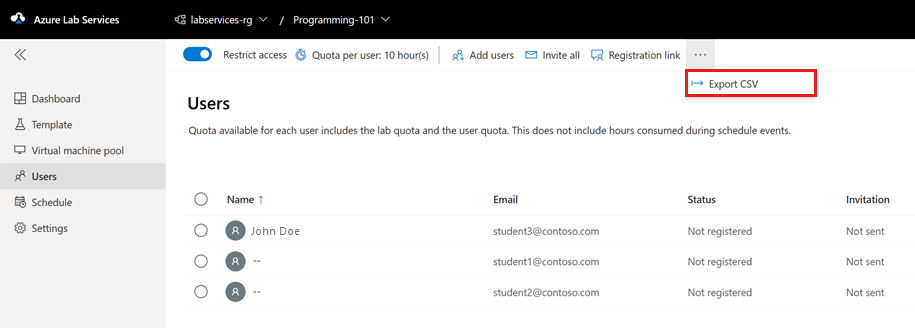
Export the list of users to a CSV file
To export the list of users for a lab:
Select the lab you want to work with.
Select Users.
On the toolbar, select the ellipsis (...), and then select Export CSV.

Next steps
- Learn how to add lab schedules
- Learn how to manage lab VM pools
- Learn how to access a lab VM
Feedback
Coming soon: Throughout 2024 we will be phasing out GitHub Issues as the feedback mechanism for content and replacing it with a new feedback system. For more information see: https://aka.ms/ContentUserFeedback.
Submit and view feedback for