Tutorial: Create a lab with the Azure Lab Services app in Teams or Canvas
With Azure Lab Services, you can create labs directly from within Microsoft Teams or Canvas. In this tutorial, you use the Azure Lab Services app for Microsoft Teams or Canvas to create and publish a lab. After you complete this tutorial, lab users can directly access their lab virtual machine from Teams or Canvas.
With the Azure Lab Services app for Teams or Canvas you can create and manage labs without having to leave the Teams or Canvas environment and lab user management is synchronized based team or course membership. Lab users are automatically registered for a lab and have a lab VM assigned to them. They can also access their lab VM directly from within Teams or Canvas.
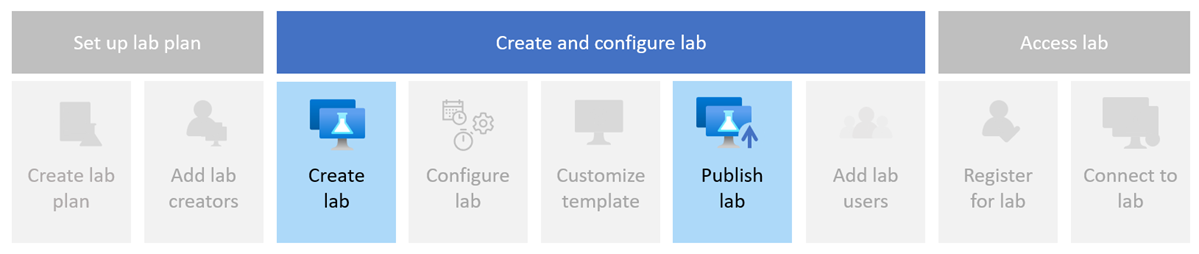
In this tutorial, you learn how to:
- Configure the Azure Lab Services app
- Create a lab in Teams or Canvas
- Publish the lab to create the lab VMs
Prerequisites
- An Azure account with an active subscription. If you don't have an Azure subscription, create a free account before you begin.
- An Azure account with permission to manage a lab, such as the Lab Creator, Owner, Contributor, or Lab Services Contributor Azure RBAC role. Learn more about the Azure Lab Services built-in roles and assignment scopes.
- An Azure lab plan. If you don't have a lab plan yet, follow the steps in Quickstart: Set up resources to create labs.
- To add the Azure Lab Services Teams app to a channel, your account needs to be an owner of the team in Microsoft Teams.
Configure the Azure Lab Services app
Before you can create and manage labs in Teams, you need to configure Teams to use the Azure Lab Services app and to grant access to your lab plan. Follow these steps to configure Teams for Azure Lab Services.
After you configured Teams, you can now access the Azure Lab Services app from a channel in Teams. All users that are a member of the team are automatically added as lab users, and assigned a lab virtual machine.
In the next step, you use the Azure Lab Services app to create a lab.
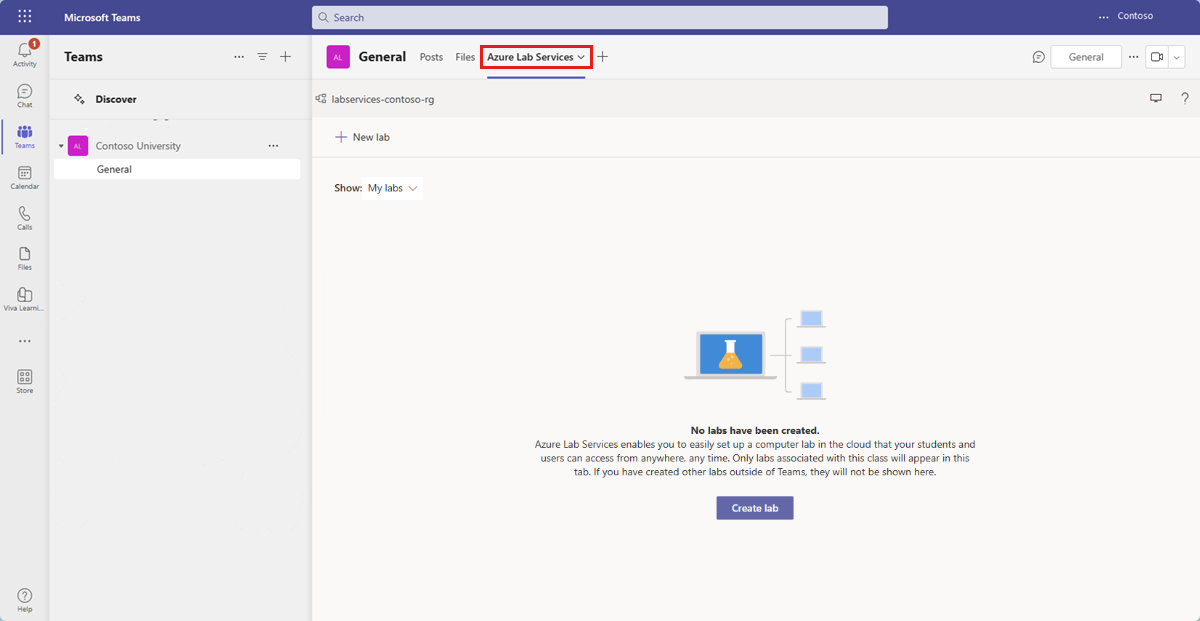
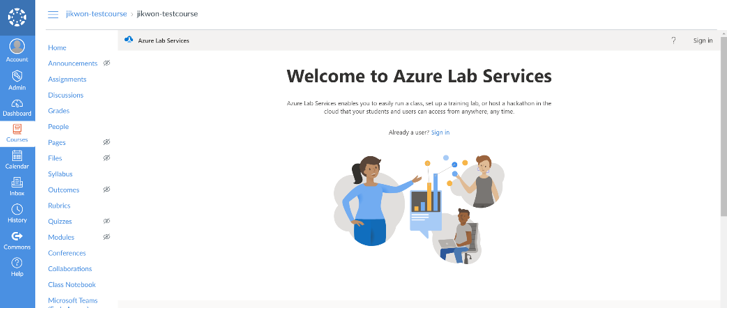
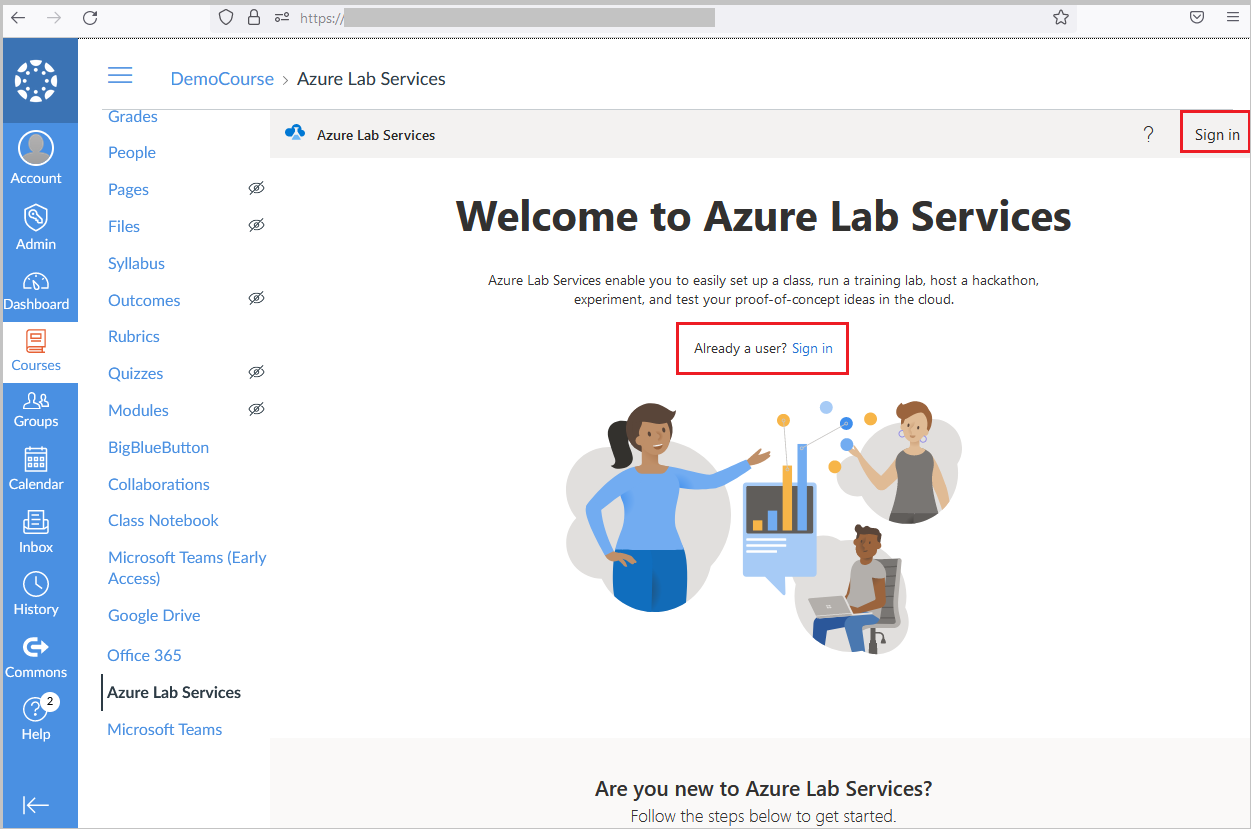
Access the Azure Lab Services app
Open Microsoft Teams, and select your team and channel.
You should see the Azure Lab Services tab.
Select the Azure Lab Services tab.
If you don't have any labs, you should see the welcome page. Otherwise, you can see the list of labs you created earlier.
Tip
Use the Show filter to switch between your labs and all labs you have access to.
Create a new lab
A lab contains the configuration and settings for creating lab VMs. All lab VMs within a lab are identical. You use the Azure Lab Services app to create a lab in the lab plan.
Important
You can only see labs in Teams or Canvas that you created with the Azure Lab Services app. If you created a lab in the Azure Lab Services website, it is not visible in Teams or Canvas.
Select Create lab to start creating a new lab.
On the New Lab page, enter the following information, and then select Next:
Field Description Name Enter programming-101. Virtual machine image Select Windows Server 2022 Datacenter. Virtual machine size Select Small. Location Leave the default value. Some virtual machine sizes might not be available depending on the lab plan region and your subscription core limit. Learn more about virtual machine sizes in the administrator's guide and how to request additional capacity.
You can enable or disable specific virtual machine images by configuring the lab plan.
On the Virtual machine credentials page, specify a default username and password, and then select Next.
By default, all the lab VMs use the same credentials.
Important
Make a note of username and password. They won't be shown again.
On the Lab policies page, leave the default values and select Next.
The default settings enable secure shell (SSH) access to the lab virtual machine, provide users with 10 quota hours, and shuts down the lab VMs when there's no activity.
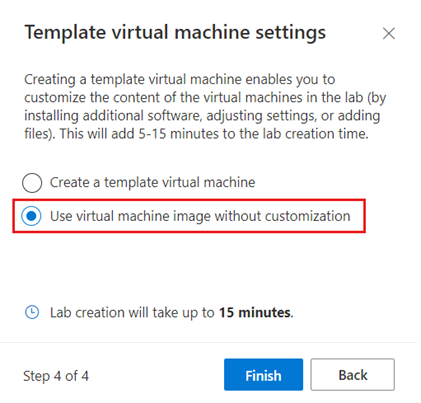
On the Template virtual machine settings page, select Use virtual machine image without customization.
In this tutorial, you use the VM image as-is, known as a templateless VM. Azure Lab Services also supports creating a template VM, which lets you make configuration changes or install software on top of the VM image.
Select Finish to start the lab creation. It might take several minutes for the lab creation to finish.
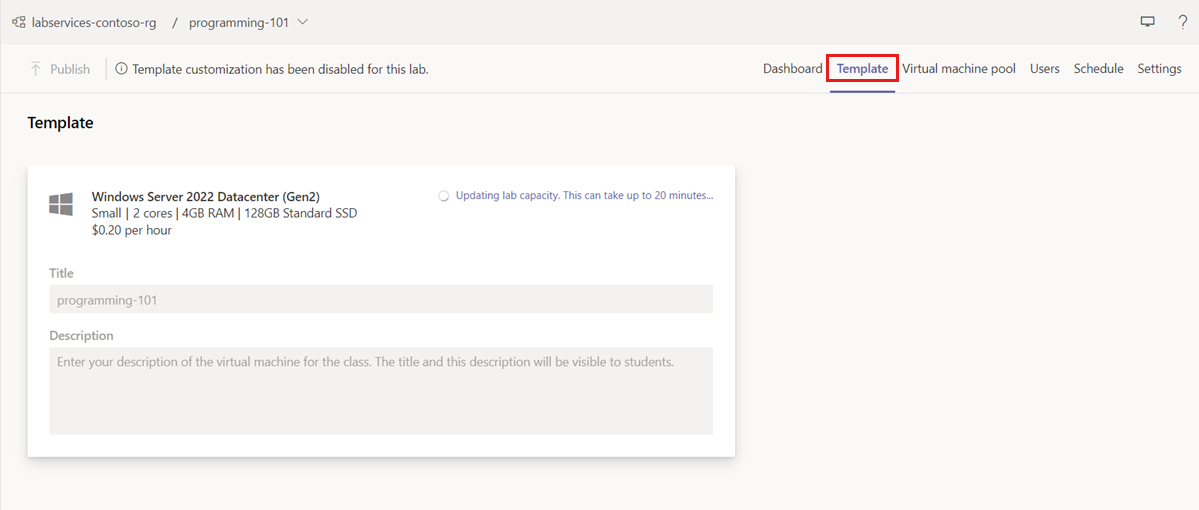
When the lab creation finishes, you can see the lab details in the Template page.
Publish the lab
Azure Lab Services doesn't create the lab virtual machines until you publish the lab. When you publish the lab, the lab virtual machines are created, and assigned to the individual lab users.
To publish the lab:
On the Template page, select Publish on the toolbar.
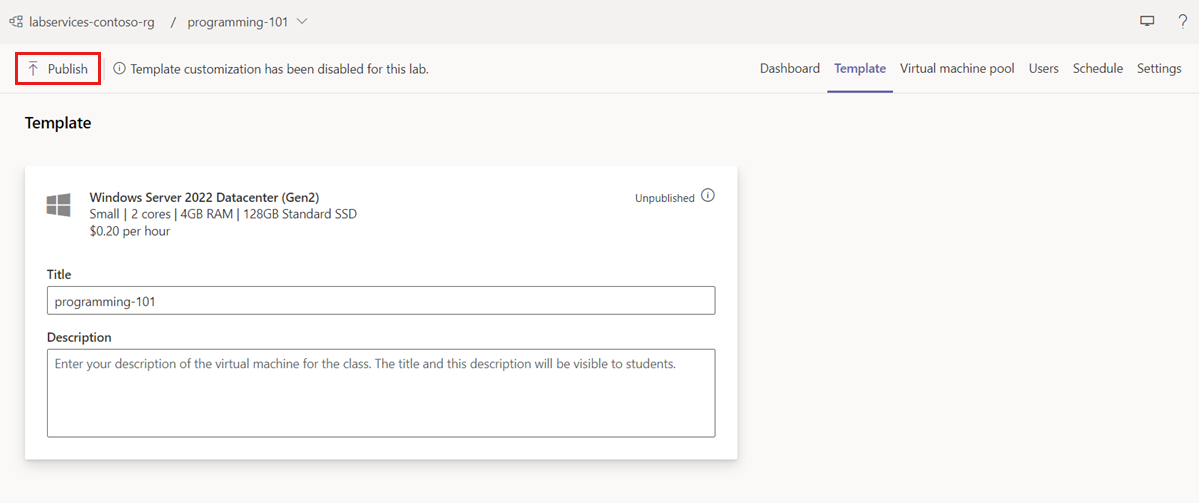
On the Publish page, select Publish to start publishing the lab.
Warning
Publishing is an irreversible action, and can't be undone.
Wait until the publishing process finishes. You can track the publishing status on the Template page.
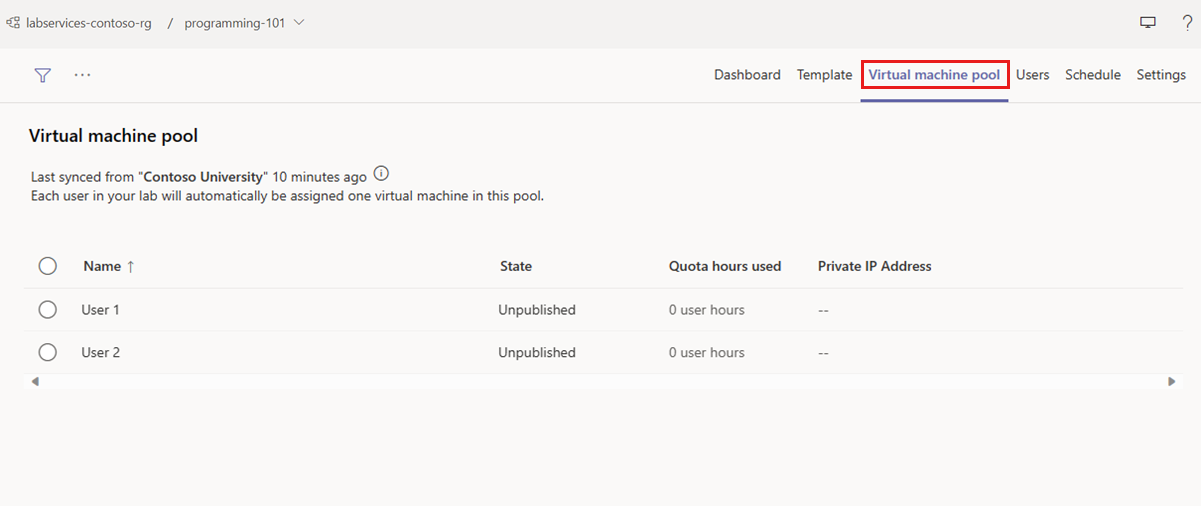
On the Virtual machine pool page, confirm that there's a lab VM for each lab user. The lab VMs are in the Stopped state.
When you create a lab in Teams or Canvas, Azure Lab Services automatically manages the lab user list based on the team or course membership. When you add or remove users in Teams or Canvas, Azure Lab Services automatically assigns or withdraws access to the lab.
Azure Lab Services also automatically manages the lab capacity (the number of lab virtual machines) and assigns the lab virtual machines to lab users. You can view the lab virtual machines and their assignments in the Virtual machine pool page:
Troubleshooting
This section outlines common error messages that you might see, along with the steps to resolve them.
Insufficient permissions to create lab.
In Canvas, an educator will see a message indicating that they don't have sufficient permission. Educators should contact their Azure admin so they can be added as a Lab Creator. For example, educators can be added as a Lab Creator to the resource group that contains their lab.
Message that there isn't enough capacity to create lab VMs.
Request a limit increase which needs to be done by an Azure Labs Services administrator.
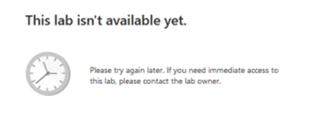
Lab users see a warning that the lab isn't available yet.
In Canvas, you'll see the following message if the educator hasn't published the lab yet. Educators must publish the lab and sync users for students to have access to a lab.
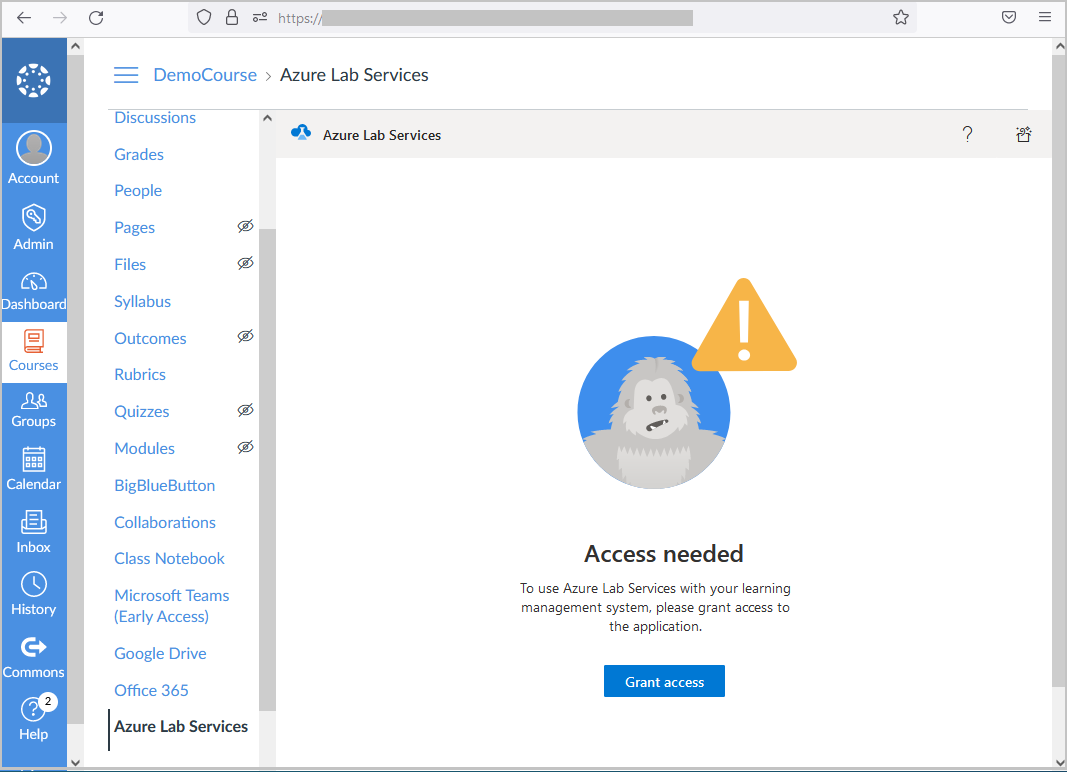
Lab users or educators are prompted to grant access.
Before a lab user or educator can first access their lab, some browsers require that they first grant Azure Lab Services access to the browser's local storage. To grant access, educators and students should select the Grant access button when they're prompted:
Educators and students see the message Access granted when access is successfully granted to Azure Lab Services. The educator or student should then reload the browser window to start using Azure Lab Services.
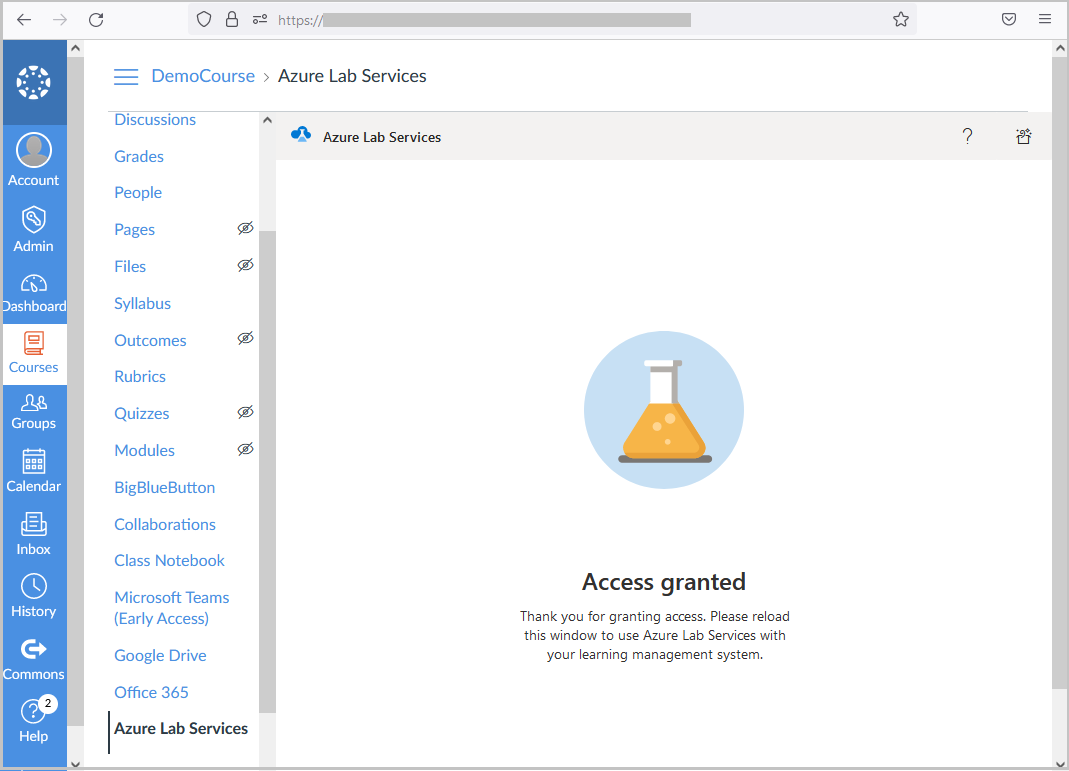
Important
Ensure that students and educators are using an up-to-date version of their browser. For older browser versions, students and educators might experience issues with being able to successfully grant access to Azure Lab Services.
- Educator isn't prompted for their credentials after they select sign-in.
When an educator accesses Azure Lab Services within their course, they might be prompted to sign in. Ensure that the browser's settings allow popups from the url of your Canvas instance, otherwise the popup might be blocked by default.
Next steps
In this tutorial, you configured the Azure Lab Services app for Teams or Canvas and created and published a lab. Azure Lab Services automatically manages the lab users and assigns a lab virtual machine to each lab user. You can further configure the lab to add a lab schedule or modify the lab settings.
- Learn how you can access and connect to a lab virtual machine from within Teams or Canvas.
Feedback
Coming soon: Throughout 2024 we will be phasing out GitHub Issues as the feedback mechanism for content and replacing it with a new feedback system. For more information see: https://aka.ms/ContentUserFeedback.
Submit and view feedback for