Tutorial: Create a lab for classroom training with Azure Lab Services
In this tutorial, you create a lab for classroom training with Azure Lab Services. Azure Lab Services enables you to create labs with infrastructure managed by Azure. Learn how to set up a customized lab template and invite students to register for their lab virtual machine (VM).

You need the Lab Creator Azure RBAC role to create labs for a lab plan. Depending on your organization, the responsibilities for creating lab plans and labs might be assigned to different people or teams. Learn more about mapping permissions across your organization.
After you complete this tutorial, lab users can register for the lab using their email, and connect to their lab virtual machine with remote desktop (RDP).
In this tutorial, you learn how to:
- Create a lab
- Customize the lab template
- Publish the lab to create lab VMs
- Add a recurring lab schedule
- Invite users to the lab by email
Prerequisites
- An Azure account with permission to manage a lab, such as the Lab Creator, Owner, Contributor, or Lab Services Contributor Azure RBAC role. Learn more about the Azure Lab Services built-in roles and assignment scopes.
- An Azure lab plan. If you don't have a lab plan yet, follow the steps in Quickstart: Set up resources to create labs.
Create a lab
You use the Azure Lab Services website to create a customizable lab (lab template) in the lab plan. In Azure Lab Services, a lab contains the configuration and settings for creating lab VMs. All lab VMs in a lab are the same. In the next section, you customize the lab template for the classroom training.
Follow these steps to add a lab to a lab plan.
Sign in to the Azure Lab Services website by using the credentials for your Azure subscription.
Select Create lab.

On the New lab page, enter the following information, and then select Next:
Field Description Name Enter Programming-101. Virtual machine image Select Windows 11 Pro. Virtual machine size Select Small. Location Leave the default value. Some virtual machine sizes might not be available depending on the lab plan region and your subscription core limit. Learn more about virtual machine sizes in the administrator's guide and how to request more capacity.
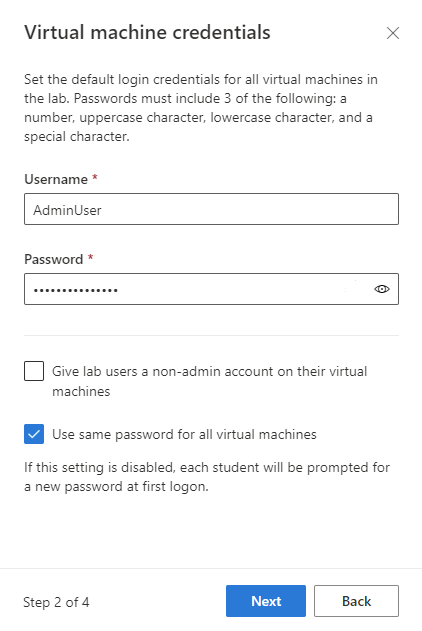
On the Virtual machine credentials page, specify the default Username and Password, and then select Next.
By default, all the lab VMs use the same credentials.
Important
Make a note of user name and password. They won't be shown again.
On the Lab policies page, accept the default values and select Next.
On the Template virtual machine settings page, select Create a template virtual machine.
A template virtual machine enables you to make configuration changes or install software on the base VM image.
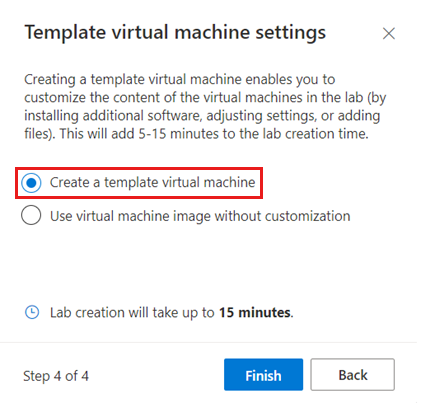
Select Finish to start creating the lab. It might take several minutes.
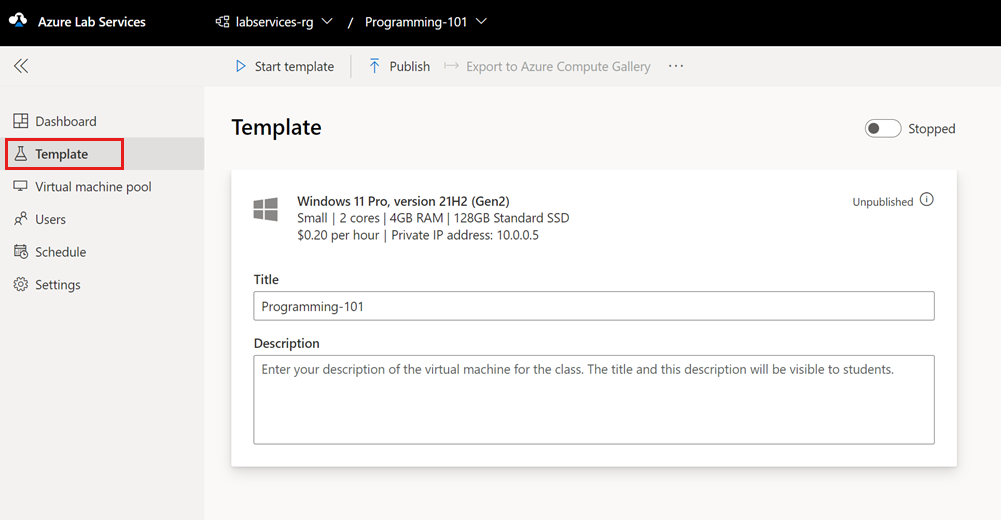
When the lab creation finishes, you can see the lab details in the Template page.


Add a lab schedule
Instead of each lab user starting their lab VM manually, you can optionally create a lab schedule to automatically start and stop the lab VMs according to your training calendar. Azure Lab Services supports one-time events or recurring schedules.
You can also use a quota to manage the number of hours that lab users can run their lab virtual machine.
Follow these steps to add a recurring schedule to your lab:
On the Schedule page for the lab, select Add scheduled event on the toolbar.
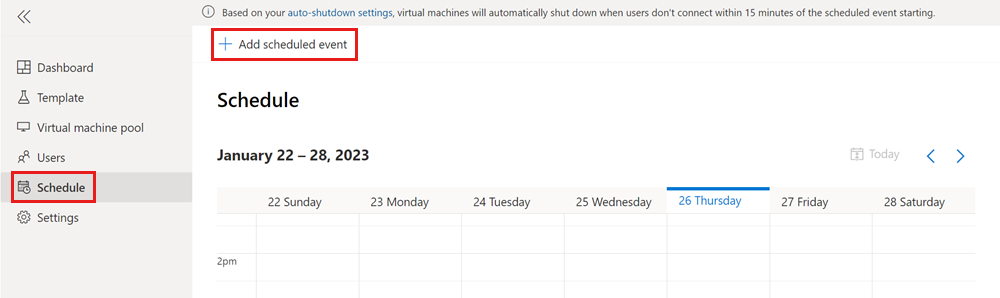
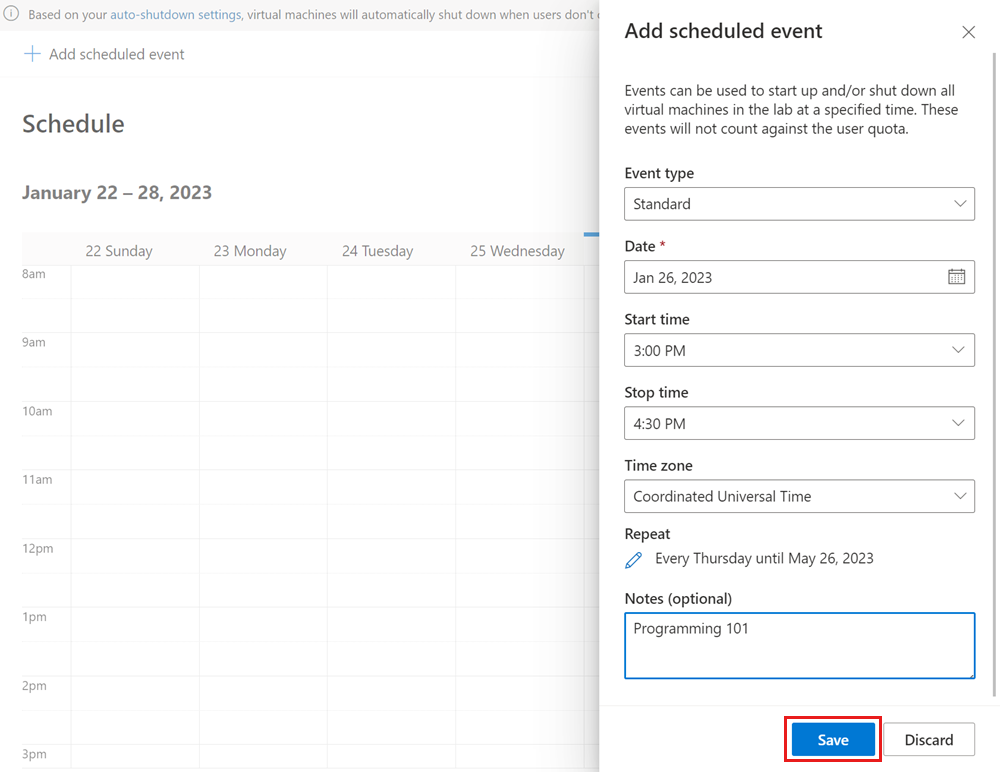
On the Add scheduled event page, enter the following information:
Field Value Event type Standard Start date Enter a start date for the classroom training. Start time Enter a start time for the classroom training. Stop time Enter an end time for the classroom training. Time zone Select your time zone. Repeat Keep the default value, which is a weekly recurrence for four months. Notes Optionally enter a description for the schedule. Select Save to confirm the lab schedule.
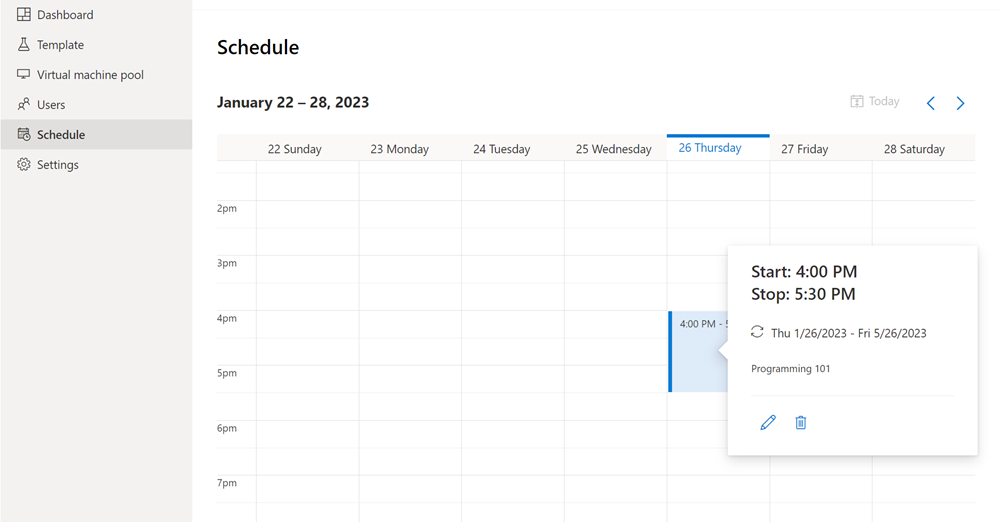
In the calendar view, confirm that the scheduled event is present.


Customize the lab template
The lab template serves as the basis for the lab VMs. To make sure that lab users have the right configuration and software components, you can customize the lab template.
To customize the lab template, start the template virtual machine. Then connect and configure it for the classroom training.
Use the following steps to update a template VM.
On the Template page for the lab, select Start template on the toolbar.
It might take a few minutes for the VM to start.
After the template VM starts, select Connect to template, and open the downloaded remote desktop connection file.
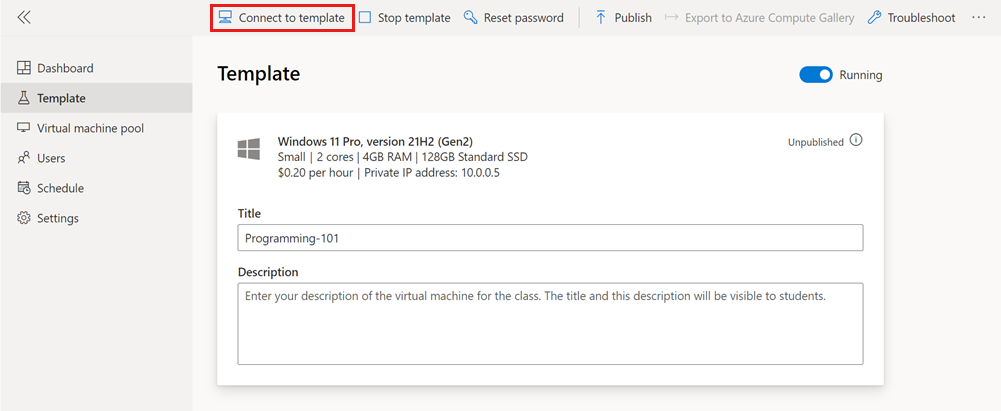
Sign in to the template VM with the credentials you specified for the lab.
Install any software that you need for the classroom training. For example, you might install Visual Studio Code for a general programming course.
Close your remote desktop session to disconnect from the template VM.
On the Template page, select Stop template.

You customized the lab template for the course. After you publish, every VM in the lab has the same configuration as the template VM.
Publish lab
All VMs in the lab share the same configuration as the lab template. Before Azure Lab Services creates lab VMs for your lab, you need to publish the lab. You can specify the maximum number of lab VMs that Azure Lab Services creates. You can also modify the number of lab virtual machines at a later stage.
To publish the lab and create the lab VMs:
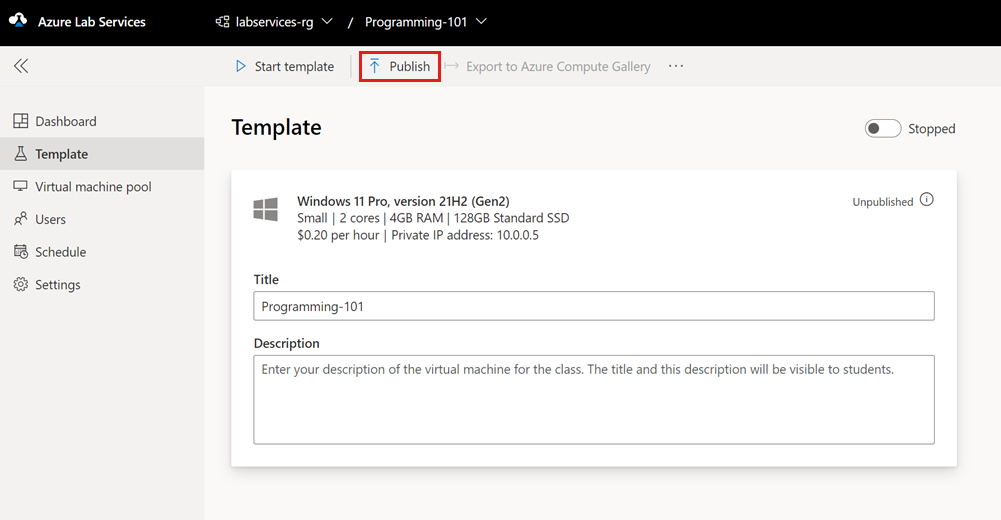
On the Template page, select Publish on the toolbar.
Warning
Publishing is an irreversible action, and can't be undone.
On the Publish template page, enter 3 for the number of VMs, and then select Publish.
It can take up to 20 minutes for the process to complete. You can track the publishing status on the Template page.
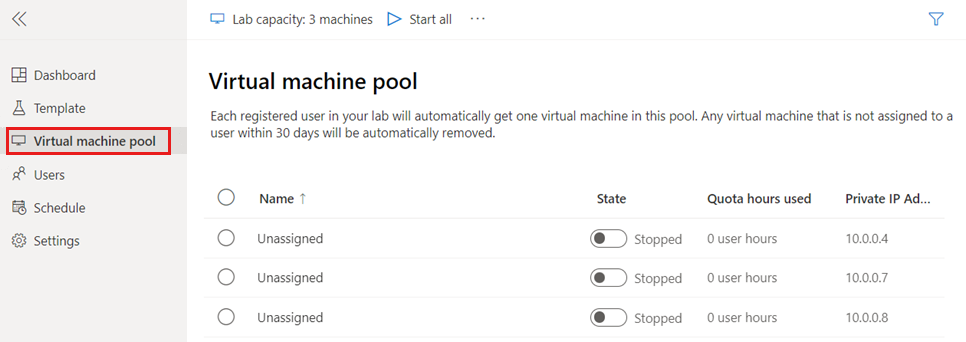
On the Virtual machine pool page, confirm that the labs VMs are created.
The lab VMs are currently stopped and unassigned, which means that they aren't assigned to specific lab users.


Caution
When you republish a lab, Azure Lab Services recreates all existing lab virtual machines and removes all data from the virtual machines.
Invite users
By default, Azure Lab Services restricts access to a lab. Only listed users can register for a lab and use a lab VM. Optionally, you can turn off restricted access.
To allow access for users to a lab, perform the following steps:
- Add the users to the lab.
- Invite the users to lab by providing them with a registration link.
Add users to the lab
Azure Lab Services supports multiple ways to add users to a lab:
- Enter email addresses manually
- Upload a CSV file with student information
- Sync the lab with a Microsoft Entra group
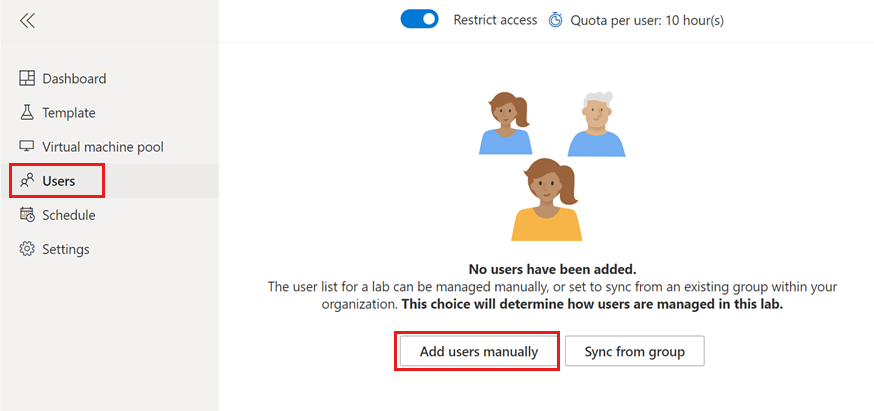
In this tutorial, manually add the users by providing email addresses. To add the users, follow these steps:
Select the Users page for the lab, and select Add users manually.
On the Add users page, enter the lab user email addresses on separate lines or on a single line separated by semicolons.
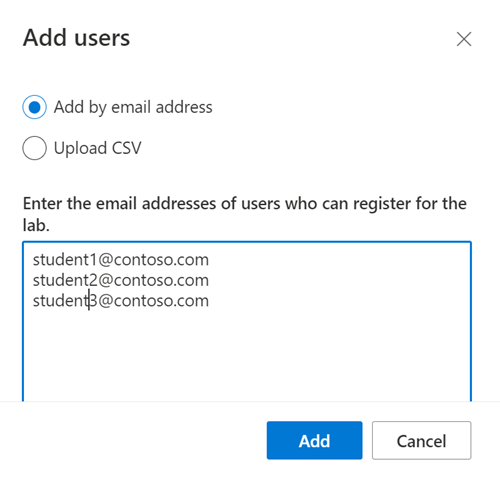
Select Add to add the users and grant them access to the lab.

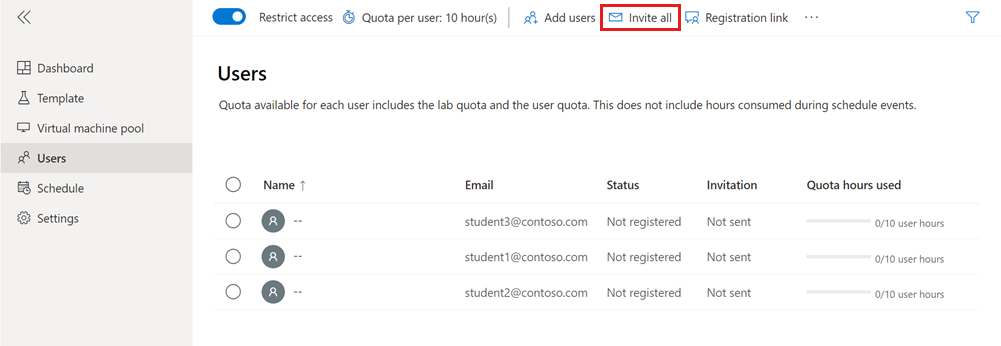
You added users to the lab. On the Users page, you can see that their status is Not registered. You can now invite these users to the lab by sending them a registration link.
Send invitation emails
After you add users to the lab, they can register for the lab by using a registration link for the lab. You can either manually provide users with the link or Azure Lab Services can send invitation emails.
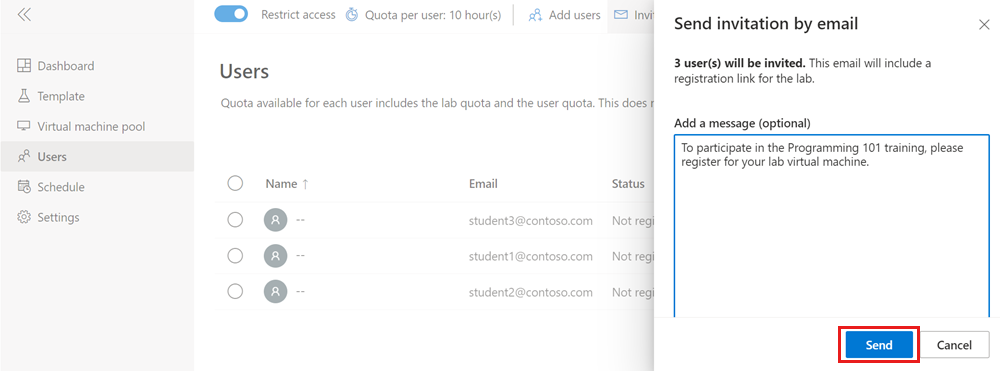
On the Users page for the lab, select Invite all on the toolbar.
On the Send invitation by email page, enter an optional message, and then select Send.
The email automatically includes the registration link. You can also get this registration link by selecting ... (ellipsis) > Registration link on the toolbar.
You can track the status of the invitation in the Users list.
The status should change to Sending and then to Sent on <date>.
After users register for the lab, their names appear on the Users page.


Troubleshooting
Lab creation fails with You are not authorized to access this resource
When you create a new lab plan, it might take a few minutes for the permissions to propagate to the lab level. You can assign the Lab Creator role at the resource group level to prevent this behavior:
- In the Azure portal, go to the resource group that contains the lab plan.
- Select Access control (IAM) from the left navigation.
- Select Add > Add role assignment.
- Assign the Lab Creator role to the user account.
Lab creation fails with Subscription has labs in 2 regions, and the regional limit for this subscription is 2
The default limit for the total number of regions you can use for creating labs varies by offer category type. If you have reached the Azure regions limit for your subscription, you can only create labs in regions that you're already using.
Learn more about how to resolve region restrictions.
Next step
You created a customized lab for a classroom training, created a recurring lab schedule, and invited users to register for the lab. Next, lab users can connect to their lab virtual machine by using remote desktop.
Feedback
Coming soon: Throughout 2024 we will be phasing out GitHub Issues as the feedback mechanism for content and replacing it with a new feedback system. For more information see: https://aka.ms/ContentUserFeedback.
Submit and view feedback for