Read data from a CSV file in JMeter with Azure Load Testing
In this article, you learn how to read data from a comma-separated value (CSV) file in JMeter with Azure Load Testing. Use data from an external CSV file to make your JMeter test script configurable. For example, you might iterate over all customers in a CSV file to pass the customer details into API request.
In JMeter, you can use the CSV Data Set Config element in your test script to read data from a CSV file.
To read data from an external file in Azure Load Testing, you have to upload the external file alongside the JMeter test script in your load test. If you scale out your test across multiple parallel test engine instances, you can choose to split the input data evenly across these instances.
Get started by cloning or downloading the samples project from GitHub.
Prerequisites
- An Azure account with an active subscription. If you don't have an Azure subscription, create a free account before you begin.
- An Azure load testing resource. To create a load testing resource, see Create and run a load test.
- An Apache JMeter test script (JMX).
- (Optional) Apache JMeter GUI to author your test script. To install Apache JMeter, see Apache JMeter Getting Started.
Update your JMeter script to read CSV data
In this section, you configure your Apache JMeter script to reference the external CSV file. You use a CSV Data Set Config element to read data from a CSV file.
Important
Azure Load Testing uploads the JMX file and all related files in a single folder. When you reference an external file in your JMeter script, verify that you have no file path references in your test script.
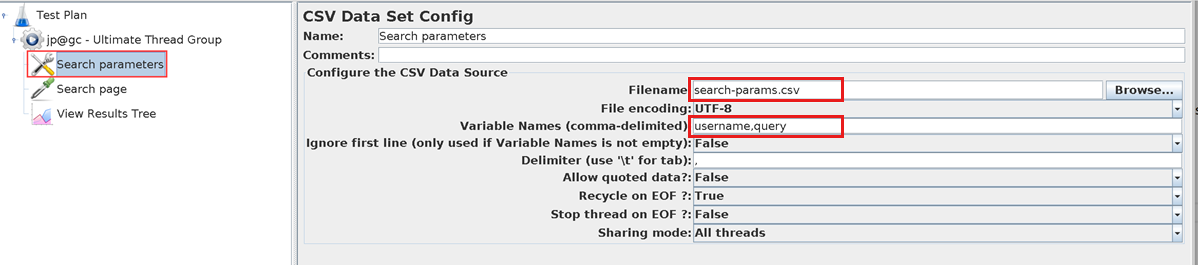
Modify the JMeter script by using the Apache JMeter GUI:
Select the CSV Data Set Config element in your test script.
Update the Filename information and remove any file path reference.
Optionally, enter the CSV field names in Variable Names, when you split the CSV file across test engines.
Azure Load Testing doesn't preserve the header row when splitting your CSV file. Provide the variable names in the CSV Data Set Config element instead of using a header row.
Repeat the previous steps for every CSV Data Set Config element in the script.
Save the JMeter script and upload the script to your load test.

Upload the CSV file to your load test
When you reference external files from your test script, make sure to upload all these files alongside the JMeter test script. When the load test starts, Azure Load Testing copies all files to a single folder on each of the test engines instances.
Important
Azure Load Testing doesn't preserve the header row when splitting your CSV file. Before you add the CSV file to the load test, remove the header row from the file.
To add a CSV file to your load test by using the Azure portal:
In the Azure portal, go to your Azure load testing resource.
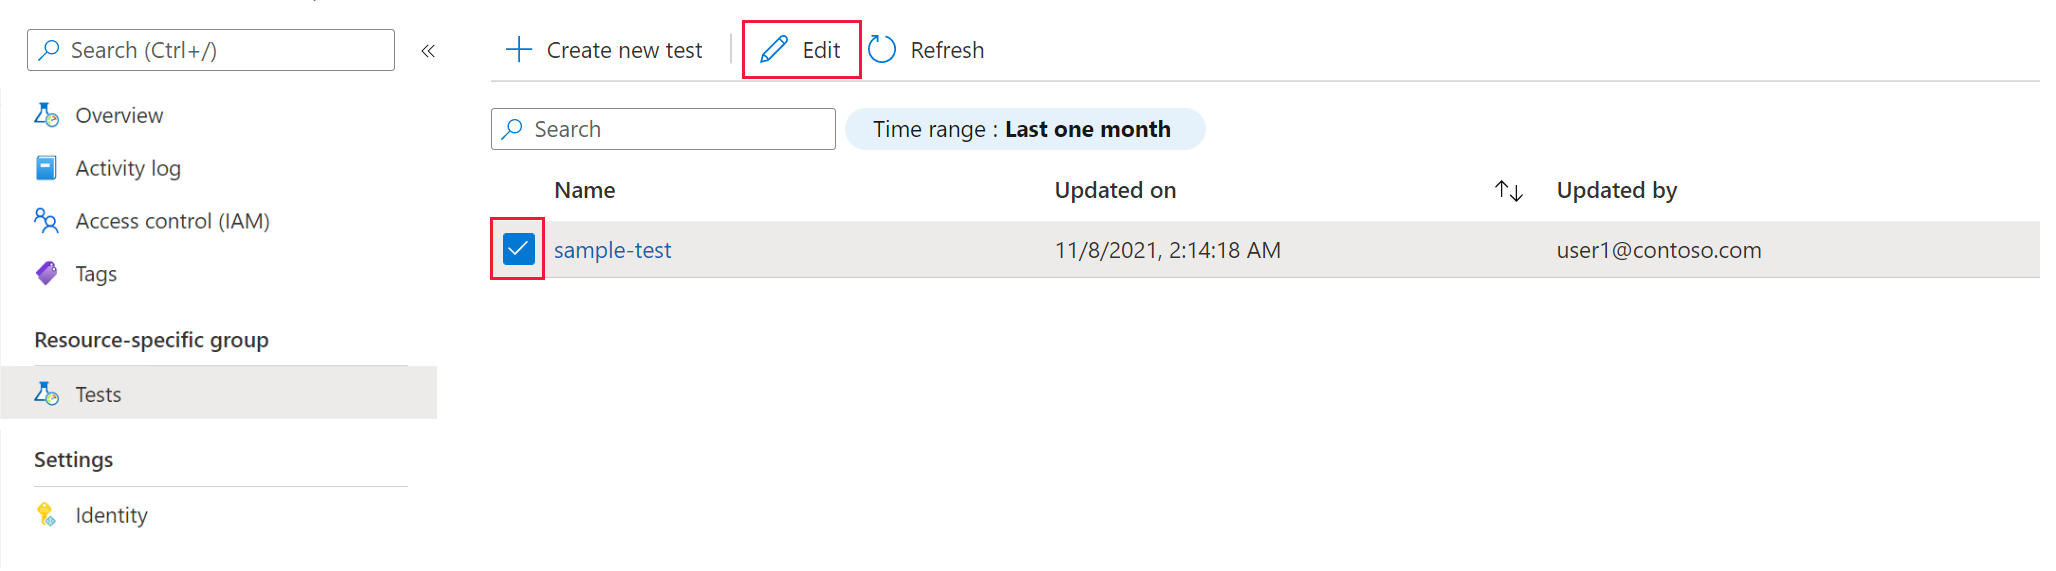
On the left pane, select Tests to view a list of tests.
Select your test from the list by selecting the checkbox, and then select Edit.
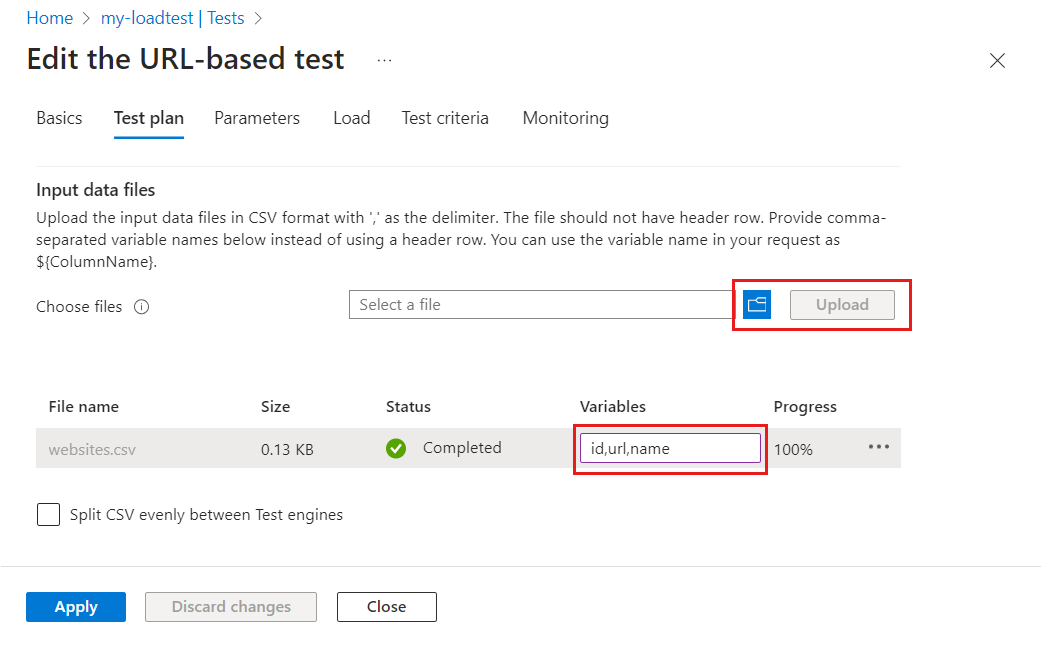
On the Test plan tab, select the CSV file from your computer, and then select Upload to upload the file to Azure.
If you're using a URL-based load test, you can enter the variable names as a comma-separated list in the Variables column.
If the size of the CSV file is greater than 50 MB, zip the file. The size of the zip file should be below 50 MB. Azure Load Testing automatically unzips the file during the test run. Only five zip artifacts are allowed with a maximum of 1000 files in each zip and an uncompressed total size of 1 GB.
Select Apply to modify the test and to use the new configuration when you rerun it.


Tip
If you're using a URL-based load test, you can reference the values from the CSV input data file in the HTTP requests by using the $(variable) syntax.
Split CSV input data across test engines
By default, Azure Load Testing copies and processes your input files unmodified across all test engine instances. By default, each test engine processes the entire CSV file. Alternately, Azure Load Testing enables you to split the CSV input data evenly across all engine instances. If you have multiple CSV files, each file is split evenly.
For example, if you have a large customer CSV input file, and the load test runs on 10 parallel test engines, then each instance processes 1/10th of the customers.
Important
Azure Load Testing doesn't preserve the header row when splitting your CSV file.
- Configure your JMeter script to use variable names when reading the CSV file.
- Remove the header row from the CSV file before you add it to the load test.
To configure your load test to split input CSV files:
Go to the Test plan tab for your load test.
Select Split CSV evenly between Test engines.
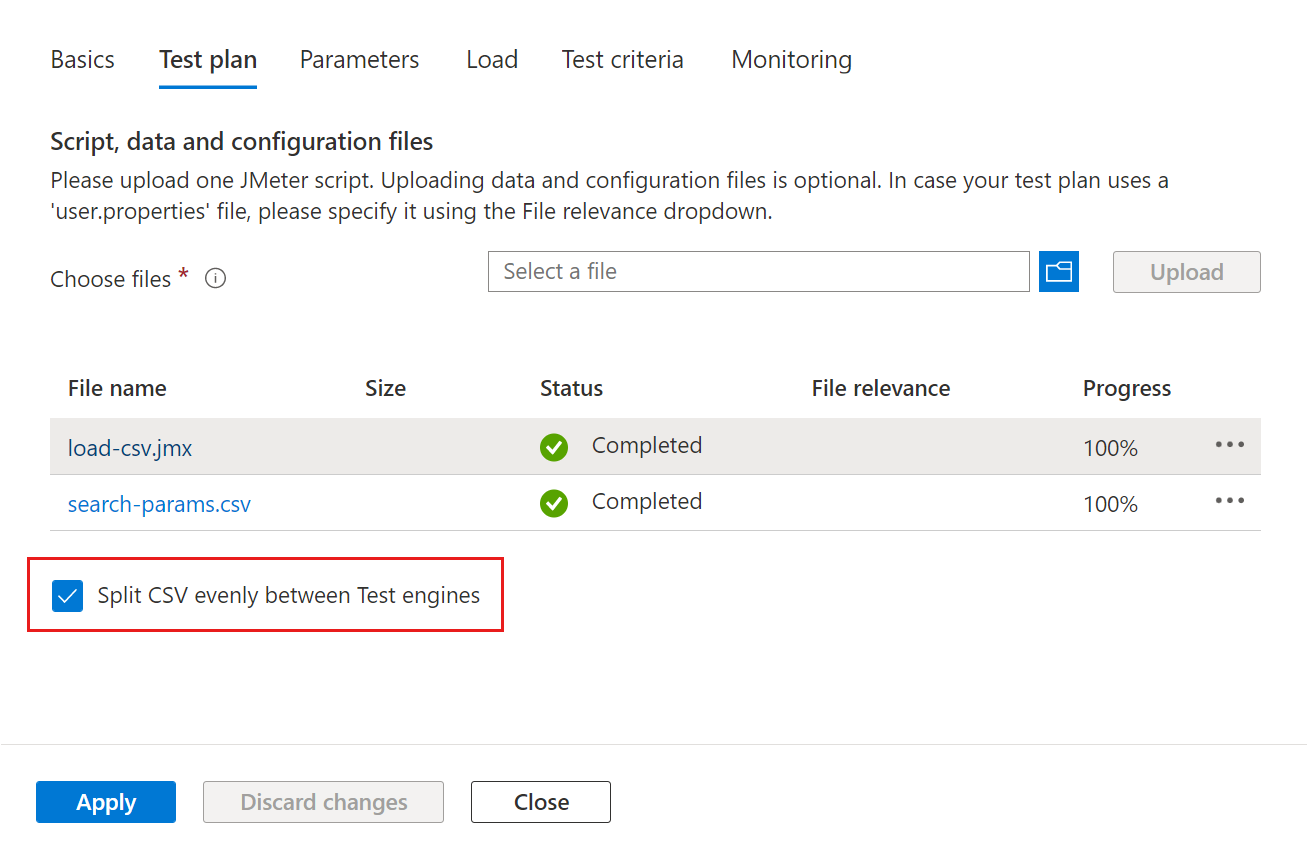
Select Apply to confirm the configuration changes.
The next time you run the test, Azure Load Testing splits and processes the CSV file evenly across the test engines.

Troubleshooting
Test status is failed and test log has File {my-filename} must exist and be readable
When the load test completes with the Failed status, you can download the test logs.
When you receive an error message File {my-filename} must exist and be readable in the test log, the input CSV file couldn't be found when running the JMeter script.
Azure Load Testing stores all input files alongside the JMeter script. When you reference the input CSV file in the JMeter script, make sure not to include the file path, but only use the filename.
The following code snippet shows an extract of a JMeter file that uses a CSVDataSet element to read the input file. Notice that the filename doesn't include the file path.
<CSVDataSet guiclass="TestBeanGUI" testclass="CSVDataSet" testname="Websites CSV" enabled="true">
    <stringProp name="filename">websites.csv</stringProp>
    <stringProp name="fileEncoding">UTF-8</stringProp>
    <stringProp name="variableNames">CustomerId,CustomerName,Url</stringProp>
    <boolProp name="ignoreFirstLine">true</boolProp>
    <stringProp name="delimiter">,</stringProp>
    <boolProp name="quotedData">false</boolProp>
    <boolProp name="recycle">false</boolProp>
    <boolProp name="stopThread">true</boolProp>
    <stringProp name="shareMode">shareMode.all</stringProp>
    <stringProp name="TestPlan.comments">Read all records from the CSV file -  stop thread at end of file</stringProp>
</CSVDataSet>
Related content
Feedback
Coming soon: Throughout 2024 we will be phasing out GitHub Issues as the feedback mechanism for content and replacing it with a new feedback system. For more information see: https://aka.ms/ContentUserFeedback.
Submit and view feedback for