Use pipeline parameters to retrain models in the designer
In this how-to article, you learn how to use Azure Machine Learning designer to retrain a machine learning model using pipeline parameters. You will use published pipelines to automate your workflow and set parameters to train your model on new data. Pipeline parameters let you re-use existing pipelines for different jobs.
In this article, you learn how to:
- Train a machine learning model.
- Create a pipeline parameter.
- Publish your training pipeline.
- Retrain your model with new parameters.
Prerequisites
- An Azure Machine Learning workspace
- Complete part 1 of this how-to series, Transform data in the designer
Important
If you do not see graphical elements mentioned in this document, such as buttons in studio or designer, you may not have the right level of permissions to the workspace. Please contact your Azure subscription administrator to verify that you have been granted the correct level of access. For more information, see Manage users and roles.
This article also assumes that you have some knowledge of building pipelines in the designer. For a guided introduction, complete the tutorial.
Sample pipeline
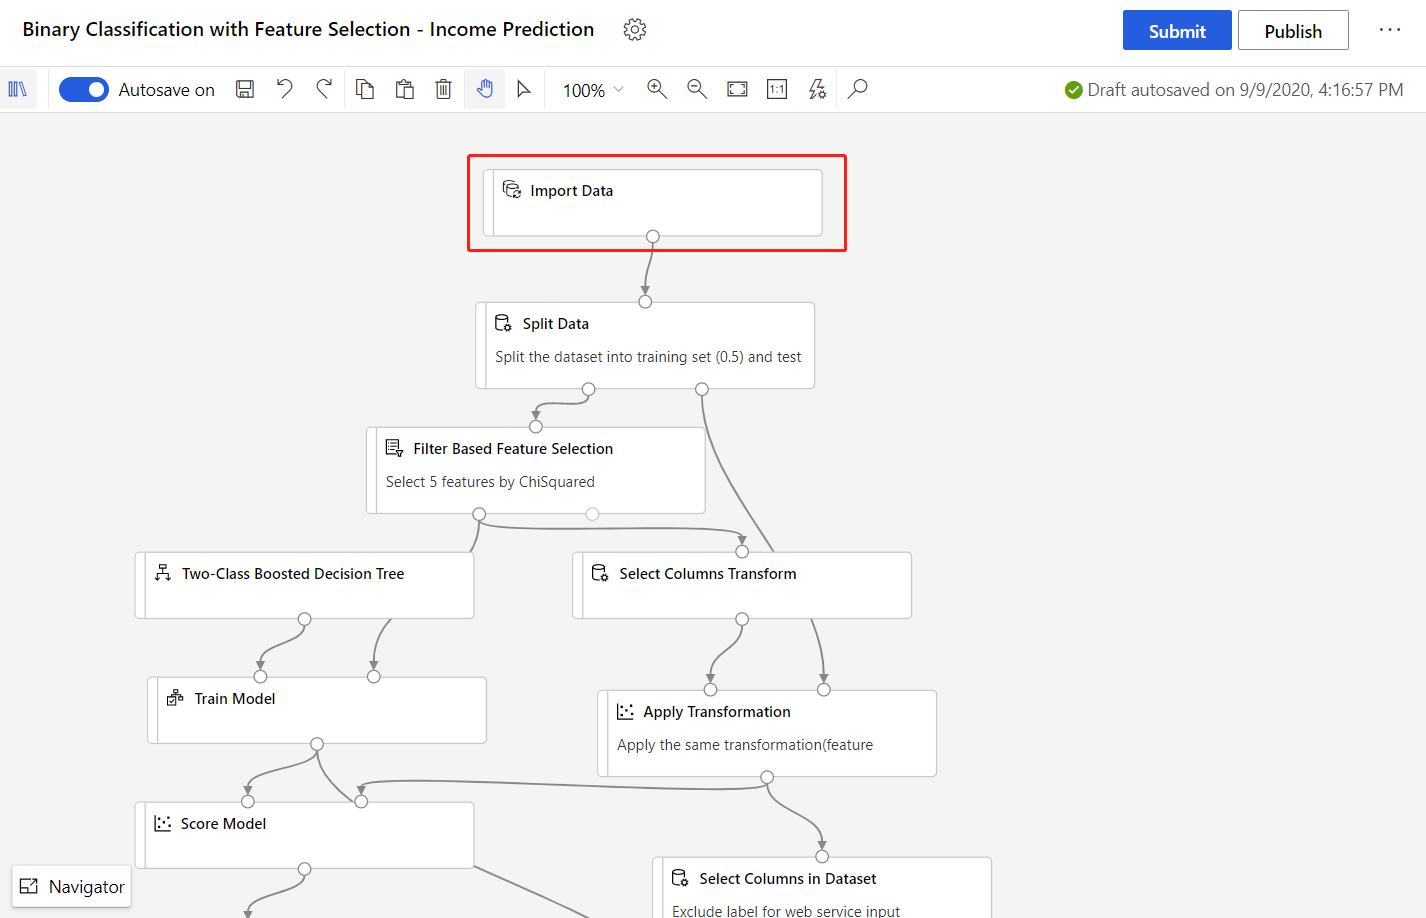
The pipeline used in this article is an altered version of a sample pipeline Income prediction in the designer homepage. The pipeline uses the Import Data component instead of the sample dataset to show you how to train models using your own data.
Create a pipeline parameter
Pipeline parameters are used to build versatile pipelines which can be resubmitted later with varying parameter values. Some common scenarios are updating datasets or some hyper-parameters for retraining. Create pipeline parameters to dynamically set variables at runtime.
Pipeline parameters can be added to data source or component parameters in a pipeline. When the pipeline is resubmitted, the values of these parameters can be specified.
For this example, you will change the training data path from a fixed value to a parameter, so that you can retrain your model on different data. You can also add other component parameters as pipeline parameters according to your use case.
Select the Import Data component.
Note
This example uses the Import Data component to access data in a registered datastore. However, you can follow similar steps if you use alternative data access patterns.
In the component detail pane, to the right of the canvas, select your data source.
Enter the path to your data. You can also select Browse path to browse your file tree.
Mouseover the Path field, and select the ellipses above the Path field that appear.
Select Add to pipeline parameter.
Provide a parameter name and a default value.

Select Save.
Note
You can also detach a component parameter from pipeline parameter in the component detail pane, similar to adding pipeline parameters.
You can inspect and edit your pipeline parameters by selecting the Settings gear icon next to the title of your pipeline draft.
- After detaching, you can delete the pipeline parameter in the Setings pane.
- You can also add a pipeline parameter in the Settings pane, and then apply it on some component parameter.
Submit the pipeline job.
Publish a training pipeline
Publish a pipeline to a pipeline endpoint to easily reuse your pipelines in the future. A pipeline endpoint creates a REST endpoint to invoke pipeline in the future. In this example, your pipeline endpoint lets you reuse your pipeline to retrain a model on different data.
Select Publish above the designer canvas.
Select or create a pipeline endpoint.
Note
You can publish multiple pipelines to a single endpoint. Each pipeline in a given endpoint is given a version number, which you can specify when you call the pipeline endpoint.
Select Publish.
Retrain your model
Now that you have a published training pipeline, you can use it to retrain your model on new data. You can submit jobs from a pipeline endpoint from the studio workspace or programmatically.
Submit jobs by using the studio portal
Use the following steps to submit a parameterized pipeline endpoint job from the studio portal:
- Go to the Endpoints page in your studio workspace.
- Select the Pipeline endpoints tab. Then, select your pipeline endpoint.
- Select the Published pipelines tab. Then, select the pipeline version that you want to run.
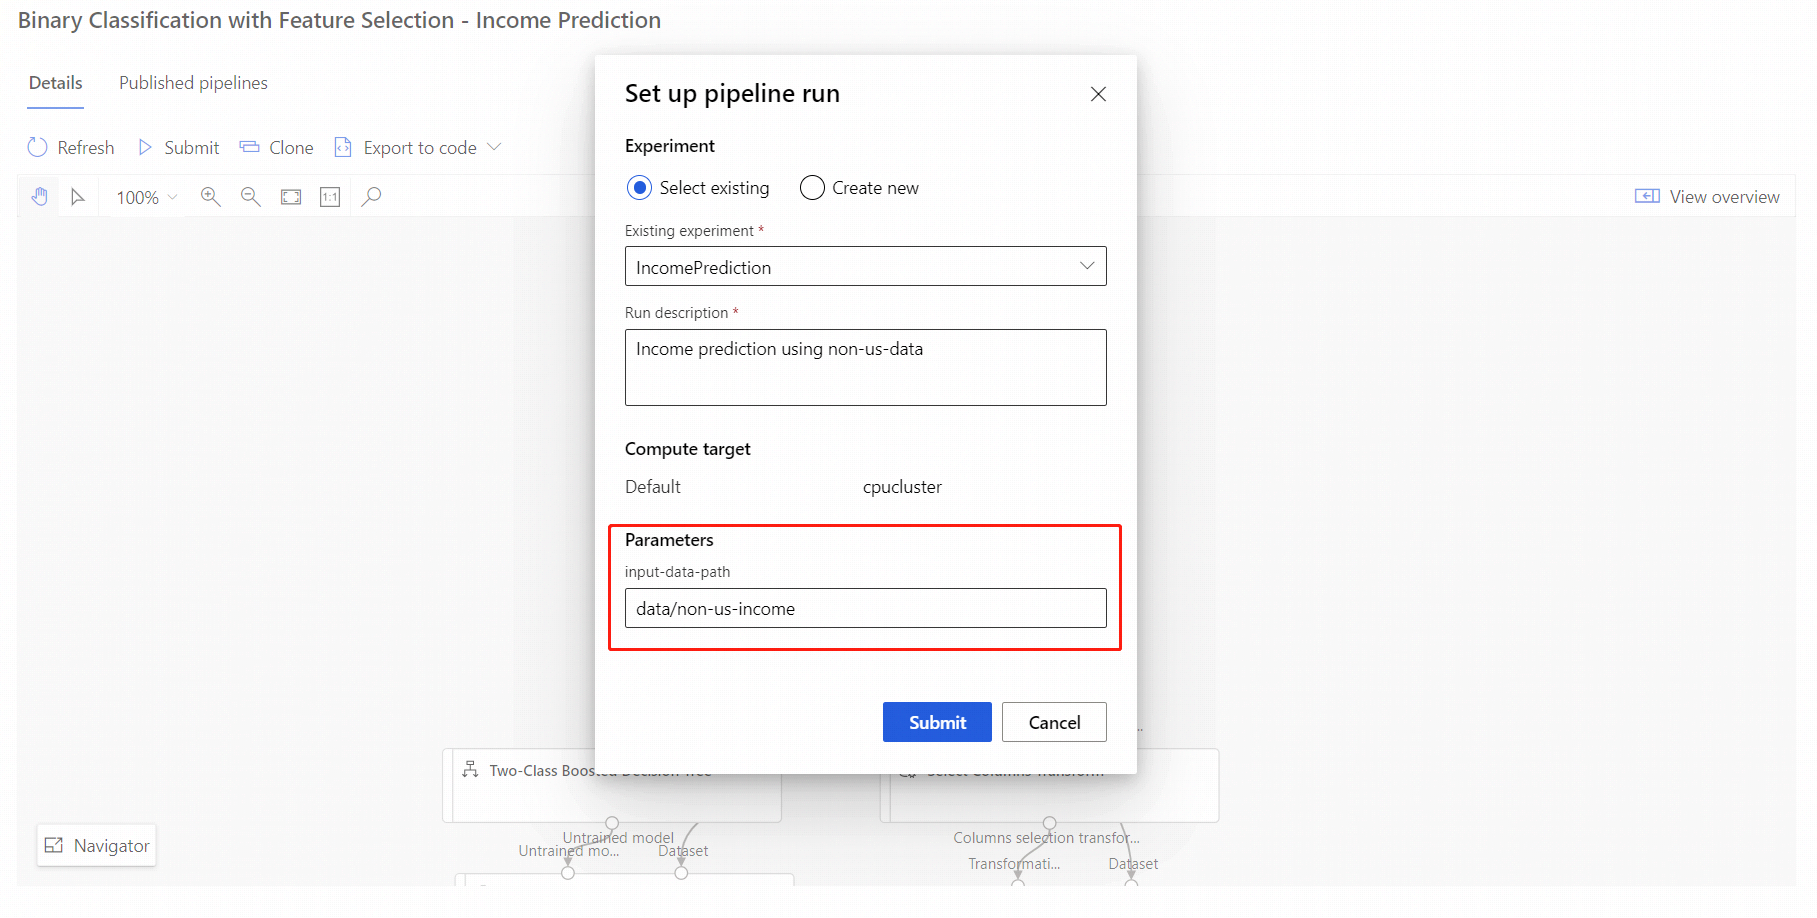
- Select Submit.
- In the setup dialog box, you can specify the parameters values for the job. For this example, update the data path to train your model using a non-US dataset.
Submit jobs by using code
You can find the REST endpoint of a published pipeline in the overview panel. By calling the endpoint, you can retrain the published pipeline.
To make a REST call, you need an OAuth 2.0 bearer-type authentication header. For information about setting up authentication to your workspace and making a parameterized REST call, see Use REST to manage resources.
Next steps
In this article, you learned how to create a parameterized training pipeline endpoint using the designer.
For a complete walkthrough of how you can deploy a model to make predictions, see the designer tutorial to train and deploy a regression model.
For how to publish and submit a job to pipeline endpoint using the SDK v1, see Publish pipelines.
Feedback
Coming soon: Throughout 2024 we will be phasing out GitHub Issues as the feedback mechanism for content and replacing it with a new feedback system. For more information see: https://aka.ms/ContentUserFeedback.
Submit and view feedback for