Launch Visual Studio Code integrated with Azure Machine Learning (preview)
In this article, you learn how to launch Visual Studio Code remotely connected to an Azure Machine Learning compute instance. Use VS Code as your integrated development environment (IDE) with the power of Azure Machine Learning resources. Use VS Code in the browser with VS Code for the Web, or use the VS Code desktop application.
Important
This feature is currently in public preview. This preview version is provided without a service-level agreement, and we don't recommend it for production workloads. Certain features might not be supported or might have constrained capabilities.
For more information, see Supplemental Terms of Use for Microsoft Azure Previews.
There are two ways you can connect to a compute instance from Visual Studio Code. We recommend the first approach.
Use VS Code as your workspace's integrated development environment (IDE). This option provides you with a full-featured development environment for building your machine learning projects.
- You can open VS Code from your workspace either in the browser VS Code for the Web or desktop application VS Code Desktop.
- We recommend VS Code for the Web, as you can do all your machine learning work directly from the browser, and without any required installations or dependencies.
Remote Jupyter Notebook server. This option allows you to set a compute instance as a remote Jupyter Notebook server. This option is only available in VS Code (Desktop).
Important
To connect to a compute instance behind a firewall, see Configure inbound and outbound network traffic.
Prerequisites
Before you get started, you need:
-
An Azure Machine Learning workspace and compute instance. Complete Create resources you need to get started to create them both.
-
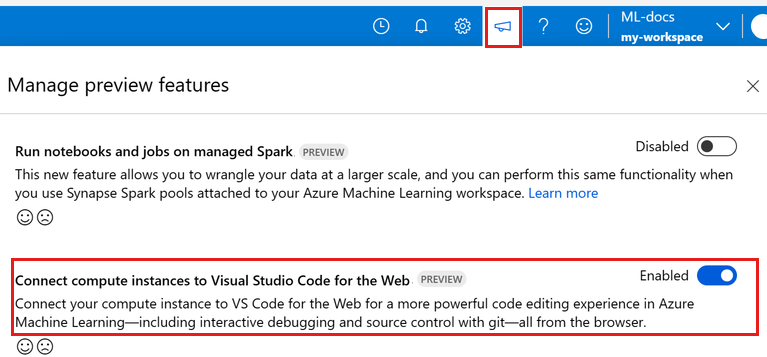
Sign in to the studio and select your workspace if it's not already open.
In the Manage preview features panel, scroll down and enable Connect compute instances to Visual Studio Code for the Web.
Use VS Code as your workspace IDE
Use one of these options to connect VS Code to your compute instance and workspace files.
VS Code for the Web provides you with a full-featured development environment for building your machine learning projects, all from the browser and without required installations or dependencies. And by connecting your Azure Machine Learning compute instance, you get the rich and integrated development experience VS Code offers, enhanced by the power of Azure Machine Learning.
Launch VS Code for the Web with one select from the Azure Machine Learning studio, and seamlessly continue your work.
Sign in to Azure Machine Learning studio and follow the steps to launch a VS Code (Web) browser tab, connected to your Azure Machine Learning compute instance.
You can create the connection from either the Notebooks or Compute section of Azure Machine Learning studio.
Notebooks
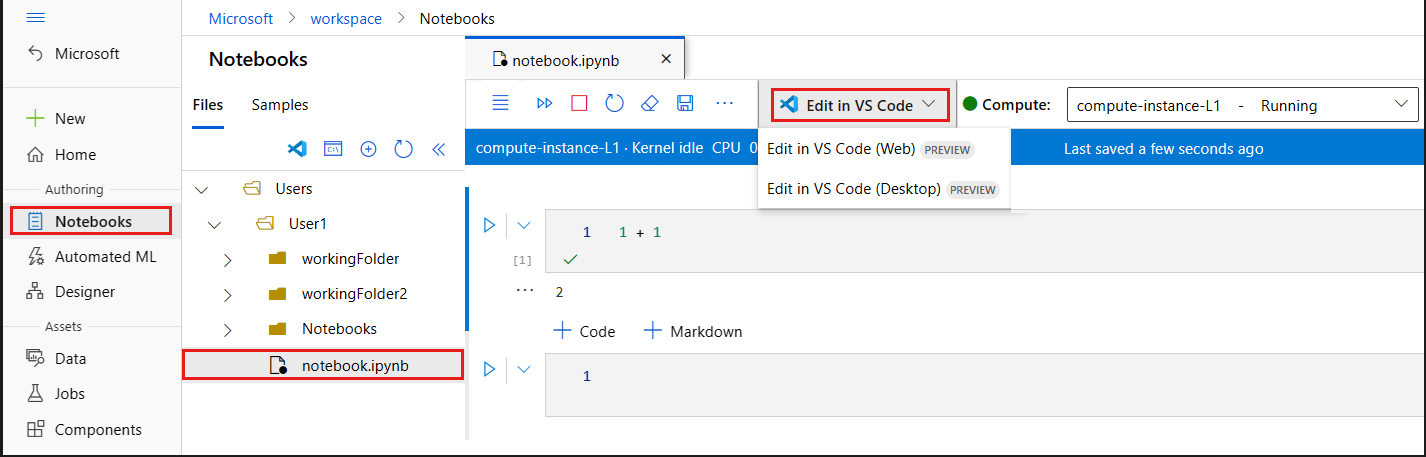
Select the Notebooks tab.
In the Notebooks tab, select the file you want to edit.
If the compute instance is stopped, select Start compute and wait until it's running.

Select Editors > Edit in VS Code (Web).
Compute
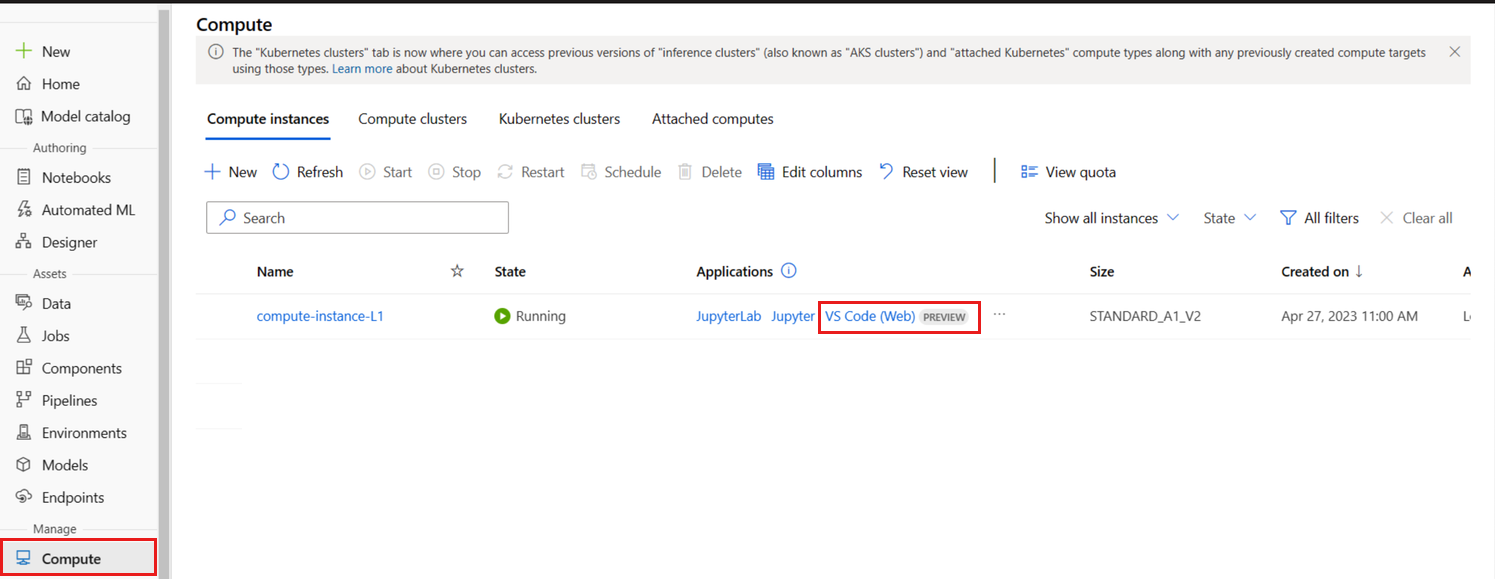
- Select the Compute tab
- If the compute instance you wish to use is stopped, select it and then select Start.
- Once the compute instance is running, in the Applications column, select VS Code (Web).


If you don't see these options, make sure you've enabled the Connect compute instances to Visual Studio Code for the Web preview feature, as shown in the Prerequisites section.


If you pick one of the click-out experiences, a new VS Code window is opened, and a connection attempt made to the remote compute instance. When attempting to make this connection, the following steps are taking place:
- Authorization. Some checks are performed to make sure the user attempting to make a connection is authorized to use the compute instance.
- VS Code Remote Server is installed on the compute instance.
- A WebSocket connection is established for real-time interaction.
Once the connection is established, it's persisted. A token is issued at the start of the session, which gets refreshed automatically to maintain the connection with your compute instance.
After you connect to your remote compute instance, use the editor to:
- Author and manage files on your remote compute instance or file share.
- Use the VS Code integrated terminal to run commands and applications on your remote compute instance.
- Debug your scripts and applications
- Use VS Code to manage your Git repositories
Remote Jupyter Notebook server
This option allows you to use a compute instance as a remote Jupyter Notebook server from Visual Studio Code (Desktop). This option connects only to the compute instance, not the rest of the workspace. You won't see your workspace files in VS Code when using this option.
In order to configure a compute instance as a remote Jupyter Notebook server, first install:
- Azure Machine Learning Visual Studio Code extension. For more information, see the Azure Machine Learning Visual Studio Code Extension setup guide.
To connect to a compute instance:
Open a Jupyter Notebook in Visual Studio Code.
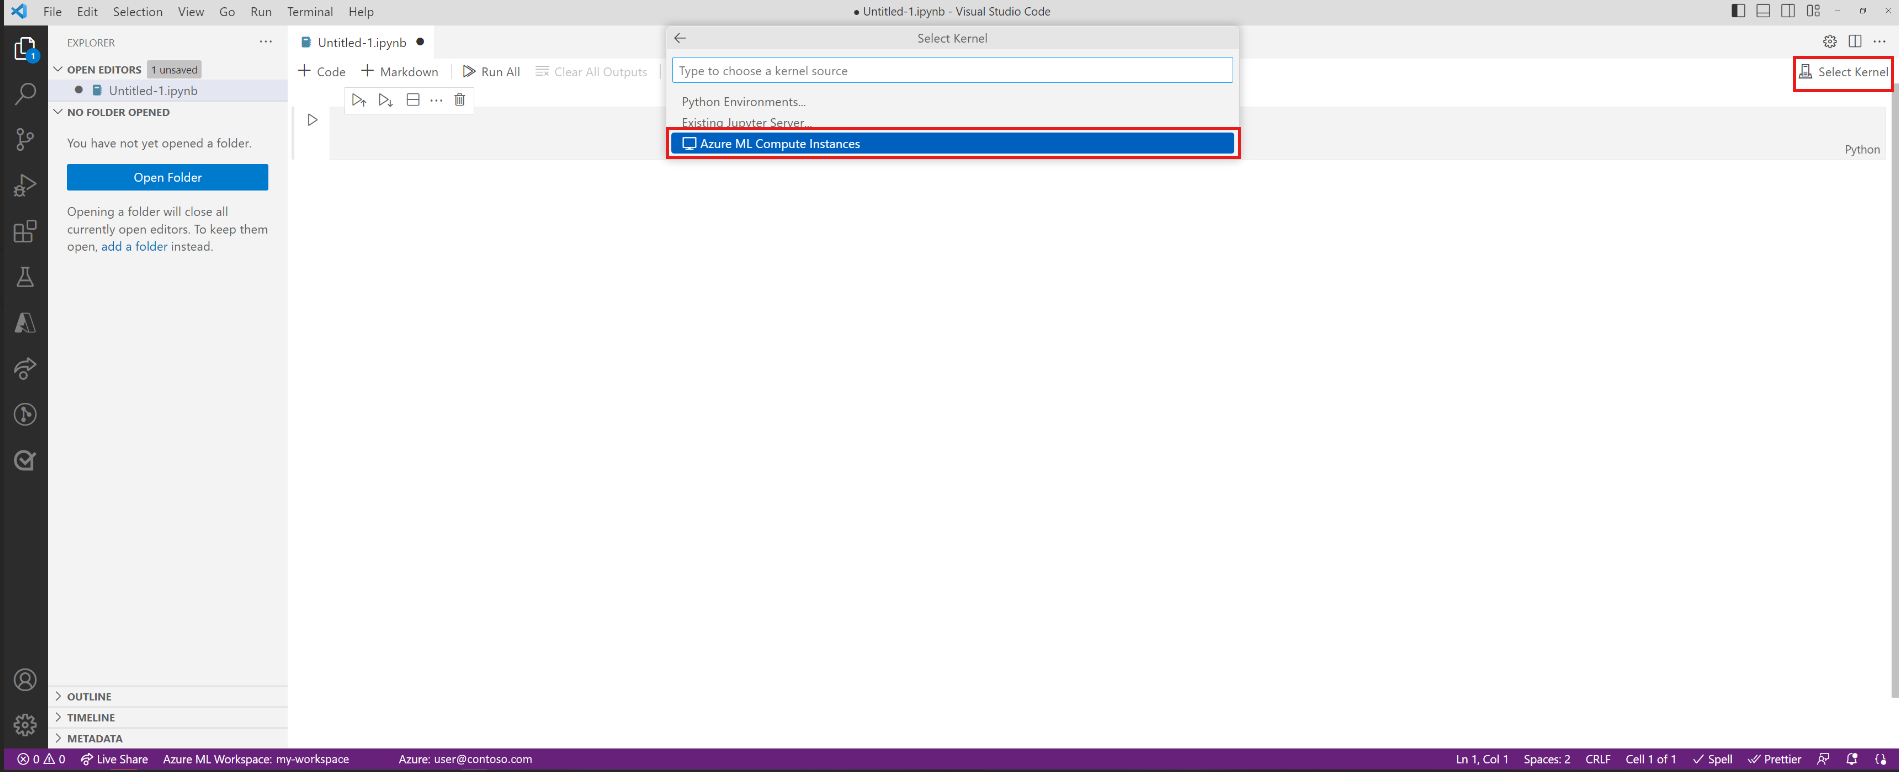
When the integrated notebook experience loads, choose Select Kernel.
Alternatively, use the command palette:
- Select View > Command Palette from the menu bar to open the command palette.
- Enter into the text box
AzureML: Connect to Compute instance Jupyter server.
Choose
Azure ML Compute Instancesfrom the list of Jupyter server options.Select your subscription from the list of subscriptions. If you have previously configured your default Azure Machine Learning workspace, this step is skipped.
Select your workspace.
Select your compute instance from the list. If you don't have one, select Create new Azure Machine Learning Compute Instance and follow the prompts to create one.
For the changes to take effect, you have to reload Visual Studio Code.
Open a Jupyter Notebook and run a cell.

Important
You MUST run a cell in order to establish the connection.
At this point, you can continue to run cells in your Jupyter Notebook.
Tip
You can also work with Python script files (.py) containing Jupyter-like code cells. For more information, see the Visual Studio Code Python interactive documentation.
Next steps
Now that you've launched Visual Studio Code remotely connected to a compute instance, you can prep your data, edit and debug your code, and submit training jobs with the Azure Machine Learning extension.
To learn more about how to make the most of VS Code integrated with Azure Machine Learning, see Work in VS Code remotely connected to a compute instance (preview).
Feedback
Coming soon: Throughout 2024 we will be phasing out GitHub Issues as the feedback mechanism for content and replacing it with a new feedback system. For more information see: https://aka.ms/ContentUserFeedback.
Submit and view feedback for