Topology (preview)
Topology provides a visualization of the entire network for understanding network configuration. It provides an interactive interface to view resources and their relationships in Azure across multiple subscriptions, resource groups and locations. You can also drill down to a resource view for resources to view their component level visualization.
Prerequisites
- If you don't have an Azure subscription, create a free account before you begin.
- An account with the necessary RBAC permissions to utilize the Network Watcher capabilities.
Supported resource types
The following are the resource types supported by topology:
- Application gateways
- Azure Bastion hosts
- Azure Front Door profiles
- ExpressRoute circuits
- Load balancers
- Network interfaces
- Network security groups
- Private endpoints
- Private Link services
- Public IP addresses
- Virtual machines
- Virtual network gateways
- Virtual networks
View Topology
To view a topology, follow these steps:
Sign in to the Azure portal with an account that has the necessary permissions.
In the search box at the top of the portal, enter Monitor. Select Monitor from the search results.
Under Insights, select Networks.
In Networks, select Topology.
Select Scope to define the scope of the Topology.
In the Select scope pane, select the list of Subscriptions, Resource groups, and Locations of the resources for which you want to view the topology. Select Save.
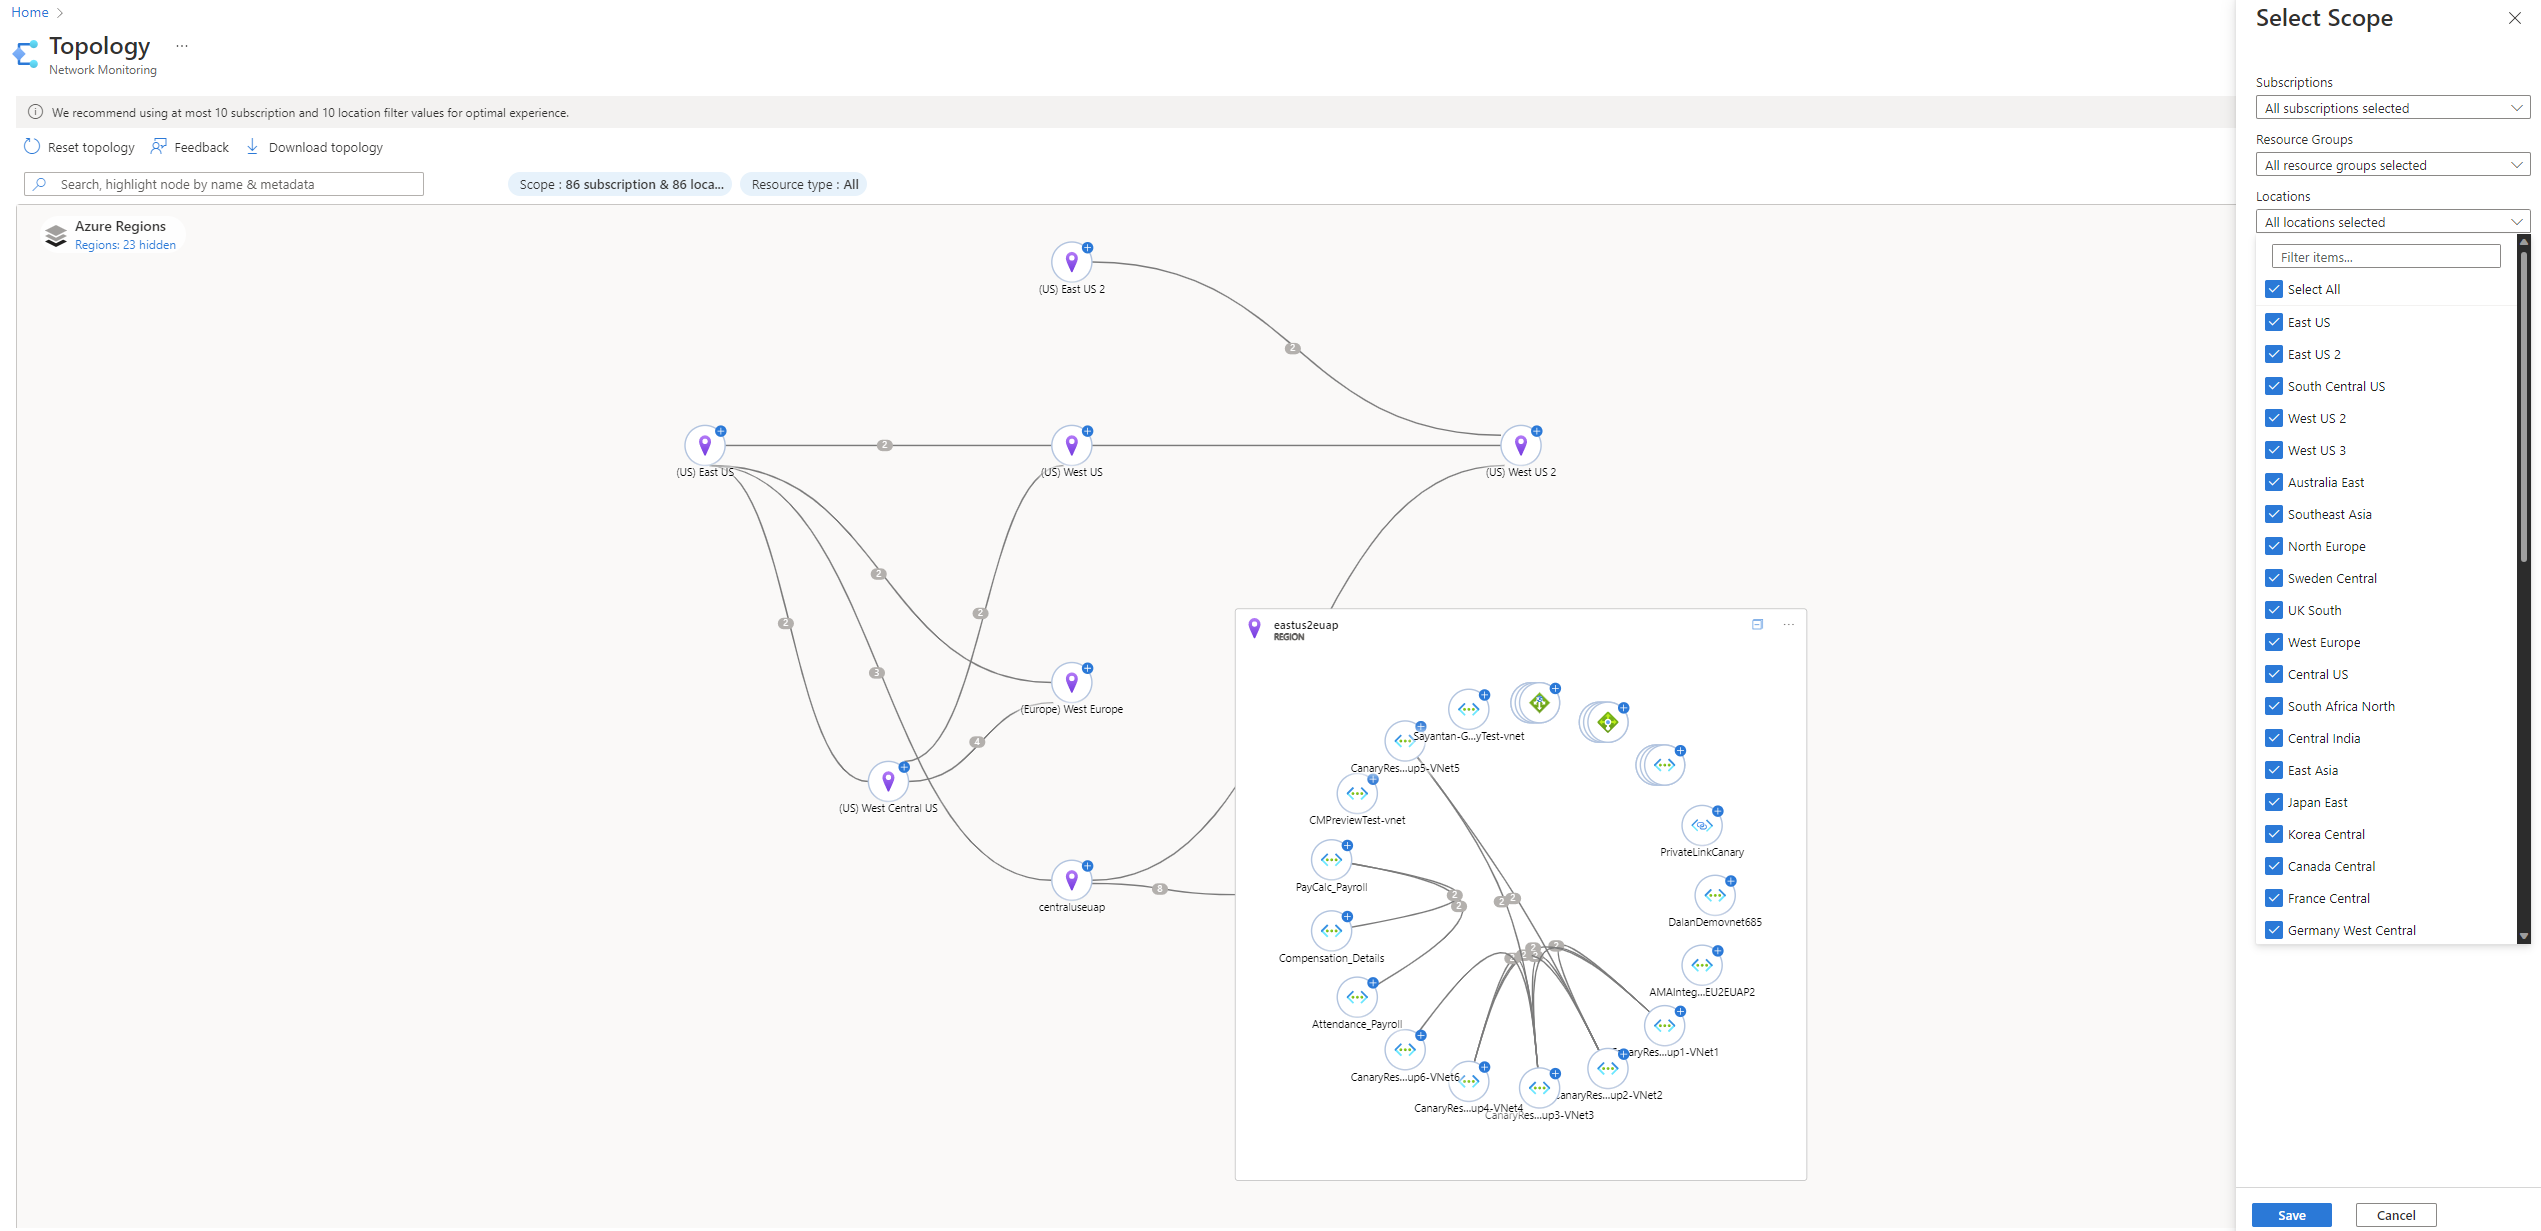
The duration to render the topology may vary depending on the number of subscriptions selected.
Select the Resource type that you want to include in the topology and select Apply. See supported resource types.

The topology containing the resources according to the scope and resource type specified, appears.

Each edge of the topology represents an association between each of the resources. In the topology, similar types of resources are grouped together.
Add regions
You can add regions that aren't part of the existing topology. The number of regions that aren't part of the existing topology are displayed. To add a region, follow these steps:
Hover on Regions under Azure Regions.
From the list of Hidden Resources, select the regions that you want to add and select Add to View.


You can view the resources in the added region as part of the topology.
Drilldown resources
To drill down to the basic unit of each network, select the plus sign on each resource. When you hover on the resource, you can see the details of that resource. Selecting a resource displays a pane on the right with a summary of the resource.

Drilling down into Azure resources such as Application Gateways and Firewalls displays the resource view diagram of that resource.

Integration with diagnostic tools
When you drill down to a VM within the topology, you can see details about the VM in the summary tab.

Follow these steps to find the next hop:
Select Insights + Diagnostics tab, and then select Next Hop.

Enter the destination IP address and then select Check Next Hop.

The Next hop capability of Network Watcher checks if the destination IP address is reachable from the source VM. The result shows the Next hop type and route table used to route traffic from the VM. For more information, see Next hop.


Next steps
To learn more about connectivity related metrics, see Connection monitor.
Feedback
Coming soon: Throughout 2024 we will be phasing out GitHub Issues as the feedback mechanism for content and replacing it with a new feedback system. For more information see: https://aka.ms/ContentUserFeedback.
Submit and view feedback for