QuickStart: Get started with Elastic
In this quickstart, you use the Azure portal to integrate an instance of Elastic with your Azure solutions.
Prerequisites
- Subscription owner - The Elastic integration with Azure can only be created by users who have Owner or Contributor permissions on the Azure subscription. Confirm that you have the appropriate access before starting the setup.
- Single sign-on app - The ability to automatically navigate between the Azure portal and Elastic Cloud is enabled via single sign-on (SSO). This option is automatically enabled and turned on for all Azure users.
Find offer
Use the Azure portal to find the Elastic application.
In a web browser, go to the Azure portal and sign in.
If you've visited the Marketplace in a recent session, select the icon from the available options. Otherwise, search for Marketplace.
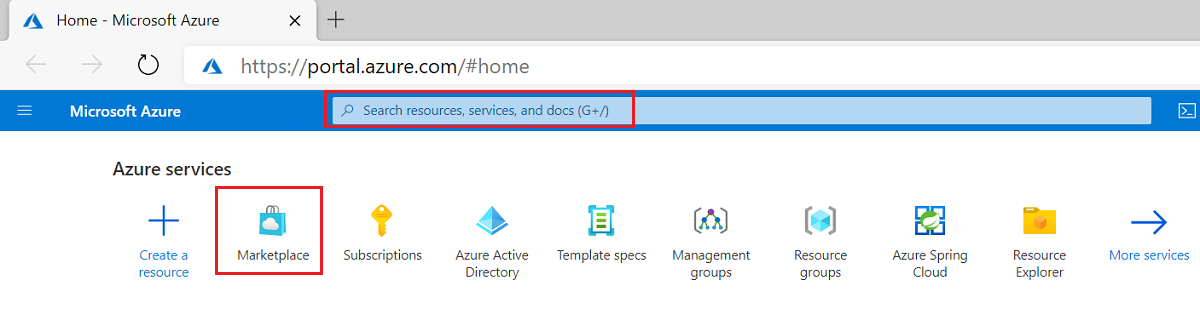
Search for Elastic and select Elastic Cloud (Elasticsearch) - An Azure Native ISV Service from the available offerings.
Select Set up + subscribe.

Create resource
After you've selected the offer for Elastic, you're ready to set up the application.
On the Create Elastic Resource basics page, provide the following values.
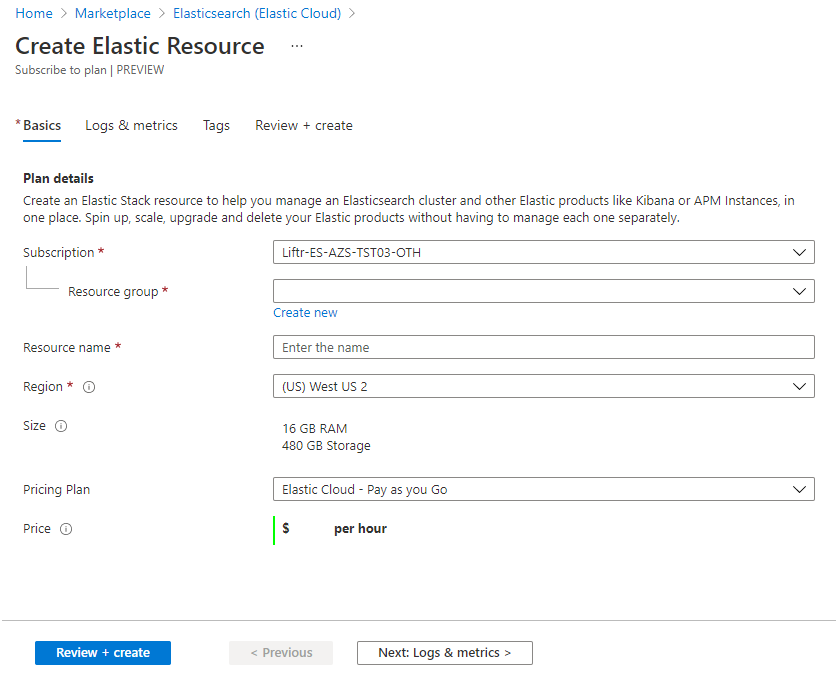
Property Description Subscription From the drop-down, select an Azure subscription where you have owner access. Resource group Specify whether you want to create a new resource group or use an existing resource group. A resource group is a container that holds related resources for an Azure solution. For more information, see Azure Resource Group overview. Elastic account name Provide the name for the Elastic account you want to create Region Select the region you want to deploy to. Pricing Plan Pay as you go. Price Specified based on the selected Elastic plan. When you've finished, select Next: Logs and Metrics.
On Logs & metrics, specify which logs to send to Elastic.
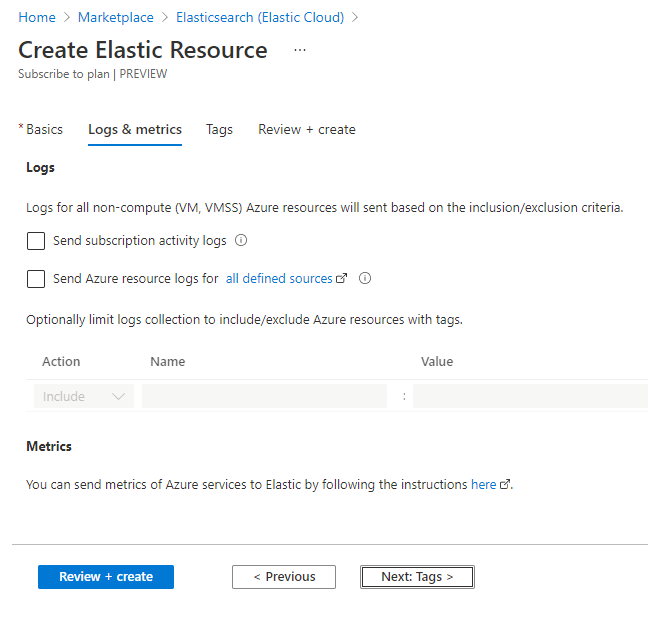
There are two types of logs that can be emitted from Azure to Elastic.
Subscription logs provide insights into the operations on each Azure resource in the subscription from the management plane. The logs also provide updates on Service Health events. Use the activity log to determine what, who, and when for any write operations (PUT, POST, DELETE) on the resources in your subscription. There's a single activity log for each Azure subscription.
Azure resource logs provide insights into operations that happen within the data plane. For example, getting a secret from a key vault or making a request to a database are data plane activities. The content of resource logs varies by the Azure service and resource type. The types of Azure resource logs are listed in Azure Monitor Resource Log categories.
To filter the Azure resources that send logs to Elastic, use resource tags. The tag rules for sending logs are:
- By default, logs are collected for all resources.
- Resources with Include tags send logs to Elastic.
- Resources with Exclude tags don't send logs to Elastic.
- If there's a conflict between inclusion and exclusion rules, exclusion takes priority.
Select Next: Tags to set up tags for the new Elastic resource.
In Tags, add custom tags for the new Elastic resource. Each tag consists of a name and value. When you've finished adding tags, select Next: Review+Create to navigate to the final step for resource creation.

On Review + create, your configuration is validated. You can review the selections you made in the earlier forms. You can also review the terms for this offering.
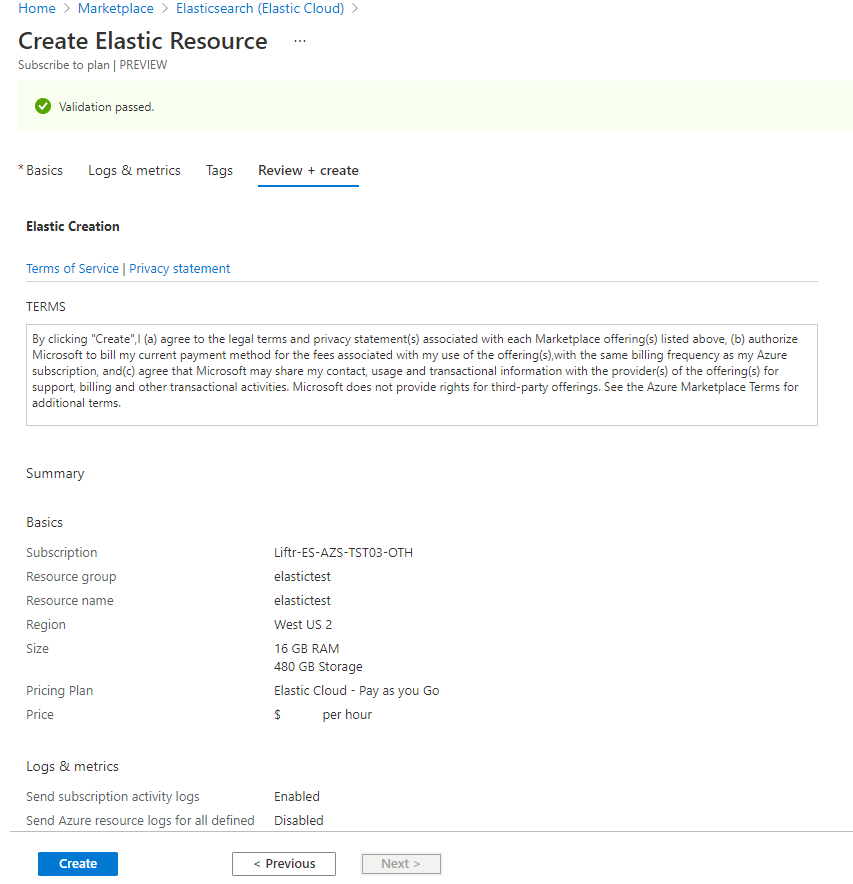
After validation has succeeded and you've reviewed the terms, select Create.
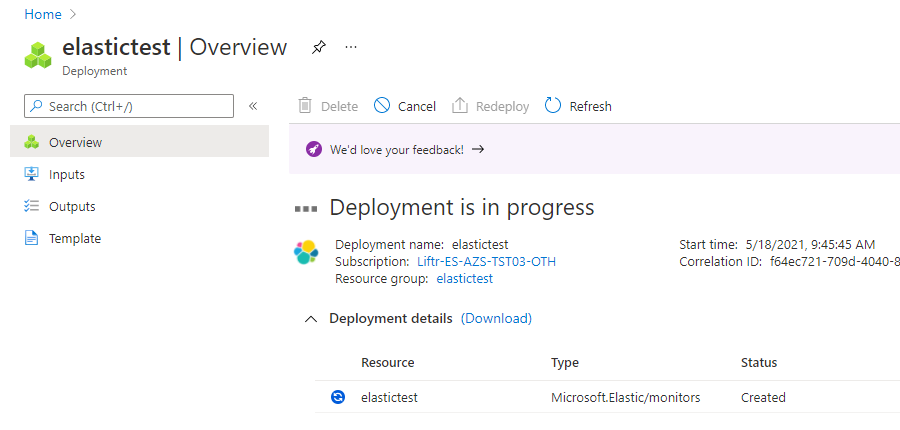
Azure starts the deployment.
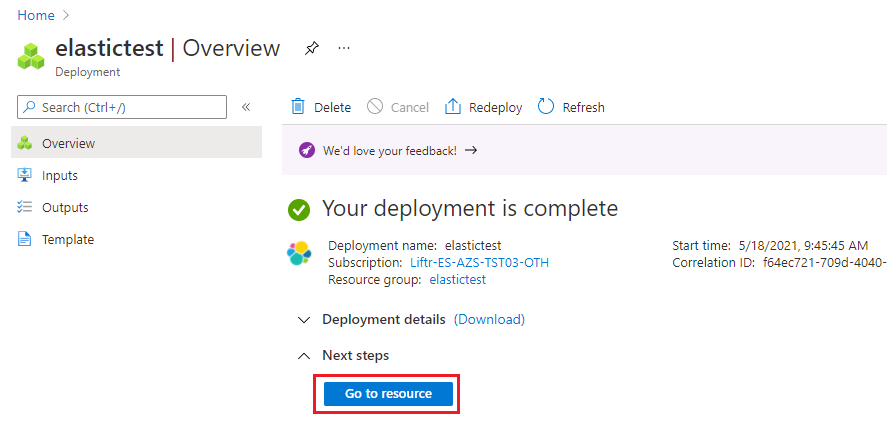
After the deployment is finished, select Go to resource to view the deployed resource.
Next steps
Get started with Elastic Cloud (Elasticsearch) - An Azure Native ISV Service on
Feedback
Coming soon: Throughout 2024 we will be phasing out GitHub Issues as the feedback mechanism for content and replacing it with a new feedback system. For more information see: https://aka.ms/ContentUserFeedback.
Submit and view feedback for