Quickstart: Create a Logz.io resource in Azure portal
This article describes how to enable Azure integration of the Logz.io software as a service (SaaS). You use Logz.io to monitor the health and performance of your Azure environment.
Prerequisites
- Subscription owner: To set up Logz.io, you must be assigned the Owner role in the Azure subscription. Before you begin this integration, check your access.
- Register resource provider: If
Microsoft.Insightsisn't already registered for your subscription, register it. For more information, see Register resource provider.
Find offer
Use the Azure portal to find Logz.io in Azure Marketplace.
Sign in to the Azure portal.
If you've visited the Marketplace in a recent session, select the icon from the available options. Otherwise, search for Marketplace.
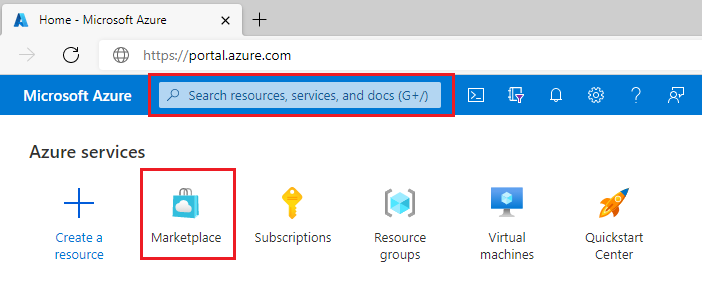
From Azure Marketplace, search for Logz.io.
Select Logz.io - Observability based on ELK & Prometheus.
Select the Set up + subscribe button. The Create new Logz.io account window opens.

Create new Logz.io account
On the Basics tab of the Create a Logz.io account screen, input the following values:
| Property | Description |
|---|---|
| Subscription | From the drop-down menu, select the Azure subscription where you have owner access. |
| Resource group | Specify whether you want to create a new resource group or use an existing resource group. A resource group is a container that holds related resources for an Azure solution. |
| Logz account name | Provide the name for the Logz.io account you want to create. |
| Location | Select West US 2 or West Europe. Logz.io supports only these Azure regions. |
| Pricing Plan | Select from the list of available Logz.io plans. |
| Billing Term | Monthly is the default. |
| Price | Specified based on the selected Logz.io plan. |
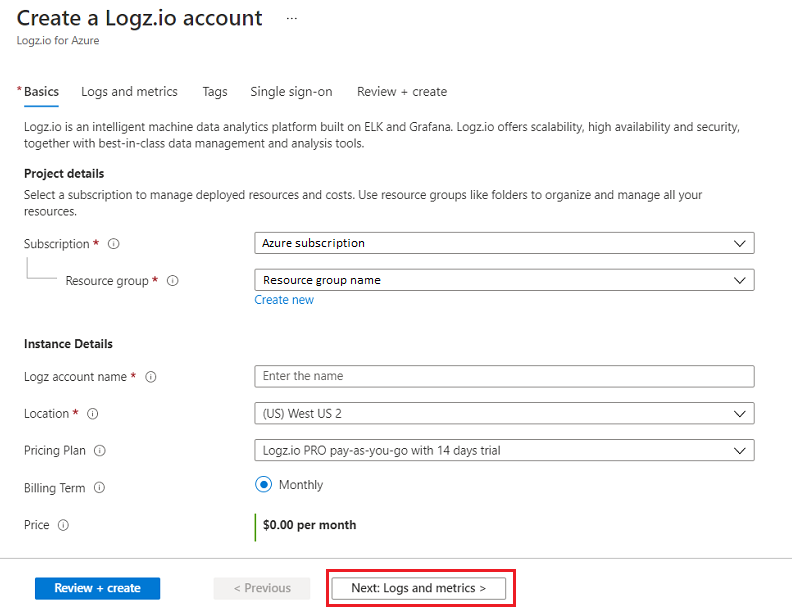
After you input the values, select the Next: Logs and metrics button.
Configure logs
On the Logs and Metrics tab, specify which Azure resources will send logs and metrics to Logz.io.
There are two types of logs that can be sent from Azure to Logz.io:
- Subscription level logs: Provide insight into the operations on each Azure resource in the subscription from the outside (the management plane) and updates on Service Health events. Use the Activity log, to determine what, who, and when for any write operations (PUT, POST, DELETE) taken on the resources in your subscription. There's a single Activity log for each Azure subscription.
- Azure resource logs: Provide insight into operations that were run within an Azure resource (the data plane). For example, getting a secret from a key vault or making a request to a database. The content of resource logs varies by the Azure service and resource type.
Subscription level logs can be sent to Logz.io by checking the box titled Send subscription level logs. If this box isn't checked, none of the subscription level logs are sent to Logz.io.
Azure resource logs can be sent to Logz.io by checking the box titled Send Azure resource logs for all defined resources. The types of Azure resource logs are listed in Azure Monitor Resource Log categories. To filter the specific set of Azure resources sending logs to Logz.io, you can use Azure resource tags.
Tag rules for sending logs are as follows:
- By default, logs are collected for all resources.
- Azure resources with Include tags send logs to Logz.io.
- Azure resources with Exclude tags do not send logs to Logz.io.
- If there's a conflict between inclusion and exclusion rules, exclusion takes a priority.
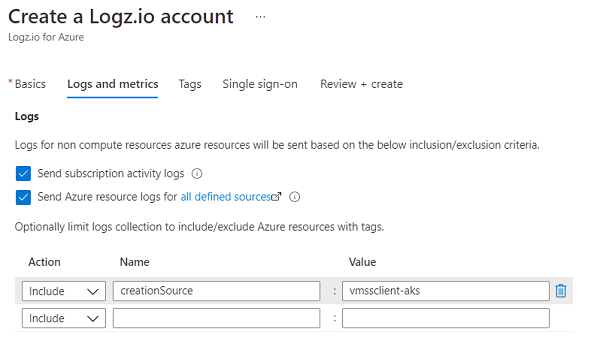
After you configure the logs and metrics, select the Next: Tags button.
Add custom tags
You can specify custom tags for the new Logz.io resource by adding key value pairs.
Each key value pair includes a Name and Value:
| Property | Description |
|---|---|
| Name | Name of the tag corresponding to the Azure Logz.io resource. |
| Value | Value of the tag corresponding to the Azure Logz.io resource. |
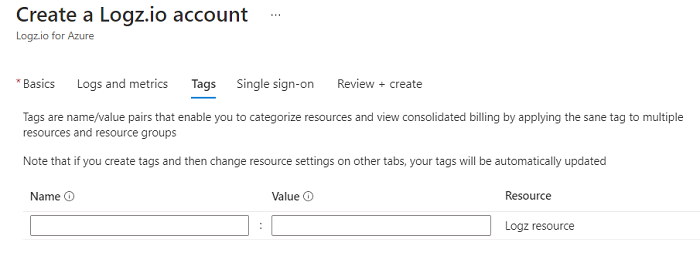
After you add tabs, select the Next: Single sign-on button.
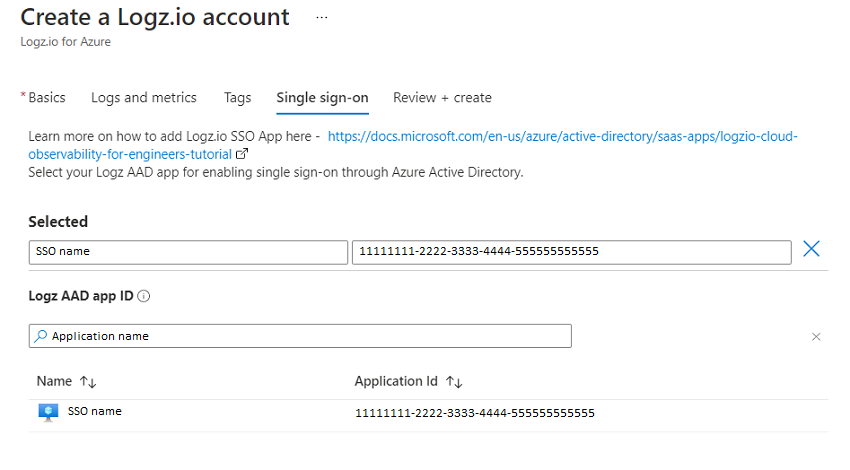
Configure single sign-on
Single sign-on (SSO) is an optional feature:
- To opt out of SSO, skip this step.
- To opt in to SSO, see Set up Logz.io single sign-on.
After Microsoft Entra ID is configured, from the Single sign-on tab, select your Logz.io SSO application.
Select the Next: Review + create button to navigate to the final step for resource creation.
Create resource
On the Review + create page, all validations are run. You can review all the selections made in the Basics, Logs and metrics, Tags and Single sign-on tabs. You can also review the Logz.io and Azure Marketplace terms and conditions.
Review all the information to verify it's correct. To begin the deployment, select the Create button.
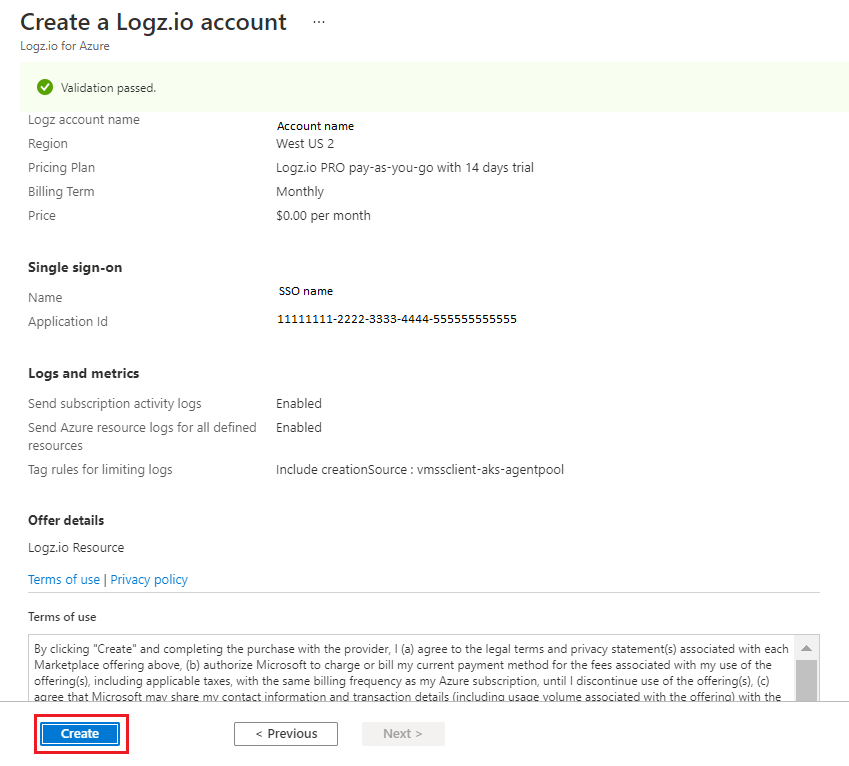
After a successful deployment, you can view the deployed Logz.io resource by selecting the Go to Resource button.
Next steps
- Learn how to manage your Logz.io integration.
- To resolve problems with the integration, see troubleshooting.
Feedback
Coming soon: Throughout 2024 we will be phasing out GitHub Issues as the feedback mechanism for content and replacing it with a new feedback system. For more information see: https://aka.ms/ContentUserFeedback.
Submit and view feedback for