Export, upload and share traces
Azure Private 5G Core offers a distributed tracing web GUI, which you can use to collect detailed traces for signaling flows involving packet core instances. You can export these traces and upload them to a storage account to allow your support representative to access them and provide troubleshooting assistance.
Prerequisites
- Ensure you can sign in to the Azure portal using an account with access to the active subscription you identified in Complete the prerequisite tasks for deploying a private mobile network. This account must have the built-in Contributor role at the subscription scope.
- Ensure you can sign in to the distributed tracing web GUI as described in Distributed tracing.
Create a storage account and blob container in Azure
When uploading and sharing a trace for the first time, you'll need to create a storage account and a container resource to store your traces. You can skip this step if this has already been done.
- Create a storage account with the following additional configuration:
- In the Advanced tab, select Enable storage account key access. This will allow your support representative to download traces stored in this account using the URLs you share with them.
- In the Data protection tab, under Access control, select Enable version-level immutability support. This will allow you to specify a time-based retention policy for the account in the next step.
- If you would like the traces in your storage account to be automatically deleted after a period of time, configure a default time-based retention policy for your storage account.
- Create a container for your traces.
Export trace from the distributed tracing web GUI
In this step, you'll export the trace from the distributed tracing web GUI and save it locally.
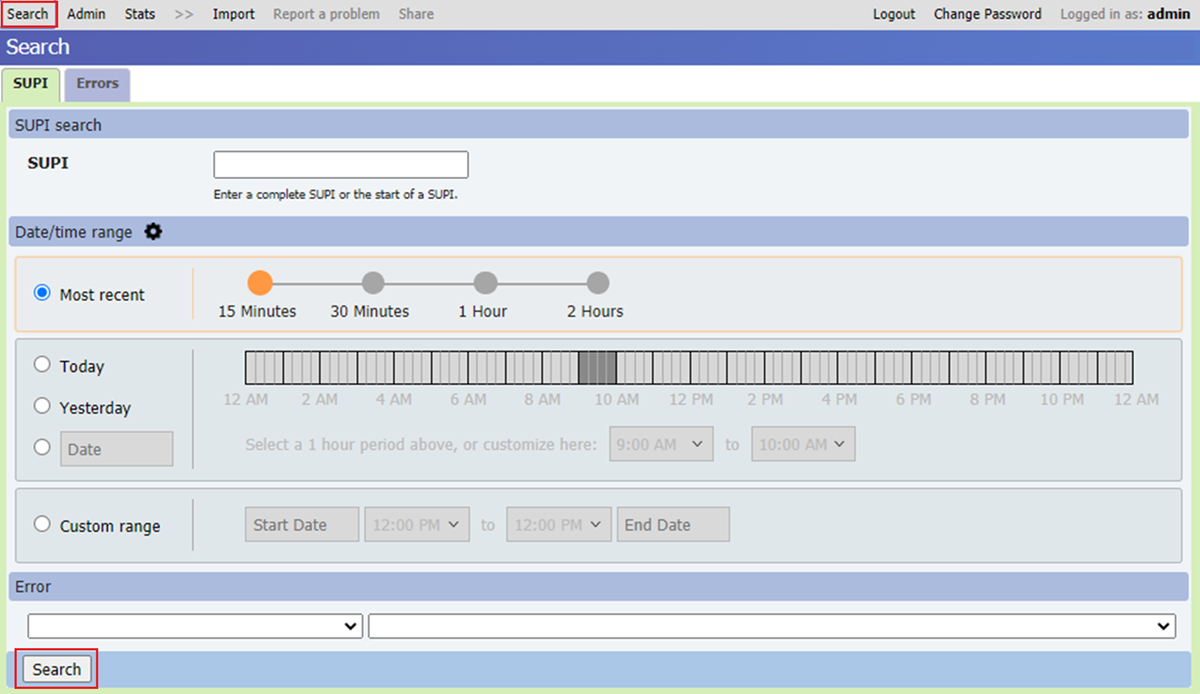
Sign in to the distributed tracing web GUI as described in Access the distributed tracing web GUI.
In the Search tab, specify the SUPI and time for the event you're interested in and select Search.
Find the relevant trace in the Diagnostics Search Results tab and select it.
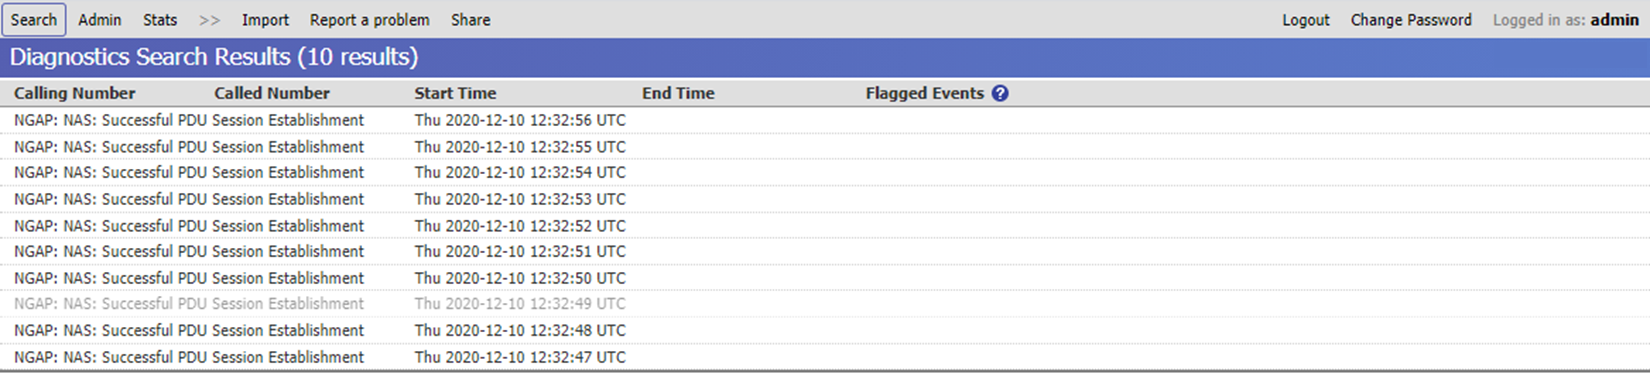
Select Export and save the file locally.
Upload trace to your blob container
You can now upload the trace to the container you created in Create a storage account and blob container in Azure.
Sign in to the Azure portal.
Navigate to your Storage account resource.
In the Resource menu, select Containers.
Select the container you created for your traces.
Select Upload. In the Upload blob window, search for the trace file you exported in the previous step and upload it.
Create URL for sharing the trace
You'll now generate a shared access signature (SAS) URL for your trace. Once you create the URL, you can share it with your support representative for assistance with troubleshooting.
Navigate to your Container resource.
Select the trace you'd like to share.
Select the Generate SAS tab.
Fill out the fields with the following configuration:
- Under Signing method, select Account key. This means anyone with access to the URL you generate will be able to paste it into a browser and download the trace.
- Under Permissions, select Read.
- Under Start and expiry date/time, set an expiration window of 48 hours for your token and URL.
- If you know the IP address from which your support representative will download the trace, set it under Allowed IP addresses. Otherwise, you can leave this blank.
Select Generate SAS token and URL.
Copy the contents of the Blob SAS URL field and share the URL with your support representative.
Delete trace
You should free up space in your blob storage by deleting the traces you'll no longer need. To delete a trace:
- Navigate to your Container resource.
- Choose the trace you want to delete.
- Select Delete.
Next steps
Feedback
Submit and view feedback for