Manage workflow requests and approvals
Important
This feature is currently in preview. The Supplemental Terms of Use for Microsoft Azure Previews include additional legal terms that apply to Azure features that are in beta, in preview, or otherwise not yet released into general availability.
This article outlines how to manage requests and approvals that generated by a workflow in Microsoft Purview.
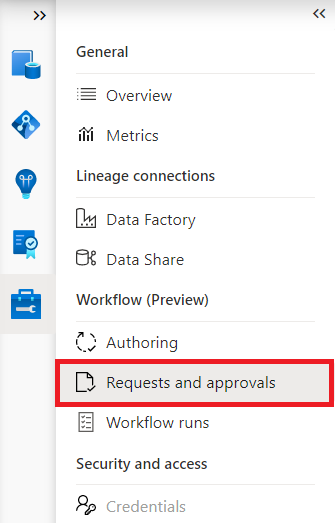
To view requests you've made or request for approvals that have been sent to you by a workflow instance, navigate to management center in the Microsoft Purview governance portal, and select Requests and Approvals.
You'll be presented with three tabs:
- Waiting for a response - This tab shows the requests (tasks) and approvals that are waiting for you to act on.
- Pending requests - You can view all the approval requests and tasks you've submitted in this tab.
- History - All the completed approvals and tasks are moved to this tab.
Waiting for a response
This tab shows the requests (tasks) and approvals that are waiting for your action.
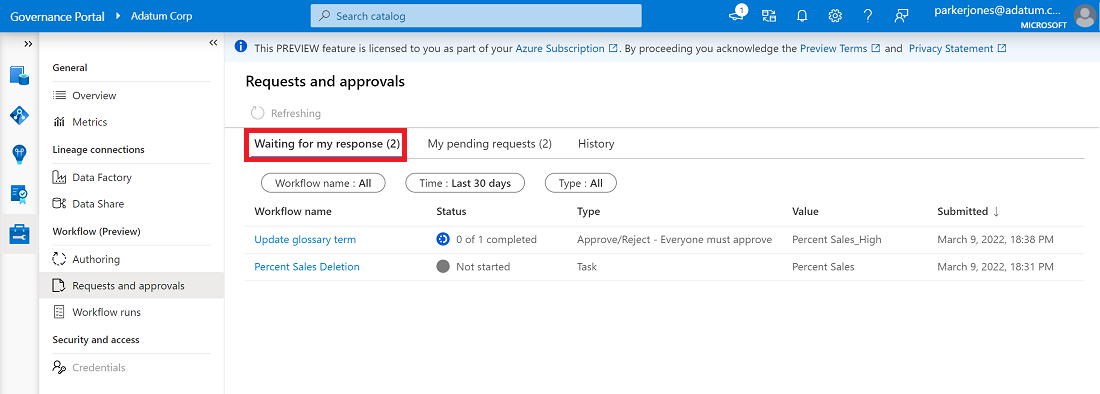
Select the request to take action.
Approvals
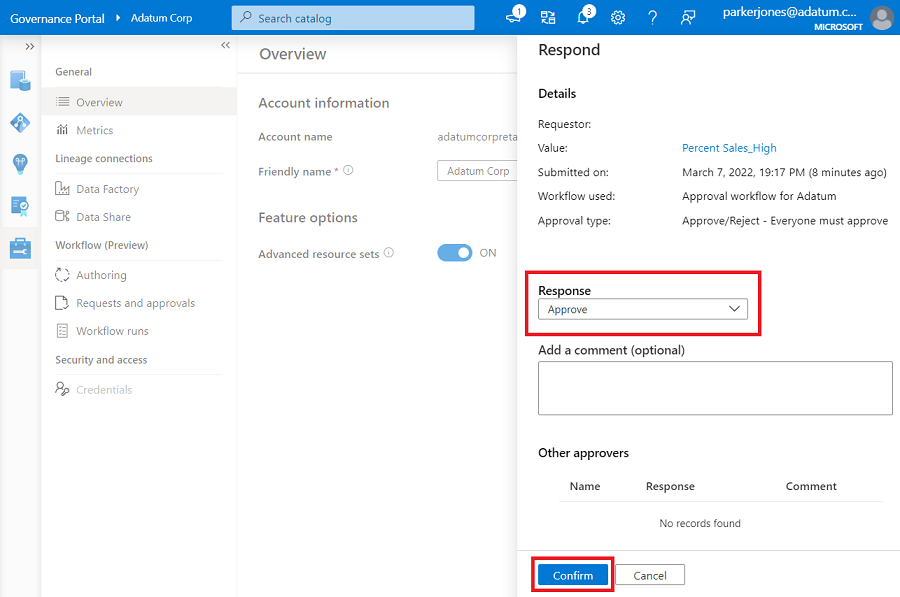
To approve/reject a request, select the request and you'll be presented with the following window:
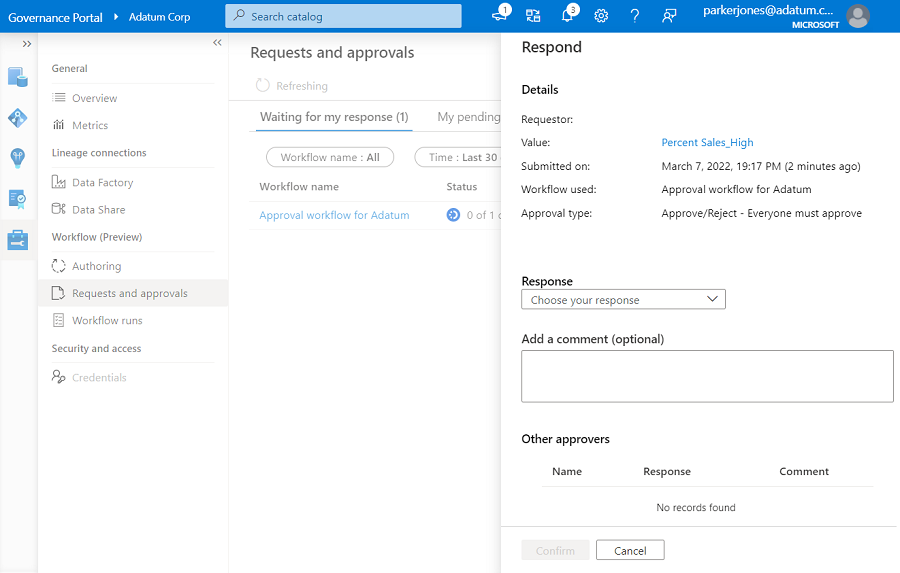
An approval activity has the following available responses:
- Approved – An approver can mark the response as Approved indicating their approval for the changes proposed by the requestor.
- Rejected - An approver can mark the response as Rejected indicating that they don't approve the changes proposed by the requestor.
Optionally, select the value to see details of the request. In the screenshot below, it shows the term details. If the approval is for a data asset, you'll be able to view the details, as shown below.
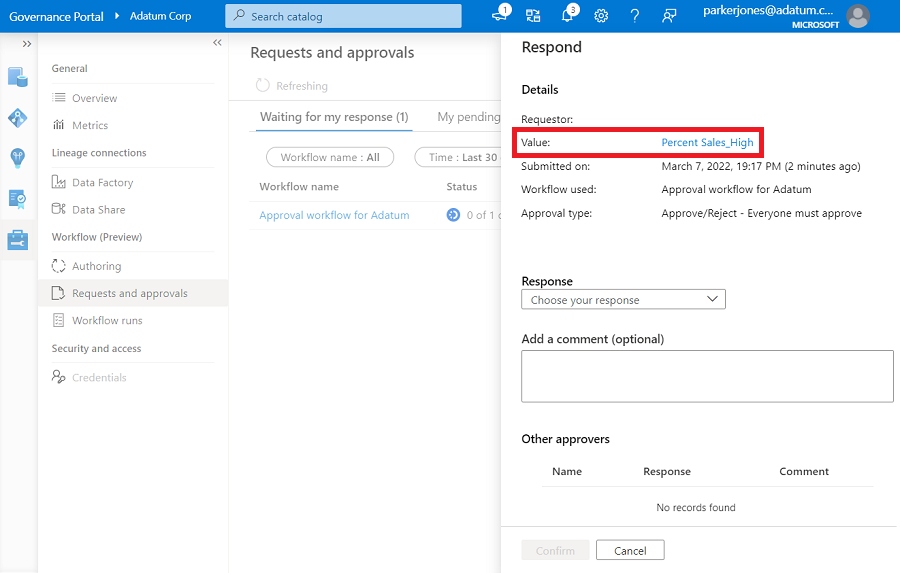
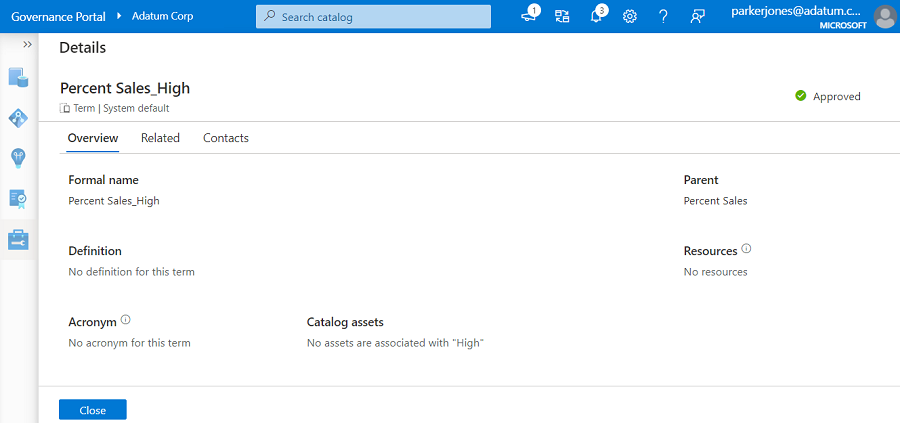
If there are updates, you'll also to be able to see the current value and proposed value.
Choose your response, optionally add comments, and select Confirm.
Tasks
To complete a task, select the task request and you'll be presented with the following window:

A task has the following statues:
- Not started – This is the status of the task when it's initially created by a workflow.
- In Progress – A task owner can mark the task as In progress to indicate that they're currently working on it.
- Complete – Once the task is complete, a task owner can change the status as Complete. This marks the completion of task activity, and the workflow will now move to the next step.
Select the correct status, add any comments, and select Confirm.
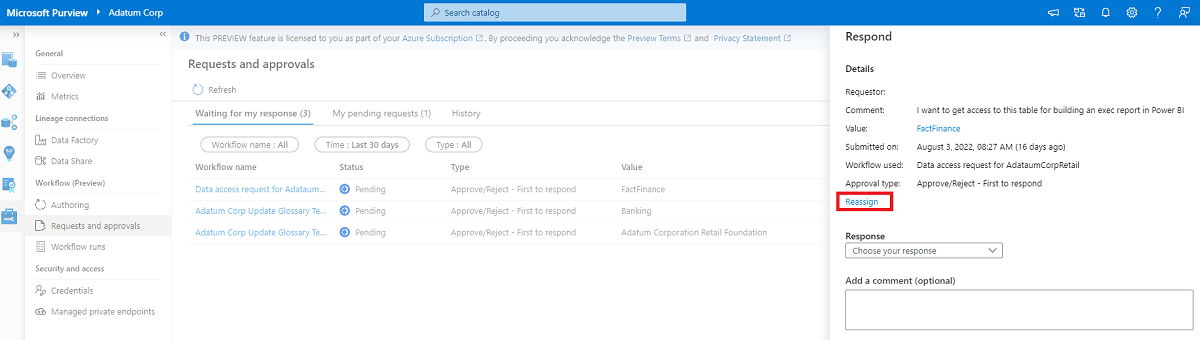
Reassign requests
You can reassign requests both approvals and tasks that are assigned to you to a different user.
To reassign, select the request or task you're assigned and select Reassign in the following window.
You'll be presented with a list of all the users who are assigned to the request. Select Assignee where your user name or the group you're part of is displayed and change it from your user name to the new user name. Select Save to complete the reassignment.
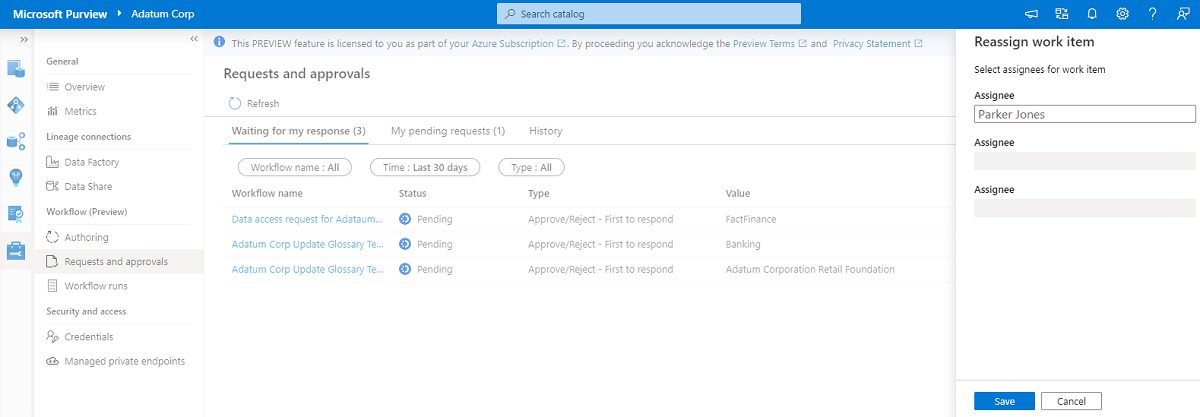
Note
You can only re-assign your user id or group you are part of to another user or group. The other assignees will be greyed out and will not available for re-assignment.
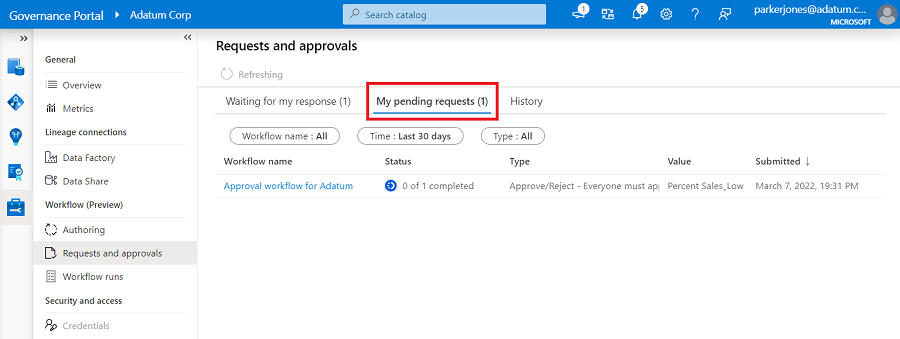
Pending requests
In this tab you can view all the approval requests and tasks that you've submitted.
Select the request to see the status and the outcomes for each approver/task owner.
Cancel workflows
You can cancel a submitted request and its underlying workflow by selecting Cancel request and its underlying workflow run.
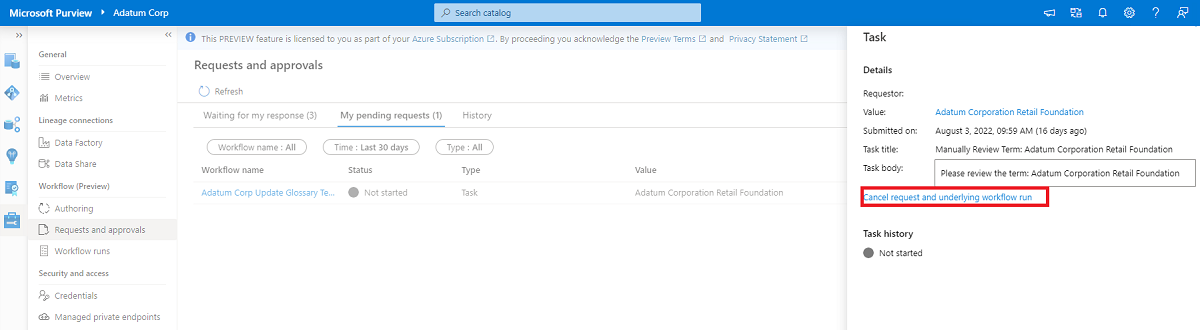
Note
You can only cancel workflows that are in progress. When you cancel a request from the requests and approvals section, it will cancel the underlying workflow run.
History
All the completed approvals and tasks are moved to this tab.
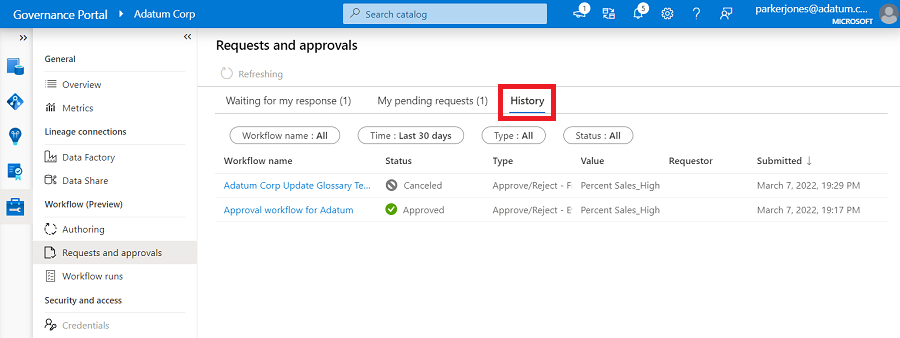
Select an approval or task to see details and responses from all approvals or task owners.
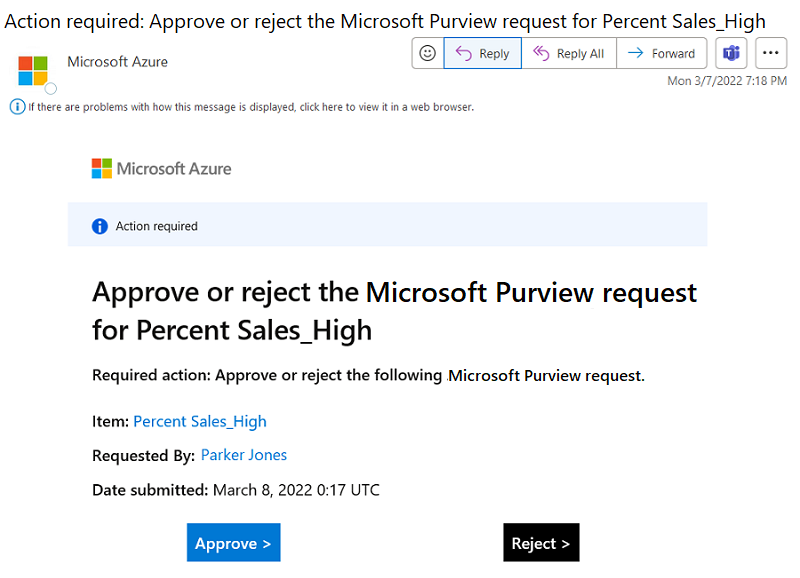
Email notifications
Purview approvals and task connectors have in-built email capabilities. Every time an approval/task action is triggered in workflow; it sends email to all the users who need to act on it.
There are two kinds of emails that can be sent:
Actionable messages - if your workflow and email client meet the requirements, your approvers can receive single and aggregated actionable approval emails where they can leave comments and reject or approve requests within outlook. For more information, the approver can also select the approval item in the message to be taken to request details in the Microsoft Purview portal.\

Standard messages - if your workflow and email client don't meet the requirements, your approvers will receive single and aggregated approval emails that will direct them to the approval experience in the Microsoft Purview portal.
Users can respond by selecting the links in the email, for actionable messages they can submit responses directly in the email, or by navigating to the Microsoft Purview governance portal and viewing their pending tasks.
Next steps
Feedback
Coming soon: Throughout 2024 we will be phasing out GitHub Issues as the feedback mechanism for content and replacing it with a new feedback system. For more information see: https://aka.ms/ContentUserFeedback.
Submit and view feedback for