Connect to and manage an on-premises SQL server instance in Microsoft Purview
This article outlines how to register on-premises SQL server instances, and how to authenticate and interact with an on-premises SQL server instance in Microsoft Purview. For more information about Microsoft Purview, read the introductory article.
Supported capabilities
| Metadata Extraction | Full Scan | Incremental Scan | Scoped Scan | Classification | Labeling | Access Policy | Lineage | Data Sharing | Live view |
|---|---|---|---|---|---|---|---|---|---|
| Yes | Yes | Yes | Yes | Yes | Yes | No | Limited** | No | No |
** Lineage is supported if dataset is used as a source/sink in Data Factory Copy activity
The supported SQL Server versions are 2005 and above. SQL Server Express LocalDB isn't supported.
When you scan an on-premises SQL server, Microsoft Purview supports:
Extracting technical metadata including:
- Instance
- Databases
- Schemas
- Tables including the columns
- Views including the columns
When setting up scan, you can choose to specify the database name to scan one database, and you can further scope the scan by selecting tables and views as needed. The whole SQL Server instance will be scanned if database name isn't provided.
Prerequisites
An Azure account with an active subscription. Create an account for free.
An active Microsoft Purview account.
You'll need to be a Data Source Administrator and Data Reader to register a source and manage it in the Microsoft Purview governance portal. See our Microsoft Purview Permissions page for details.
Set up the latest self-hosted integration runtime. For more information, see the create and configure a self-hosted integration runtime guide.
Register
This section describes how to register an on-premises SQL server instance in Microsoft Purview using the Microsoft Purview governance portal.
Authentication for registration
There are two ways to set up authentication for SQL server on-premises:
- SQL Authentication
- Windows Authentication
Set up SQL server authentication
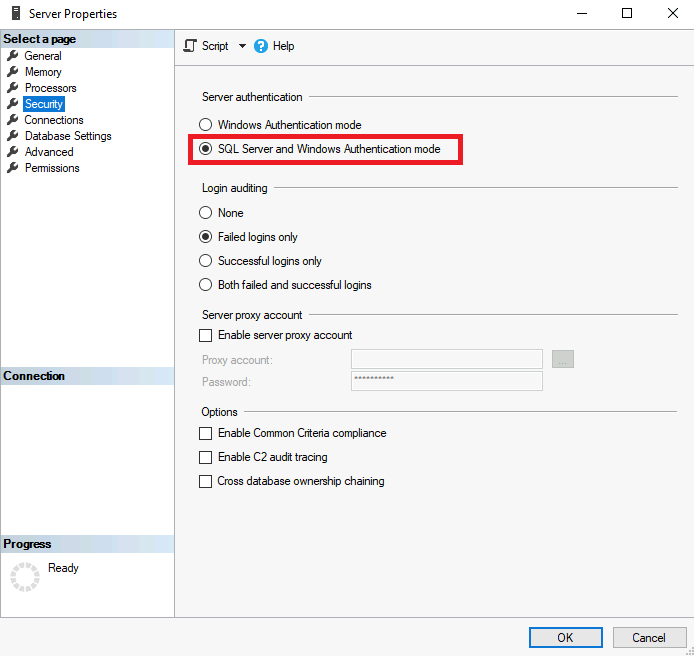
If SQL Authentication is applied, ensure the SQL Server deployment is configured to allow SQL Server and Windows Authentication.
To enable this, within SQL Server Management Studio (SSMS), navigate to Server Properties and change from Windows Authentication Mode to SQL Server and Windows Authentication mode.
If Windows Authentication is applied, configure the SQL Server deployment to use Windows Authentication mode.
A change to the Server Authentication will require a restart of the SQL Server Instance and SQL Server Agent, this can be triggered within SSMS by navigating to the SQL Server instance and selecting "Restart" within the right-click options pane.
Creating a new login and user
If you would like to create a new login and user to be able to scan your SQL server, follow the steps below:
The account must have access to the master database. This is because the sys.databases is in the master database. The Microsoft Purview scanner needs to enumerate sys.databases in order to find all the SQL databases on the server.
Note
All the steps below can be executed using the code provided here
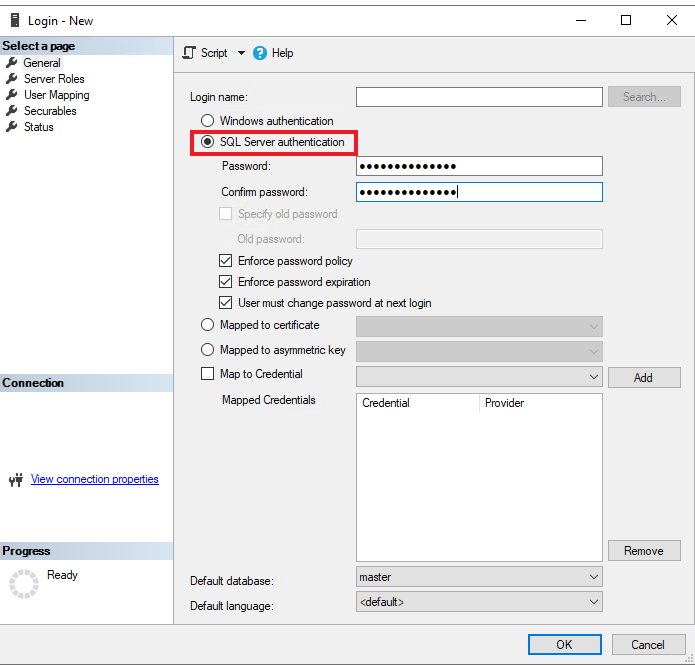
Navigate to SQL Server Management Studio (SSMS), connect to the server, navigate to security, select and hold (or right-click) on login and create New login. If Windows Authentication is applied, select Windows authentication. If SQL Authentication is applied, make sure to select SQL authentication.
Select Server roles on the left navigation and ensure that public role is assigned.
Select User mapping on the left navigation, select all the databases in the map and select the Database role: db_datareader.
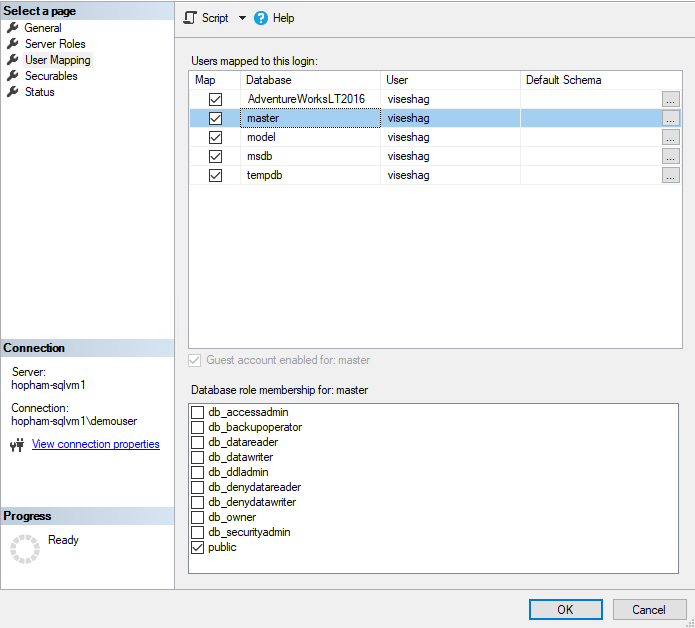
Select OK to save.
If SQL Authentication is applied, navigate again to the user you created, by selecting and holding (or right-clicking) and selecting Properties. Enter a new password and confirm it. Select the 'Specify old password' and enter the old password. It is required to change your password as soon as you create a new login.

Storing your SQL login password in a key vault and creating a credential in Microsoft Purview
- Navigate to your key vault in the Azure portal1. Select Settings > Secrets
- Select + Generate/Import and enter the Name and Value as the password from your SQL server login
- Select Create to complete
- If your key vault isn't connected to Microsoft Purview yet, you'll need to create a new key vault connection
- Finally, create a new credential using the username and password to set up your scan. Make sure the right authentication method is selected when creating a new credential. If SQL Authentication is applied, select "SQL authentication" as the authentication method. If Windows Authentication is applied, then select Windows authentication.
Steps to register
Open the Microsoft Purview governance portal by:
- Browsing directly to https://web.purview.azure.com and selecting your Microsoft Purview account.
- Opening the Azure portal, searching for and selecting the Microsoft Purview account. Selecting the the Microsoft Purview governance portal button.
Under Sources and scanning in the left navigation, select Integration runtimes. Make sure a self-hosted integration runtime is set up. If it isn't set up, follow the steps mentioned here to create a self-hosted integration runtime for scanning on an on-premises or Azure VM that has access to your on-premises network.
Select Data Map on the left navigation.
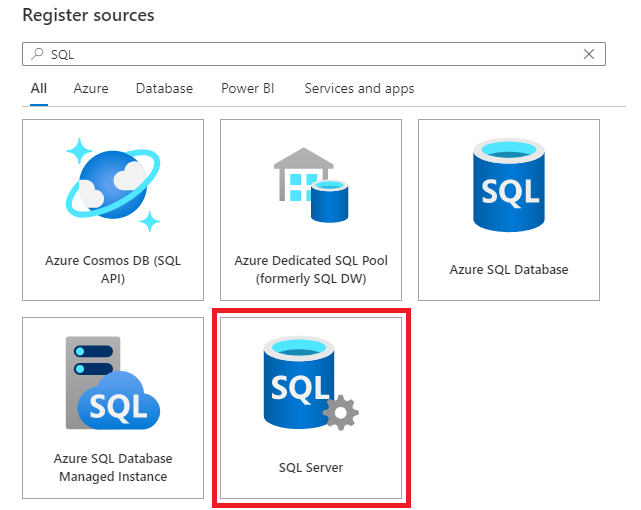
Select Register
Select SQL server and then Continue
Provide a friendly name, which will be a short name you can use to identify your server, and the server endpoint.
Select Finish to register the data source.
Scan
Follow the steps below to scan on-premises SQL server instances to automatically identify assets and classify your data. For more information about scanning in general, see our introduction to scans and ingestion
Create and run scan
To create and run a new scan, do the following:
Select the Data Map tab on the left pane in the Microsoft Purview governance portal.
Select the SQL Server source that you registered.
Select New scan
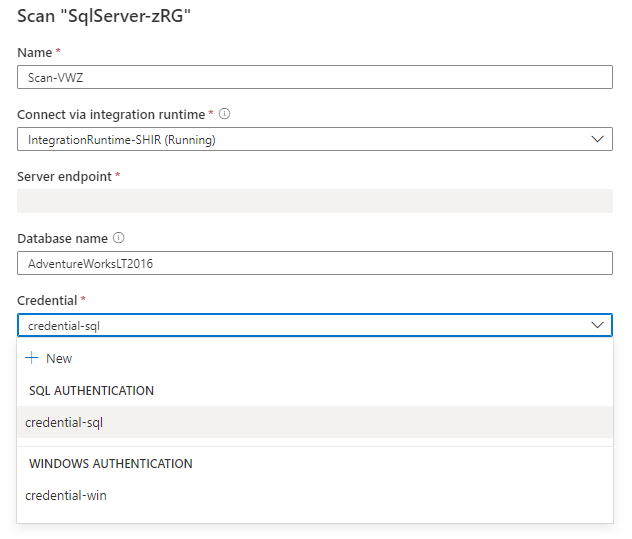
Select the credential to connect to your data source. The credentials are grouped and listed under different authentication methods.
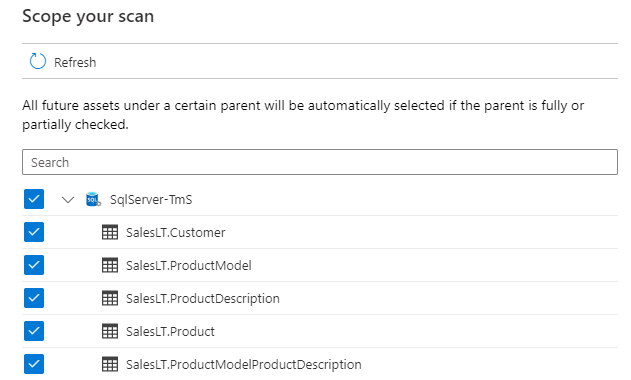
You can scope your scan to specific tables by choosing the appropriate items in the list after enter Database name.
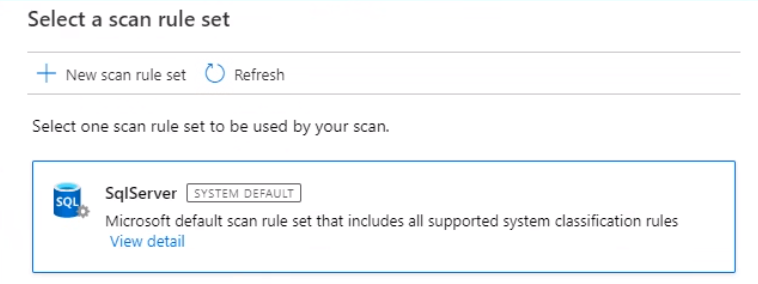
Then select a scan rule set. You can choose between the system default, existing custom rule sets, or create a new rule set inline.
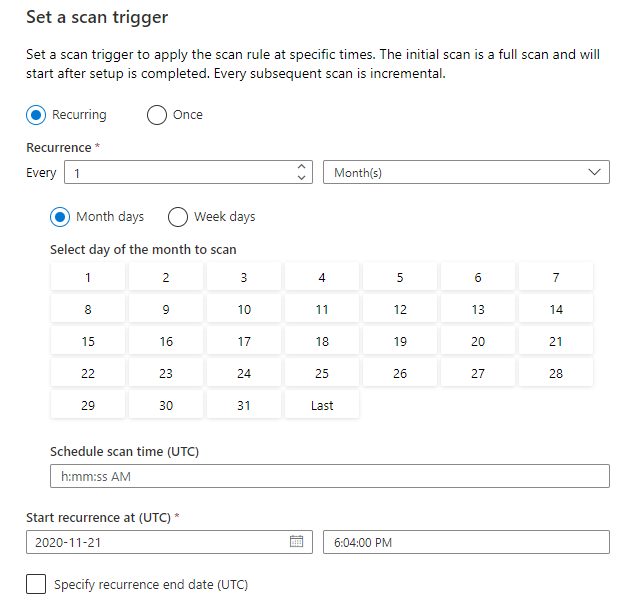
Choose your scan trigger. You can set up a schedule or run the scan once.
Review your scan and select Save and run.
View your scans and scan runs
To view existing scans:
- Go to the Microsoft Purview portal. On the left pane, select Data map.
- Select the data source. You can view a list of existing scans on that data source under Recent scans, or you can view all scans on the Scans tab.
- Select the scan that has results you want to view. The pane shows you all the previous scan runs, along with the status and metrics for each scan run.
- Select the run ID to check the scan run details.
Manage your scans
To edit, cancel, or delete a scan:
Go to the Microsoft Purview portal. On the left pane, select Data Map.
Select the data source. You can view a list of existing scans on that data source under Recent scans, or you can view all scans on the Scans tab.
Select the scan that you want to manage. You can then:
- Edit the scan by selecting Edit scan.
- Cancel an in-progress scan by selecting Cancel scan run.
- Delete your scan by selecting Delete scan.
Note
- Deleting your scan does not delete catalog assets created from previous scans.
Next steps
Now that you have registered your source, follow the below guides to learn more about Microsoft Purview and your data.
Feedback
Coming soon: Throughout 2024 we will be phasing out GitHub Issues as the feedback mechanism for content and replacing it with a new feedback system. For more information see: https://aka.ms/ContentUserFeedback.
Submit and view feedback for