Connect to and manage Azure Synapse Analytics workspaces in Microsoft Purview
This article outlines how to register Azure Synapse Analytics workspaces. It also describes how to authenticate and interact with Azure Synapse Analytics workspaces in Microsoft Purview. For more information about Microsoft Purview, read the introductory article.
Note
There are dedicated SQL pools (formerly SQL DW) and dedicated SQL pools in Azure Synapse workspace and you can refer to What is the difference between dedicated SQL pools (SQL DW) and dedicated SQL pools in Azure Synapse workspaces for the detail difference between the two. Currently Microsoft Purview provides separate data sources for dedicated SQL pools (formerly SQL DW) and dedicated SQL pools:
- if you are looking to register and scan a dedicated SQL pool (formerly SQL DW), you can follow instructions in Connect to and manage dedicated SQL pools in Microsoft Purview.
- if you are looking to register and scan a dedicated SQL pool (formerly SQL DW) which has enabled Azure Synapse workspace features as documented in Enable Azure Synapse workspace features for a dedicated SQL pool (formerly SQL DW), you can also follow instructions in Connect to and manage Azure Synapse Analytics workspaces in Microsoft Purview.
- if you are looking to register and scan a dedicated SQL pool or a serverless SQL pool in Azure Synapse workspace, you must follow instructions in Connect to and manage Azure Synapse Analytics workspaces in Microsoft Purview.
Supported capabilities
| Metadata Extraction | Full Scan | Incremental Scan | Scoped Scan | Classification | Labeling | Access Policy | Lineage | Data Sharing | Live view |
|---|---|---|---|---|---|---|---|---|---|
| Yes | Yes | Yes | No | Yes | No | No | Yes - pipelines | No | No |
Currently, Azure Synapse Analytics lake databases are not supported.
For external tables, Azure Synapse Analytics doesn't currently capture the relationship of those tables to their original files.
Prerequisites
An Azure account with an active subscription. Create an account for free.
An active Microsoft Purview account.
Data source administrator and data reader permissions to register a source and manage it in the Microsoft Purview governance portal. For details, see Access control in the Microsoft Purview governance portal.
Register
The following procedure describes how to register Azure Synapse Analytics workspaces in Microsoft Purview by using the Microsoft Purview governance portal.
Only a user who has at least a data reader role on the Azure Synapse Analytics workspace and who is also a data source administrator in Microsoft Purview can register an Azure Synapse Analytics workspace.
Open the Microsoft Purview governance portal and select your Microsoft Purview account.
Alternatively, go to the Azure portal, search for and select the Microsoft Purview account, and then select the Microsoft Purview governance portal button.
On the left pane, select Sources.
Select Register.
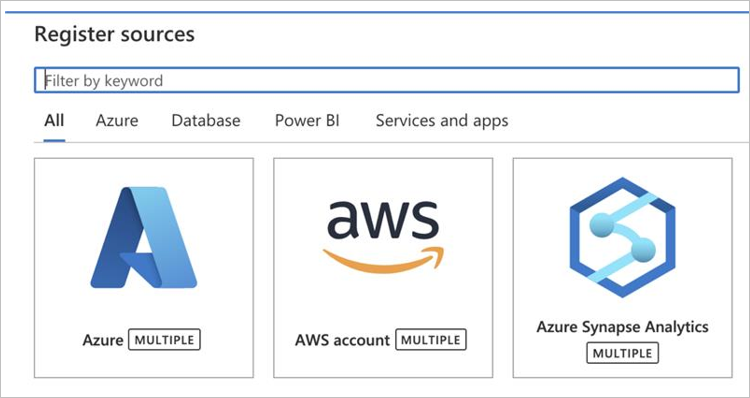
Under Register sources, select Azure Synapse Analytics (multiple).
Select Continue.
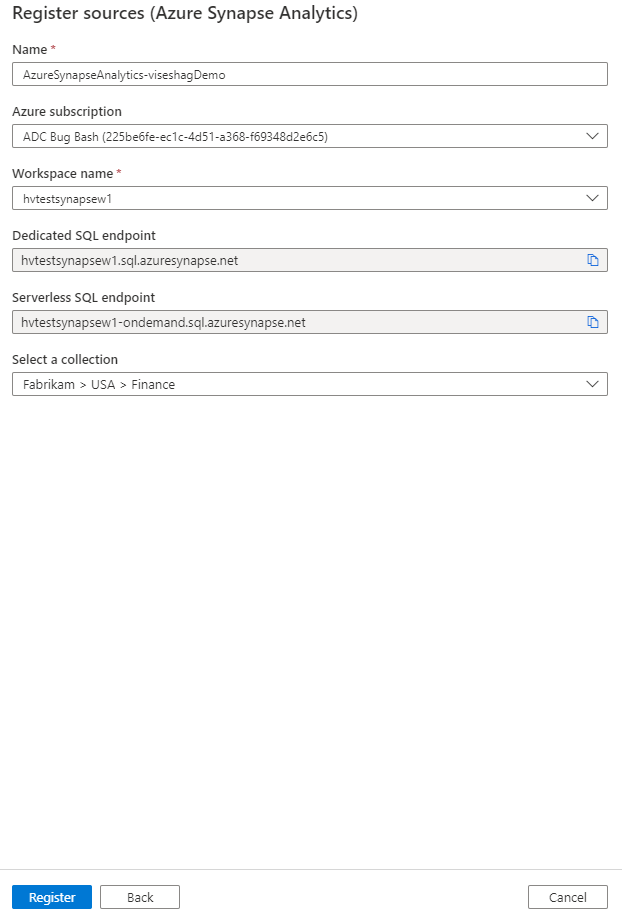
On the Register sources (Azure Synapse Analytics) page, do the following:
For Name, enter a name for the data source to be listed in the data catalog.
Optionally, for Azure subscription, choose a subscription to filter down to.
For Workspace name, select the workspace that you're working with.
The boxes for the SQL endpoints are automatically filled in based on your workspace selection.
Select a collection from the list.
Select Register to finish registering the data source.
Scan
Use the following steps to scan Azure Synapse Analytics workspaces to automatically identify assets and classify your data. For more information about scanning in general, see Scans and ingestion in Microsoft Purview.
- Set up authentication for enumerating your dedicated or serverless resources. This step will allow Microsoft Purview to enumerate your workspace assets and perform scans.
- Apply permissions to scan the contents of the workspace.
- Confirm that your network is set up to allow access for Microsoft Purview.
Enumeration authentication
Use the following procedures to set up authentication. You must be an owner or a user access administrator to add the specified roles.
Authentication for enumerating dedicated SQL database resources
- In the Azure portal, go to the Azure Synapse Analytics workspace resource.
- On the left pane, select Access Control (IAM).
- Select the Add button.
- Set the Reader role and enter your Microsoft Purview account name, which represents its managed service identity (MSI).
- Select Save to finish assigning the role.
If you want to scan a dedicated SQL pool (formerly SQL DW) which has enabled Azure Synapse workspace features as documented in Enable Azure Synapse workspace features for a dedicated SQL pool (formerly SQL DW), here are the additional configuration steps needed for the dedicated SQL pool (formerly SQL DW):
- In the Azure portal, go to the SQL server resource associated with the dedicated SQL pool (formerly SQL DW).
- On the left pane, select Access Control (IAM).
- Select the Add button.
- Set the Reader role and enter your Microsoft Purview account name, which represents its managed service identity (MSI).
- Select Save to finish assigning the role.
Note
If you're planning to register and scan multiple Azure Synapse Analytics workspaces in your Microsoft Purview account, you can also assign the role from a higher level, such as a resource group or a subscription.
Authentication for enumerating serverless SQL database resources
There are three places where you need to set authentication to allow Microsoft Purview to enumerate your serverless SQL database resources.
To set authentication for the Azure Synapse Analytics workspace:
- In the Azure portal, go to the Azure Synapse Analytics workspace resource.
- On the left pane, select Access Control (IAM).
- Select the Add button.
- Set the Reader role and enter your Microsoft Purview account name, which represents its MSI.
- Select Save to finish assigning the role.
To set authentication for the storage account:
- In the Azure portal, go to the resource group or subscription that contains the storage account associated with the Azure Synapse Analytics workspace.
- On the left pane, select Access Control (IAM).
- Select the Add button.
- Set the Storage blob data reader role and enter your Microsoft Purview account name (which represents its MSI) in the Select box.
- Select Save to finish assigning the role.
To set authentication for the Azure Synapse Analytics serverless database:
Go to your Azure Synapse Analytics workspace and open Synapse Studio.
On the left pane, select Data.
Select the ellipsis (...) next to one of your databases, and then start a new SQL script.
Run the following command in your SQL script to add the Microsoft Purview account MSI (represented by the account name) on the serverless SQL databases:
CREATE LOGIN [PurviewAccountName] FROM EXTERNAL PROVIDER;
Apply permissions to scan the contents of the workspace
You must set up authentication on each SQL database that you want to register and scan from your Azure Synapse Analytics workspace. Select from the following scenarios for steps to apply permissions.
Important
The following steps for serverless databases do not apply to replicated databases. In Azure Synapse Analytics, serverless databases that are replicated from Spark databases are currently read-only. For more information, see Operation isn't allowed for a replicated database.
Use a managed identity for dedicated SQL databases
Important
If you're using a self-hosted integration runtime to connect to your resource on a private network, managed identities won't work. You need to use service principal authentication or SQL authentication.
To run the commands in the following procedure, you must be an Azure Synapse administrator on the workspace. For more information about Azure Synapse Analytics permissions, see Set up access control for your Azure Synapse Analytics workspace.
Go to your Azure Synapse Analytics workspace.
Go to the Data section, and then look for one of your dedicated SQL databases.
Select the ellipsis (...) next to the database name, and then start a new SQL script.
Run the following command in your SQL script to add the Microsoft Purview account MSI (represented by the account name) as
db_datareaderon the dedicated SQL database:CREATE USER [PurviewAccountName] FROM EXTERNAL PROVIDER GO EXEC sp_addrolemember 'db_datareader', [PurviewAccountName] GORun the following command in your SQL script to verify the addition of the role:
SELECT p.name AS UserName, r.name AS RoleName
FROM sys.database_principals p
LEFT JOIN sys.database_role_members rm ON p.principal_id = rm.member_principal_id
LEFT JOIN sys.database_principals r ON rm.role_principal_id = r.principal_id
WHERE p.authentication_type_desc = 'EXTERNAL'
ORDER BY p.name;
Follow the same steps for each database that you want to scan.
Use a managed identity for serverless SQL databases
Go to your Azure Synapse Analytics workspace.
Go to the Data section, and select one of your SQL databases.
Select the ellipsis (...) next to the database name, and then start a new SQL script.
Run the following command in your SQL script to add the Microsoft Purview account MSI (represented by the account name) as
db_datareaderon the serverless SQL databases:CREATE USER [PurviewAccountName] FOR LOGIN [PurviewAccountName]; ALTER ROLE db_datareader ADD MEMBER [PurviewAccountName];Run the following command in your SQL script to verify the addition of the role:
SELECT p.name AS UserName, r.name AS RoleName
FROM sys.database_principals p
LEFT JOIN sys.database_role_members rm ON p.principal_id = rm.member_principal_id
LEFT JOIN sys.database_principals r ON rm.role_principal_id = r.principal_id
WHERE p.authentication_type_desc = 'EXTERNAL'
ORDER BY p.name;
Follow the same steps for each database that you want to scan.
Grant permission to use credentials for external tables
If the Azure Synapse Analytics workspace has any external tables, you must give the Microsoft Purview managed identity References permission on the external table's scoped credentials. With the References permission, Microsoft Purview can read data from external tables.
Run the following command in your SQL script to get the list of database scoped credentials:
Select name, credential_identity
from sys.database_scoped_credentials;
To grant the access to database scoped credentials, run the following command. Replace
scoped_credentialwith the name of the database scoped credential.GRANT REFERENCES ON DATABASE SCOPED CREDENTIAL::[scoped_credential] TO [PurviewAccountName];To verify the permission assignment, run the following command in your SQL script:
SELECT dp.permission_name, dp.grantee_principal_id, p.name AS grantee_principal_name
FROM sys.database_permissions AS dp
JOIN sys.database_principals AS p ON dp.grantee_principal_id = p.principal_id
JOIN sys.database_scoped_credentials AS c ON dp.major_id = c.credential_id;
Set up firewall access for the Azure Synapse Analytics workspace
In the Azure portal, go to the Azure Synapse Analytics workspace.
On the left pane, select Networking.
For Allow Azure services and resources to access this workspace control, select ON.
Select Save.
If you want to scan a dedicated SQL pool (formerly SQL DW) which has enabled Azure Synapse workspace features as documented in Enable Azure Synapse workspace features for a dedicated SQL pool (formerly SQL DW), here are the additional configuration steps needed for the dedicated SQL pool (formerly SQL DW):
In the Azure portal, go to the SQL server resource associated with the dedicated SQL pool (formerly SQL DW).
On the left pane, select Networking.
For Allow Azure services and resources to access this server control, select ON.
Select Save.
Important
If you can't enable Allow Azure services and resources to access this workspace on your Azure Synapse Analytics workspaces, you'll get a serverless database enumeration failure when you set up a scan in the Microsoft Purview governance portal. In this case, you can choose the Enter manually option to specify the database names that you want to scan, and then proceed or set up a scan using an API.
Create and run a scan
In the Microsoft Purview governance portal, on the left pane, select Data Map.
Select the data source that you registered.
Select View details, and then select New scan. Alternatively, you can select the Scan quick action icon on the source tile.
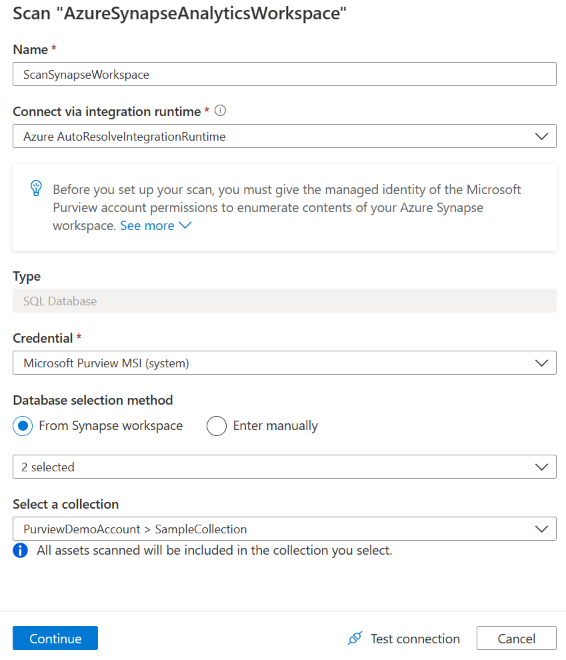
On the Scan details pane, in the Name box, enter a name for the scan.
Note
For the integration runtime, if you are using Managed VNet Runtime, make sure you have created required Managed Private Enpoints:
- To scan Serverless pools, create a managed private enpoint of sqlOnDemand sub-resource type for your Synapse workspace.
- To scan Dedicated pools, create a managed private enpoint of sql sub-resource type for your Synapse workspace.
- If you are scanning both Serverless and Dedicated pools, you ust create both managed private endpoints and in the wizard select one.
In the Credential dropdown list, select the credential to connect to the resources within your data source.
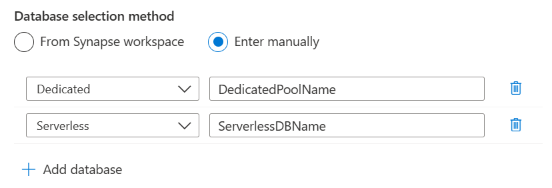
For Database selection method, select From Synapse workspace or Enter manually. By default, Microsoft Purview tries to enumerate the databases under the workspace, and you can select the ones that you want to scan.
If you get an error that says Microsoft Purview failed to load the serverless databases, you can select Enter manually to specify the type of database (dedicated or serverless) and the corresponding database name.
Select Test connection to validate the settings. If you get any error, on the report page, hover over the connection status to see details.
Select Continue.
Select Scan rule sets of type Azure Synapse SQL. You can also create scan rule sets inline.
Choose your scan trigger. You can set up a schedule or run the scan once.
Review your scan, and then select Save to complete the setup.
View your scans and scan runs
To view existing scans:
- Go to the Microsoft Purview portal. On the left pane, select Data map.
- Select the data source. You can view a list of existing scans on that data source under Recent scans, or you can view all scans on the Scans tab.
- Select the scan that has results you want to view. The pane shows you all the previous scan runs, along with the status and metrics for each scan run.
- Select the run ID to check the scan run details.
Manage your scans
To edit, cancel, or delete a scan:
Go to the Microsoft Purview portal. On the left pane, select Data Map.
Select the data source. You can view a list of existing scans on that data source under Recent scans, or you can view all scans on the Scans tab.
Select the scan that you want to manage. You can then:
- Edit the scan by selecting Edit scan.
- Cancel an in-progress scan by selecting Cancel scan run.
- Delete your scan by selecting Delete scan.
Note
- Deleting your scan does not delete catalog assets created from previous scans.
Set up a scan by using an API
Here's an example of creating a scan for a serverless database by using the Microsoft Purview REST API. Replace the placeholders in braces ({}) with your actual settings. Learn more from Scans - Create Or Update.
PUT https://{purview_account_name}.purview.azure.com/scan/datasources/<data_source_name>/scans/{scan_name}?api-version=2022-02-01-preview
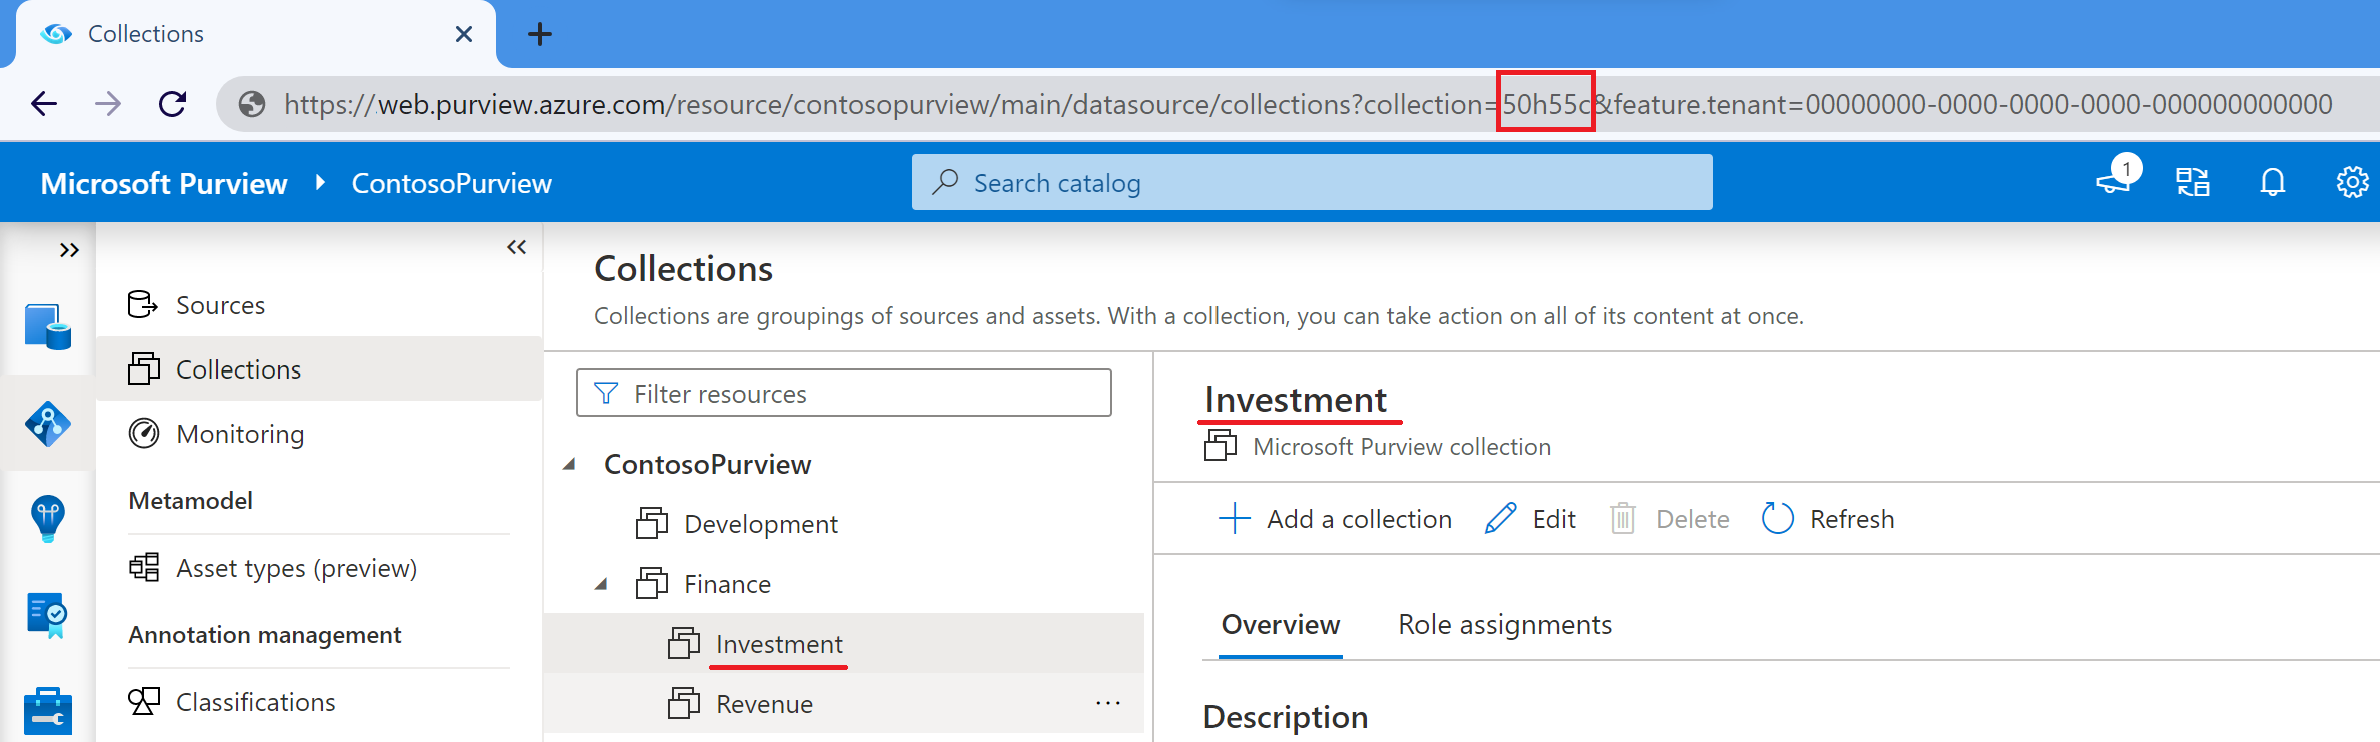
In the following code, collection_id is not the friendly name for the collection, a five-character ID. For the root collection, collection_id is the name of the collection. For all subcollections, it's instead the ID that you can find in one of these places:
The URL in the Microsoft Purview governance portal. Select the collection, and check the URL to find where it says collection=. That's your ID. In the following example, the Investment collection has the ID 50h55c.
You can list child collection names of the root collection to list the collections, and then use the name instead of the friendly name.

{
    "properties":{
        "resourceTypes":{
            "AzureSynapseServerlessSql":{
                "scanRulesetName":"AzureSynapseSQL",
                "scanRulesetType":"System",
                "resourceNameFilter":{
                    "resources":[ "{serverless_database_name_1}", "{serverless_database_name_2}", ...]
                }
            }
        },
        "credential":{
            "referenceName":"{credential_name}",
            "credentialType":"SqlAuth | ServicePrincipal | ManagedIdentity (if UAMI authentication)"
        },
        "collection":{
            "referenceName":"{collection_id}",
            "type":"CollectionReference"
        },
        "connectedVia":{
            "referenceName":"{integration_runtime_name}",
            "integrationRuntimeType":"SelfHosted (if self-hosted IR) | Managed (if VNet IR)"
        }
    },
    "kind":"AzureSynapseWorkspaceCredential | AzureSynapseWorkspaceMsi (if system-assigned managed identity authentication)"
}
To schedule the scan, create a trigger for it after scan creation. For more information, see Triggers - Create Trigger.
Troubleshooting
If you have any problems with scanning:
- Confirm that you followed all prerequisites.
- Confirm that you set up enumeration authentication for your resources.
- Confirm that you set up authentication.
- Check the network by confirming firewall settings.
- Review the scan troubleshooting documentation.
Next steps
Now that you've registered your source, use the following guides to learn more about Microsoft Purview and your data:
Feedback
Coming soon: Throughout 2024 we will be phasing out GitHub Issues as the feedback mechanism for content and replacing it with a new feedback system. For more information see: https://aka.ms/ContentUserFeedback.
Submit and view feedback for