Tutorial: Respond to Azure Service Bus events received via Azure Event Grid by using Azure Logic Apps
In this tutorial, you learn how to respond to Azure Service Bus events that are received via Azure Event Grid by using Azure Logic Apps.
Prerequisites
If you don't have an Azure subscription, create a free account before you begin.
Create a Service Bus namespace
Follow instructions in this tutorial: Quickstart: Use the Azure portal to create a Service Bus topic and subscriptions to the topic to do the following tasks:
- Create a premium Service Bus namespace.
- Get the connection string.
- Create a Service Bus topic.
- Create a subscription to the topic. You need only one subscription in this tutorial, so no need to create subscriptions S2 and S3.
Send messages to the Service Bus topic
In this step, you use a sample application to send messages to the Service Bus topic you created in the previous step.
Clone the GitHub azure-service-bus repository or download the zip file and extract files from it.
In Visual Studio, go to the \samples\DotNet\Azure.Messaging.ServiceBus\ServiceBusEventGridIntegrationV2 folder, and then open the SBEventGridIntegration.sln file.
In the Solution Explorer window, expand the MessageSender project, and select Program.cs.
Replace
<SERVICE BUS NAMESPACE - CONNECTION STRING>with the connection string to your Service Bus namespace and<TOPIC NAME>with the name of the topic.const string ServiceBusConnectionString = "<SERVICE BUS NAMESPACE - CONNECTION STRING>"; const string TopicName = "<TOPIC NAME>";Build and run the program to send 5 test messages (
const int numberOfMessages = 5;) to the Service Bus topic.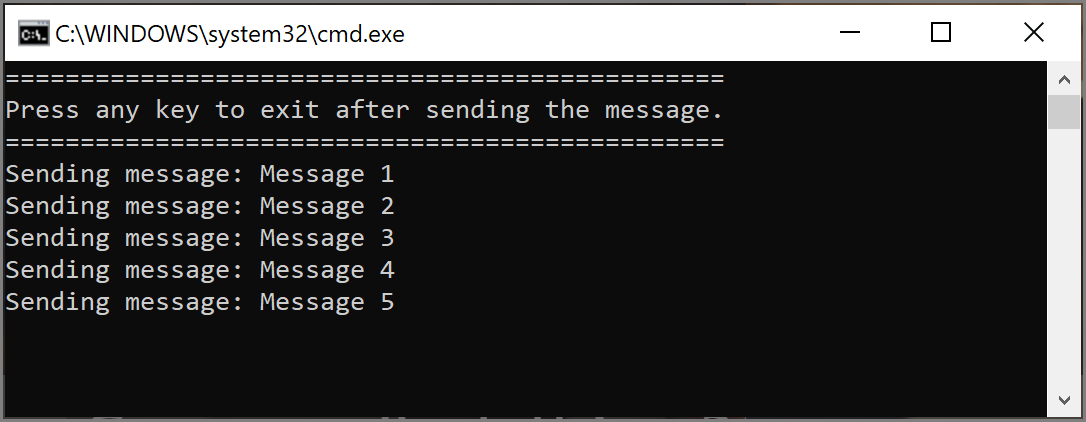
Receive messages by using Logic Apps
In this step, you create an Azure logic app that receives Service Bus events via Azure Event Grid.
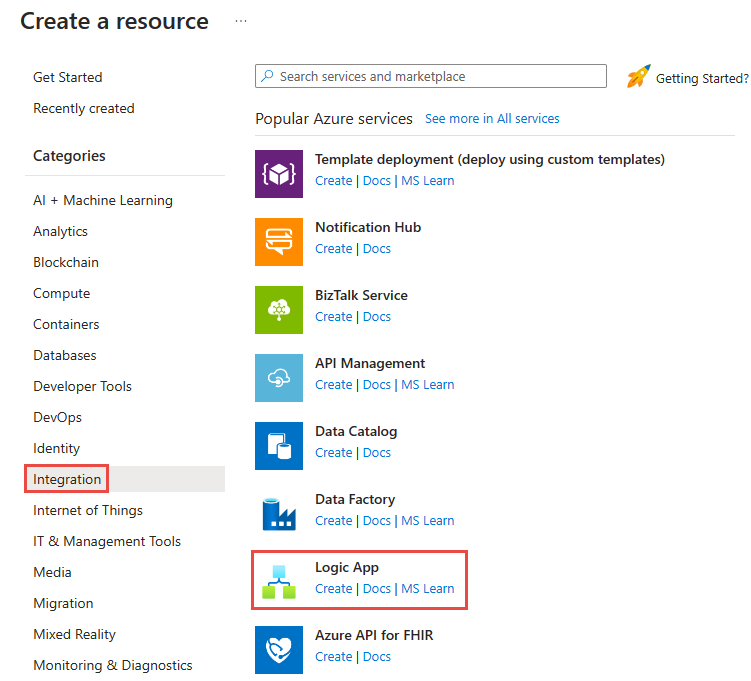
Select + Create a resource, select Integration, and then select Logic App.
On the Create Logic App page, follow these steps:
- Select your Azure subscription.
- Select Use existing for the Resource group, and select the resource group that you used for other resources (like Azure function, Service Bus namespace) that you created earlier.
- Enter a name for the logic app.
- Select the Region for the logic app.
- For Plan type, select Consumption.
- Select Review + Create.
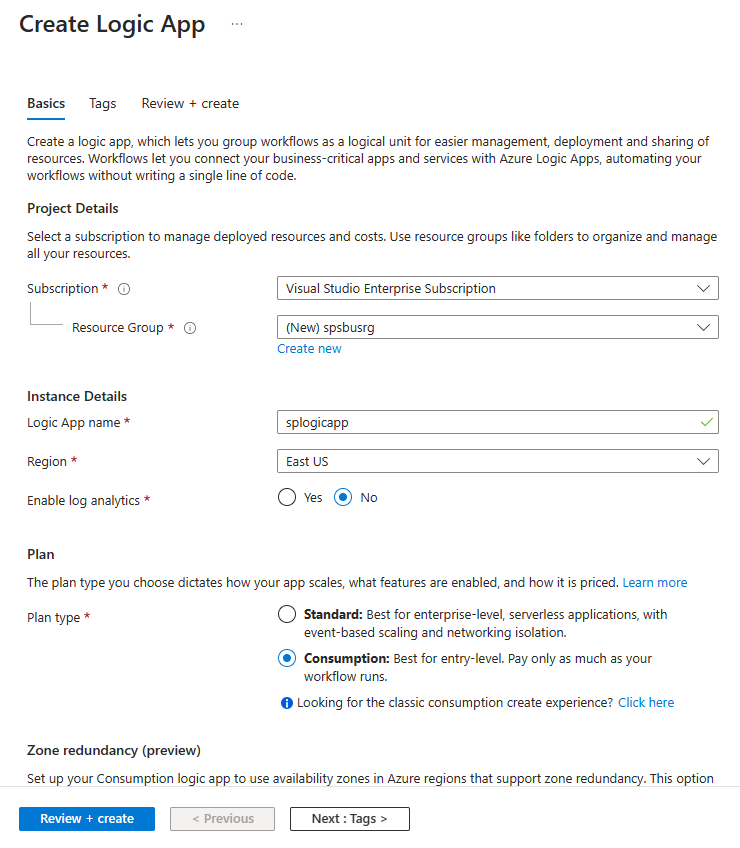
- On the Review + Create page, select Create to create the logic app.
On the Deployment complete page, select Go to resource to navigate to the Logic app page.
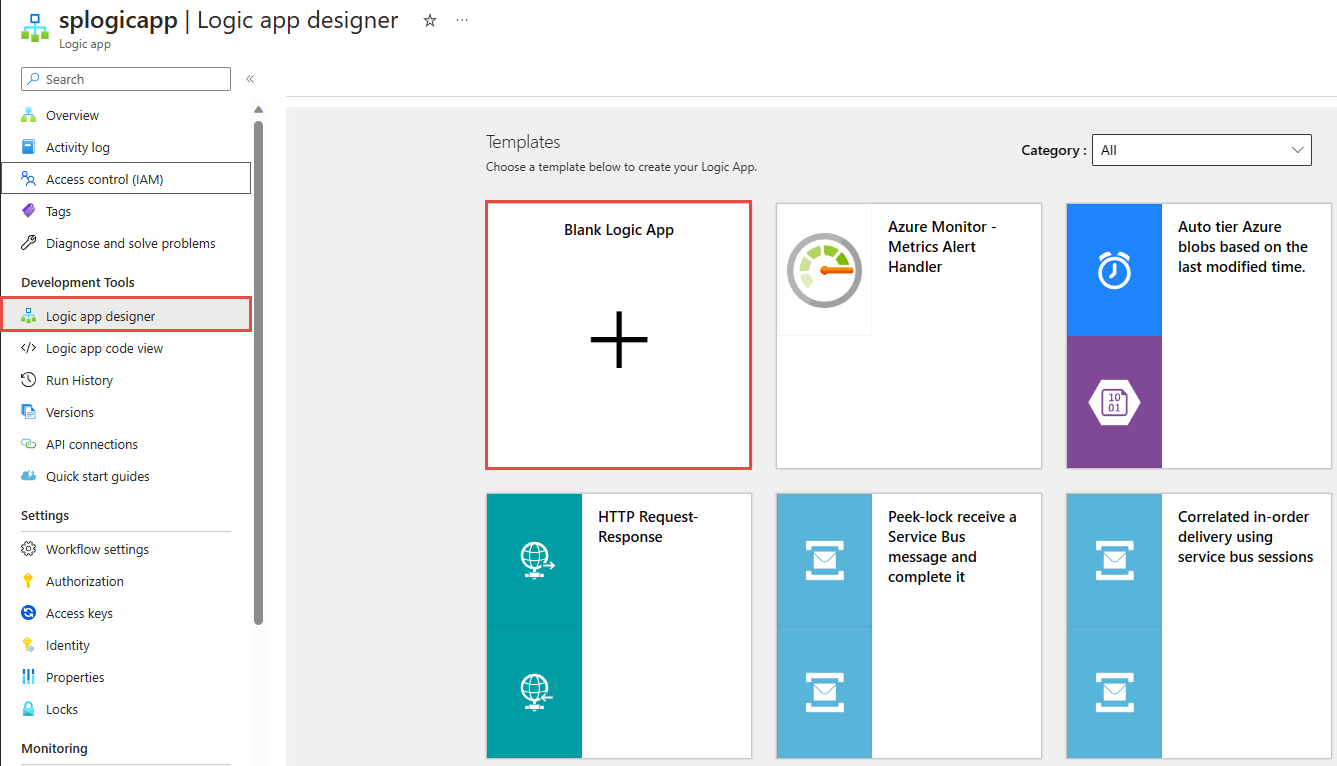
On the Logic Apps Designer page, select Blank Logic App under Templates.
Add a step receive messages from Service Bus via Event Grid
On the Logic app page, select Logic app designer on the left menu.
In the right pane, under Templates, select Blank Logic App.
On the designer, do the following steps:
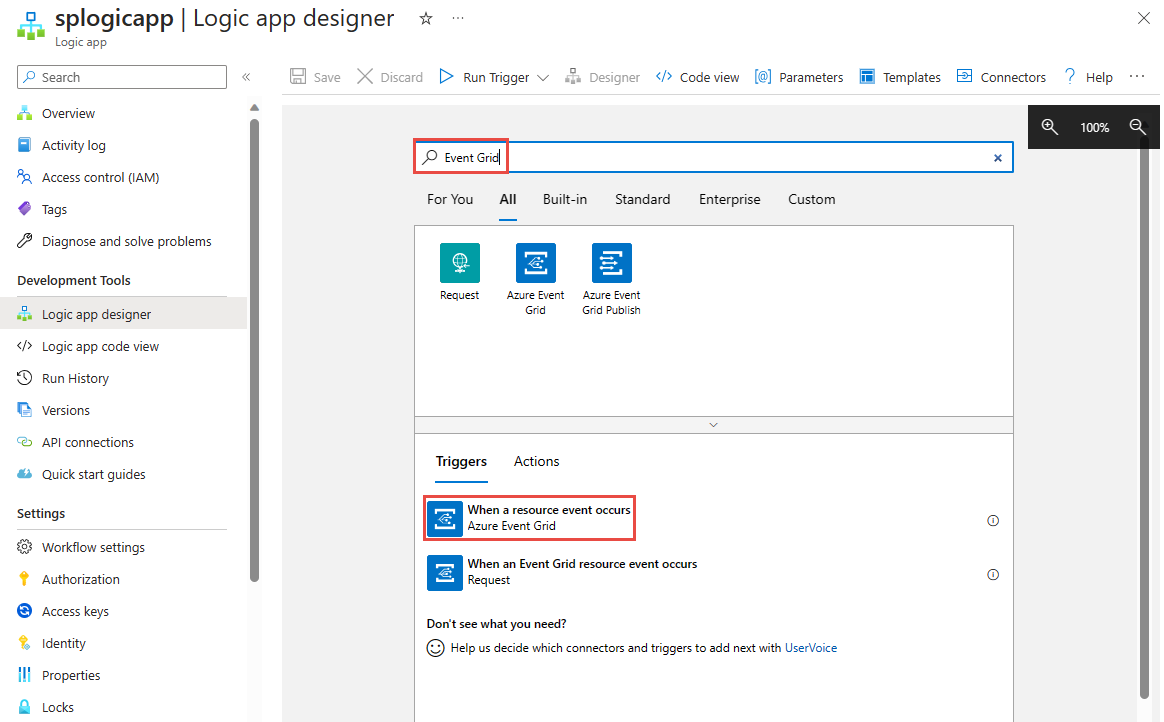
Search for Event Grid.
Select When a resource event occurs - Azure Event Grid.
Select Sign in.
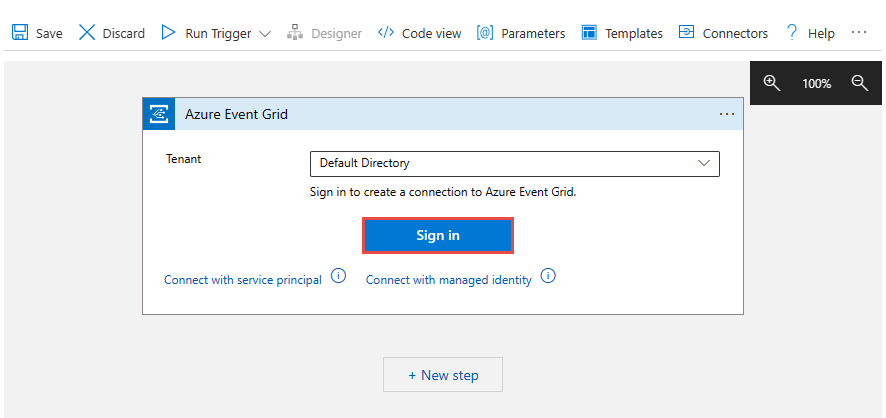
On the Sign in to your account page, select the account you want to use to sign in to Azure. 1.
On the When a resource event occurs page, do the following steps:
Select your Azure subscription.
For Resource Type, select Microsoft.ServiceBus.Namespaces.
For Resource Name, select your Service Bus namespace.
Select Add new parameter, select Suffix Filter, and then move the focus outside drop-down list.
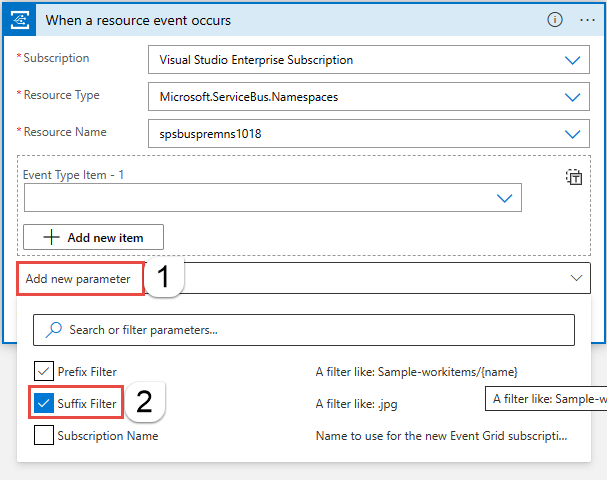
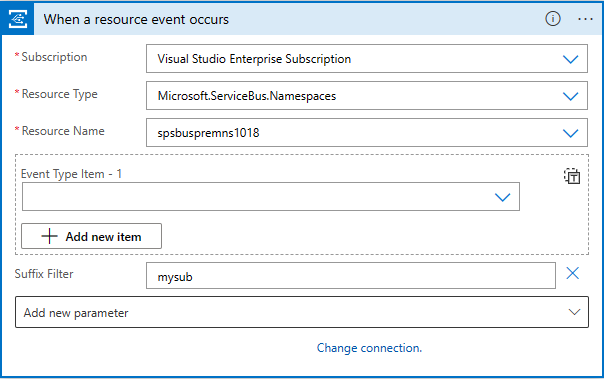
For Suffix Filter, enter the name of your Service Bus topic subscription.
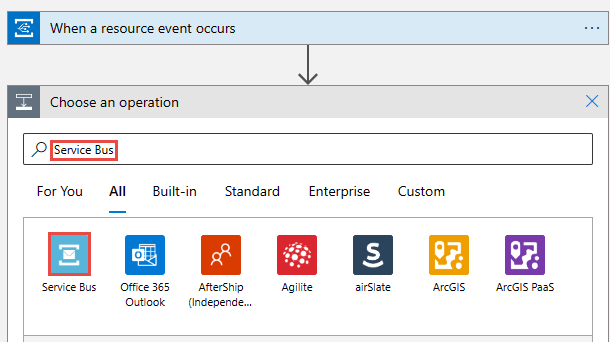
Select + New Step in the designer, and do the following steps:
Search for Service Bus.
Select Service Bus in the list.
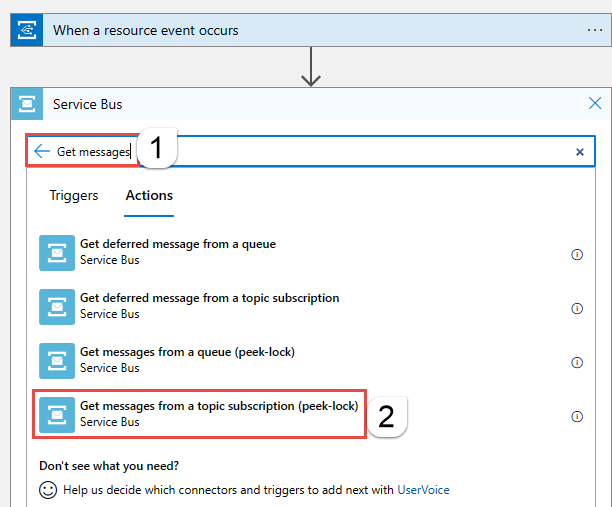
Select for Get messages in the Actions list.
Select Get messages from a topic subscription (peek-lock).
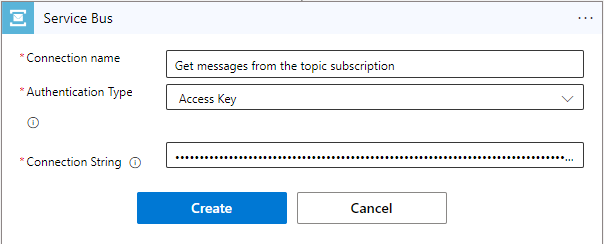
Follow these steps:
Enter a name for the connection. For example: Get messages from the topic subscription.
Confirm that Authentication Type is set to Access Key.
For Connection String, copy and paste the connection string to the Service Bus namespace that you saved earlier.
Select Create.
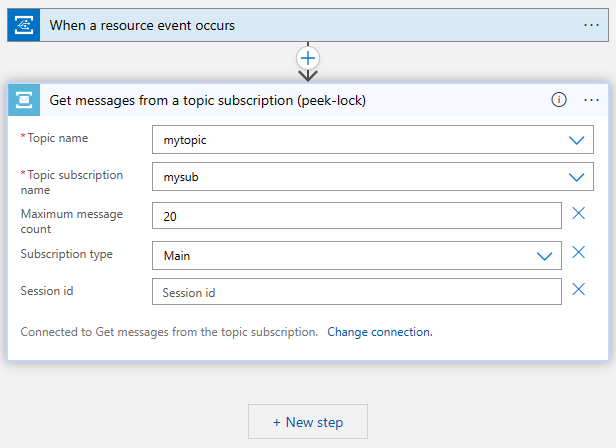
Select your topic and subscription.
Add a step to process and complete received messages
In this step, you add steps to send the received message in an email and then complete the message. In a real-world scenario, you process a message in the logic app before completing the message.
Add a foreach loop
Select + New step.
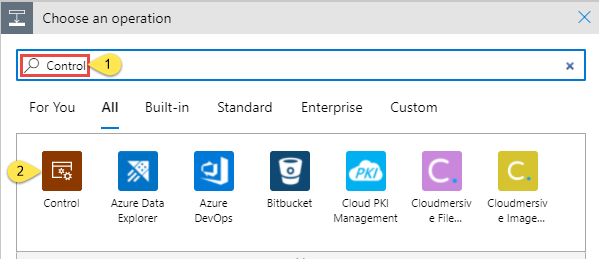
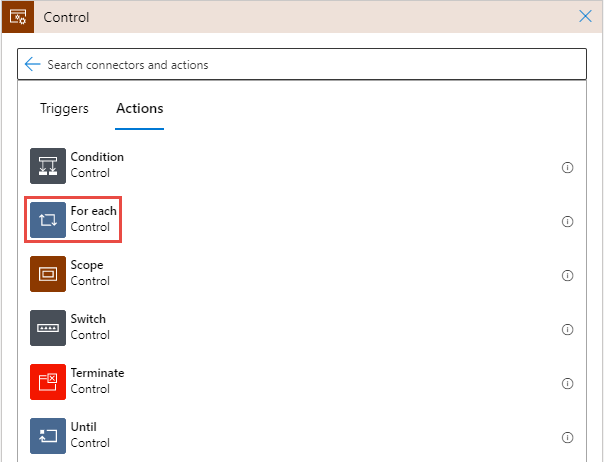
Search for and then select Control.
In the Actions list, select For each.
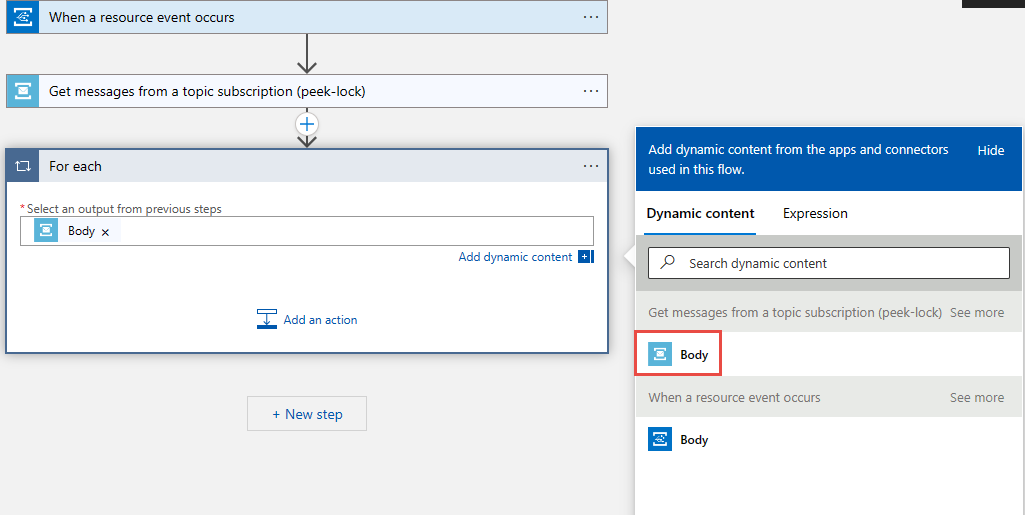
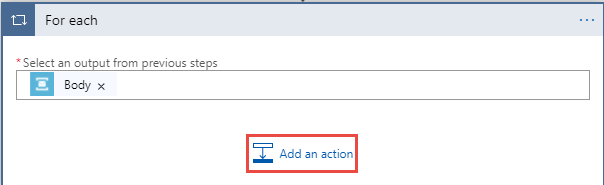
For Select an output from previous steps (click inside text box if needed), select Body under Get messages from a topic subscription (peek-lock).
Add a step inside the foreach loop to send an email with the message body
Within For Each loop, select Add an action.
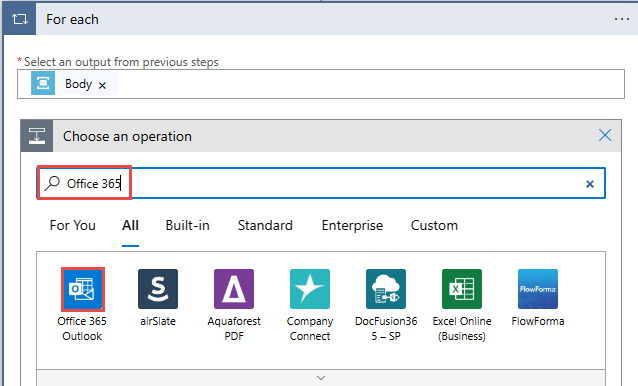
In the Search connectors and actions text box, enter Office 365.
Select Office 365 Outlook in the search results.
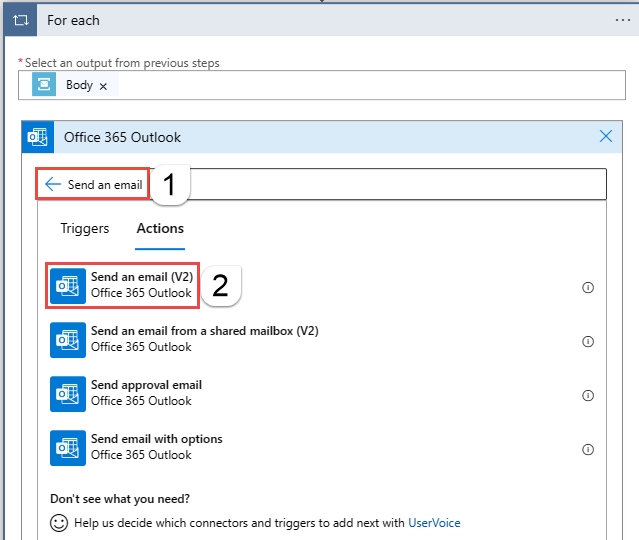
In the list of actions, select Send an email (V2).
Select Sign in, and follow steps to create a connection to Office 365 Outlook.
In the Send an email (V2) window, follow these steps:
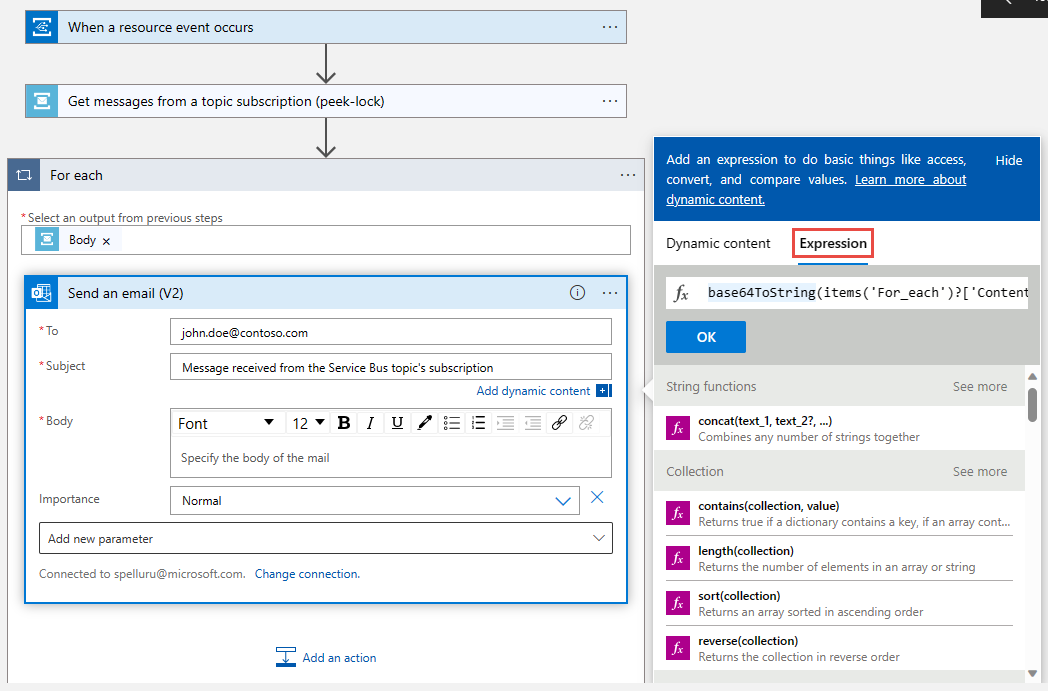
Select inside the text box for Body, and follow these steps:
For To, enter an email address.
For Subject, enter Message received from Service Bus topic's subscription.
Switch to Expression.
Enter the following expression:
base64ToString(items('For_each')?['ContentData'])Select OK.
Add another action in the foreach loop to complete the message
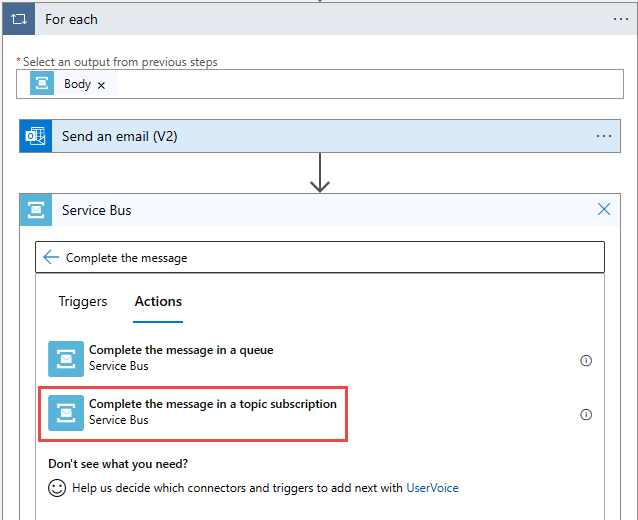
Within For Each loop, select Add an action.
Select Service Bus in the Recent list.
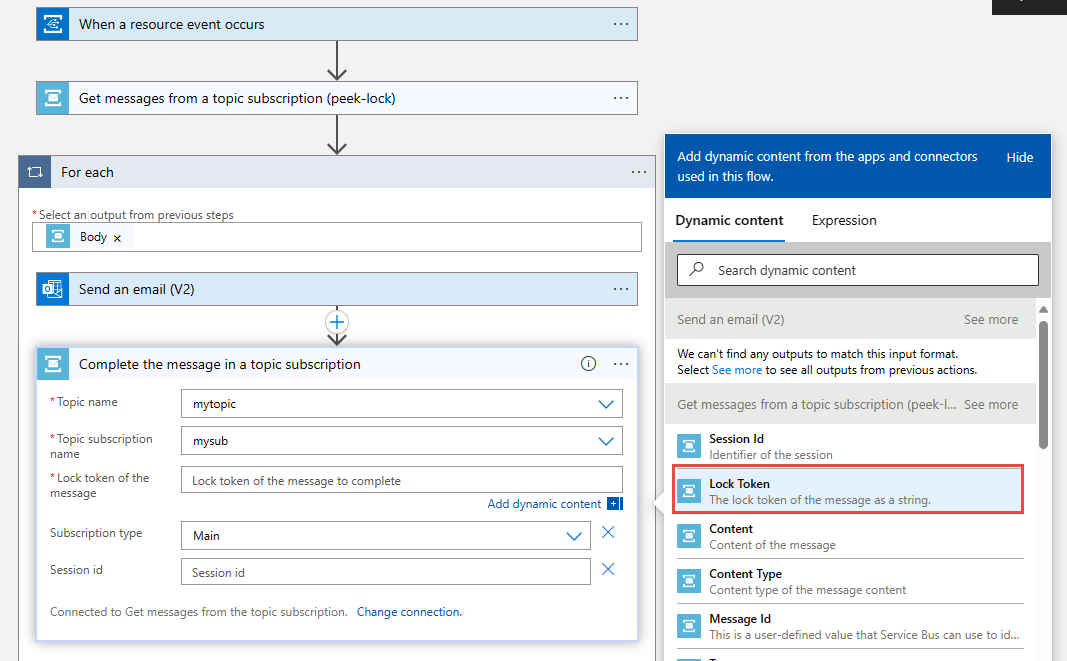
Select Complete the message in a topic subscription from the list of actions.
Select your Service Bus topic.
Select a subscription to the topic.
For Lock token of the message, select Lock Token from the Dynamic content.
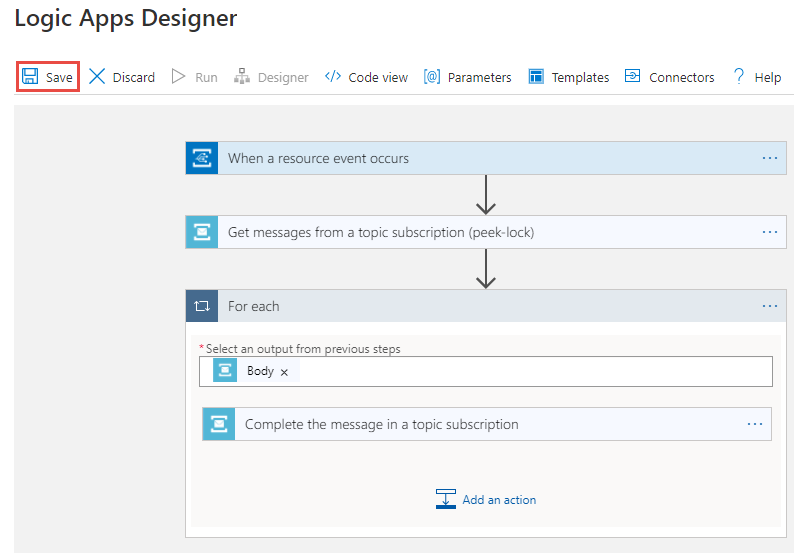
Select Save on the toolbar on the Logic Apps Designer to save the logic app.
Test the app
If you haven't already sent test messages to the topic, follow instructions in the Send messages to the Service Bus topic section to send messages to the topic.
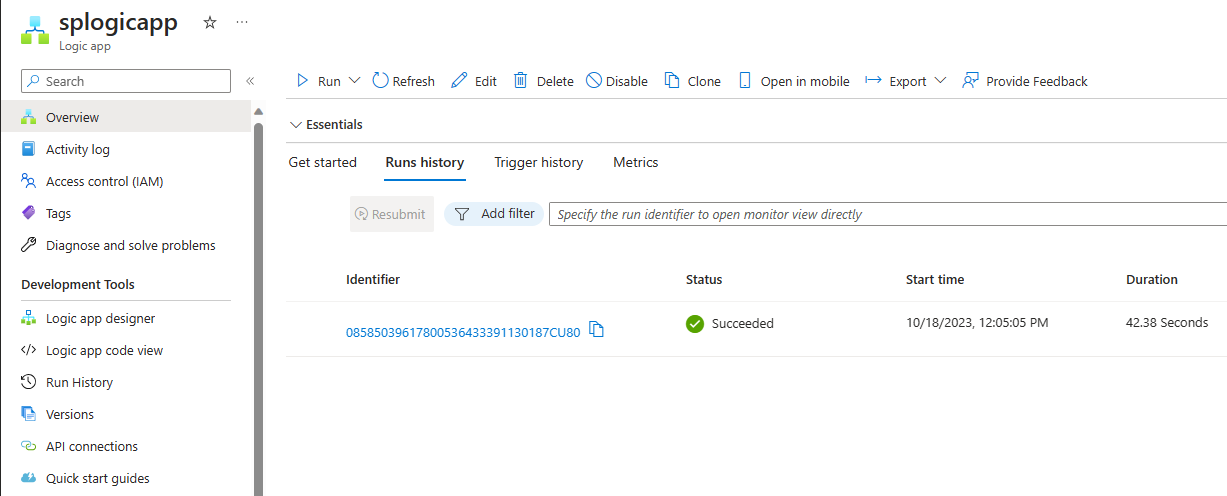
Switch to the Overview page of your logic app and then switch to the Runs history tab in the bottom pane. You see the logic app runs messages that were sent to the topic. It could take a few minutes before you see the logic app runs. Select Refresh on the toolbar to refresh the page.
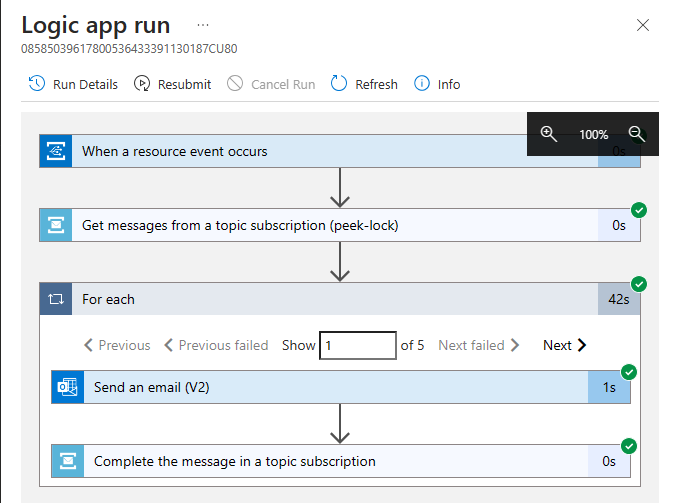
Select a logic app run to see the details. Notice that it processed 5 messages in the for loop.
You should get an email for each message the logic app receives.


Troubleshoot
If you don't see any invocations after waiting and refreshing for sometime, follow these steps:
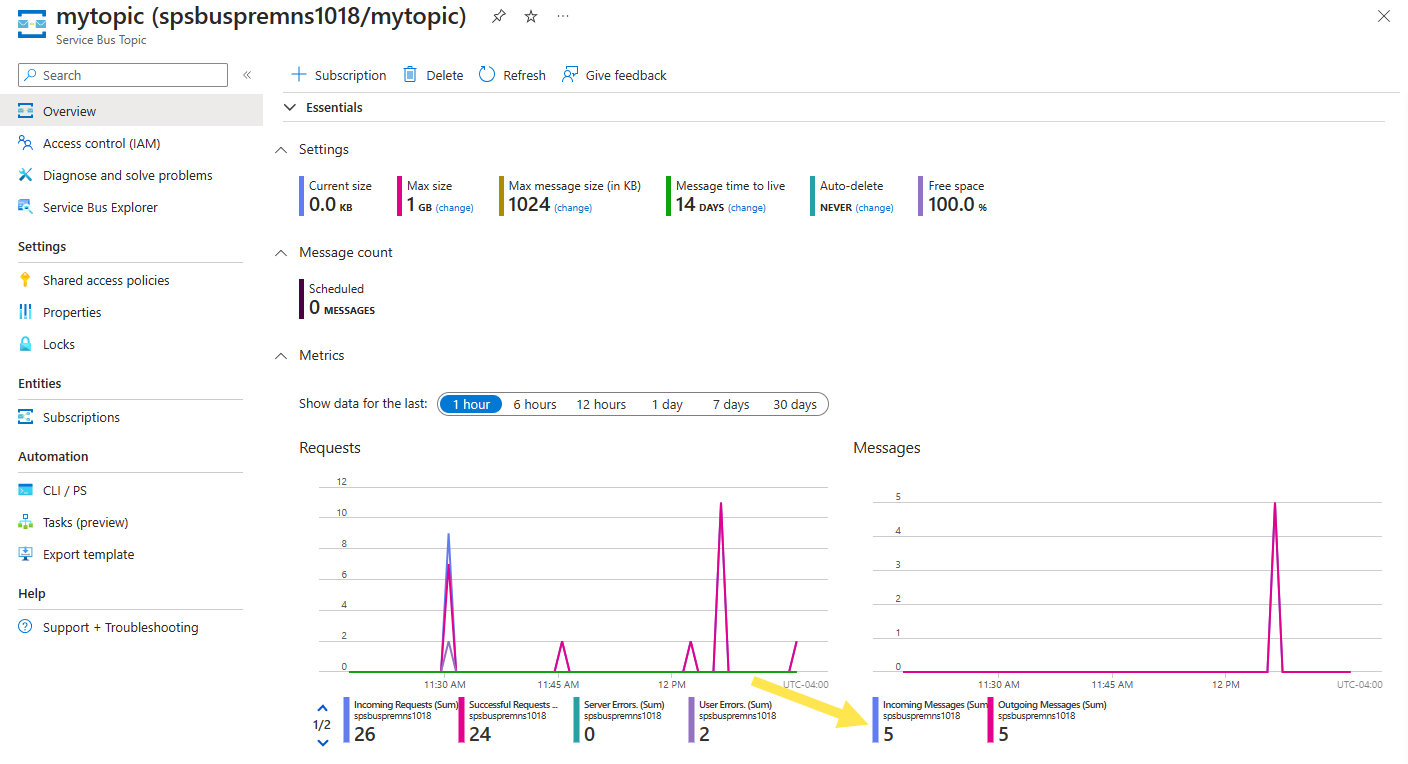
Confirm that the messages reached the Service Bus topic. See the incoming messages counter on the Service Bus Topic page. In this case, I ran the MessageSender application once, so I see 5 messages.
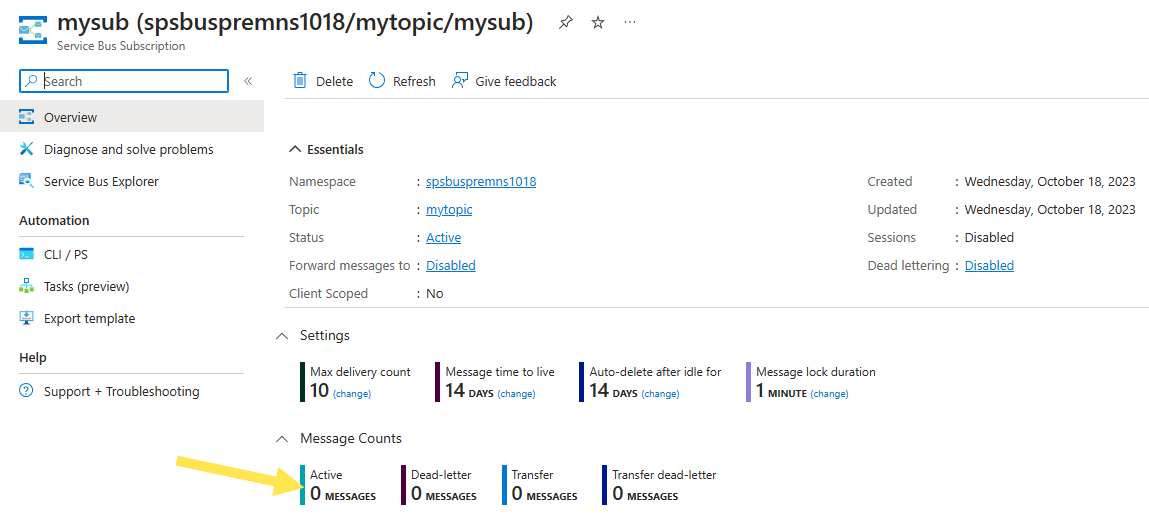
Confirm that there are no active messages at the Service Bus subscription. If you don't see any events on this page, verify that the Service Bus Subscription page doesn't show any Active message count. If the number for this counter is greater than zero, the messages at the subscription aren't forwarded to the handler function (event subscription handler) for some reason. Verify that you've set up the event subscription properly.
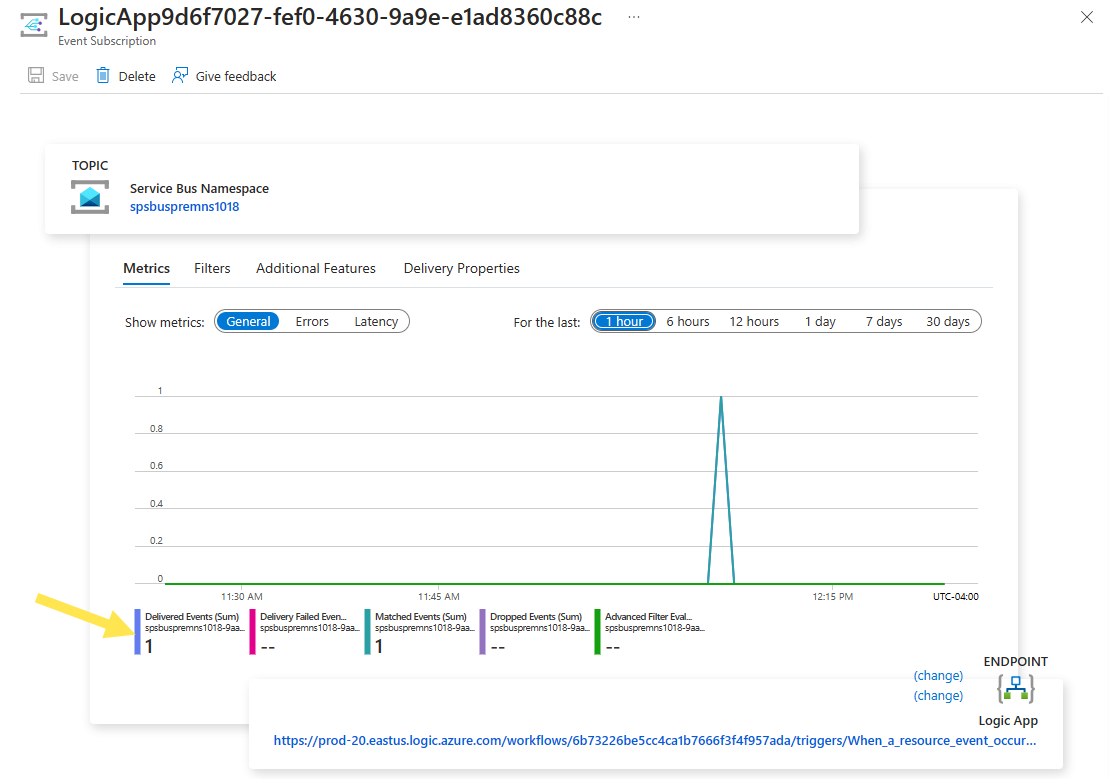
You also see delivered events on the Events page of the Service Bus namespace.

You can also see that the events are delivered on the Event Subscription page. You can get to this page by selecting the event subscription on the Events page.


Next steps
- Learn more about Azure Event Grid.
- Learn more about Azure Functions.
- Learn more about the Logic Apps feature of Azure App Service.
- Learn more about Azure Service Bus.
Feedback
Coming soon: Throughout 2024 we will be phasing out GitHub Issues as the feedback mechanism for content and replacing it with a new feedback system. For more information see: https://aka.ms/ContentUserFeedback.
Submit and view feedback for