Grant a Service Fabric application access to Azure resources on a Service Fabric cluster
Before an application can use its managed identity to access other resources, grant permissions to that identity on the protected Azure resource being accessed. Granting permissions is typically a management action on the control plane of the Azure service that owns the protected resource routed by Azure Resource Manager. That service enforces any applicable role-based access checking.
The exact sequence of steps depends on the type of Azure resource being accessed and the language and client used to grant permissions. This article assumes a user-assigned identity assigned to the application and includes several examples. Consult the documentation of the respective Azure services for up-to-date instructions on granting permissions.
Grant access to Azure Storage
You can use the Service Fabric application's managed identity, which is user-assigned in this case, to get the data from an Azure storage blob. Grant the identity the required permissions in the Azure portal by using the following steps:
- Navigate to the storage account.
- Select the Access Control (IAM) link in the left panel.
- (Optional) Check existing access: select System-assigned or User-assigned managed identity in the Find control. Select the appropriate identity from the ensuing result list.
- Select Add > Add role assignment on top of the page to add a new role assignment for the application's identity.
- Under Role, from the dropdown list, select Storage Blob Data Reader.
- In the next dropdown list, under Assign access to, choose User assigned managed identity.
- Next, ensure the proper subscription is listed in Subscription dropdown list and then set Resource Group to All resource groups.
- Under Select, choose the UAI corresponding to the Service Fabric application and then select Save.
Support for system-assigned Service Fabric managed identities doesn't include integration in the Azure portal. If your application uses a system-assigned identity, find the client ID of the application's identity, and then repeat the steps above but selecting the Microsoft Entra user, group, or service principal option in the Find control.
Grant access to Azure Key Vault
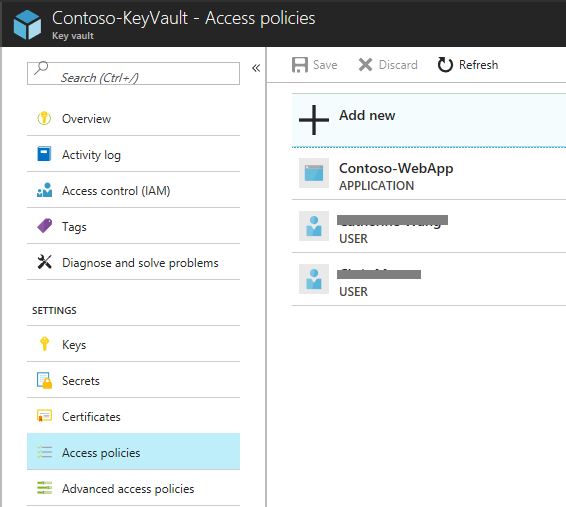
Similarly to accessing storage, you can use the managed identity of a Service Fabric application to access an Azure Key Vault. The steps for granting access in the Azure portal are similar to the steps listed above. Refer to the image below for differences.
The following example illustrates granting access to a vault by using a template deployment. Add the snippets below as another entry under the resources element of the template. The sample demonstrates access granting for both user-assigned and system-assigned identity types, respectively. Choose the applicable one.
    # under 'variables':
  "variables": {
        "userAssignedIdentityResourceId" : "[resourceId('Microsoft.ManagedIdentity/userAssignedIdentities/', parameters('userAssignedIdentityName'))]",
    }
    # under 'resources':
    {
        "type": "Microsoft.KeyVault/vaults/accessPolicies",
        "name": "[concat(parameters('keyVaultName'), '/add')]",
        "apiVersion": "2018-02-14",
        "properties": {
            "accessPolicies": [
                {
                    "tenantId": "[reference(variables('userAssignedIdentityResourceId'), '2018-11-30').tenantId]",
                    "objectId": "[reference(variables('userAssignedIdentityResourceId'), '2018-11-30').principalId]",
                    "dependsOn": [
                        "[variables('userAssignedIdentityResourceId')]"
                    ],
                    "permissions": {
                        "keys":         ["get", "list"],
                        "secrets":      ["get", "list"],
                        "certificates": ["get", "list"]
                    }
                }
            ]
        }
    },
For system-assigned managed identities:
    # under 'variables':
  "variables": {
        "sfAppSystemAssignedIdentityResourceId": "[concat(resourceId('Microsoft.ServiceFabric/managedClusters/applications/', parameters('clusterName'), parameters('applicationName')), '/providers/Microsoft.ManagedIdentity/Identities/default')]"
    }
    # under 'resources':
    {
        "type": "Microsoft.KeyVault/vaults/accessPolicies",
        "name": "[concat(parameters('keyVaultName'), '/add')]",
        "apiVersion": "2018-02-14",
        "properties": {
            "accessPolicies": [
            {
                    "name": "[concat(parameters('clusterName'), '/', parameters('applicationName'))]",
                    "tenantId": "[reference(variables('sfAppSystemAssignedIdentityResourceId'), '2018-11-30').tenantId]",
                    "objectId": "[reference(variables('sfAppSystemAssignedIdentityResourceId'), '2018-11-30').principalId]",
                    "dependsOn": [
                        "[variables('sfAppSystemAssignedIdentityResourceId')]"
                    ],
                    "permissions": {
                        "secrets": [
                            "get",
                            "list"
                        ],
                        "certificates":
                        [
                            "get",
                            "list"
                        ]
                    }
            },
        ]
        }
    }
For more information, see Vaults - Update Access Policy.
Next steps
Feedback
Coming soon: Throughout 2024 we will be phasing out GitHub Issues as the feedback mechanism for content and replacing it with a new feedback system. For more information see: https://aka.ms/ContentUserFeedback.
Submit and view feedback for