Set up disaster recovery of on-premises Hyper-V VMs to Azure
The Azure Site Recovery service contributes to your disaster recovery strategy by managing and orchestrating replication, failover, and failback of on-premises machines and Azure virtual machines (VMs).
This tutorial is the third in a series that shows you how to set up on-premises Hyper-V VMs for disaster recovery to Azure. This tutorial applies to Hyper-V VMs that aren't managed by Microsoft System Center Virtual Machine Manager.
In this tutorial, you learn how to:
- Set up the source replication environment, including on-premises Site Recovery components and the target replication environment.
- Create a replication policy.
- Enable replication for a VM.
Note
We design tutorials to show the simplest deployment path for a scenario. The tutorials use default options when possible, and they don't show all possible settings and paths. For more information about a scenario, see the How-to Guides section of the Site Recovery documentation.
Prerequisites
This tutorial is the third in a series of tutorials. It assumes that you've already completed the tasks in the first two tutorials:
Prepare the infrastructure
It's important to prepare the infrastructure before you set up disaster recovery of on-premises Hyper-V VMs to Azure.
Deployment planning
In the Azure portal, go to Recovery Services vaults and select your vault. In the preceding tutorial, you prepared the ContosoVMVault vault.
On the vault command bar, select Enable Site Recovery.
On Site Recovery, under the Hyper-V machines to Azure tile, select Prepare infrastructure.
On Prepare infrastructure, select the Deployment planning tab. For Deployment planning completed?, select I will do it later.
Tip
For this tutorial, you don't need to use the Deployment Planner. If you're planning a large deployment, download the Deployment Planner for Hyper-V from the link on the pane. Learn more about Hyper-V deployment planning.
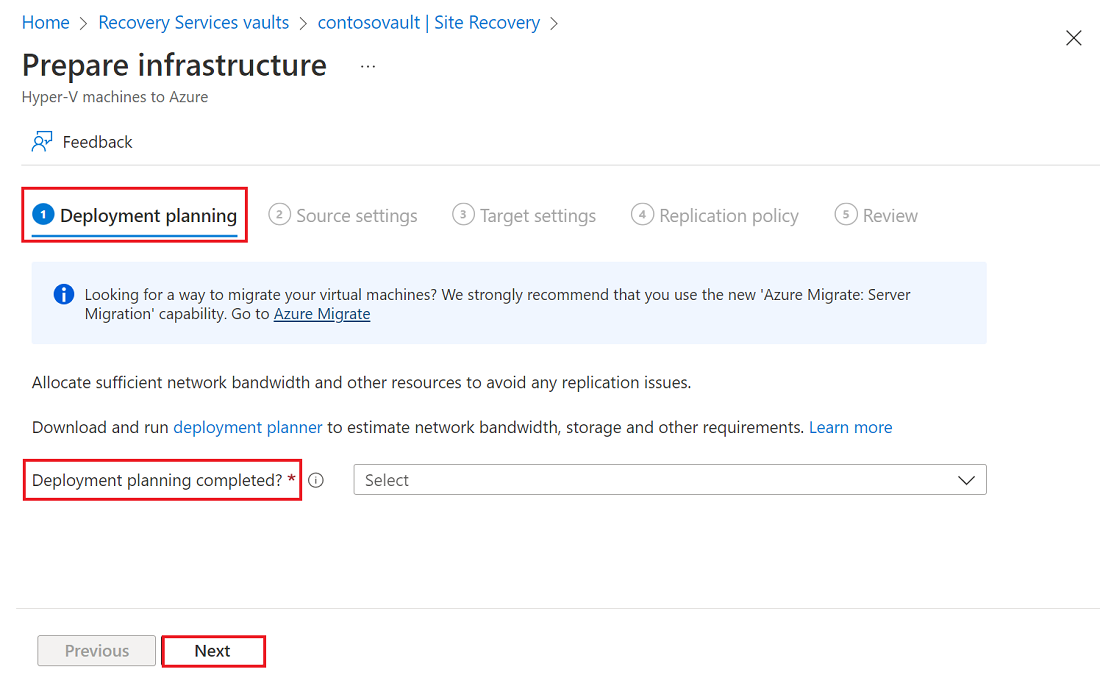
Select Next.
Source settings
To set up the source environment, you create a Hyper-V site. You add to the site the Hyper-V hosts that contain VMs you want to replicate. Then, you download and install the Azure Site Recovery provider and the Microsoft Azure Recovery Services (MARS) agent for Azure Site Recovery on each host, and register the Hyper-V site in the vault.
- On Prepare infrastructure, on the Source settings tab, complete these steps:
For Are you Using System Center VMM to manage Hyper-V hosts?, select No.
For Hyper-V site, enter a name for the site. You can also use the Add Hyper-V site option to add a new Hyper-V site. For example, use ContosoHyperVSite.
For Hyper-V servers, select Add Hyper-V server to add a server.
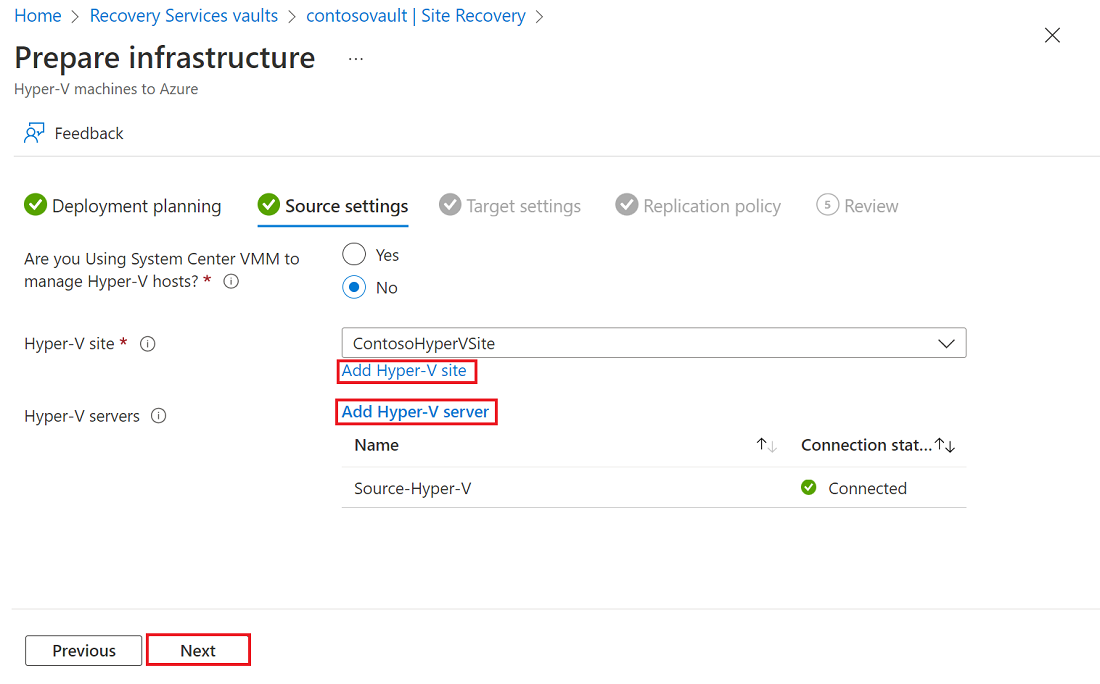
On Add Server, complete these steps:
Download the installer for the Microsoft Azure Site Recovery provider.
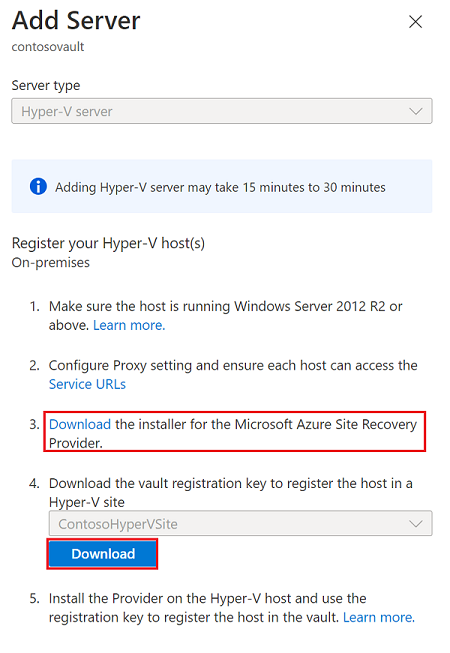
Download the vault registration key. You need this key to access the provider. The key is valid for five days. Learn more.
Select the site you created.
- Select Next.
Site Recovery checks for compatible Azure storage accounts and networks in your Azure subscription.
Install the provider
Install the downloaded setup file (AzureSiteRecoveryProvider.exe) on each Hyper-V host that you want to add to the Hyper-V site. Setup installs the Site Recovery provider and the Recovery Services agent (MARS for Azure Site Recovery) on each Hyper-V host.
- Run the setup file.
- In the Azure Site Recovery provider setup wizard, for Microsoft Update, opt in to use Microsoft Update to check for provider updates.
- On Installation, accept the default installation location for the provider and agent, and then select Install.
- After installation, in the Microsoft Azure Site Recovery Registration Wizard, for Vault Settings, select Browse. On Key File, select the vault key file that you downloaded.
- Select the Azure Site Recovery subscription, the vault name (ContosoVMVault), and the Hyper-V site (ContosoHyperVSite) to which the Hyper-V server belongs.
- On Proxy Settings, select Connect directly to Azure Site Recovery without a proxy.
- On Registration, after the server is registered in the vault, select Finish.
Metadata from the Hyper-V server is retrieved by Azure Site Recovery, and the server appears in Site Recovery Infrastructure > Hyper-V Hosts. This process can take up to 30 minutes.
Install the provider on a Hyper-V Core server
If you're running a Hyper-V Core server, download the setup file and complete these steps:
Extract the files from AzureSiteRecoveryProvider.exe to a local directory by running this command:
AzureSiteRecoveryProvider.exe /x:. /qRun
.\setupdr.exe /i. Results are logged to %Programdata%\ASRLogs\DRASetupWizard.log.Register the server by running this command:
cd "C:\Program Files\Microsoft Azure Site Recovery Provider"
"C:\Program Files\Microsoft Azure Site Recovery Provider\DRConfigurator.exe" /r /Friendlyname "FriendlyName of the Server" /Credentials "path to where the credential file is saved"
Target settings
Select and verify target resources:
On Prepare infrastructure, on the Target settings tab, complete these steps:
- For Subscription, select the subscription and the resource group (ContosoRG) in which the Azure VMs will be created after failover.
- For Post-failover deployment model, select the Resource Manager deployment model.
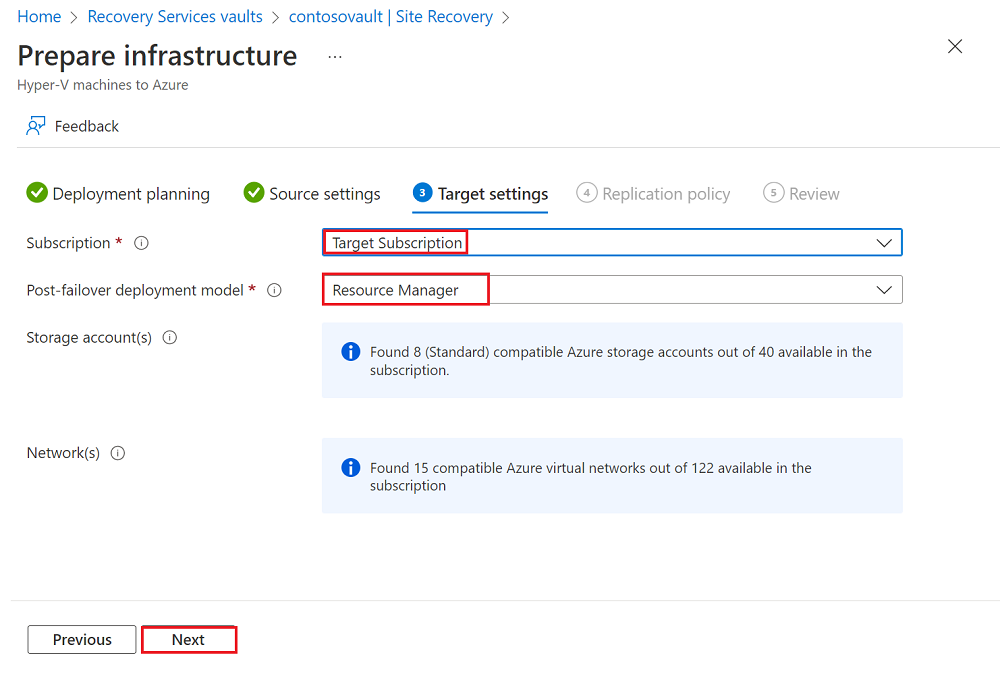
Select Next.
Replication policy
On Prepare infrastructure, on the Replication policy tab, complete these steps:
For Replication policy, select the replication policy.
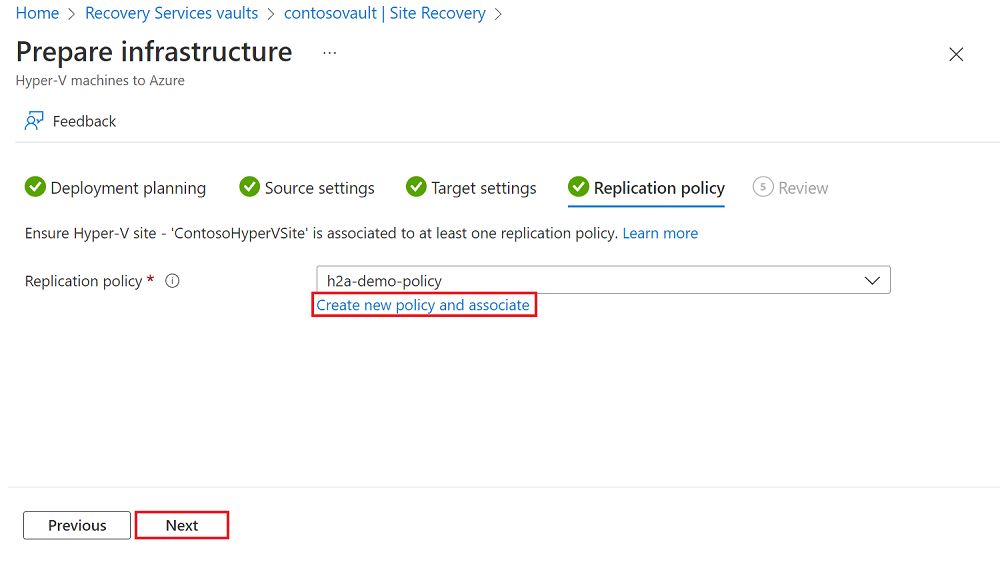
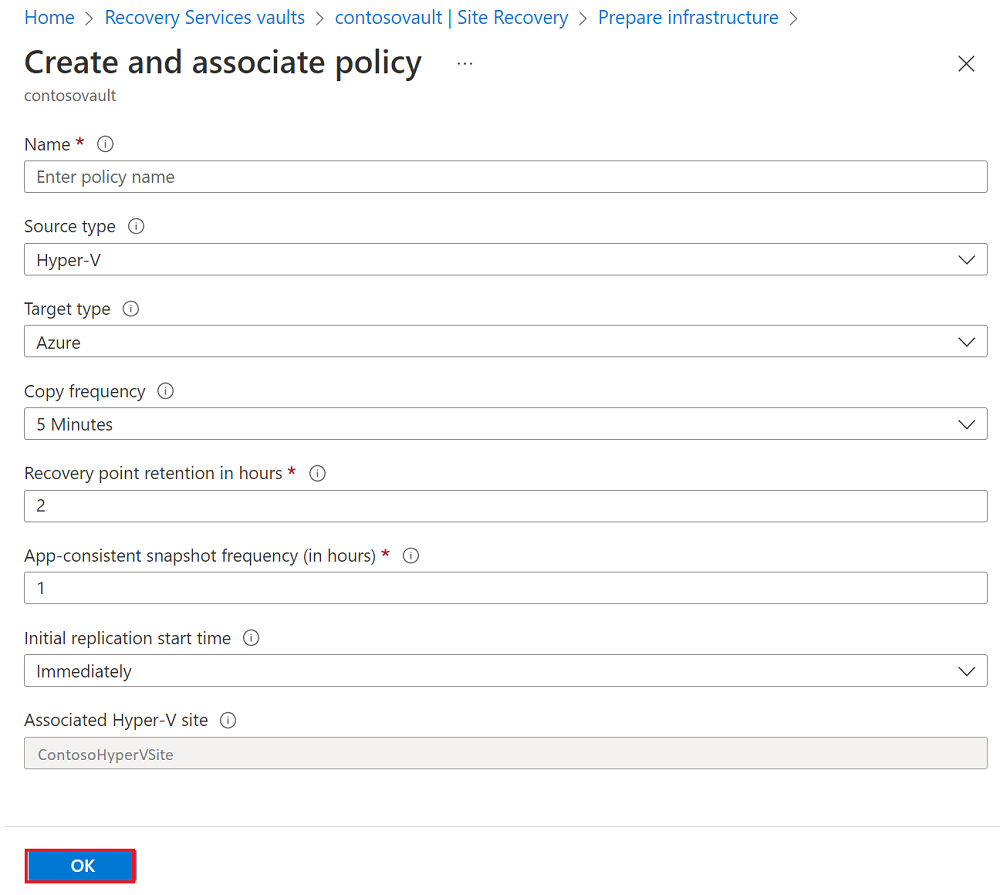
If you don't have a replication policy, select the Create new policy and associate link to create a new policy. On the Create and associate policy pane, complete these steps:
- For Name, enter a name for the policy. For example, use ContosoReplicationPolicy.
- For Source type, select the ContosoHyperVSite site.
- For Target type, verify the target (Azure), the vault subscription, and the Resource Manager deployment mode.
- For Copy frequency, select 5 Minutes.
- For Recovery point retention in hours, select 2.
- For App-consistent snapshot frequency, select 1.
- For Initial replication start time, select Immediately.
- Select OK to create the policy. When you create a new policy, it's automatically associated with the specified Hyper-V site.
Select Next.
On the Review tab, review your selections, and then select Create.
You can track progress in your Azure portal notifications. When the job finishes, the initial replication is complete, and the VM is ready for failover.
Enable replication
In the Azure portal, go to Recovery Services vaults and select the vault.
On the vault command bar, select Enable Site Recovery.
On Site Recovery, under the Hyper-V machines to Azure tile, select Enable replication.
On Enable replication, on the Source environment tab, select a source location, and then select Next.

On the Target environment tab, complete these steps:
- For Subscription, enter or select the subscription.
- For Post-failover resource group, select the resource group name to fail over to.
- For Post-failover deployment model, select Resource Manager.
- For Storage account, enter or select the storage account.
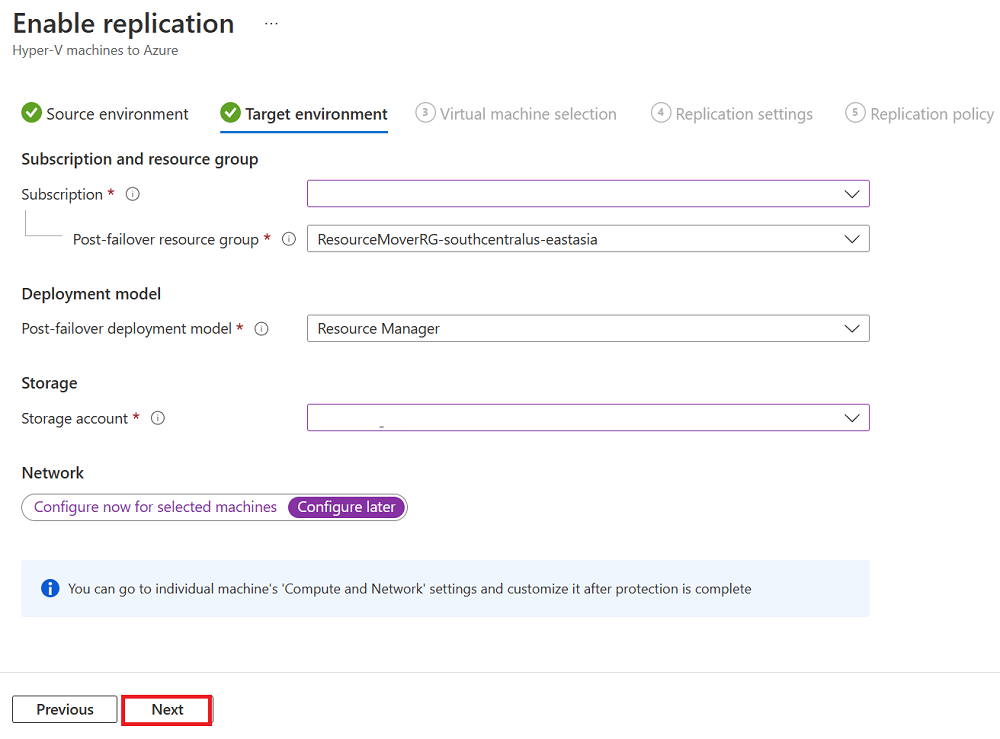
Select Next.
On the Virtual machine selection tab, select the VM to replicate, and then select Next.
On the Replication settings tab, select and verify the disk details, and then select Next.
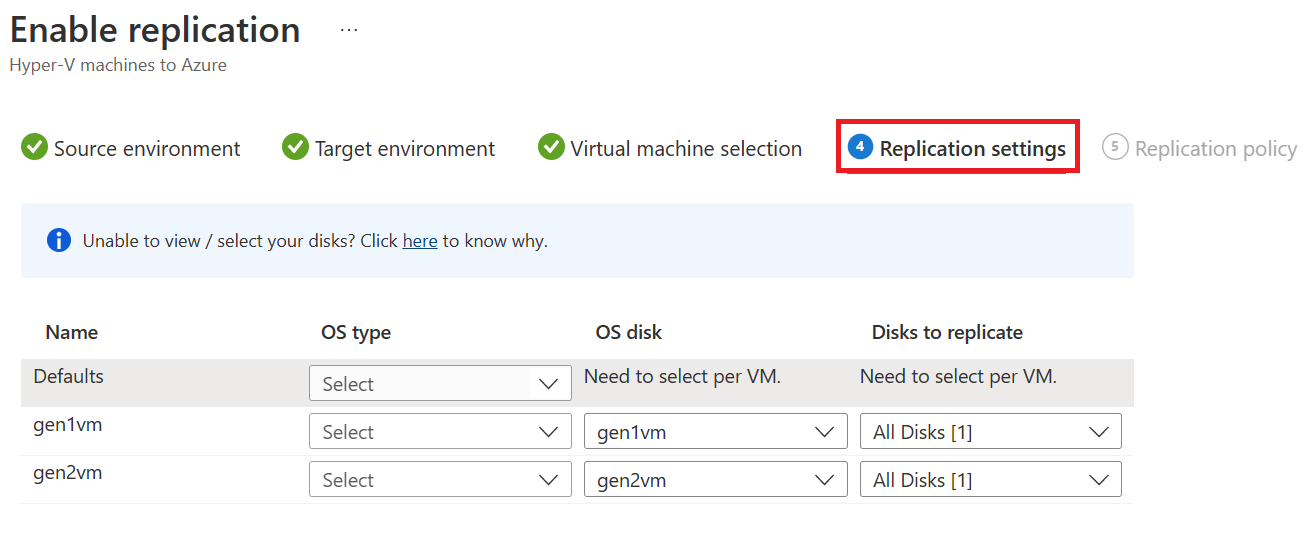
On the Replication policy tab, verify that the correct replication policy is selected, and then select Next.
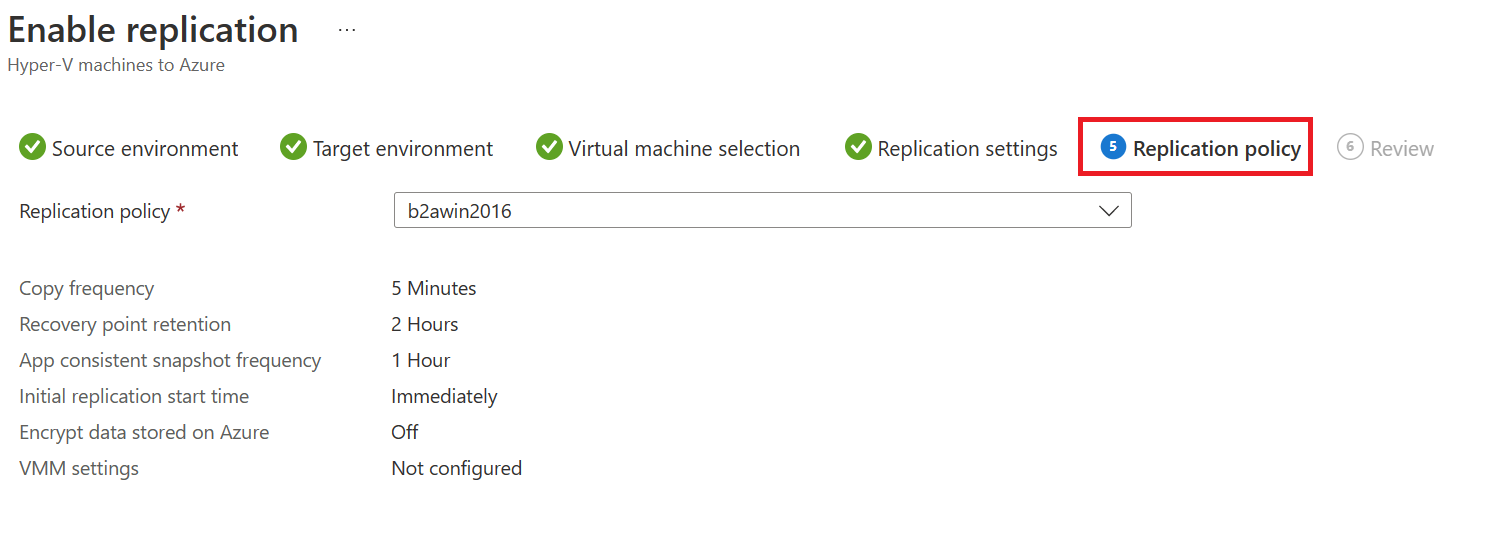
On the Review tab, review your selections, and then select Enable Replication.
Next steps
Learn more about running a disaster recovery drill.
Feedback
Coming soon: Throughout 2024 we will be phasing out GitHub Issues as the feedback mechanism for content and replacing it with a new feedback system. For more information see: https://aka.ms/ContentUserFeedback.
Submit and view feedback for