Note
Access to this page requires authorization. You can try signing in or changing directories.
Access to this page requires authorization. You can try changing directories.
Note
The Basic, Standard, and Enterprise plans entered a retirement period on March 17, 2025. For more information, see the Azure Spring Apps retirement announcement.
The Standard consumption and dedicated plan entered a retirement period on September 30, 2024, with a complete shutdown by the end of March 2025. For more information, see Migrate Azure Spring Apps Standard consumption and dedicated plan to Azure Container Apps.
This article applies to: ✅ Basic/Standard ✅ Enterprise
This article shows you how to use the Azure Spring Apps task for Azure Pipelines to deploy applications.
Continuous integration and continuous delivery tools let you quickly deploy updates to existing applications with minimal effort and risk. Azure DevOps helps you organize and control these key jobs.
The following video describes end-to-end automation using tools of your choice, including Azure Pipelines.
Create an Azure Resource Manager service connection
First, create an Azure Resource Manager service connection to your Azure DevOps project. For instructions, see Connect to Microsoft Azure. Be sure to select the same subscription you're using for your Azure Spring Apps service instance.
Build and deploy apps
You can now build and deploy your projects using a series of tasks. The following Azure Pipelines template defines variables, a .NET Core task to build the application, and an Azure Spring Apps task to deploy the application.
variables:
  workingDirectory: './steeltoe-sample'
  planetMainEntry: 'Microsoft.Azure.SpringCloud.Sample.PlanetWeatherProvider.dll'
  solarMainEntry: 'Microsoft.Azure.SpringCloud.Sample.SolarSystemWeather.dll'
  planetAppName: 'planet-weather-provider'
  solarAppName: 'solar-system-weather'
  serviceName: '<your service name>'

steps:
# Restore, build, publish and package the zipped planet app
- task: DotNetCoreCLI@2
  inputs:
    command: 'publish'
    publishWebProjects: false
    arguments: '--configuration Release'
    zipAfterPublish: false
    modifyOutputPath: false
    workingDirectory: $(workingDirectory)

# Deploy the planet app
- task: AzureSpringCloud@0
  inputs:
    azureSubscription: '<Service Connection Name>'
    Action: 'Deploy'
    AzureSpringCloud: $(serviceName)
    AppName: 'testapp'
    DeploymentType: 'Artifacts'
    UseStagingDeployment: false
    DeploymentName: 'default'
    Package: $(workingDirectory)/src/$(planetAppName)/publish-deploy-planet.zip
    RuntimeVersion: 'NetCore_31'
    DotNetCoreMainEntryPath: $(planetMainEntry)

# Deploy the solar app
- task: AzureSpringCloud@0
  inputs:
    azureSubscription: '<Service Connection Name>'
    Action: 'Deploy'
    AzureSpringCloud: $(serviceName)
    AppName: 'testapp'
    DeploymentType: 'Artifacts'
    UseStagingDeployment: false
    DeploymentName: 'default'
    Package: $(workingDirectory)/src/$(solarAppName)/publish-deploy-solar.zip
    RuntimeVersion: 'NetCore_31'
    DotNetCoreMainEntryPath: $(solarMainEntry)
Set up an Azure Spring Apps instance and an Azure DevOps project
First, use the following steps to set up an existing Azure Spring Apps instance for use with Azure DevOps.
- Go to your Azure Spring Apps instance, then create a new app.
- Go to the Azure DevOps portal, then create a new project under your chosen organization. If you don't have an Azure DevOps organization, you can create one for free.
- Select Repos, then import the Spring Boot demo code to the repository.
Create an Azure Resource Manager service connection
Next, create an Azure Resource Manager service connection to your Azure DevOps project. For instructions, see Connect to Microsoft Azure. Be sure to select the same subscription you're using for your Azure Spring Apps service instance.
Build and deploy apps
You can now build and deploy your projects using a series of tasks. The following sections show you various options for deploying your app using Azure DevOps.
Deploy using a pipeline
To deploy using a pipeline, follow these steps:
Select Pipelines, then create a new pipeline with a Maven template.
Edit the azure-pipelines.yml file to set the
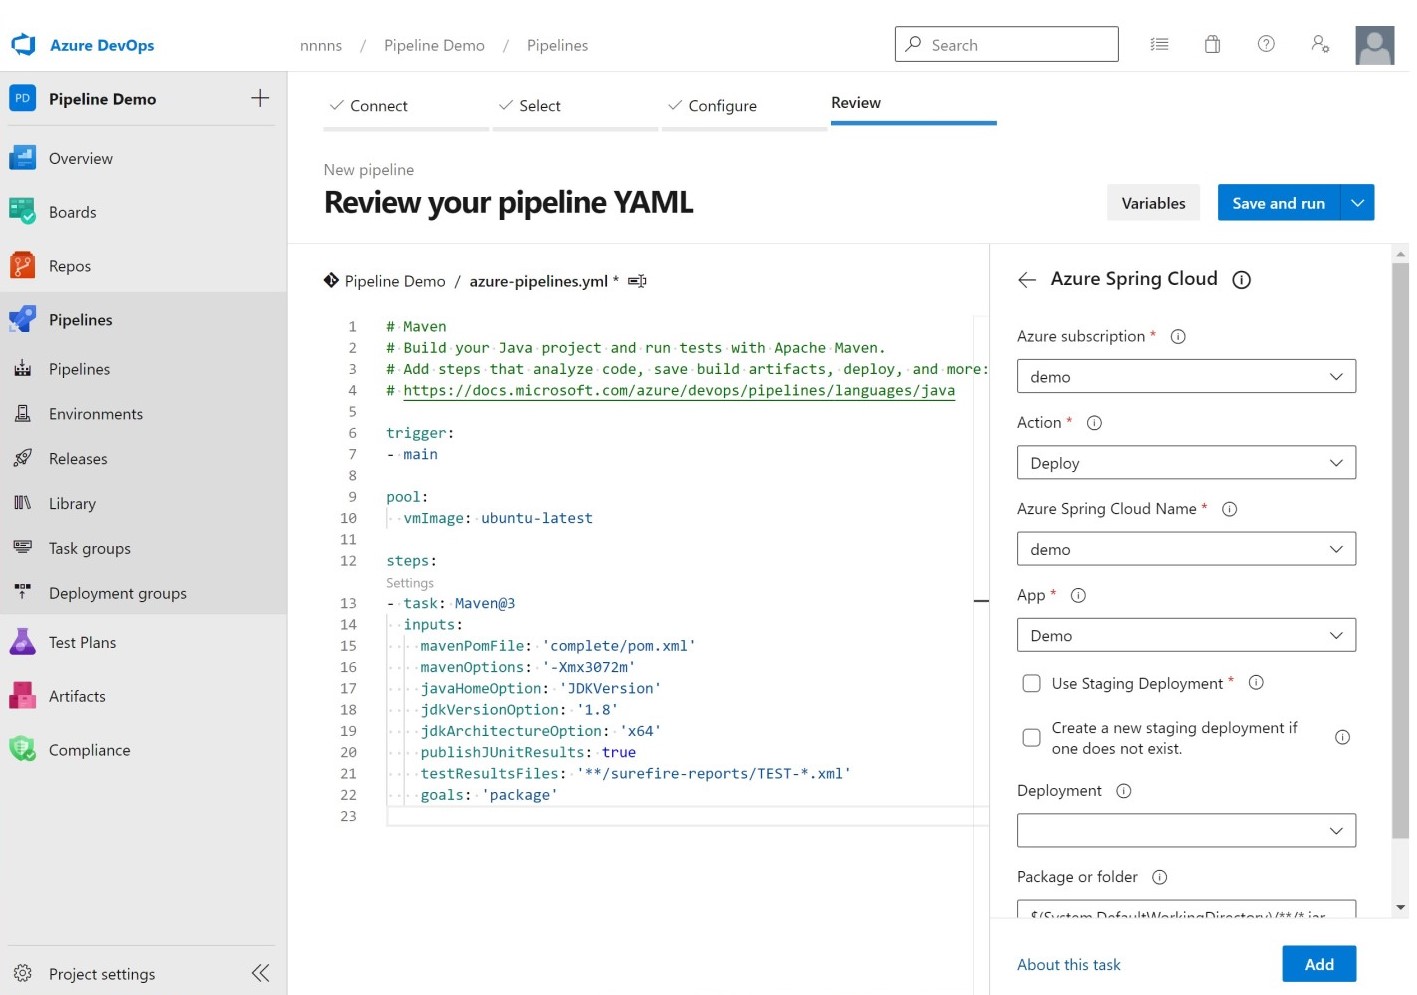
mavenPomFilefield to complete/pom.xml.Select Show assistant on the right side, then select the Azure Spring Apps template.
Select the service connection you created for your Azure Subscription, then select your Azure Spring Apps instance and app instance.
Disable Use Staging Deployment.
Set Package or folder to complete/target/spring-boot-complete-0.0.1-SNAPSHOT.jar.
Select Add to add this task to your pipeline.
Your pipeline settings should match the following image.
You can also build and deploy your projects using following pipeline template. This example first defines a Maven task to build the application, followed by a second task that deploys the JAR file using the Azure Spring Apps task for Azure Pipelines.
steps:
- task: Maven@3
  inputs:
    mavenPomFile: 'complete/pom.xml'
- task: AzureSpringCloud@0
  inputs:
    azureSubscription: '<your service connection name>'
    Action: 'Deploy'
    AzureSpringCloud: <your Azure Spring Apps service>
    AppName: <app-name>
    DeploymentType: 'Artifacts'
    UseStagingDeployment: false
    DeploymentName: 'default'
    Package: ./target/your-result-jar.jar
Select Save and run, then wait for job to finish.

Blue-green deployments
The deployment shown in the previous section receives application traffic immediately upon deployment. This enables you to test the application in the production environment before it receives any customer traffic.
Edit the pipeline file
To build the application the same way as shown previously and deploy it to a staging deployment, use the following template. In this example, the staging deployment must already exist. For an alternative approach, see Blue-green deployment strategies.
steps:
- task: Maven@3
  inputs:
    mavenPomFile: 'pom.xml'
- task: AzureSpringCloud@0
  inputs:
    azureSubscription: '<your service connection name>'
    Action: 'Deploy'
    AzureSpringCloud: <your Azure Spring Apps service>
    AppName: <app-name>
    DeploymentType: 'Artifacts'
    UseStagingDeployment: true
    Package: ./target/your-result-jar.jar
- task: AzureSpringCloud@0
  inputs:
    azureSubscription: '<your service connection name>'
    Action: 'Set Production'
    AzureSpringCloud: <your Azure Spring Apps service>
    AppName: <app-name>
    UseStagingDeployment: true
Use the Releases section
The following steps show you how to enable a blue-green deployment from the Releases section.
Select Pipelines and create a new pipeline for your Maven build and publish artifact.
- Select Azure Repos Git for your code location.
- Select a repository where your code is located.
- Select the Maven template and modify the file to set the
mavenPomFilefield to complete/pom.xml. - Select Show assistant on the right side and select the Publish build artifacts template.
- Set Path to publish to complete/target/spring-boot-complete-0.0.1-SNAPSHOT.jar.
- Select Save and run.
Select Releases, then Create release.
Add a new pipeline, and select Empty job to create a job.
Under Stages select the line 1 job, 0 task
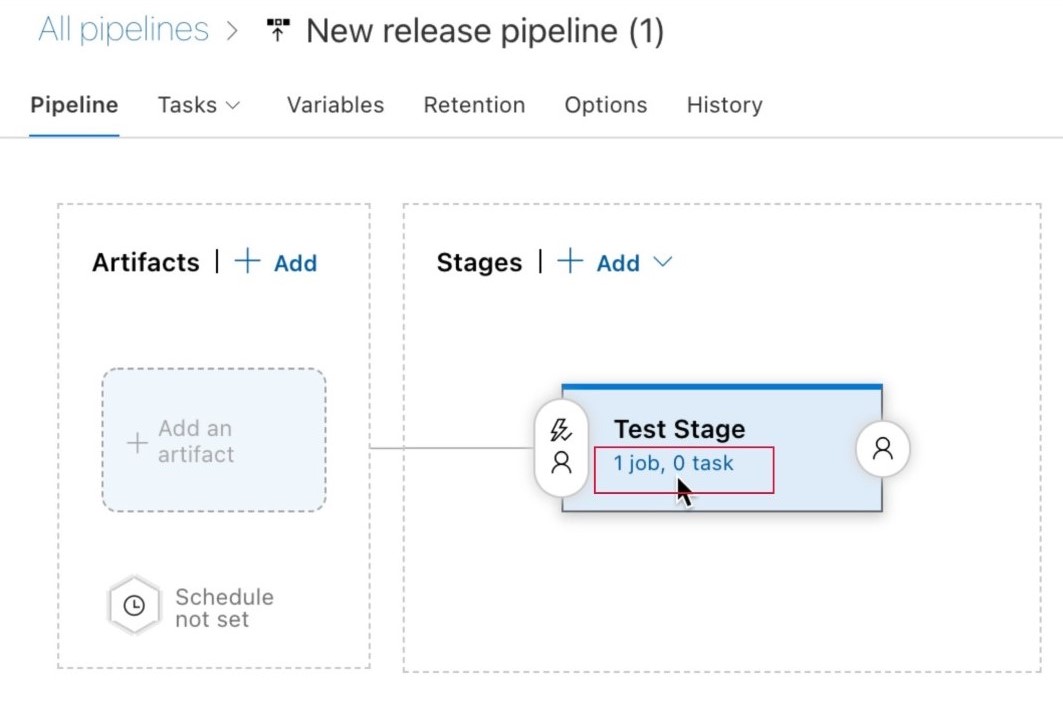
- Select the + to add a task to the job.
- Search for the Azure Spring Apps template, then select Add to add the task to the job.
- Select Azure Spring Apps Deploy: to edit the task.
- Fill this task with your app's information, then disable Use Staging Deployment.
- Enable Create a new staging deployment if one does not exist, then enter a name in Deployment.
- Select Save to save this task.
- Select OK.
Select Pipeline, then select Add an artifact.
- Under Source (build pipeline) select the pipeline created previously.
- Select Add, then Save.
Select 1 job, 1 task under Stages.
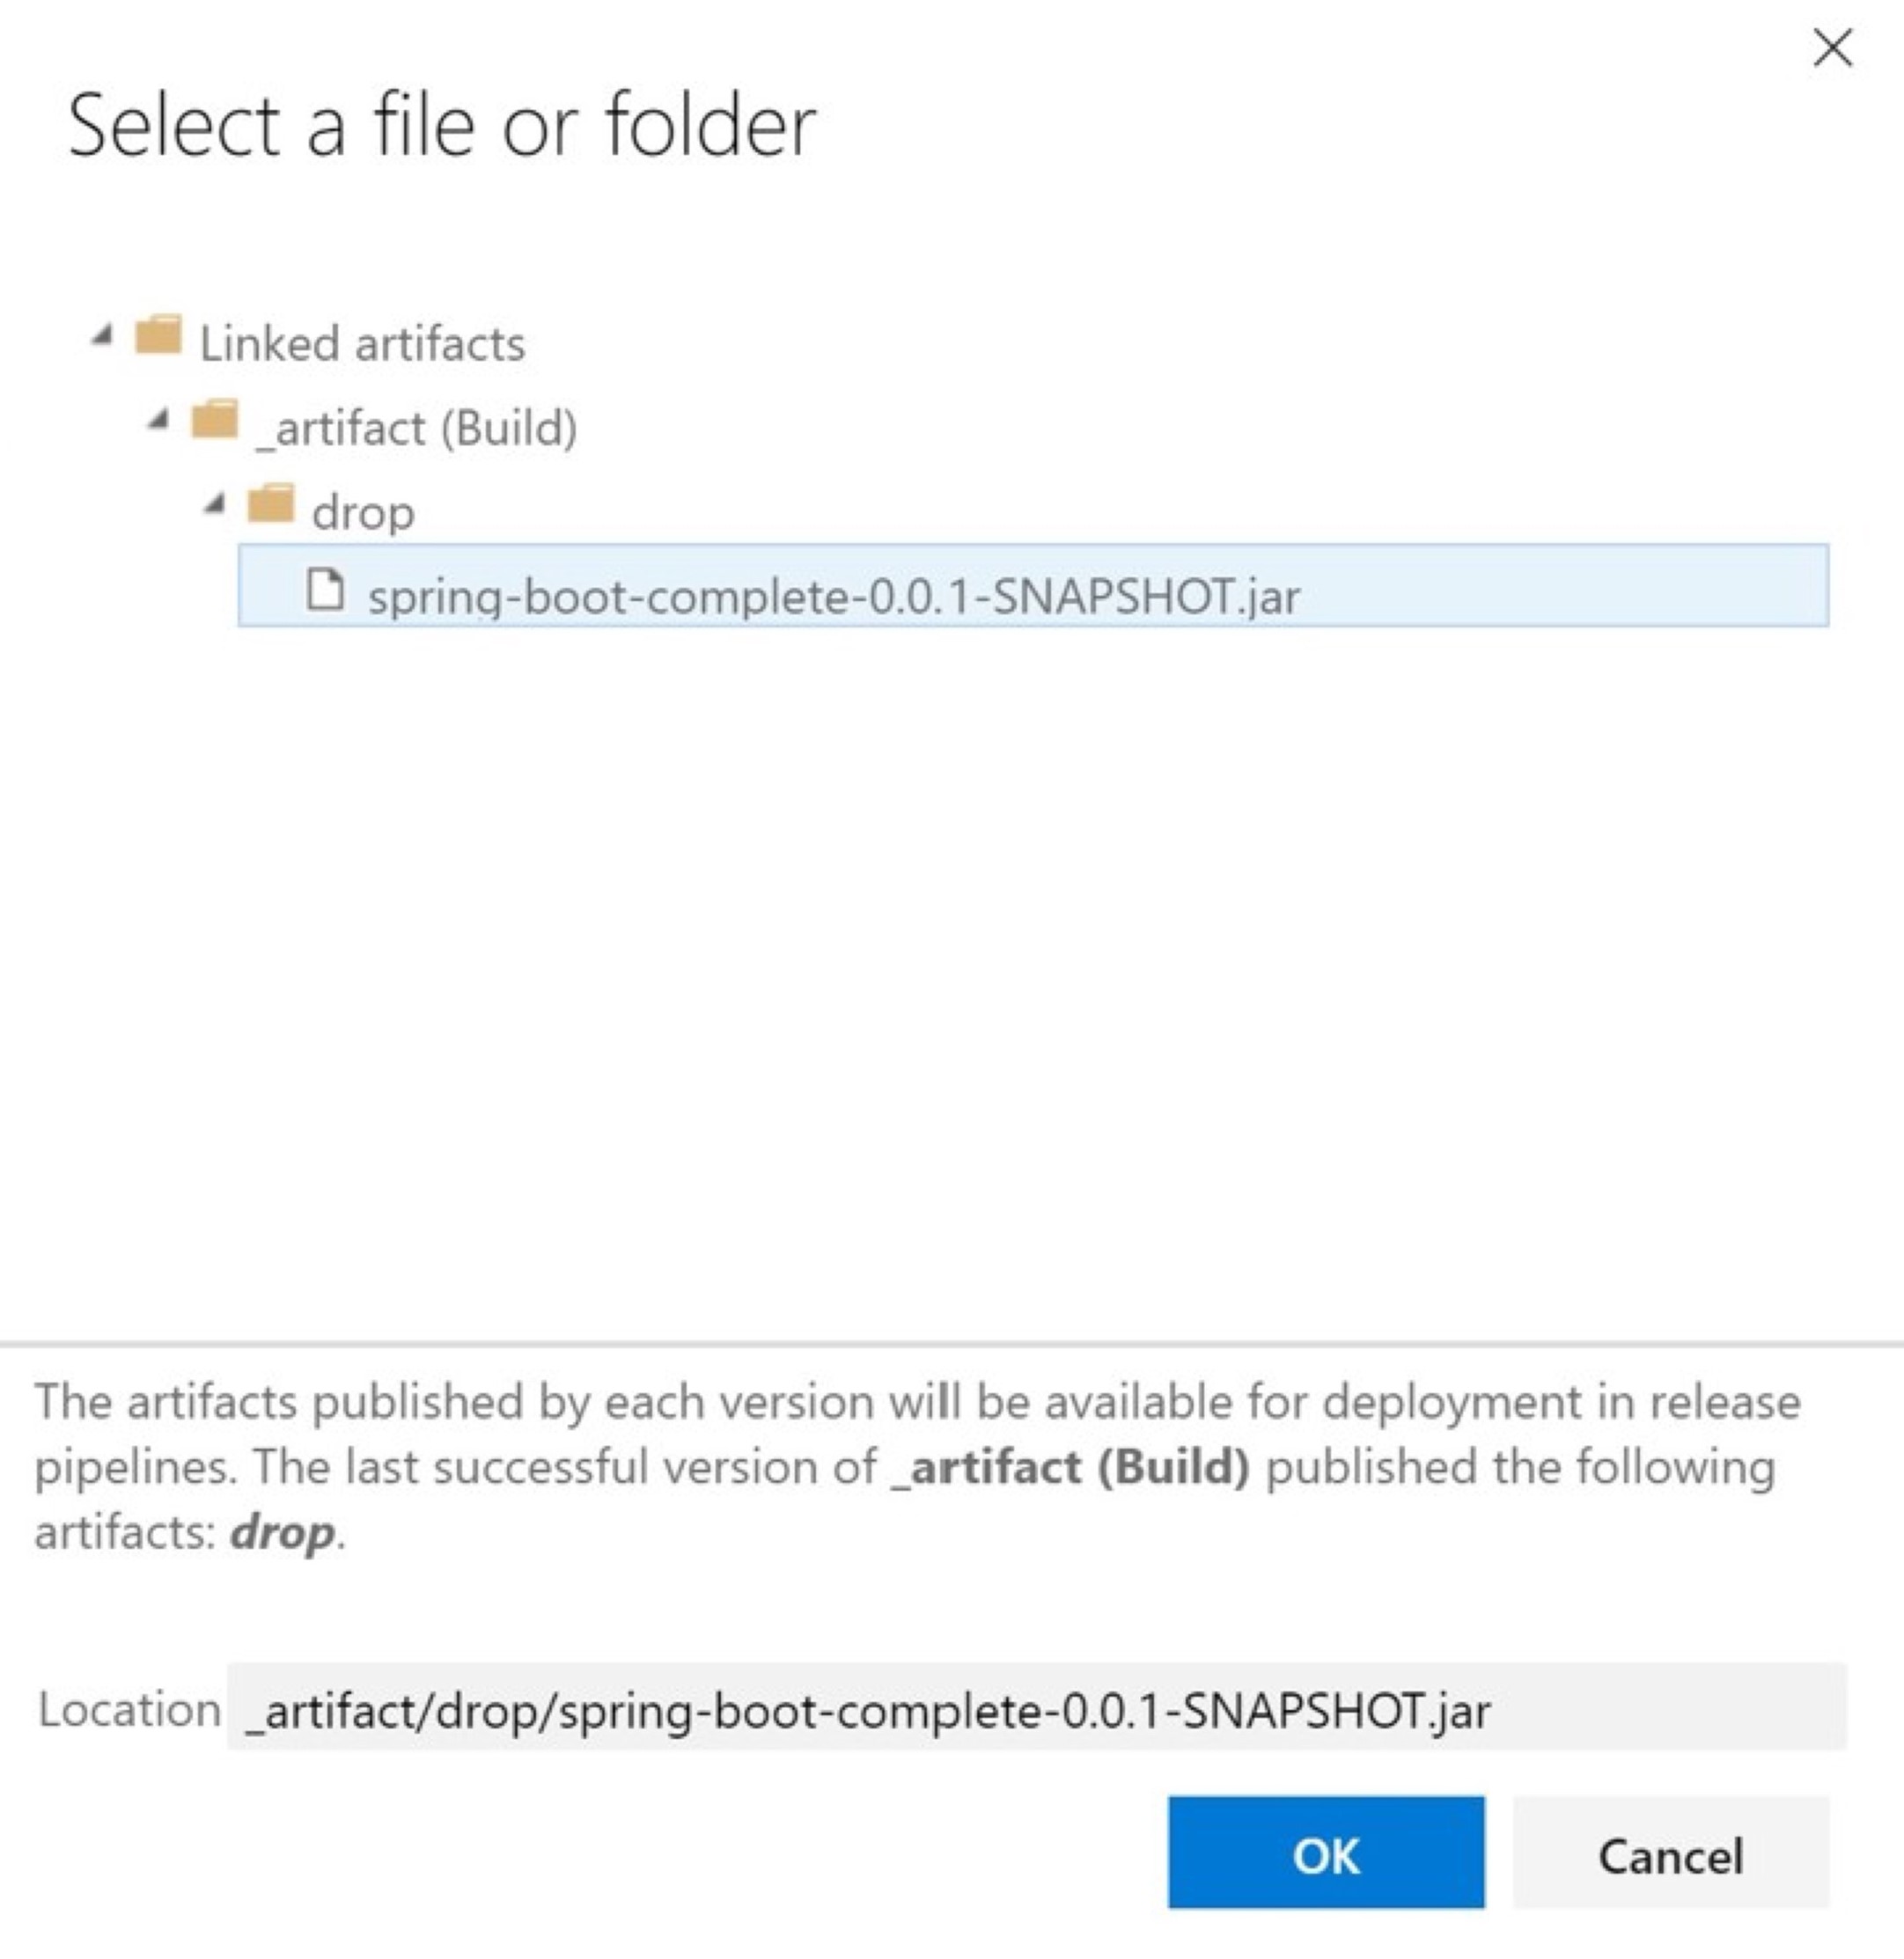
Navigate to the Azure Spring Apps Deploy task in Stage 1, then select the ellipsis next to Package or folder.
Select spring-boot-complete-0.0.1-SNAPSHOT.jar in the dialog, then select OK.
Select the + to add another Azure Spring Apps task to the job.
Change the action to Set Production Deployment.
Select Save, then Create release to automatically start the deployment.


To verify your app's current release status, select View release. After this task is finished, visit the Azure portal to verify your app status.
Deploy from source
To deploy directly to Azure without a separate build step, use the following pipeline template.
- task: AzureSpringCloud@0
  inputs:
    azureSubscription: '<your service connection name>'
    Action: 'Deploy'
    AzureSpringCloud: <your Azure Spring Apps service>
    AppName: <app-name>
    DeploymentType: 'Artifacts'
    UseStagingDeployment: false
    DeploymentName: 'default'
    Package: $(Build.SourcesDirectory)
Deploy from custom image
To deploy directly from an existing container image, use the following pipeline template.
- task: AzureSpringCloud@0
  inputs:
    azureSubscription: '<your service connection name>'
    Action: 'Deploy'
    AzureSpringCloud: '<your Azure Spring Apps service>'
    AppName: '<app-name>'
    DeploymentType: 'CustomContainer'
    UseStagingDeployment: false
    DeploymentName: 'default'
    ContainerRegistry: 'docker.io'  # or your Azure Container Registry, e.g: 'contoso.azurecr.io'
    RegistryUsername: '$(username)'
    RegistryPassword: '$(password)'
    ContainerImage: '<your image tag>'
Deploy and specify a builder (Enterprise plan only)
If you're using the Azure Spring Apps Enterprise plan, you can also specify which builder to use for deploy actions using the builder option, as shown in the following example. For more information, see Use Tanzu Build Service.
- task: AzureSpringCloud@0
  inputs:
    azureSubscription: '<your-service-connection-name>'
    Action: 'Deploy'
    AzureSpringCloud: '<your-Azure-Spring-Apps-service-instance-name>'
    AppName: '<app-name>'
    UseStagingDeployment: false
    DeploymentName: 'default'
    Package: './target/your-result-jar.jar'
    Builder: '<your-Tanzu-Build-Service-Builder-resource>'