Deploy Azure Spring Apps in a virtual network
Note
Azure Spring Apps is the new name for the Azure Spring Cloud service. Although the service has a new name, you'll see the old name in some places for a while as we work to update assets such as screenshots, videos, and diagrams.
This article applies to: ✔️ Java ✔️ C#
This article applies to: ❌ Basic ✔️ Standard ✔️ Enterprise
This tutorial explains how to deploy an Azure Spring Apps instance in your virtual network. This deployment is sometimes called VNet injection.
The deployment enables:
- Isolation of Azure Spring Apps apps and service runtime from the internet on your corporate network.
- Azure Spring Apps interaction with systems in on-premises data centers or Azure services in other virtual networks.
- Empowerment of customers to control inbound and outbound network communications for Azure Spring Apps.
The following video describes how to secure Spring Boot applications using managed virtual networks.
Note
You can select your Azure virtual network only when you create a new Azure Spring Apps service instance. You can't change to use another virtual network after Azure Spring Apps has been created.
Prerequisites
Register the Azure Spring Apps resource provider Microsoft.AppPlatform and Microsoft.ContainerService according to the instructions in Register resource provider on Azure portal or by running the following Azure CLI command:
az provider register --namespace Microsoft.AppPlatform
az provider register --namespace Microsoft.ContainerService
Virtual network requirements
The virtual network to which you deploy your Azure Spring Apps instance must meet the following requirements:
- Location: The virtual network must reside in the same location as the Azure Spring Apps instance.
- Subscription: The virtual network must be in the same subscription as the Azure Spring Apps instance.
- Subnets: The virtual network must include two subnets dedicated to an Azure Spring Apps instance:
- One for the service runtime.
- One for your Spring applications.
- There's a one-to-one relationship between these subnets and an Azure Spring Apps instance. Use a new subnet for each service instance you deploy. Each subnet can only include a single service instance.
- Address space: CIDR blocks up to /28 for both the service runtime subnet and the Spring applications subnet.
- Route table: By default the subnets don't need existing route tables associated. You can bring your own route table.
Use the following steps to set up the virtual network to contain the Azure Spring Apps instance.
Create a virtual network
If you already have a virtual network to host an Azure Spring Apps instance, skip steps 1, 2, and 3. You can start from step 4 to prepare subnets for the virtual network.
On the Azure portal menu, select Create a resource. From Azure Marketplace, select Networking > Virtual network.
In the Create virtual network dialog box, enter or select the following information:
Setting Value Subscription Select your subscription. Resource group Select your resource group, or create a new one. Name Enter azure-spring-apps-vnet. Location Select East US. Select Next: IP Addresses.
For the IPv4 address space, enter 10.1.0.0/16.
Select Add subnet. Then enter service-runtime-subnet for Subnet name and enter 10.1.0.0/24 for Subnet address range. Then select Add.
Select Add subnet again, and then enter the subnet name and subnet address range. For example, enter apps-subnet and 10.1.1.0/24. Then select Add.
Select Review + create. Leave the rest as defaults, and select Create.
Grant service permission to the virtual network
This section shows you to grant Azure Spring Apps the Owner permission on your virtual network. This permission enables you to grant a dedicated and dynamic service principal on the virtual network for further deployment and maintenance.
Note
The minimal required permissions are User Access Administrator and Network Contributor. You can grant role assignments to both of them if you can't grant Owner permission.
If you're using your own route table or a user defined route feature, you also need to grant Azure Spring Apps the same role assignments to your route tables. For more information, see the Bring your own route table section and Control egress traffic for an Azure Spring Apps instance.
Use the following steps to grant permission:
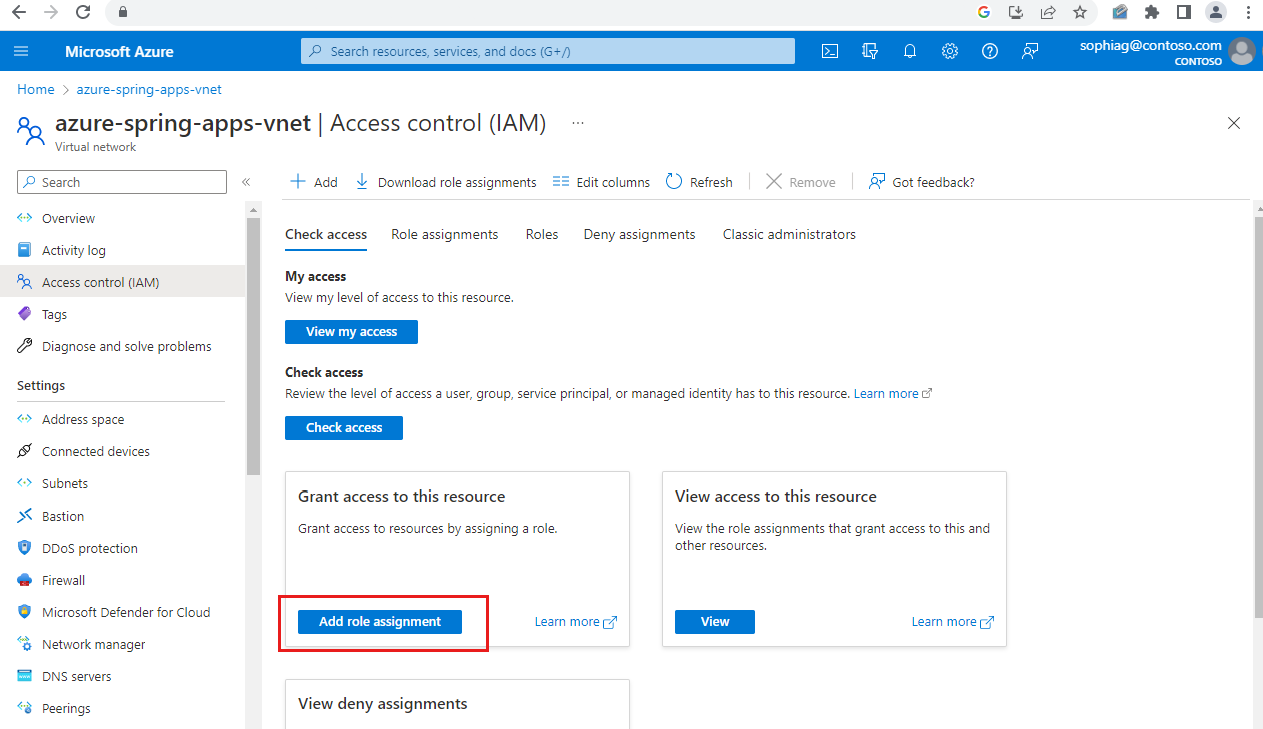
Select the virtual network
azure-spring-apps-vnetyou previously created.Select Access control (IAM), and then select Add > Add role assignment.
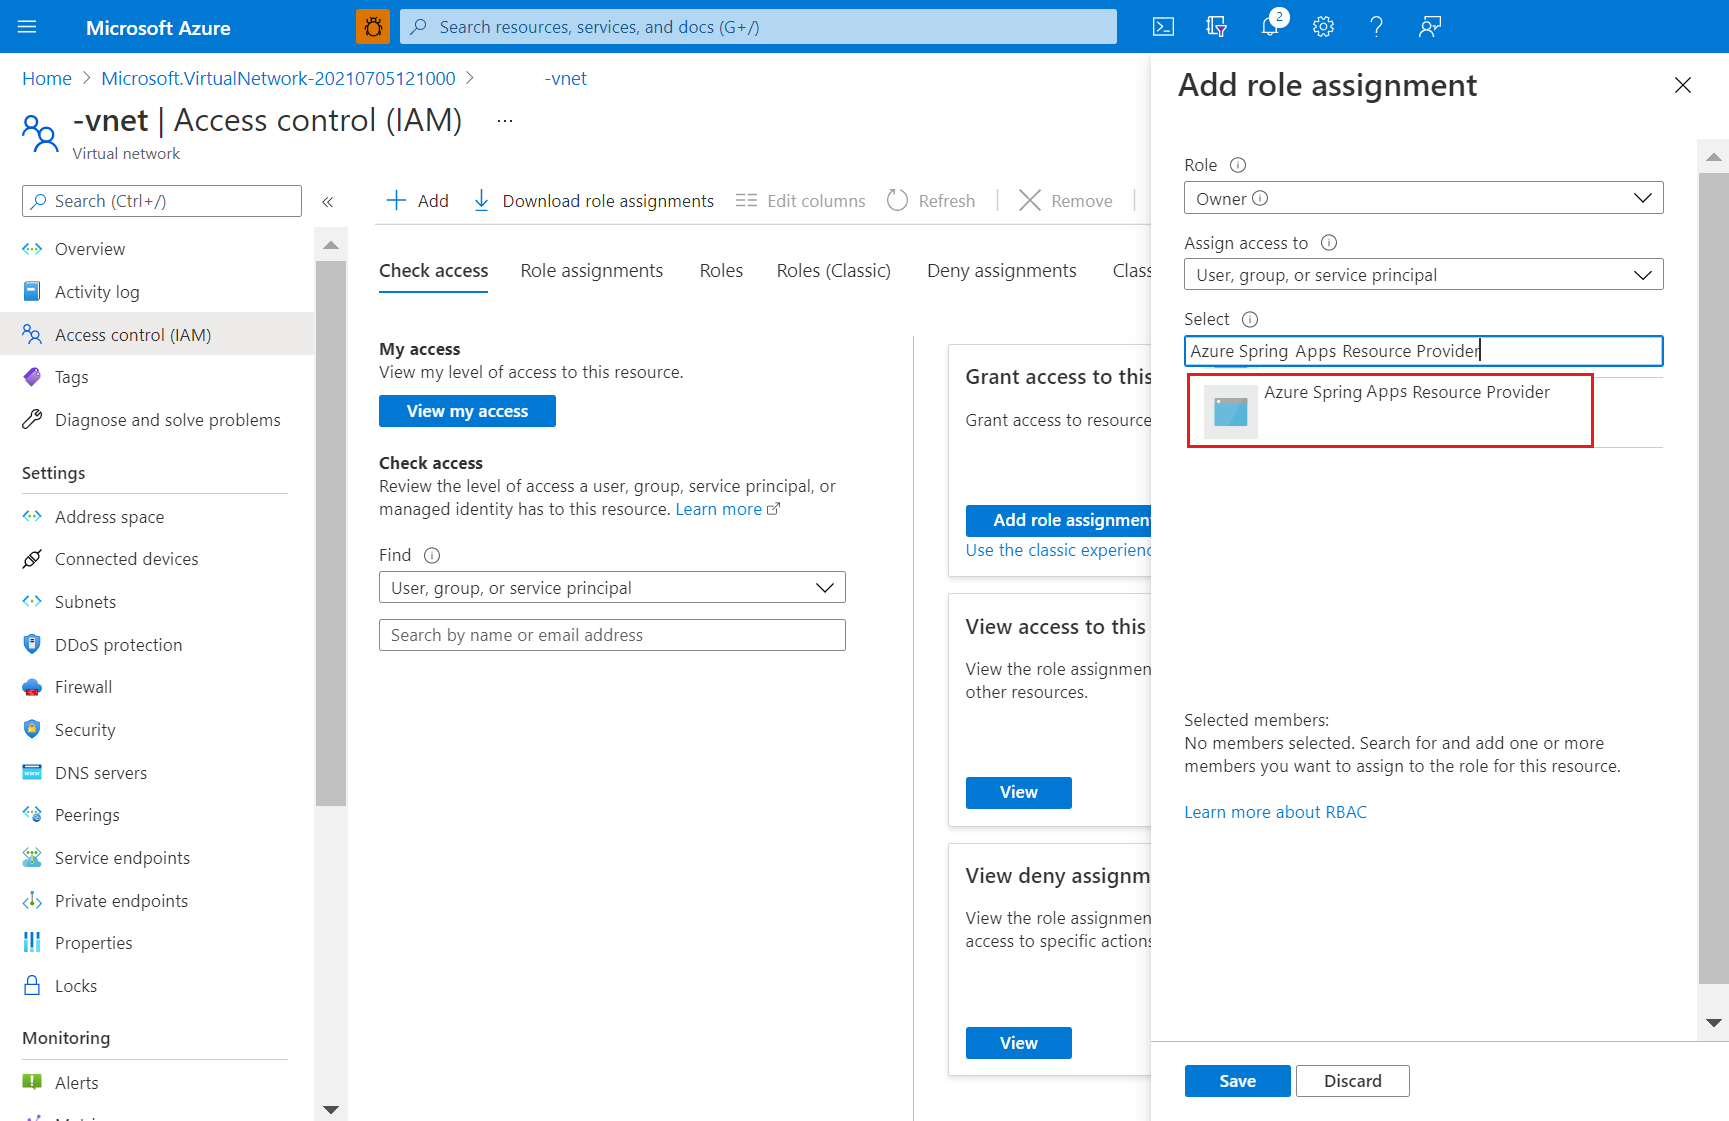
Assign the
Ownerrole to the Azure Spring Apps Resource Provider. For more information, see Assign Azure roles using the Azure portal.Note
If you don't find Azure Spring Apps Resource Provider, search for Azure Spring Cloud Resource Provider.


Deploy an Azure Spring Apps instance
Use the following steps to deploy an Azure Spring Apps instance in the virtual network:
Open the Azure portal.
In the top search box, search for Azure Spring Apps. Select Azure Spring Apps from the result.
On the Azure Spring Apps page, select Add.
Fill out the form on the Azure Spring Apps Create page.
Select the same resource group and region as the virtual network.
For Name under Service Details, select azure-spring-apps-vnet.
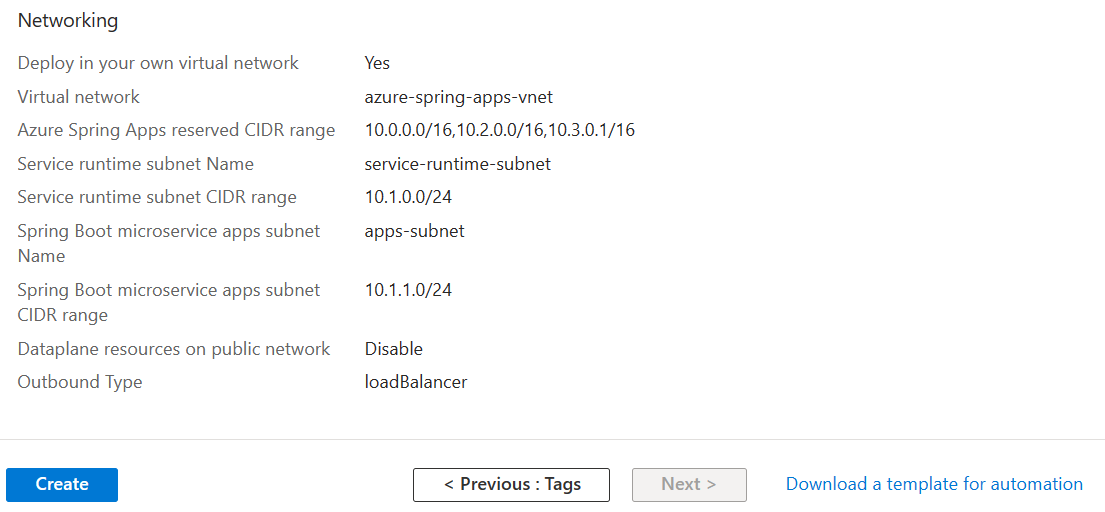
Select the Networking tab, and select the following values:
Setting Value Deploy in your own virtual network Select Yes. Virtual network Select azure-spring-apps-vnet. Service runtime subnet Select service-runtime-subnet. Spring Boot microservice apps subnet Select apps-subnet. 
Select Review and create.
Verify your specifications, and select Create.
After the deployment, two more resource groups are created in your subscription to host the network resources for the Azure Spring Apps instance. Go to Home, and then select Resource groups from the top menu items to find the following new resource groups.
The resource group named as ap-svc-rt_{service instance name}_{service instance region} contains network resources for the service runtime of the service instance.

The resource group named as ap-app_{service instance name}_{service instance region} contains network resources for your Spring applications of the service instance.

Those network resources are connected to your virtual network created in the preceding image.

Important
The resource groups are fully managed by the Azure Spring Apps service. Do not manually delete or modify any resource inside.
Using smaller subnet ranges
This table shows the maximum number of app instances Azure Spring Apps supports using smaller subnet ranges.
| App subnet CIDR | Total IPs | Available IPs | Maximum app instances |
|---|---|---|---|
| /28 | 16 | 8 | App with 0.5 core: 192 |
| /27 | 32 | 24 | App with 0.5 core: 456 |
| /26 | 64 | 56 | App with 0.5 core: 500 |
| /25 | 128 | 120 | App with 0.5 core: 500 |
| /24 | 256 | 248 | App with 0.5 core: 500 |
For subnets, Azure reserves five IP addresses, and Azure Spring Apps requires at least three IP addresses. At least eight IP addresses are required, so /29 and /30 are nonoperational.
For a service runtime subnet, the minimum size is /28.
Note
A small subnet range impacts the underlying resource you can use for system components like ingress controller. Azure Spring Apps uses an underlying ingress controller to handle application traffic management. The number of ingress controller instances automatically increases as application traffic increases. Reserve a larger virtual network subnet IP range if application traffic could increase in the future. You typically reserve one IP addresses for traffic of 10000 requests per second.
Bring your own route table
Azure Spring Apps supports using existing subnets and route tables.
If your custom subnets don't contain route tables, Azure Spring Apps creates them for each of the subnets and adds rules to them throughout the instance lifecycle. If your custom subnets contain route tables, Azure Spring Apps acknowledges the existing route tables during instance operations and adds/updates and/or rules accordingly for operations.
Warning
Custom rules can be added to the custom route tables and updated. However, rules are added by Azure Spring Apps and these must not be updated or removed. Rules such as 0.0.0.0/0 must always exist on a given route table and map to the target of your internet gateway, such as an NVA or other egress gateway. Use caution when updating rules when only your custom rules are being modified.
Route table requirements
The route tables to which your custom vnet is associated must meet the following requirements:
- You can associate your Azure route tables with your vnet only when you create a new Azure Spring Apps service instance. You can't change to use another route table after Azure Spring Apps has been created.
- Both the Spring application subnet and the service runtime subnet must associate with different route tables or neither of them.
- Permissions must be assigned before instance creation. Be sure to grant Azure Spring Apps Resource Provider the
Ownerpermission (orUser Access AdministratorandNetwork Contributorpermissions) on your route tables. - You can't update the associated route table resource after cluster creation. While you can't update the route table resource, you can modify custom rules on the route table.
- You can't reuse a route table with multiple instances due to potential conflicting routing rules.
Using Custom DNS Servers
Azure Spring Apps supports using custom DNS servers in your virtual network.
If you don't specify custom DNS servers in your DNS Server Virtual Network setting, Azure Spring Apps will, by default, use the Azure DNS to resolve IP addresses. If your virtual network is configured with custom DNS settings, add Azure DNS IP 168.63.129.16 as the upstream DNS server in the custom DNS server. Azure DNS can resolve IP addresses for all the public FQDNs mentioned in Customer responsibilities running Azure Spring Apps in a virtual network. It can also resolve IP address for *.svc.private.azuremicroservices.io in your virtual network.
If your custom DNS server can't add Azure DNS IP 168.63.129.16 as the upstream DNS server, use the following steps:
- Ensure that your custom DNS server can resolve IP addresses for all the public FQDNs. For more information, see Customer responsibilities running Azure Spring Apps in a virtual network.
- Add the DNS record
*.svc.private.azuremicroservices.ioto the IP of your application. For more information, see the Find the IP for your application section of Access an app in Azure Spring Apps in a virtual network.
Next steps
Feedback
Coming soon: Throughout 2024 we will be phasing out GitHub Issues as the feedback mechanism for content and replacing it with a new feedback system. For more information see: https://aka.ms/ContentUserFeedback.
Submit and view feedback for