Azure Spring Apps is the new name for the Azure Spring Cloud service. Although the service has a new name, you'll see the old name in some places for a while as we work to update assets such as screenshots, videos, and diagrams.
This article applies to: ✔️ Standard consumption and dedicated (Preview) ✔️ Basic/Standard ✔️ Enterprise
This article explains how to deploy a Spring Boot event-driven application to Azure Spring Apps.
The sample project is an event-driven application that subscribes to a Service Bus queue named lower-case, and then handles the message and sends another message to another queue named upper-case. To make the app simple, message processing just converts the message to uppercase. The following diagram depicts this process:
This article provides the following options for deploying to Azure Spring Apps:
The Azure portal option is the easiest and the fastest way to create resources and deploy applications with a single click. This option is suitable for Spring developers who want to quickly deploy applications to Azure cloud services.
The Azure portal + Maven plugin option is a more conventional way to create resources and deploy applications step by step. This option is suitable for Spring developers using Azure cloud services for the first time.
The Azure Developer CLI option is a more efficient way to automatically create resources and deploy applications through simple commands. The Azure Developer CLI uses a template to provision the Azure resources needed and to deploy the application code. This option is suitable for Spring developers who are familiar with Azure cloud services.
The Azure portal option is the easiest and fastest way to create resources and deploy applications with a single click. This option is suitable for Spring developers who want to quickly deploy applications to Azure cloud services.
The Azure portal + Maven plugin option is a more conventional way to create resources and deploy applications step by step. This option is suitable for Spring developers using Azure cloud services for the first time.
The Azure CLI option uses a powerful command line tool to manage Azure resources. This option is suitable for Spring developers who are familiar with Azure cloud services.
The Deploy to Azure button in the next section launches an Azure portal experience that downloads a JAR package from the ASA-Samples-Web-Application releases page on GitHub. No local preparation steps are needed.
Use the following steps to prepare the sample locally:
The sample project is ready on GitHub. Clone the sample project by using the following command:
Build the sample project by using the following commands:
cd ASA-Samples-Event-Driven-Application
./mvnw clean package
Use the following steps to prepare the sample locally. These steps use AZD to initialize the event-driven application from the Azure Developer CLI templates.
Open a terminal, create a new, empty folder, then navigate to it.
Use the following command to initialize the project:
The following list describes the command interactions:
Enter a new environment name: Provide an environment name, which is used as a suffix for the resource group that is created to hold all Azure resources. This name should be unique within your Azure subscription.
The console outputs messages similar to the following example:
Initializing a new project (azd init)

(✓) Done: Initialized git repository
(✓) Done: Downloading template code to: <your-local-path>

Enter a new environment name: <your-env-name>

SUCCESS: New project initialized!
You can view the template code in your directory: <your-local-path>
Learn more about running 3rd party code on our DevHub: https://aka.ms/azd-third-party-code-notice
3. Prepare the cloud environment
The main resources you need to run this sample are an Azure Spring Apps instance, an Azure Key Vault, and an Azure Service Bus instance. Use the following steps to create these resources.
This section uses a Deploy to Azure button to launch a deployment experience in the Azure portal. This experience uses an ARM template to create Azure resources.
3.1. Sign in to the Azure portal
Go to the Azure portal and enter your credentials to sign in to the portal. The default view is your service dashboard.
3.2. Create Azure resources
Use the following steps to create all the Azure resources that the app depends on:
Select the following Deploy to Azure button to launch the deployment experience in the Azure portal:
Fill out the form on the Basics tab. Use the following table as a guide for completing the form:
Setting
Suggested value
Description
Subscription
Your subscription name.
The Azure subscription that you want to use for your server. If you have multiple subscriptions, choose the subscription in which you'd like to be billed for the resource.
Resource group
myresourcegroup
A new resource group name or an existing one from your subscription.
Region
The region closest to your users.
The region is used to create the resource group.
Select Review and Create to review your selections. Then, select Create to deploy the app to Azure Spring Apps.
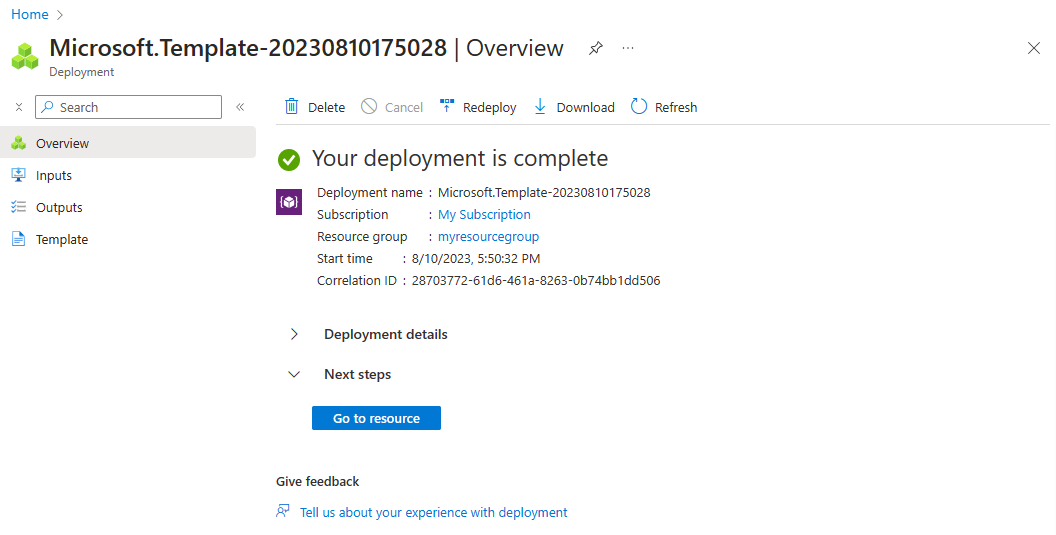
On the toolbar, select the Notifications icon (a bell) to monitor the deployment process. After the deployment finishes, you can select Pin to dashboard, which creates a tile for this service on your Azure portal dashboard as a shortcut to the service's Overview page. Select Go to resource to open the service's Overview page.
3.1. Sign in to the Azure portal
Open your web browser and go to the Azure portal. Enter your credentials to sign in to the portal. The default view is your service dashboard.
3.2. Create a Service Bus instance
Use the following steps to create a Service Bus instance:
Select Create a resource in the corner of the Azure portal.
In the Search services and marketplace search box, search for service bus.
On the Service Bus section, select Create.
Fill out the form on the Basics tab. Use the following table as a guide for completing the form:
Setting
Suggested value
Description
Subscription
Your subscription name.
The Azure subscription that you want to use for your server. If you have multiple subscriptions, choose the subscription in which you'd like to be billed for the resource.
Resource group
myresourcegroup
A new resource group name or an existing one from your subscription.
Namespace name
my-srvbus
A unique name that identifies your Service Bus service.
Location
The location closest to your users.
The location that is closest to your users.
Hosting options and plans
Basic
The pricing plan determines the resource and cost associated with your instance.
Select Review and Create to review the creation parameters. Then, select Create to finish creating the Service Bus instance.
On the toolbar, select the Notifications icon (a bell) to monitor the deployment process. After the deployment finishes, you can select Pin to dashboard, which creates a tile for this service on your Azure portal dashboard as a shortcut to the service's Overview page. Select Go to resource to open the service's Overview page.
Select Go to resource to go to the Service Bus Namespace page.
Select Shared access policies on the navigation menu and then select RootManageSharedAccessKey.
On the SAS Policy: RootManageSharedAccessKey page, copy and save the Primary Connection String value, which is used to set up connections from the Spring app.
Select Queues on the navigation menu and then select Queue.
On the Create Queue page, enter lower-case for Name and then select Create.
Create another queue by repeating the previous step using upper-case for Name.
3.3. Create an Azure Spring Apps instance
Use the following steps to create the service instance:
Select Create a resource in the corner of the portal.
Select Compute > Azure Spring Apps.
Fill out the Standard consumption & dedicated (preview) form with the following information:
Setting
Suggested value
Description
Subscription
Your subscription name
The Azure subscription that you want to use for your server. If you have multiple subscriptions, choose the subscription in which you'd like to be billed for the resource.
Resource group
myresourcegroup
A new resource group name or an existing one from your subscription.
Name
myasa
A unique name that identifies your Azure Spring Apps service. The name must be between 4 and 32 characters long and can contain only lowercase letters, numbers, and hyphens. The first character of the service name must be a letter and the last character must be either a letter or a number.
Plan
Standard consumption & dedicated (preview)
The pricing plan determines the resources and cost associated with your instance.
Region
The region closest to your users
The location that is closest to your users.
Container Apps Environment
myacaenv
The environment is a secure boundary around one or more container apps that can communicate with each other and share a virtual network, logging, and Dapr configuration.
(Optional) Use the following steps to create a Container Apps Environment:
Fill out the Basics tab with the following information:
Environment name: myacaenv
Plan: Consumption
Zone redundancy: Disabled
Select Create to create the Container Apps Environment.
Fill out the Basics tab with the following information:
Environment name: myacaenv
Plan: (Preview) Consumption and Dedicated workload profiles
Zone redundancy: Disabled
Select the Workload profiles (Preview) tab, and then select Add workload profile to add a workload profile.
On the Add workload profile (Preview) page, add the following information:
Workload profile name: my-wlp
Workload profile size: Select Dedicated-D4
Autoscaling instance count range: Select 3 and 5
Select Add. This selection takes you back to the Add workload profile(Preview) page. Select my-wlp, and then select Create to create the Container Apps Environment.
Select Review and Create to review your selections. Select Create to provision the Azure Spring Apps instance.
On the toolbar, select the Notifications icon (a bell) to monitor the deployment process. After the deployment is done, you can select Pin to dashboard, which creates a tile for this service on your Azure portal dashboard as a shortcut to the service's Overview page. Selecting Go to resource opens the service's Overview page.
Select Go to resource to go to the Azure Spring Apps Overview page.
Select Apps in the left navigational menu, and then select Create App.
On the Create App page, enter simple-event-driven-app for App name, and then select Use quick start sample app to create app.
Select Create to finish creating the Azure Spring Apps instance.
After the app creation, select the app name you created in the previous step.
Select Configuration from the navigation pane, and then configure the following property on the Environment variables tab.
SERVICE_BUS_CONNECTION_STRING: Enter the Service Bus primary connection string.
Select Save to save the connection properties.
Use the following command to log in Azure with OAuth2. Ignore this step if you already logged in.
azd auth login
The console outputs messages similar to the following example:
Logged in to Azure.
Use the following command to provision the template's infrastructure to Azure:
azd provision
The following list describes the command interactions:
Please select an Azure Subscription to use: Use arrows to move, type to filter, and then press Enter.
Please select an Azure location to use: Use arrows to move, type to filter, and then press Enter.
The console outputs messages similar to the following example:
SUCCESS: Your application was provisioned in Azure in xx minutes xx seconds.
You can view the resources created under the resource group rg-<your-environment-name>-<random-string>> in Azure Portal:
https://portal.azure.com/#@/resource/subscriptions/<your-subscription-id>/resourceGroups/rg-<your-environment-name>/overview
Note
This command may take a while to complete. You see a progress indicator as it provisions Azure resources.
The Deploy to Azure button in the previous section launches an Azure portal experience that includes application deployment, so nothing else is needed.
The following list describes the command interactions:
OAuth2 login: You need to authorize the sign in to Azure based on the OAuth2 protocol.
Select subscription: Select the subscription list number of the Azure Spring Apps instance you created, which defaults to the first subscription in the list. If you use the default number, press Enter directly.
Use existing Azure Spring Apps in Azure: Press y to use the existing Azure Spring Apps instance.
Select Azure Spring Apps for deployment: Select the list number of the Azure Spring Apps instance you created. If you use the default number, press Enter directly.
Use existing app in Azure Spring Apps <your-instance-name>: Press y to use the app created.
Confirm to save all the above configurations: Press y. If you press n, the configuration isn't saved in the POM files.
Use the following command to deploy the app:
./mvnw azure-spring-apps:deploy
The following list describes the command interaction:
OAuth2 login: You need to authorize the sign in to Azure based on the OAuth2 protocol.
After the command is executed, you can see from the following log messages that the deployment was successful:
[INFO] Deployment(default) is successfully created
[INFO] Starting Spring App after deploying artifacts...
[INFO] Deployment Status: Running
Use the following steps to use AZD to package the app, provision the Azure resources required by the web application, and then deploy to Azure Spring Apps.
Use the following command to package a deployable copy of your application:
azd package
The console outputs messages similar to the following example:
SUCCESS: Your application was packaged for Azure in xx seconds.
Use the following command to deploy the application code to those newly provisioned resources:
azd deploy
The console outputs messages similar to the following example:
Deploying services (azd deploy)

(✓) Done: Deploying service simple-event-driven-app
- No endpoints were found

SUCCESS: Your application was deployed to Azure in xx minutes xx seconds.
You can view the resources created under the resource group rg-<your-environment-name> in Azure Portal:
https://portal.azure.com/#@/resource/subscriptions/<your-subscription-id>/resourceGroups/rg-<your-environment-name>/overview
Note
You can also use azd up to combine the previous three commands: azd provision (provisions Azure resources), azd package (packages a deployable copy of your application), and azd deploy (deploys application code). For more information, see Azure-Samples/ASA-Samples-Event-Driven-Application.
The Deploy to Azure button in the next section launches an Azure portal experience that downloads a JAR package from the ASA-Samples-Web-Application releases page on GitHub. No local preparation steps are needed.
Use the following steps to prepare the sample locally:
The sample project is ready on GitHub. Clone the sample project by using the following command:
Build the sample project by using the following commands:
cd ASA-Samples-Event-Driven-Application
./mvnw clean package
Use the following steps to prepare the sample locally. These steps use AZD to initialize the event-driven application from the Azure Developer CLI templates.
Open a terminal, create a new, empty folder, then navigate to it.
Use the following command to initialize the project:
The following list describes the command interactions:
Enter a new environment name: Provide an environment name, which is used as a suffix for the resource group that is created to hold all Azure resources. This name should be unique within your Azure subscription.
The console outputs messages similar to the following example:
Initializing a new project (azd init)

(✓) Done: Initialized git repository
(✓) Done: Downloading template code to: <your-local-path>

Enter a new environment name: <your-env-name>

SUCCESS: New project initialized!
You can view the template code in your directory: <your-local-path>
Learn more about running 3rd party code on our DevHub: https://aka.ms/azd-third-party-code-notice
3. Prepare the cloud environment
The main resources you need to run this sample are an Azure Spring Apps instance, an Azure Key Vault instance, and an Azure Service Bus instance. Use the following steps to create these resources.
This section uses a Deploy to Azure button to launch a deployment experience in the Azure portal. This experience uses an ARM template to create Azure resources.
3.1. Sign in to the Azure portal
Go to the Azure portal and enter your credentials to sign in to the portal. The default view is your service dashboard.
3.2. Create Azure resources
Use the following steps to create all the Azure resources that the app depends on:
Select the following Deploy to Azure button to launch the deployment experience in the Azure portal:
Fill out the form on the Basics tab. Use the following table as a guide for completing the form:
Setting
Suggested value
Description
Subscription
Your subscription name.
The Azure subscription that you want to use for your server. If you have multiple subscriptions, choose the subscription in which you'd like to be billed for the resource.
Resource group
myresourcegroup
A new resource group name or an existing one from your subscription.
Region
The region closest to your users.
The region is used to create the resource group.
Select Review and Create to review your selections. Then, select Create to deploy the app to Azure Spring Apps.
On the toolbar, select the Notifications icon (a bell) to monitor the deployment process. After the deployment finishes, you can select Pin to dashboard, which creates a tile for this service on your Azure portal dashboard as a shortcut to the service's Overview page. Select Go to resource to open the service's Overview page.
3.1. Sign in to the Azure portal
Open your web browser and go to the Azure portal. Enter your credentials to sign in to the portal. The default view is your service dashboard.
3.2. Create a Service Bus instance
Use the following steps to create a Service Bus instance:
Select Create a resource in the corner of the Azure portal.
In the Search services and marketplace search box, search for service bus.
On the Service Bus section, select Create.
Fill out the form on the Basics tab. Use the following table as a guide for completing the form:
Setting
Suggested value
Description
Subscription
Your subscription name.
The Azure subscription that you want to use for your server. If you have multiple subscriptions, choose the subscription in which you'd like to be billed for the resource.
Resource group
myresourcegroup
A new resource group name or an existing one from your subscription.
Namespace name
my-srvbus
A unique name that identifies your Service Bus service.
Location
The location closest to your users.
The location that is closest to your users.
Hosting options and plans
Basic
The pricing plan determines the resource and cost associated with your instance.
Select Review and Create to review the creation parameters. Then, select Create to finish creating the Service Bus instance.
On the toolbar, select the Notifications icon (a bell) to monitor the deployment process. After the deployment finishes, you can select Pin to dashboard, which creates a tile for this service on your Azure portal dashboard as a shortcut to the service's Overview page. Select Go to resource to open the service's Overview page.
Select Go to resource to go to the Service Bus Namespace page.
Select Shared access policies on the navigation menu and then select RootManageSharedAccessKey.
On the SAS Policy: RootManageSharedAccessKey page, copy and save the Primary Connection String value, which is used to set up connections from the Spring app.
Select Queues on the navigation menu and then select Queue.
On the Create Queue page, enter lower-case for Name and then select Create.
Create another queue by repeating the previous step using upper-case for Name.
3.3. Create an Azure Spring Apps instance
Use the following steps to create an Azure Spring Apps instance:
Select Create a resource in the corner of the Azure portal.
Select Compute > Azure Spring Apps.
Fill out the Basics form with the following information:
Use the following table as a guide for completing the form. The recommended Plan is Standard.
Setting
Suggested value
Description
Subscription
Your subscription name
The Azure subscription that you want to use for your server. If you have multiple subscriptions, choose the subscription in which you'd like to be billed for the resource.
Resource group
myresourcegroup
A new resource group name or an existing one from your subscription.
Name
myasa
A unique name that identifies your Azure Spring Apps service. The name must be between 4 and 32 characters long and can contain only lowercase letters, numbers, and hyphens. The first character of the service name must be a letter and the last character must be either a letter or a number.
Plan
Standard
The plan determines the resource and cost associated with your instance.
Region
The region closest to your users
The location that is closest to your users.
Zone Redundant
Unchecked
Whether to create your Azure Spring Apps service in an Azure availability zone, it could only be supported in several regions at the moment.
Select Review and Create to review your selections. Select Create to provision the Azure Spring Apps instance.
On the toolbar, select the Notifications icon (a bell) to monitor the deployment process. Once the deployment is done, you can select Pin to dashboard, which creates a tile for this service on your Azure portal dashboard as a shortcut to the service's Overview page. Selecting Go to resource opens the service's Overview page.
3.4. Connect app instance to Service Bus instance
Go to your Azure Spring Apps instance in the Azure portal.
Select Apps in the navigation menu, then select Create App.
On the Create App page, enter simple-event-driven-app for App name and select Java 17 for Runtime platform.
After the app creation, select the app name you created in the previous step.
On the Configuration page, select the Environment variables tab, enter SERVICE_BUS_CONNECTION_STRING for Key, paste the Service Bus connection string for Value, then select Save.
Use the following command to sign in to Azure with OAuth2. Ignore this step if you already logged in.
azd auth login
The console outputs messages similar to the following example:
Logged in to Azure.
Use the following command to set the template using the standard plan:
azd env set PLAN standard
Use the following command to package a deployable copy of your application, provision the template's infrastructure to Azure, and deploy the application code to those newly provisioned resources:
azd provision
The following list describes the command interactions:
Select an Azure Subscription to use: Use arrows to move, type to filter, then press Enter.
Select an Azure location to use: Use arrows to move, type to filter, then press Enter.
The console outputs messages similar to the following example:
SUCCESS: Your application was provisioned in Azure in xx minutes xx seconds.
You can view the resources created under the resource group rg-<your-environment-name> in Azure Portal:
https://portal.azure.com/#@/resource/subscriptions/<your-subscription-id>/resourceGroups/rg-<your-environment-name>/overview
Note
This command may take a while to complete. You're shown a progress indicator as it provisions Azure resources.
The Deploy to Azure button in the previous section launches an Azure portal experience that includes application deployment, so nothing else is needed.
The following list describes the command interactions:
OAuth2 login: You need to authorize the sign in to Azure based on the OAuth2 protocol.
Select subscription: Select the subscription list number of the Azure Spring Apps instance you created, which defaults to the first subscription in the list. If you use the default number, press Enter directly.
Use existing Azure Spring Apps in Azure: Press y to use the existing Azure Spring Apps instance.
Select Azure Spring Apps for deployment: Select the list number of the Azure Spring Apps instance you created. If you use the default number, press Enter directly.
Use existing app in Azure Spring Apps <your-instance-name>: Press y to use the app created.
Confirm to save all the above configurations: Press y. If you press n, the configuration isn't saved in the POM files.
Use the following command to deploy the app:
./mvnw azure-spring-apps:deploy
The following list describes the command interaction:
OAuth2 login: You need to authorize the sign in to Azure based on the OAuth2 protocol.
After the command is executed, you can see from the following log messages that the deployment was successful:
[INFO] Deployment(default) is successfully created
[INFO] Starting Spring App after deploying artifacts...
[INFO] Deployment Status: Running
Use the following steps to use AZD to package the app, provision the Azure resources required by the web application, and then deploy to Azure Spring Apps.
Use the following command to package a deployable copy of your application:
azd package
The console outputs messages similar to the following example:
SUCCESS: Your application was packaged for Azure in xx seconds.
Use the following command to deploy the application code to those newly provisioned resources:
azd deploy
The console outputs messages similar to the following example:
Deploying services (azd deploy)

(✓) Done: Deploying service simple-event-driven-app
- No endpoints were found

SUCCESS: Your application was deployed to Azure in xx minutes xx seconds.
You can view the resources created under the resource group rg-<your-environment-name> in Azure Portal:
https://portal.azure.com/#@/resource/subscriptions/<your-subscription-id>/resourceGroups/rg-<your-environment-name>/overview
Note
You can also use azd up to combine the previous three commands: azd provision (provisions Azure resources), azd package (packages a deployable copy of your application), and azd deploy (deploys application code). For more information, see Azure-Samples/ASA-Samples-Event-Driven-Application.
The Deploy to Azure button in the next section launches an Azure portal experience that downloads a JAR package from the ASA-Samples-Web-Application releases page on GitHub. No local preparation steps are needed.
Use the following steps to prepare the sample locally:
The sample project is ready on GitHub. Clone the sample project by using the following command:
Build the sample project by using the following commands:
cd ASA-Samples-Event-Driven-Application
./mvnw clean package
3. Prepare the cloud environment
The main resources you need to run this sample are an Azure Spring Apps instance and an Azure Service Bus instance. The following sections describe how to create these resources.
This section uses a Deploy to Azure button to launch a deployment experience in the Azure portal. This experience uses an ARM template to create Azure resources.
3.1. Sign in to the Azure portal
Go to the Azure portal and enter your credentials to sign in to the portal. The default view is your service dashboard.
3.2. Create Azure resources
Use the following steps to create all the Azure resources that the app depends on:
Select the following Deploy to Azure button to launch the deployment experience in the Azure portal:
Fill out the form on the Basics tab. Use the following table as a guide for completing the form:
Setting
Suggested value
Description
Subscription
Your subscription name.
The Azure subscription that you want to use for your server. If you have multiple subscriptions, choose the subscription in which you'd like to be billed for the resource.
Resource group
myresourcegroup
A new resource group name or an existing one from your subscription.
Region
The region closest to your users.
The region is used to create the resource group.
Select Review and Create to review your selections. Then, select Create to deploy the app to Azure Spring Apps.
On the toolbar, select the Notifications icon (a bell) to monitor the deployment process. After the deployment finishes, you can select Pin to dashboard, which creates a tile for this service on your Azure portal dashboard as a shortcut to the service's Overview page. Select Go to resource to open the service's Overview page.
3.1. Sign in to the Azure portal
Go to the Azure portal and enter your credentials to sign in to the portal. The default view is your service dashboard.
3.2. Create a Service Bus instance
Use the following steps to create a Service Bus instance:
Select Create a resource in the corner of the Azure portal.
In the Search services and marketplace search box, search for service bus.
On the Service Bus section, select Create.
Fill out the form on the Basics tab. Use the following table as a guide for completing the form:
Setting
Suggested value
Description
Subscription
Your subscription name.
The Azure subscription that you want to use for your server. If you have multiple subscriptions, choose the subscription in which you'd like to be billed for the resource.
Resource group
myresourcegroup
A new resource group name or an existing one from your subscription.
Namespace name
my-srvbus
A unique name that identifies your Service Bus service.
Location
The location closest to your users.
The location that is closest to your users.
Hosting options and plans
Basic
The pricing plan determines the resource and cost associated with your instance.
Select Review and Create to review the creation parameters. Then, select Create to finish creating the Service Bus instance.
On the toolbar, select the Notifications icon (a bell) to monitor the deployment process. After the deployment finishes, you can select Pin to dashboard, which creates a tile for this service on your Azure portal dashboard as a shortcut to the service's Overview page. Select Go to resource to open the service's Overview page.
Select Go to resource to go to the Service Bus Namespace page.
Select Queues on the navigation menu, then select Queue.
On the Create Queue page, enter lower-case for Name and then select Create.
Create another queue by repeating the previous step using upper-case for Name.
3.3. Create an Azure Spring Apps instance
Use the following steps to create the service instance:
Select Create a resource in the corner of the Azure portal.
Select Compute > Azure Spring Apps.
Fill out the Basics form with the following information:
Setting
Suggested value
Description
Subscription
Your subscription name.
The Azure subscription that you want to use for your server. If you have multiple subscriptions, choose the subscription in which you'd like to be billed for the resource.
Resource group
myresourcegroup
A new resource group name or an existing one from your subscription.
Name
myasa
A unique name that identifies your Azure Spring Apps service. The name must be between 4 and 32 characters long and can contain only lowercase letters, numbers, and hyphens. The first character of the service name must be a letter and the last character must be either a letter or a number.
Region
The region closest to your users.
The location that is closest to your users.
Hosting options and plans
Enterprise
The pricing plan that determines the resource and cost associated with your instance.
Zone Redundant
Unchecked
The option to create your Azure Spring Apps service in an Azure availability zone. This feature isn't currently supported in all regions.
Software IP Plan
Pay-as-You-Go
The pricing plan that lets you pay as you go with Azure Spring Apps.
Deploy sample project
Unchecked
The option to use the built-in sample application.
Select Review and Create to review your selections. Then, select Create to provision the Azure Spring Apps instance.
On the toolbar, select the Notifications icon (a bell) to monitor the deployment process. After the deployment finishes, you can select Pin to dashboard, which creates a tile for this service on your Azure portal dashboard as a shortcut to the service's Overview page.
Select Go to resource to go to the Azure Spring Apps Overview page.
3.4. Connect app instance to Service Bus instance
Use the following steps to connect your service instances:
Go to your Azure Spring Apps instance in the Azure portal.
From the navigation pane, open the Apps pane and then select Create App.
On the Create App page, for the app name, use simple-event-driven-app and leave all the other fields with their default values.
Select Create to finish creating the app and then select the app to view the details.
Select Service Connector from the navigation pane and then select Create to create a new service connection.
Fill out the Basics tab with the following information:
Service type: Select Service Bus.
Connection name: Populated with an automatically generated name that you can modify.
Subscription: Select your subscription.
Namespace: Select the namespace you created.
Client type: Select SpringBoot.
Configure the Next: Authentication tab with the following information:
Select the authentication type you'd like to use between your compute service and target service.: Select Connection string.
Select Next: Networking. Use the default option Configure firewall rules to enable access to target service.
Select Next: Review and Create to review your selections, then select Create to create the connection.
3.1. Provide names for each resource
Create variables to hold the resource names by using the following commands. Be sure to replace the placeholders with your own values.
Use the following steps to create a new resource group:
Use the following command to sign in to the Azure CLI:
az login
Use the following command to set the default location:
az configure --defaults location=${LOCATION}
Use the following command to list all available subscriptions to determine the subscription ID to use:
az account list --output table
Use the following command to set the default subscription:
az account set --subscription <subscription-ID>
Use the following command to create a resource group:
az group create --resource-group ${RESOURCE_GROUP}
Use the following command to set the newly created resource group as the default resource group:
az configure --defaults group=${RESOURCE_GROUP}
3.3. Install extension and register namespace
Use the following commands to install the Azure Spring Apps extension for the Azure CLI and register the Microsoft.SaaS namespace:
az extension add --name spring --upgrade
az provider register --namespace Microsoft.SaaS
3.4. Create an Azure Spring Apps instance
Use the following command to create your Azure Spring Apps instance:
az spring create \
    --name ${AZURE_SPRING_APPS_INSTANCE} \
    --sku Enterprise
Then, use the following command to create an app in the Azure Spring Apps instance:
az spring app create \
    --service ${AZURE_SPRING_APPS_INSTANCE} \
    --name ${APP_NAME}
3.5. Create a Service Bus instance
Use the following steps to create a Service Bus instance:
Use the following command to create a Service Bus namespace:
az servicebus namespace create --name ${SERVICE_BUS_NAME_SPACE}
Use the following commands to create two queues named lower-case and upper-case:
az servicebus queue create \
    --namespace-name ${SERVICE_BUS_NAME_SPACE} \
    --name lower-case
az servicebus queue create \
    --namespace-name ${SERVICE_BUS_NAME_SPACE} \
    --name upper-case
3.6. Connect app instance to Service Bus instance
You've now created both the Service Bus and the app in Azure Spring Apps, but the app can't connect to the Service Bus. Use the following steps to enable the app to connect to the Service Bus, and then deploy the app:
Get the Service Bus's connection string by using the following command:
The Deploy to Azure button in the previous section launches an Azure portal experience that includes application deployment, so nothing else is needed.
The following list describes the command interactions:
OAuth2 login: You need to authorize the sign in to Azure based on the OAuth2 protocol.
Select subscription: Select the subscription list number of the Azure Spring Apps instance you created, which defaults to the first subscription in the list. If you use the default number, press Enter directly.
Use existing Azure Spring Apps in Azure: Press y to use the existing Azure Spring Apps instance.
Select Azure Spring Apps for deployment: Select the list number of the Azure Spring Apps instance you created. If you use the default number, press Enter directly.
Use existing app in Azure Spring Apps <your-instance-name>: Press y to use the app created.
Confirm to save all the above configurations: Press y. If you press n, the configuration isn't saved in the POM files.
Use the following command to deploy the app:
./mvnw azure-spring-apps:deploy
The following list describes the command interaction:
OAuth2 login: You need to authorize the sign in to Azure based on the OAuth2 protocol.
After the command is executed, you can see from the following log messages that the deployment was successful:
[INFO] Starting Spring App after deploying artifacts...
[INFO] Deployment Status: Running
The cloud environment is now ready. Deploy the app by using the following command:
az spring app deploy \
    --service ${AZURE_SPRING_APPS_INSTANCE} \
    --name ${APP_NAME} \
    --artifact-path target/simple-event-driven-app-0.0.2-SNAPSHOT.jar
5. Validate the app
Use the following steps to confirm that the event-driven app works correctly. You can validate the app by sending a message to the lower-case queue, then confirm that there's a message in the upper-case queue.
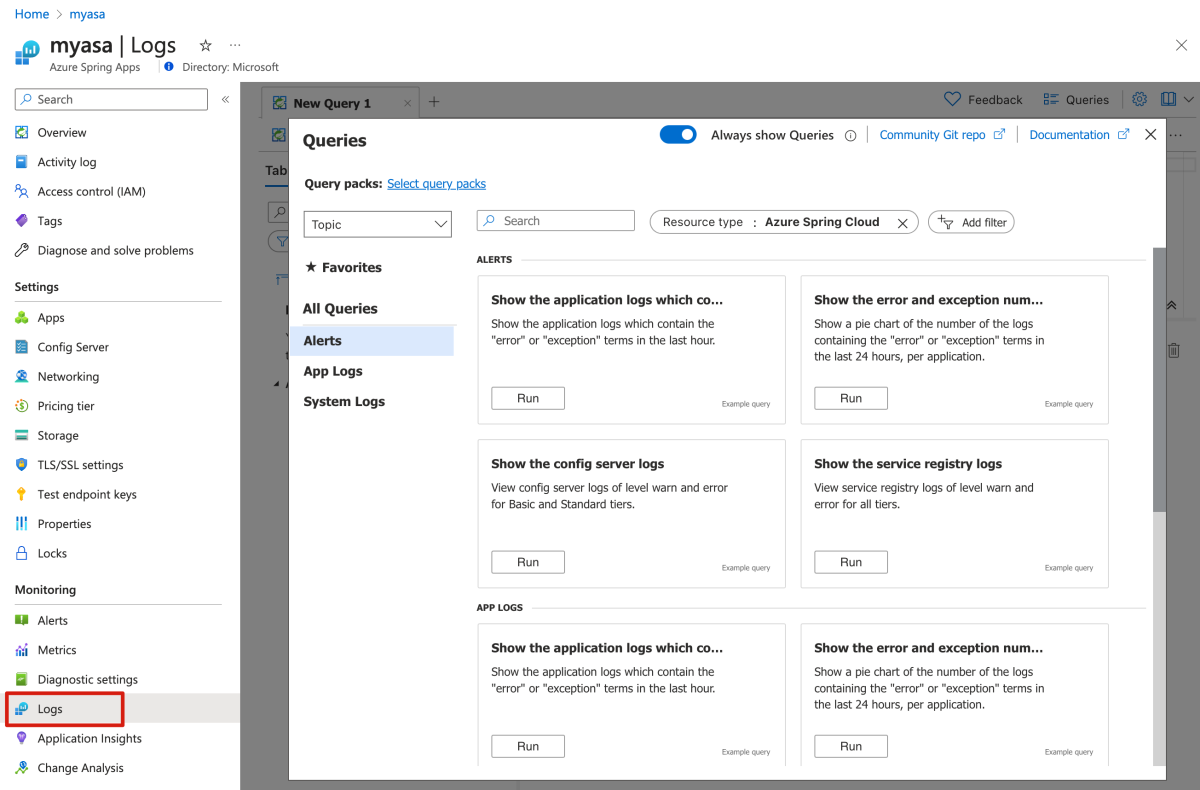
Go to the Azure Spring Apps instance Overview page and select Logs to check the app's logs.
Use the following command to check the app's log to investigate any deployment issue:
az spring app logs \
    --service ${AZURE_SPRING_APPS_INSTANCE} \
    --name ${APP_NAME}
6. Clean up resources
Be sure to delete the resources you created in this article when you no longer need them. You can delete the Azure resource group, which includes all the resources in the resource group.
Coming soon: Throughout 2024 we will be phasing out GitHub Issues as the feedback mechanism for content and replacing it with a new feedback system. For more information see: https://aka.ms/ContentUserFeedback.