Configure Azure Synapse Link for SQL Server 2022 with network security
This article is a guide for configuring Azure Synapse Link for SQL Server 2022 with network security. Before you begin this process, you should know how to create and start Azure Synapse Link for SQL Server 2022. For information, see Get started with Azure Synapse Link for SQL Server 2022.
Create a managed workspace virtual network without data exfiltration
In this section, you create an Azure Synapse workspace with a managed virtual network enabled. You'll enable managed virtual network, and then select No to allow outbound traffic from the workspace to any target. For an overview, see Azure Synapse Analytics managed virtual network.
Sign in to the Azure portal.
Open Synapse Studio, go to Manage, select Integration runtimes, and then select AutoResolvingIntegrationRuntime.
In the pop-up window, select the Virtual network tab, and then enable Interactive authoring.

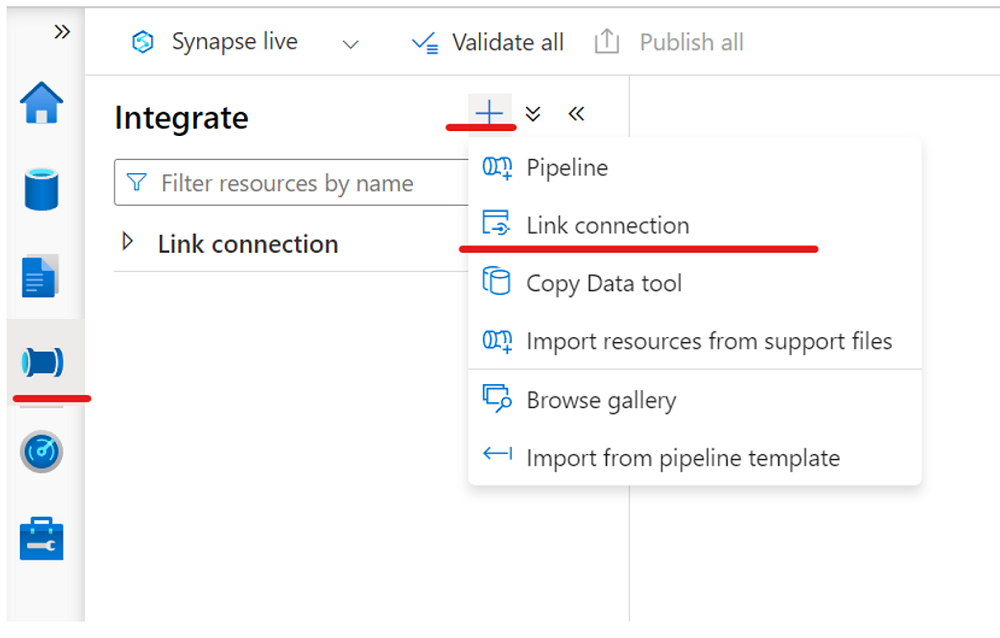
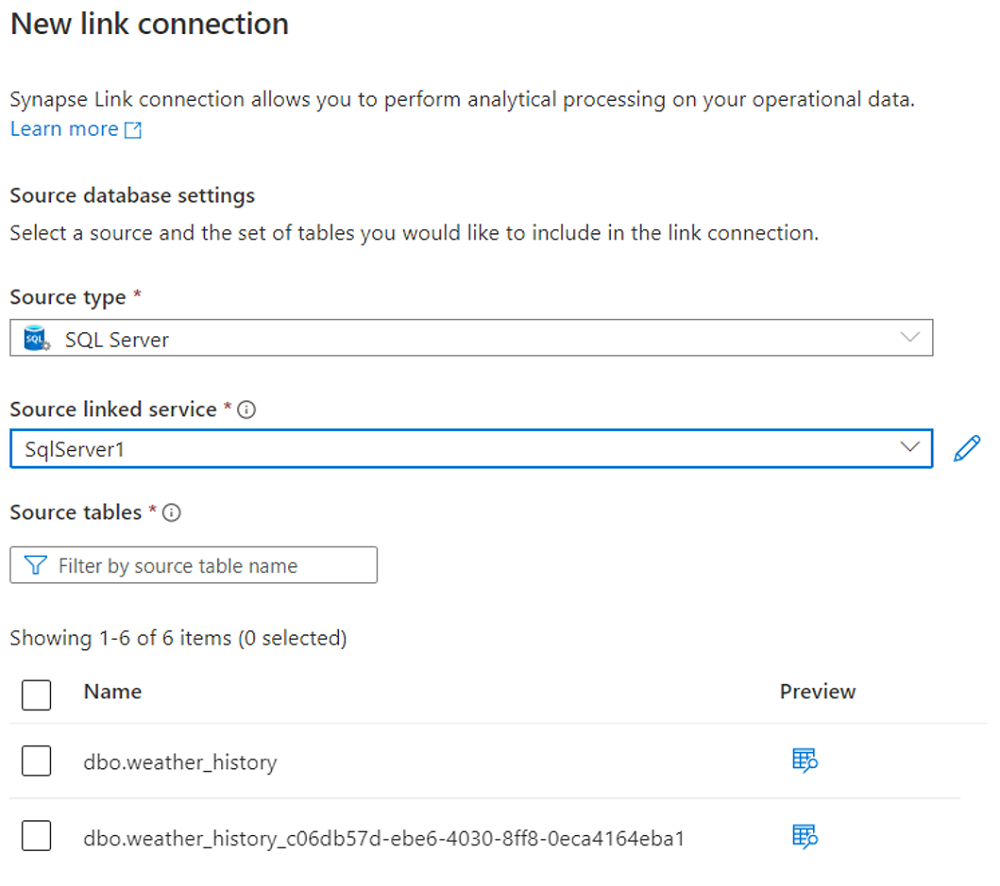
On the Integrate pane, create a link connection to replicate data from your SQL Server 2022 instance to the Azure Synapse SQL pool.
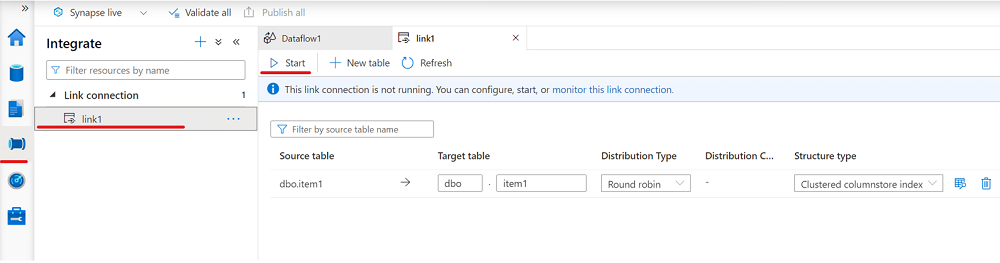
Start your link connection.
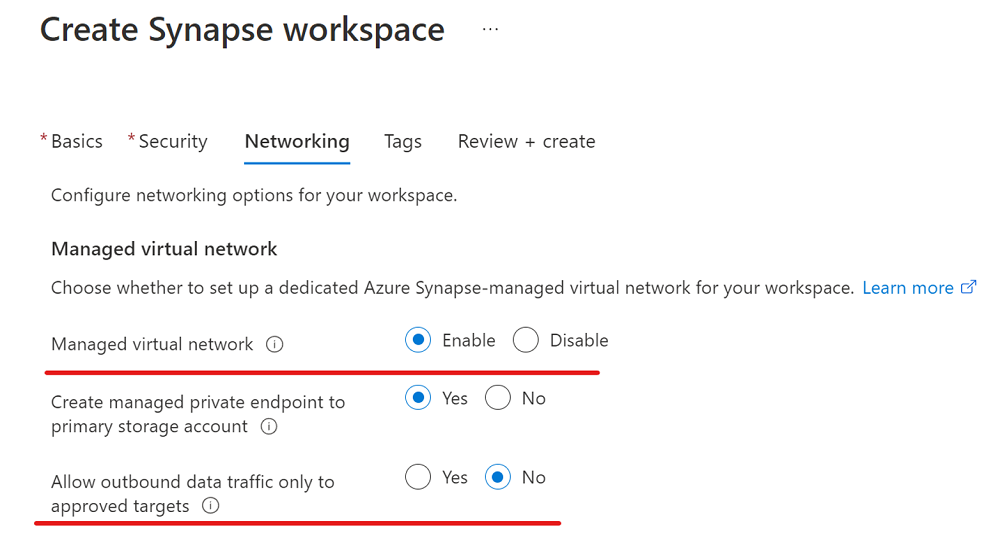
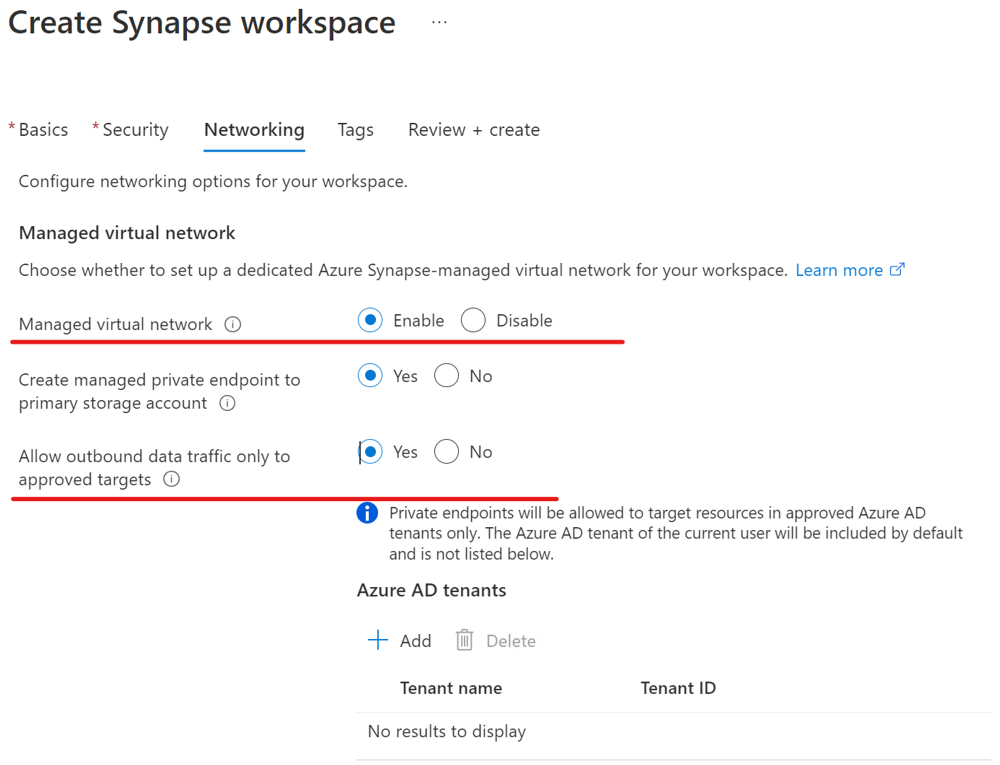
Create a managed workspace virtual network with data exfiltration
In this section, you create an Azure Synapse workspace with managed virtual network enabled. You'll enable managed virtual network and select Yes to limit outbound traffic from the managed workspace virtual network to targets through managed private endpoints. For an overview, see Azure Synapse Analytics managed virtual network.
Sign in to the Azure portal.
Open Synapse Studio, go to Manage, select Integration runtimes, and then select AutoResolvingIntegrationRuntime.
In the pop-up window, select the Virtual network tab, and then enable Interactive authoring.
Create a linked service that connects to your SQL Server 2022 instance.
To learn how, see the "Create a linked service for your source SQL Server 2022 database" section of Get started with Azure Synapse Link for SQL Server 2022.
Add a role assignment to ensure that you've granted your Azure Synapse workspace managed identity permissions to your Azure Data Lake Storage Gen2 storage account that's used as the landing zone.
To learn how, see the "Create a linked service to connect to your landing zone on Azure Data Lake Storage Gen2" section of Get started with Azure Synapse Link for SQL Server 2022.
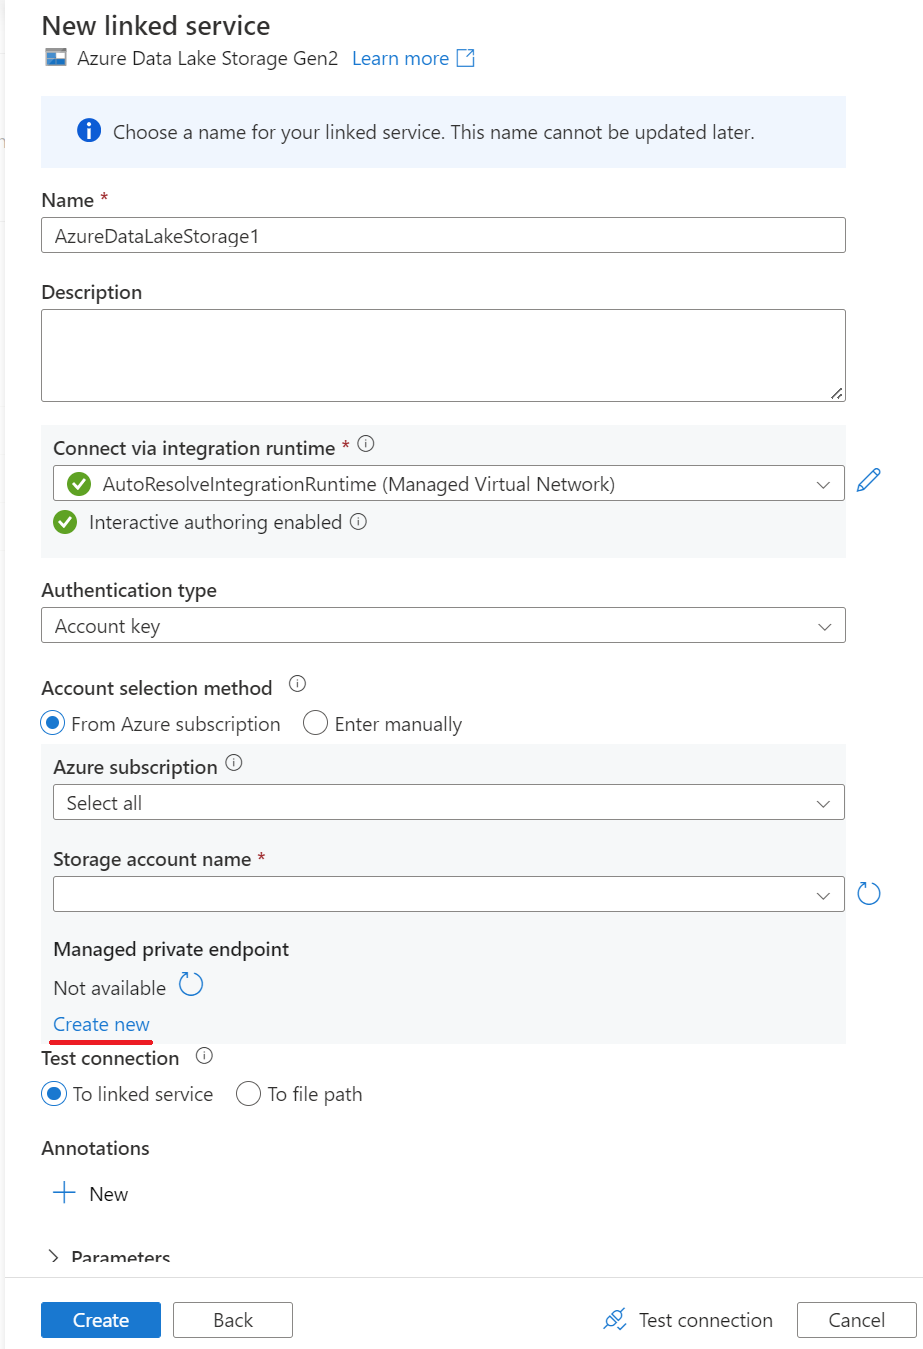
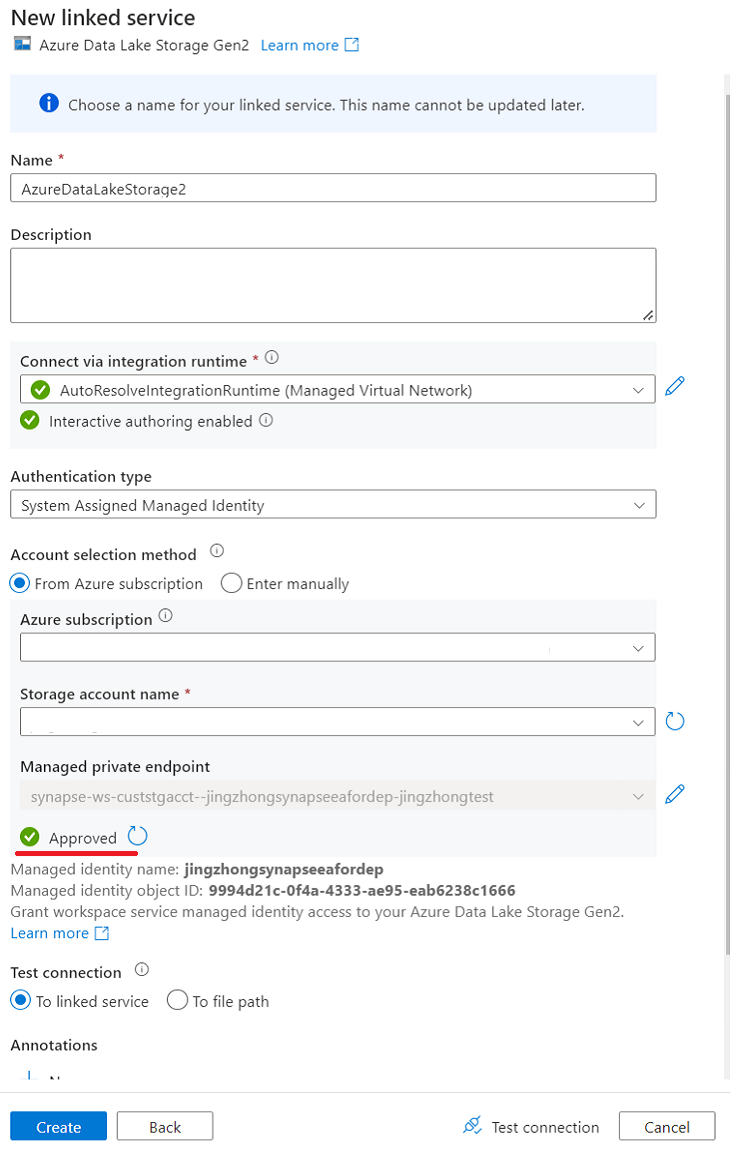
Create a linked service that connects to your Azure Data Lake Storage Gen2 storage (landing zone) with managed private endpoint enabled.
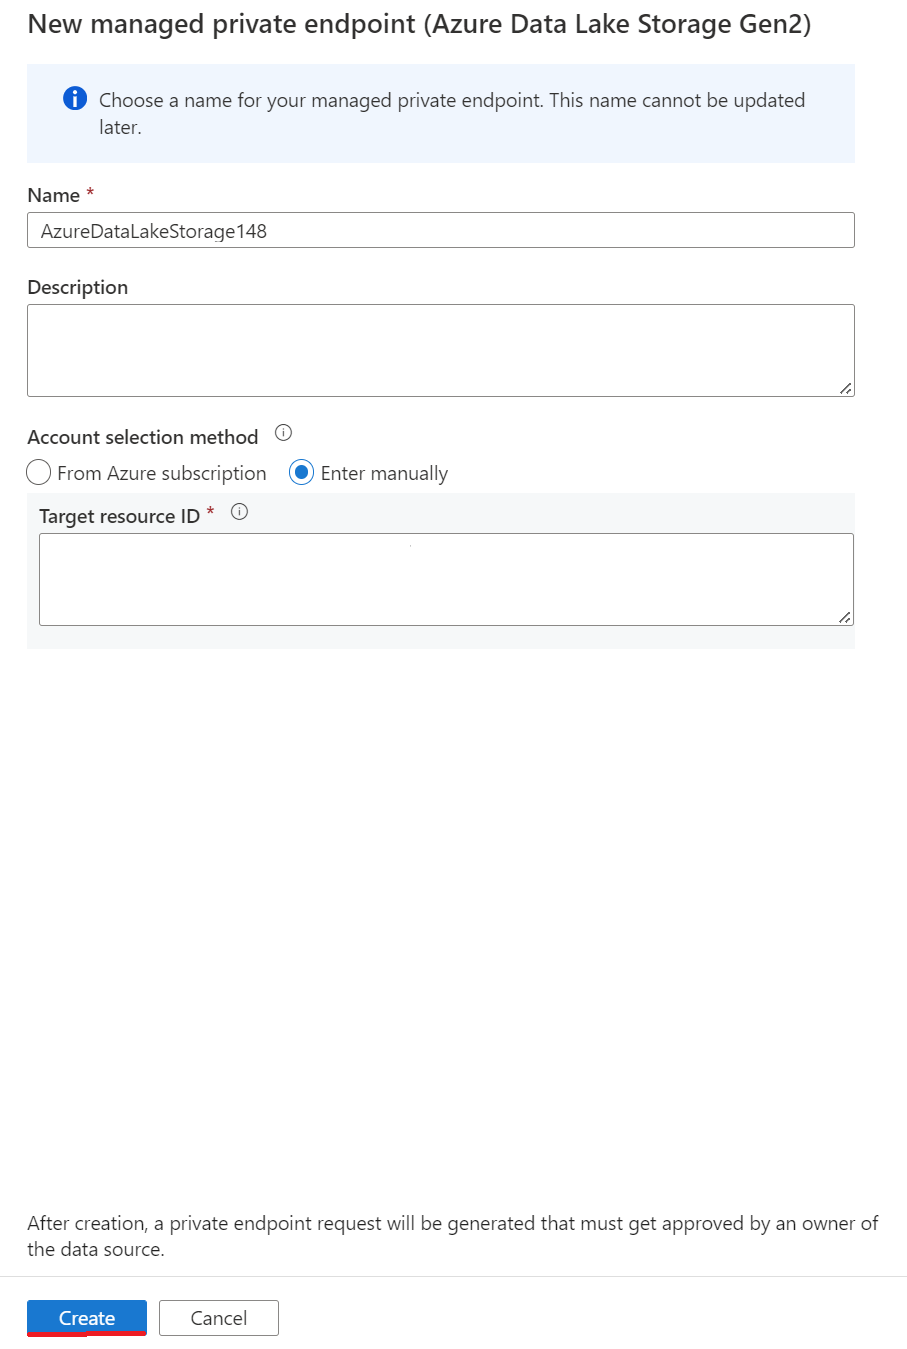
a. Create a managed private endpoint in the linked service for Azure Data Lake Storage Gen2 storage.
b. Complete the managed private endpoint creation in the linked service for Azure Data Lake Storage Gen2 storage.
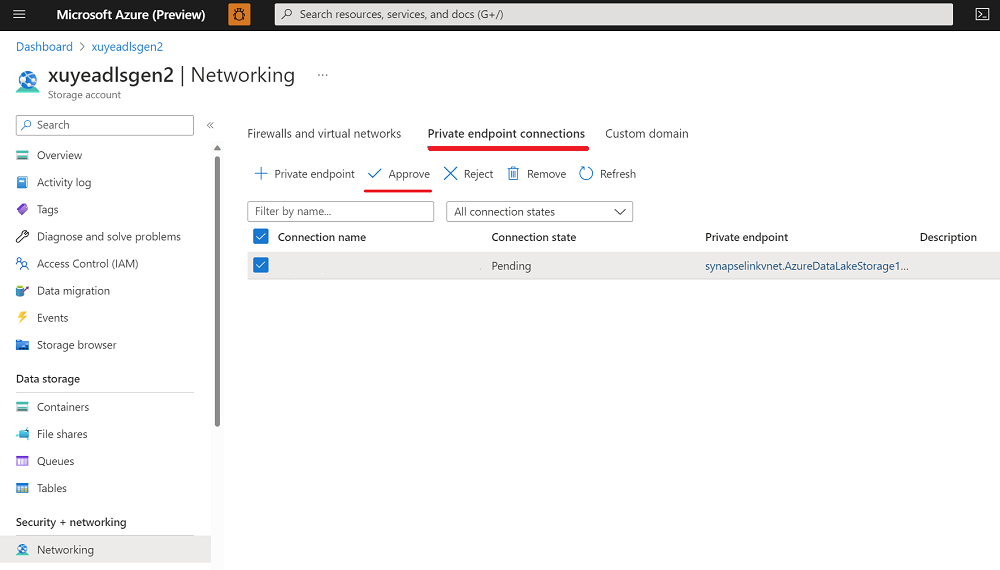
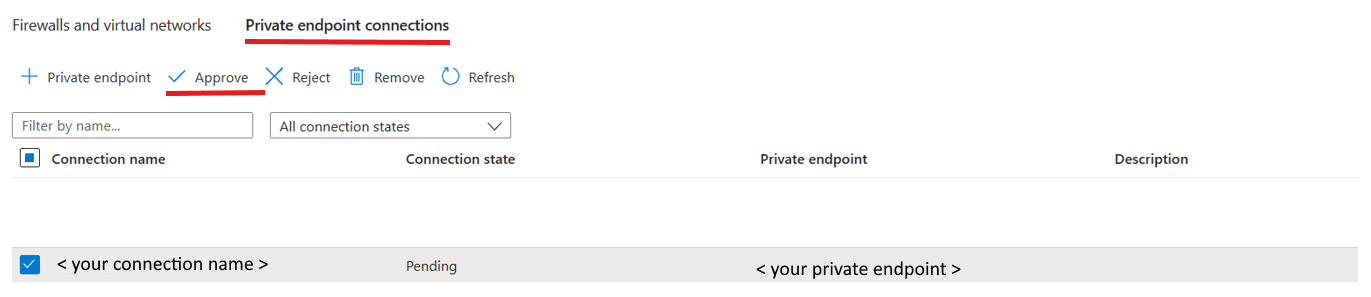
c. Go to the Azure portal for your Azure Data Lake Storage Gen2 storage as a landing zone, and then approve the private endpoint connections.
d. Complete the creation of the linked service for Azure Data Lake Storage Gen2 storage.
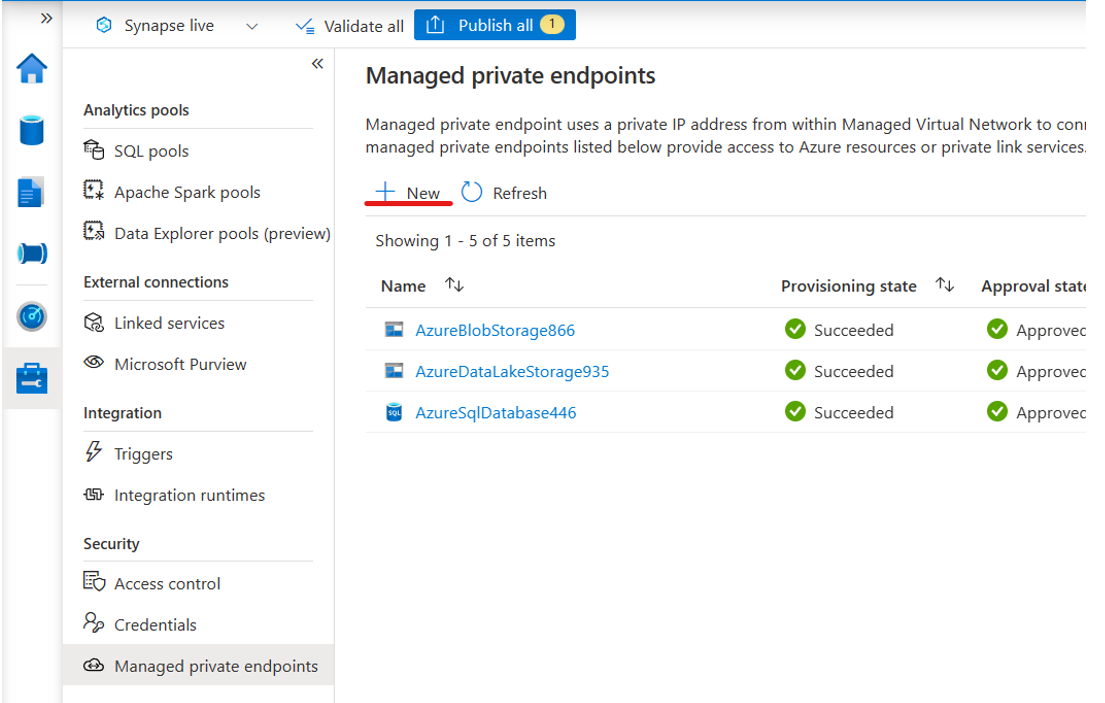
Create a blob type managed private endpoint to landing zone.
a. Navigate to Managed private endpoints page, and then select +New.
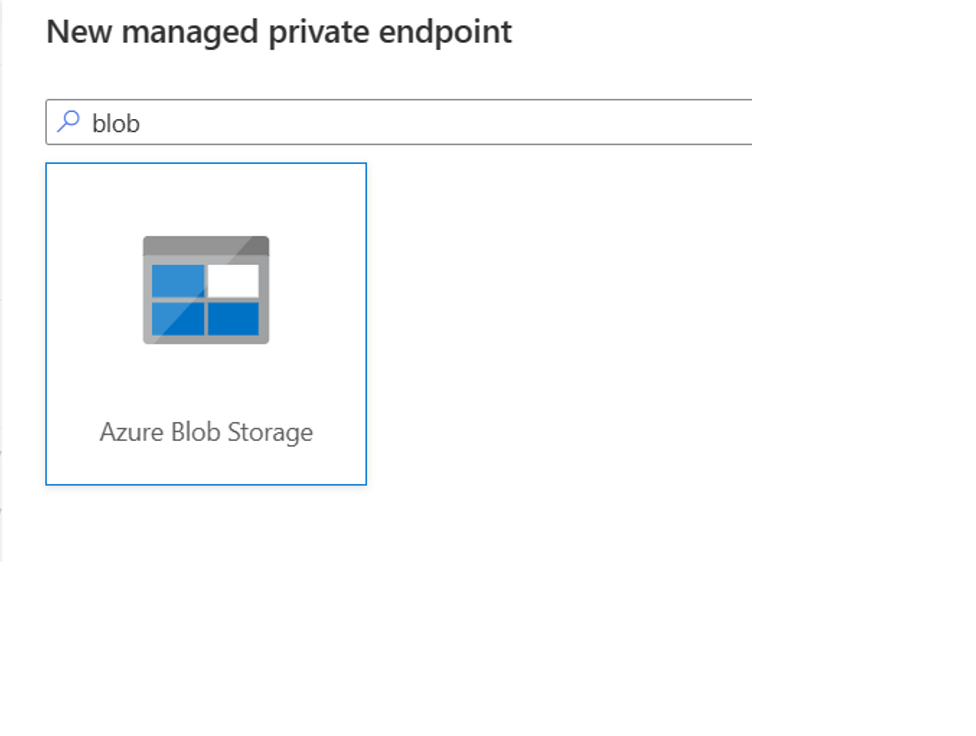
b. Enter blob in the search box on New managed private endpoint pane, and then select Azure Blob Storage.
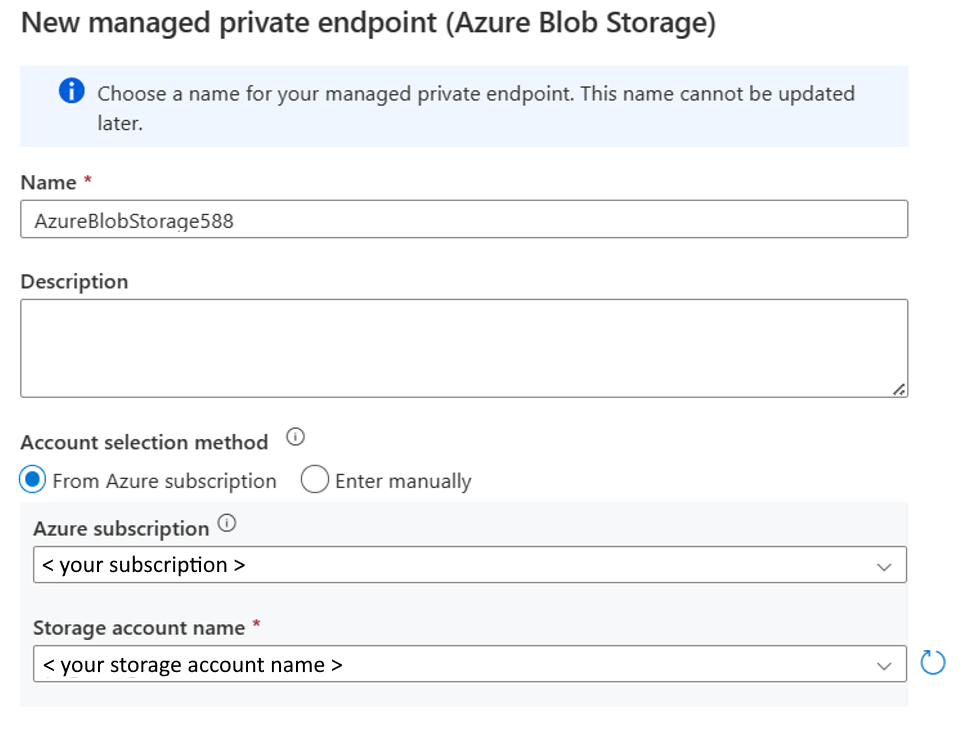
c. Complete the managed private endpoint creation for Azure Blob Storage.
d. After creating an Azure Blob Storage private endpoint, go to your Azure Data Lake Storage Gen2 networking page and approve it.
In case your SQL Server 2022 instance is installed on a virtual machine (VM) and your Azure Storage account is disabled from public network access, you can create a private endpoint of storage sub resource type blob to ensure secure communications between your VM, SQL Server and Azure Storage. For more information, refer to Tutorial: Connect to a storage account using an Azure Private Endpoint.
Now you can create a link connection from the Integrate pane to replicate data from your SQL Server 2022 instance to an Azure Synapse SQL pool.
Start your link connection.
Next steps
If you're using a database other than a SQL Server 2022 instance, see:
Feedback
Coming soon: Throughout 2024 we will be phasing out GitHub Issues as the feedback mechanism for content and replacing it with a new feedback system. For more information see: https://aka.ms/ContentUserFeedback.
Submit and view feedback for