Quickstart: Create a Traffic Manager profile using the Azure portal
This quickstart describes how to create a Traffic Manager profile that delivers high availability for your web application.
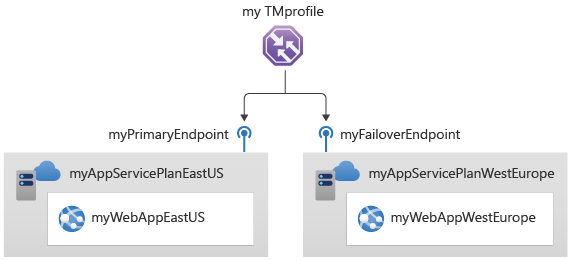
In this quickstart, you'll read about two instances of a web application. Each of them is running in a different Azure region. You'll create a Traffic Manager profile based on endpoint priority. The profile directs user traffic to the primary site running the web application. Traffic Manager continuously monitors the web application. If the primary site is unavailable, it provides automatic failover to the backup site.
If you don't have an Azure subscription, create a free account now.
Prerequisites
For this quickstart, you'll need two instances of a web application deployed in two different Azure regions (East US and West Europe). Each will serve as primary and failover endpoints for Traffic Manager.
Sign in to the Azure portal.
On the upper-left side of the screen, select Create a resource. Search for Web App and select Create.
In Create a Web App, type or select the following values in the Basics tab:
Setting Value Subscription Select your subscription. Resource group Select Create new and enter myResourceGroupTM1 in the text box. Name Enter a unique Name for your web app. This example uses myWebAppEastUS. Publish Select Code. Runtime stack Select ASP.NET V4.8. Operating System Select Windows. Region Select East US. Windows Plan Select Create new and enter myAppServicePlanEastUS in the text box. Sku and size Select Standard S1 100 total ACU, 1.75-GB memory. 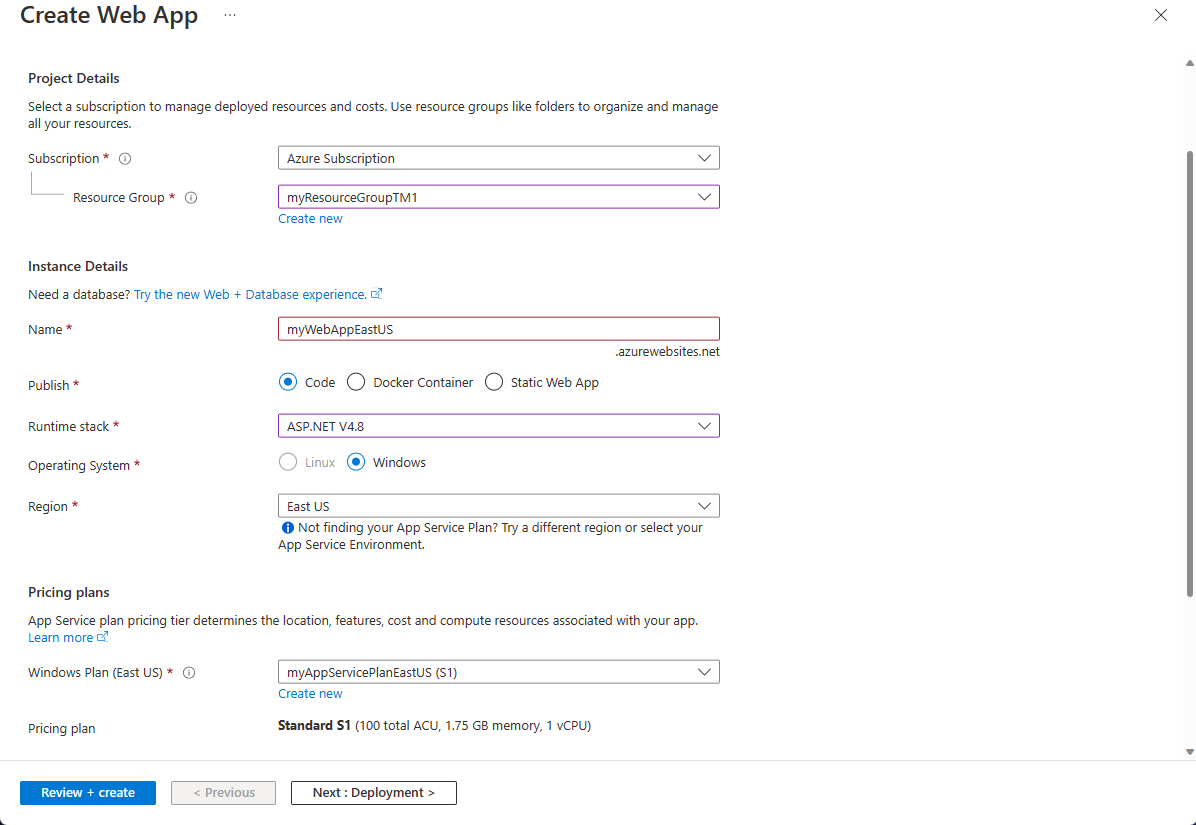
Select the Monitoring tab, or select Next to the Monitoring tab. Under Monitoring, set Application Insights > Enable Application Insights to No.
Select Review and create.
Review the settings, and then select Create. When the Web App successfully deploys, it creates a default web site.
Follow steps 1-6 to create a second Web App named myWebAppWestEurope. The Resource Group name is myResourceGroupTM2, with Region of West Europe, and App Service Plan name of myAppServicePlanWestEurope. All the other settings are the same as myWebAppEastUS.
Create a Traffic Manager profile
Create a Traffic Manager profile that directs user traffic based on endpoint priority.
On the upper-left side of the screen, select Create a resource. Then search for Traffic Manager profile and select Create.
In the Create Traffic Manager profile, enter, or select these settings:
Setting Value Name Enter a unique name for your Traffic Manager profile. Routing method Select Priority. Subscription Select the subscription you want the traffic manager profile applied to. Resource group Select myResourceGroupTM1. Location This setting refers to the location of the resource group. It has no effect on the Traffic Manager profile that will be deployed globally. 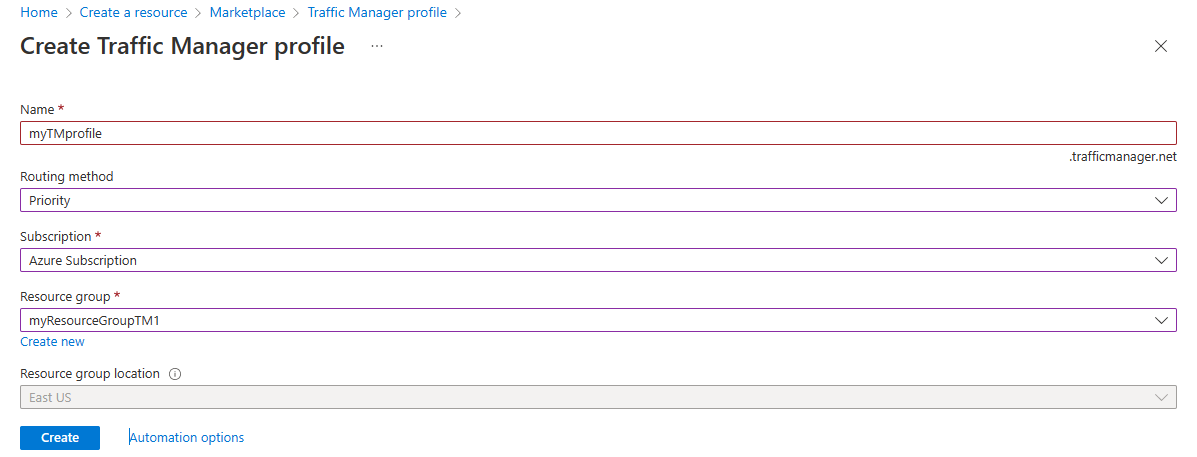
Select Create.
Add Traffic Manager endpoints
Add the website in the East US as primary endpoint to route all the user traffic. Add the website in West Europe as a failover endpoint. When the primary endpoint is unavailable, traffic automatically routes to the failover endpoint.
In the portal's search bar, enter the Traffic Manager profile name that you created in the preceding section.
Select the profile from the search results.
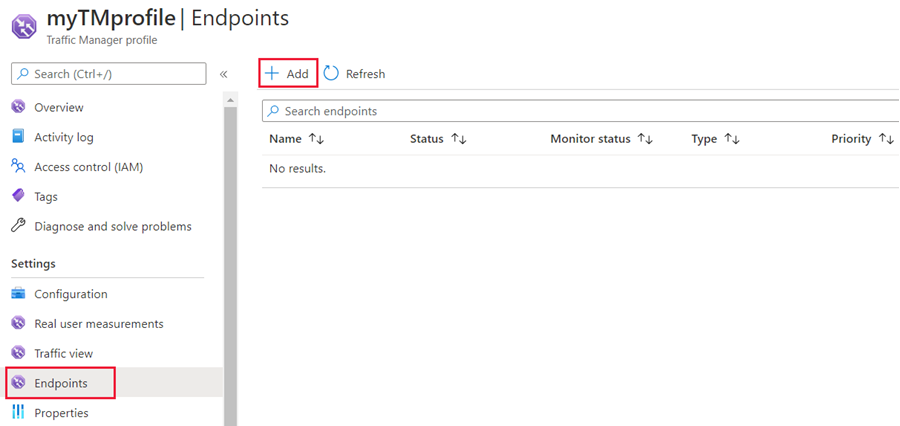
In Traffic Manager profile, in the Settings section, select Endpoints, and then select Add.
Enter, or select, these settings:
Setting Value Type Select Azure endpoint. Name Enter myPrimaryEndpoint. Target resource type Select App Service. Target resource Select Choose an app service > East US. Priority Select 1. All traffic goes to this endpoint when it's healthy. 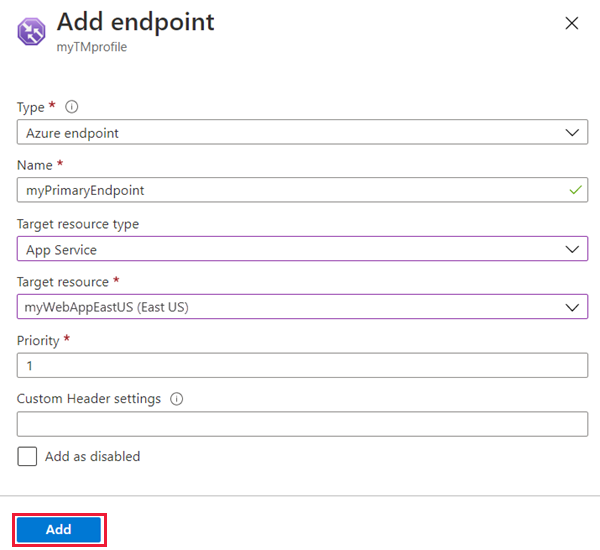
Select Add.
To create a failover endpoint for your second Azure region, repeat steps 3 and 4 with these settings:
Setting Value Type Select Azure endpoint. Name Enter myFailoverEndpoint. Target resource type Select App Service. Target resource Select Choose an app service > West Europe. Priority Select 2. All traffic goes to this failover endpoint if the primary endpoint is unhealthy. Select Add.
When you're done adding the two endpoints, they're displayed in Traffic Manager profile. Notice that their monitoring status is Online now.
Test Traffic Manager profile
In this section, you'll check the domain name of your Traffic Manager profile. You'll also configure the primary endpoint to be unavailable. Finally, you get to see that the web app is still available. It's because Traffic Manager sends the traffic to the failover endpoint.
Check the DNS name
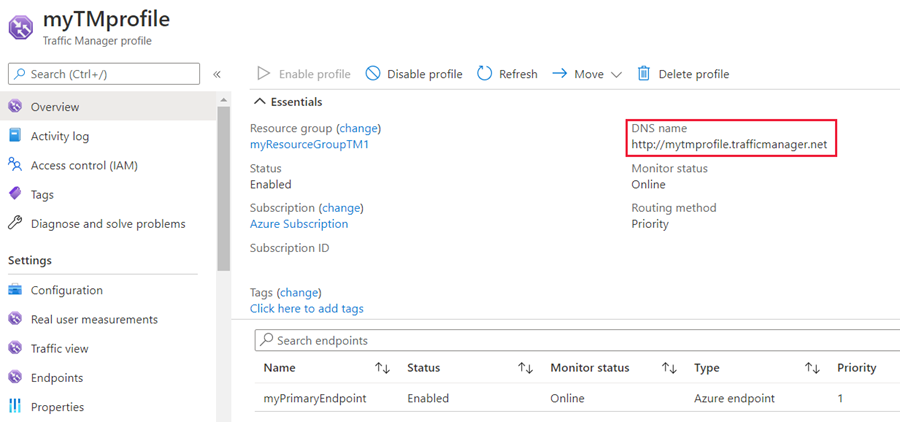
In the portal’s search bar, search for the Traffic Manager profile name that you created in the preceding section.
Select the traffic manager profile. The Overview appears.
The Traffic Manager profile displays the DNS name of your newly created Traffic Manager profile.
View Traffic Manager in action
In a web browser, enter the DNS name of your Traffic Manager profile to view your Web App's default website.
Note
In this quickstart scenario, all requests route to the primary endpoint. It is set to Priority 1.

To view Traffic Manager failover in action, disable your primary site:
- In the Traffic Manager Profile page, from the Overview section, select myPrimaryEndpoint.
- In myPrimaryEndpoint, select Disabled > Save.
- Close myPrimaryEndpoint. Notice that the status is Disabled now.
Copy the DNS name of your Traffic Manager Profile from the preceding step to view the website in a new web browser session.
Verify that the web app is still available.
The primary endpoint isn't available, so you were routed to the failover endpoint.
Clean up resources
When you're done using the private link service, delete the resource group to clean up the resources used in this quickstart.
Enter myResourceGroupTM1 in the search box at the top of the portal, and select myResourceGroupTM1 from the search results.
Select Delete resource group.
In TYPE THE RESOURCE GROUP NAME, enter myResourceGroupTM1.
Select Delete.
Repeat steps 1-4 for the second resource group myResourceGroupTM2.
Next steps
In this quickstart, you created a Traffic Manager profile. It allows you to direct user traffic for high-availability web applications. To learn more about routing traffic, continue to the Traffic Manager tutorials.
Feedback
Coming soon: Throughout 2024 we will be phasing out GitHub Issues as the feedback mechanism for content and replacing it with a new feedback system. For more information see: https://aka.ms/ContentUserFeedback.
Submit and view feedback for