Deploy updates now and track results with Azure Update Manager
Applies to: ✔️ Windows VMs ✔️ Linux VMs ✔️ On-premises environment ✔️ Azure Arc-enabled servers.
This article describes how to perform an on-demand update on a single virtual machine (VM) or multiple VMs by using Azure Update Manager.
See the following sections for more information:
Supported regions
Update Manager is available in all Azure public regions.
Configure reboot settings
The registry keys listed in Configure automatic updates by editing the registry and Registry keys used to manage restart can cause your machines to reboot. A reboot can happen even if you specify Never Reboot in the Schedule settings. Configure these registry keys to best suit your environment.
Install updates on a single VM
You can install updates from Overview or Machines on the Update Manager page or from the selected VM.
To install one-time updates on a single VM:
Sign in to the Azure portal.
On Update Manager > Overview, select your subscription and select One-time update to install updates.
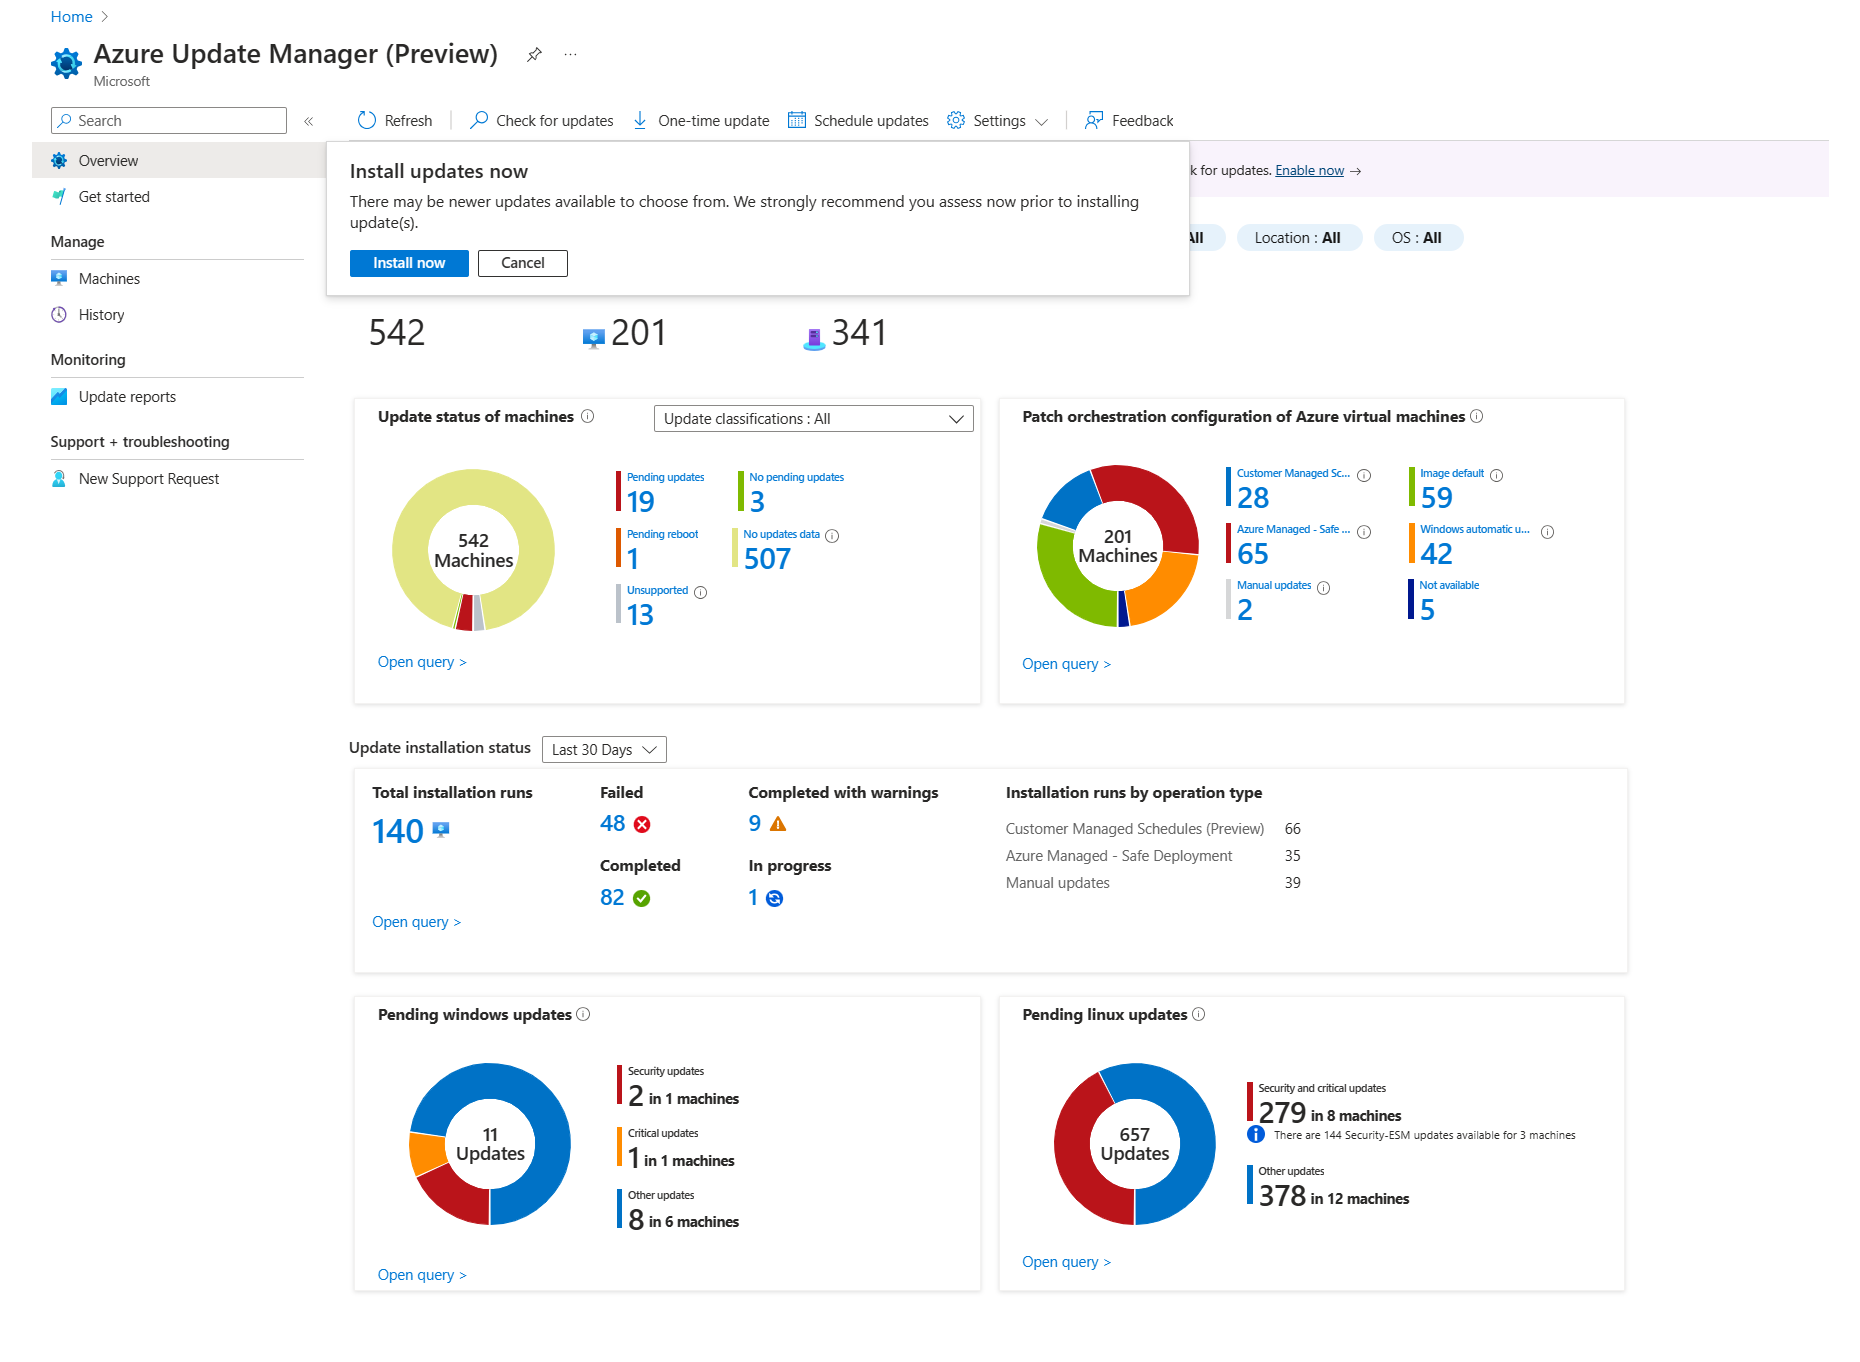
Select Install now to proceed with the one-time updates:
- Install one-time updates: Select Add machine to add the machine for deploying one time.
- Select resources: Choose the machine and select Add.
On the Updates pane, specify the updates to include in the deployment. For each product, select or clear all supported update classifications and specify the ones to include in your update deployment.
If your deployment is meant to apply only for a select set of updates, it's necessary to clear all the preselected update classifications when you configure the Inclusion/exclusion updates described in the following steps. This action ensures only the updates you've specified to include in this deployment are installed on the target machine.
Note
- Selected Updates shows a preview of OS updates that you can install based on the last OS update assessment information available. If the OS update assessment information in Update Manager is obsolete, the actual updates installed would vary. Especially if you've chosen to install a specific update category, where the OS updates applicable might vary as new packages or KB IDs might be available for the category.
- Update Manager doesn't support driver updates.
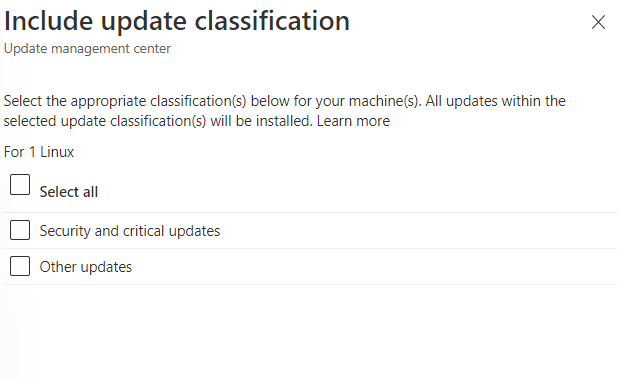
Select Include update classification. Select the appropriate classifications that must be installed on your machines.
Select Include KB ID/package to include in the updates. You can add multiple KB IDs and package names. When you add KB ID/package name, the next row appears. The package can have both name and version. . For example, use
3103696or3134815. For Windows, you can refer to the MSRC webpage to get the details of the latest Knowledge Base release. For supported Linux distros, you specify a comma separated list of packages by the package name, and you can include wildcards. For example, usekernel*,glibc, orlibc=1.0.1. Based on the options specified, Update Manager shows a preview of OS updates under the Selected Updates section.To exclude updates that you don't want to install, select Exclude KB ID/package. We recommend selecting this option because updates that aren't displayed here might be installed, as newer updates might be available. You can excludedd multiple KB IDs and package names.
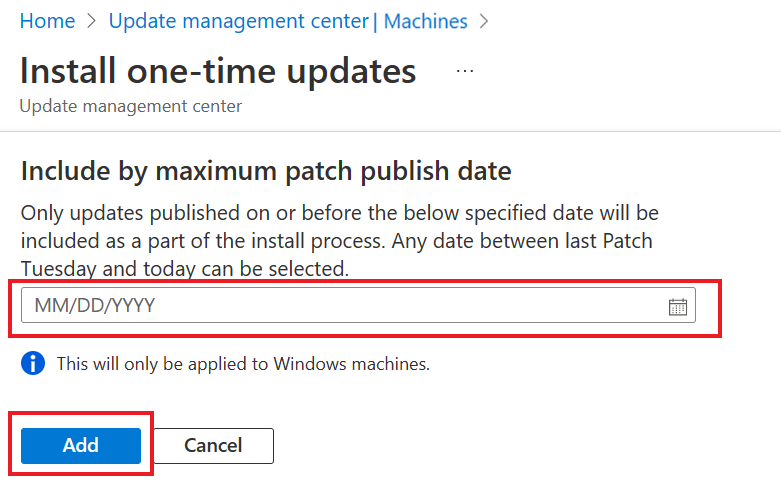
To ensure that the updates published are on or before a specific date, select Include by maximum patch publish date. Select the date and select Add > Next.
On the Properties pane, specify the reboot and maintenance window:
- Use the Reboot option to specify the way to handle reboots during deployment. The following options are available:
- Reboot if required
- Never reboot
- Always reboot
- Use Maximum duration (in minutes) to specify the amount of time allowed for updates to install. The maximum limit supported is 235 minutes. Consider the following details when you specify the window:
- It controls the number of updates that must be installed.
- New updates continue to install if the maintenance window limit is approaching.
- In-progress updates aren't terminated if the maintenance window limit is exceeded.
- Any remaining updates that aren't yet installed aren't attempted. We recommend that you reevaluate the maintenance window if this issue is consistently encountered.
- If the limit is exceeded on Windows, it's often because of a service pack update that's taking a long time to install.
- Use the Reboot option to specify the way to handle reboots during deployment. The following options are available:
After you're finished configuring the deployment, verify the summary in Review + install and select Install.


Install updates at scale
Follow these steps to create a new update deployment for multiple machines.
Note
You can check the updates from Overview or Machines.
You can schedule updates.
Sign in to the Azure portal.
On Update Manager > Overview, select your subscription and select One-time update > Install now to install updates.
On the Install one-time updates pane, you can select the resources and machines to install the updates.
On the Machines page, you can view all the machines available in your subscription. You can also use Add machine to add the machines for deploying one-time updates. You can add up to 20 machines. Choose Select all and select Add.
Machines displays a list of machines for which you can deploy a one-time update. Select Next and follow the procedure from step 6 listed in From Overview pane of Install updates on a single VM.
A notification informs you when the activity starts, and another tells you when it's finished. After it's successfully finished, you can view the installation operation results in History. You can view the status of the operation at any time from the Azure activity log.
View update history for a single VM
You can browse information about your Azure VMs and Azure Arc-enabled servers across your Azure subscriptions. For more information, see Update deployment history.
After your scheduled deployment starts, you can see its status on the History tab. It displays the total number of deployments, including the successful and failed deployments.

Currently, the Windows update history for a VM doesn't show the updates that are installed from Azure Update Manager. To view a summary of the updates applied on your machines, go to Azure Update Manager > Manage > History in Azure portal.
Note
- To view a summary of the updates applied on your machines, go to Azure Update Manager > Manage > History in Azure portal.
- Alternatively, go to Control Panel > Programs > Programs and Features > Installed Updates to view the installed CBS updates. This view only shows history of CBS updates Servicing stack updates - Windows Deployment which can be uninstalled.
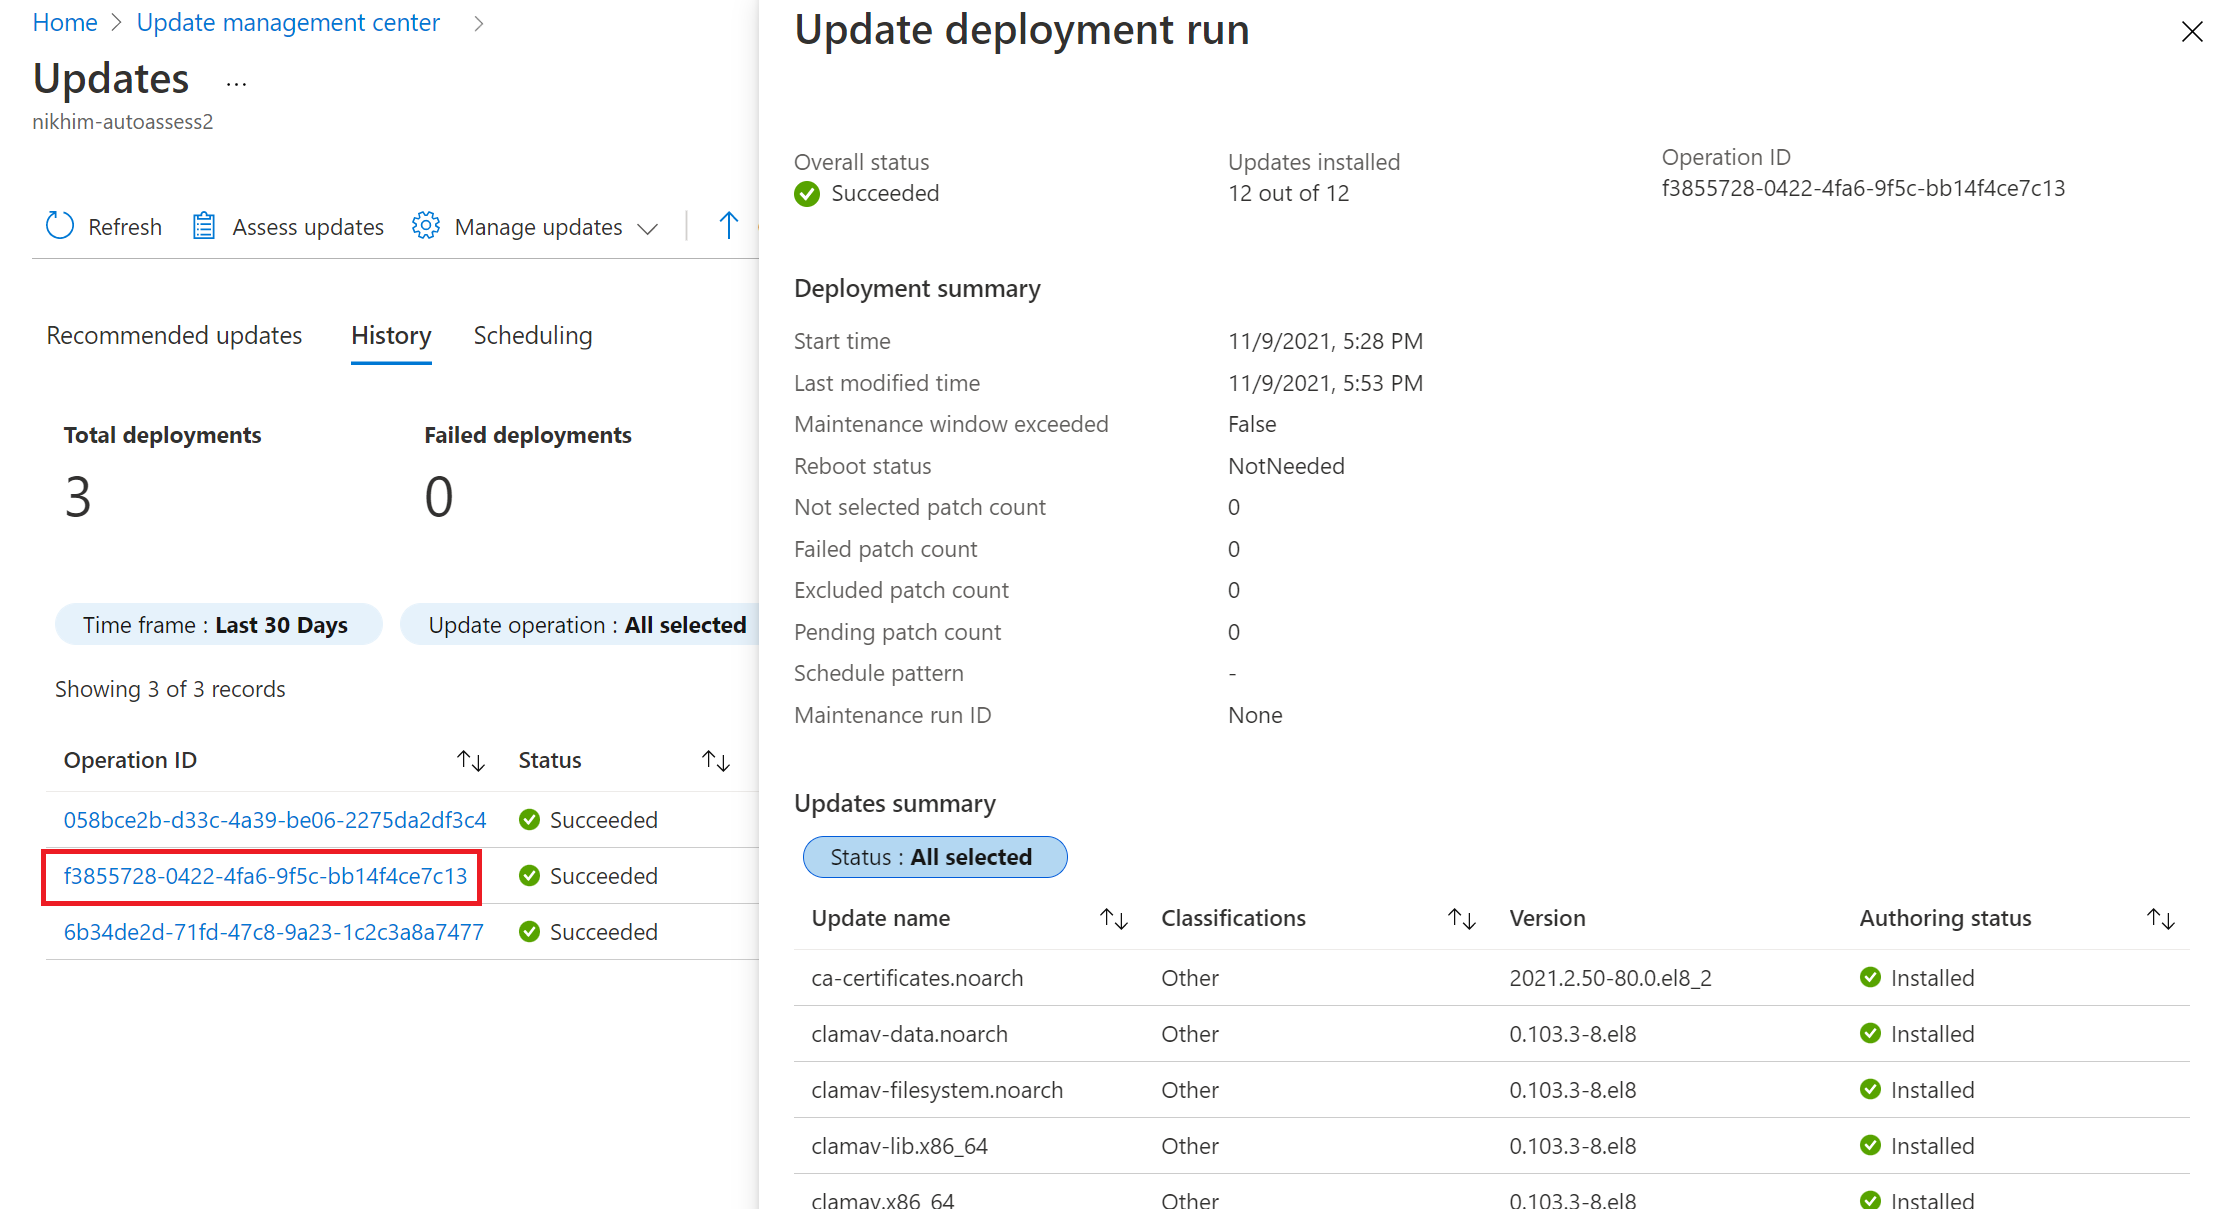
A list of the deployments created are shown in the update deployment grid and include relevant information about the deployment. Every update deployment has a unique GUID, represented as Operation ID, which is listed along with Status, Updates Installed and Time details. You can filter the results listed in the grid.
Select any one of the update deployments from the list to open the Update deployment run page. Here, you can see a detailed breakdown of the updates and the installation results for the Azure VM or Azure Arc-enabled server.
The available values are:
- Not attempted: The update wasn't installed because insufficient time was available, based on the defined maintenance window duration.
- Not selected: The update wasn't selected for deployment.
- Succeeded: The update succeeded.
- Failed: The update failed.
Next steps
- To view update assessment and deployment logs generated by Update Manager, see Query logs.
- To troubleshoot issues, see Troubleshoot issues with Azure Update Manager.
Feedback
Coming soon: Throughout 2024 we will be phasing out GitHub Issues as the feedback mechanism for content and replacing it with a new feedback system. For more information see: https://aka.ms/ContentUserFeedback.
Submit and view feedback for