Configure the rolling deployment strategy for Azure Linux virtual machines
Applies to: ✔️ Linux VMs
Azure Pipelines provides a fully featured set of CI/CD automation tools for deployments to virtual machines. This article will show you how to set up a classic release pipeline that uses the rolling strategy to deploy your web applications to Linux virtual machines.
Rolling deployments
In each iteration, a rolling deployment replaces instances of an application's previous version. It replaces them with instances of the new version on a fixed set of machines (rolling set). The following walk-through shows how to configure a rolling update to virtual machines.
Using Continuous-delivery, you can configure rolling updates to your virtual machines within the Azure portal.
[!IMPORTANT] Virtual Machine's Continuous delivery setting will be retired on March 31, 2023. Learn more
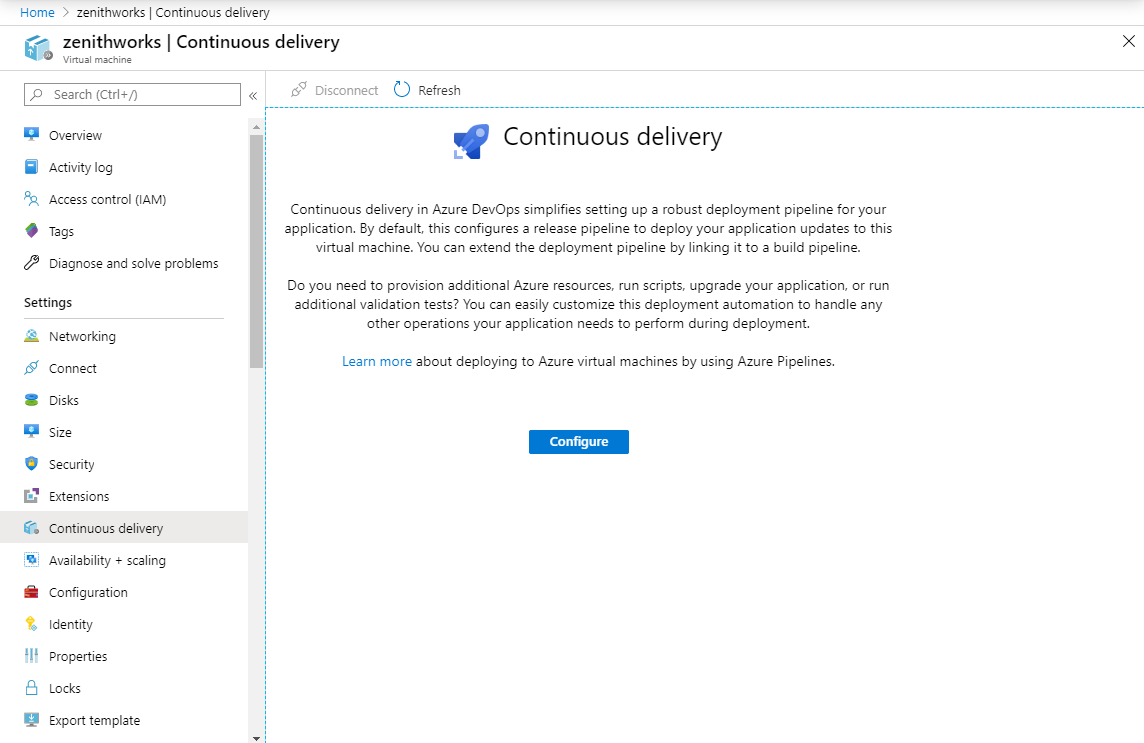
Sign in to Azure portal and navigate to a virtual machine.
Select Continuous delivery, and then select Configure.
Select your Azure DevOps Organization and your Project from the dropdown menu or Create a new one.
Select your Deployment group from the dropdown menu or Create a new one.
Select your Build pipeline.
Select Deployment strategy, and then select Rolling.
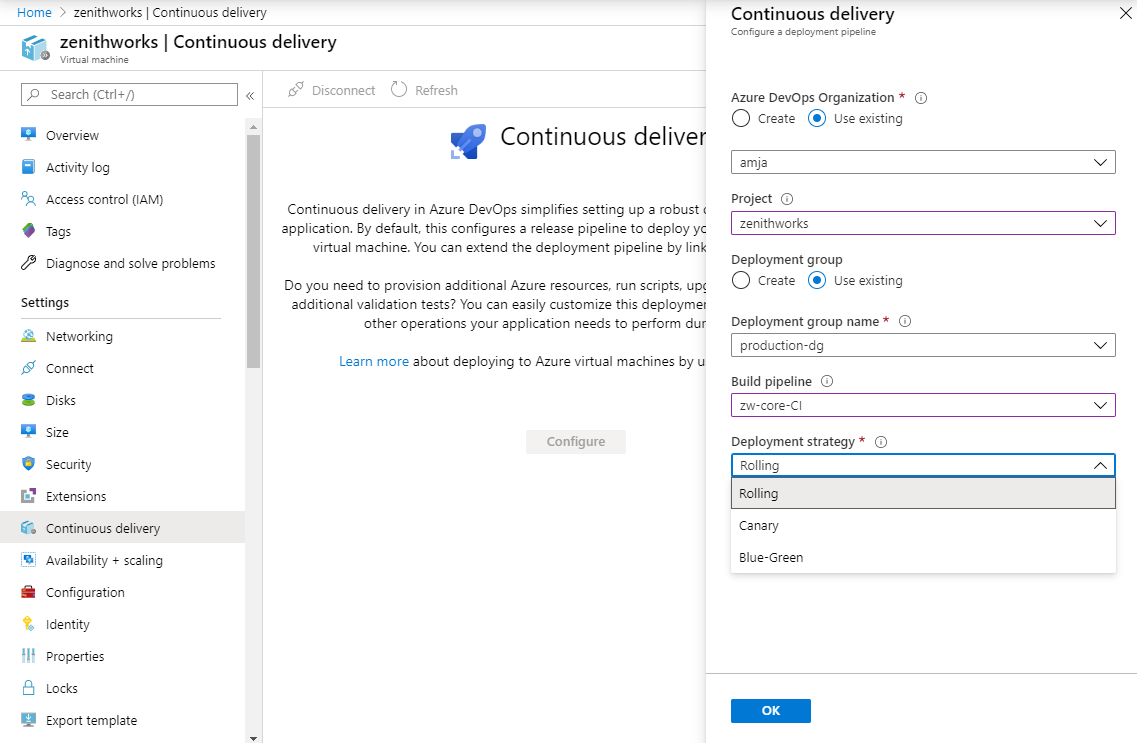
Optionally, you can tag each machine with its role such as web or db. These tags help you target only VMs that have a specific role.
Select OK to configure the continuous delivery pipeline.
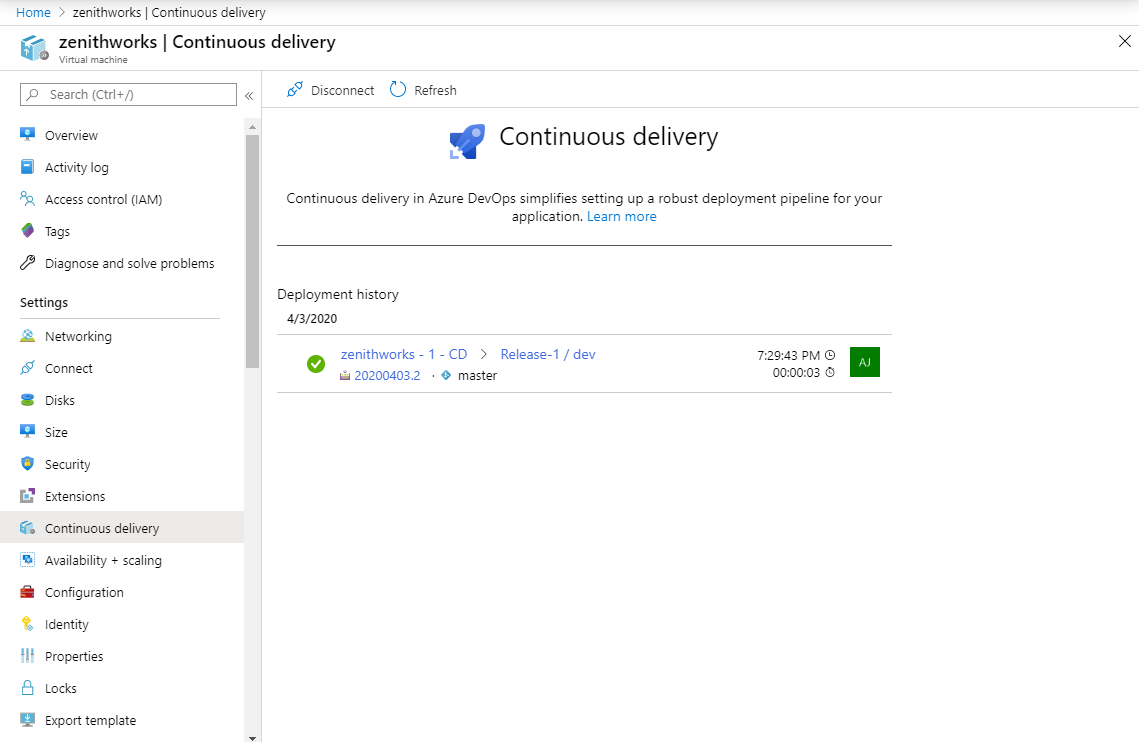
After completion, your continuous delivery pipeline should look similar to the following.
If you want to configure multiple VMs, repeat steps 2 through 4 for the other VMs. If you use the same deployment group that already has a configured pipeline, the new VMs will just be added to the deployment group and no new pipelines will be created.
Select the link to navigate to your pipeline, and then selectEdit to modify the pipeline definition.
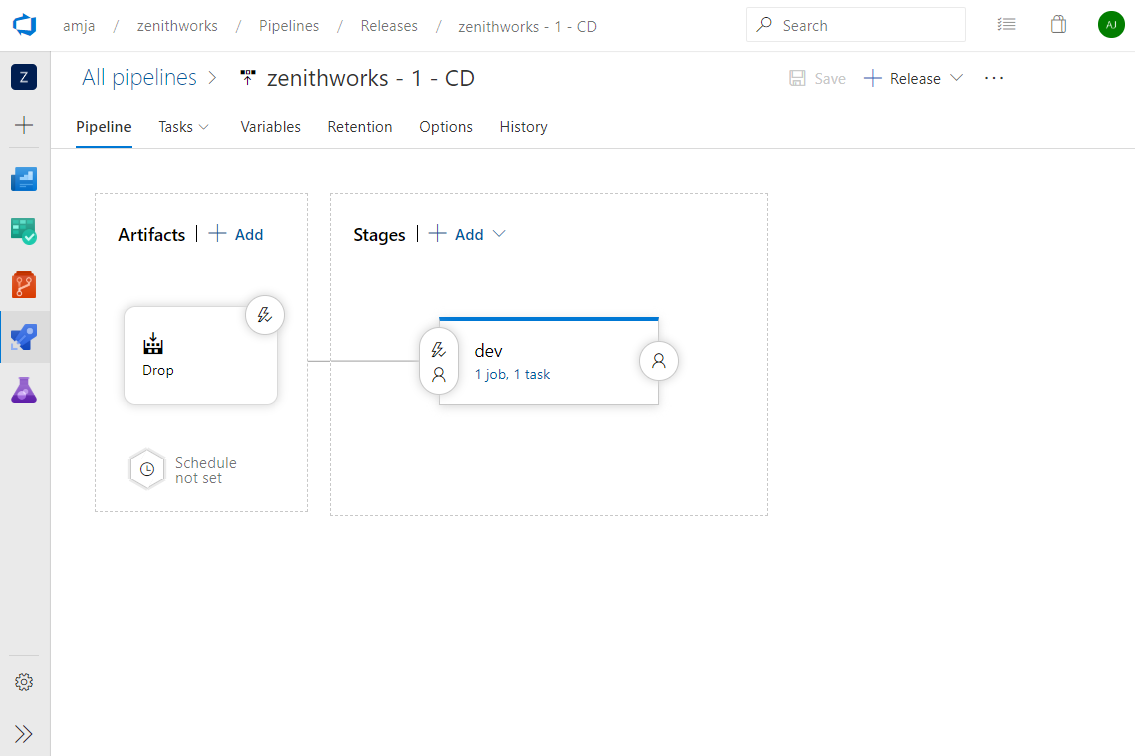
Select the tasks in the dev stage to navigate to the pipeline tasks, and then select Deploy.
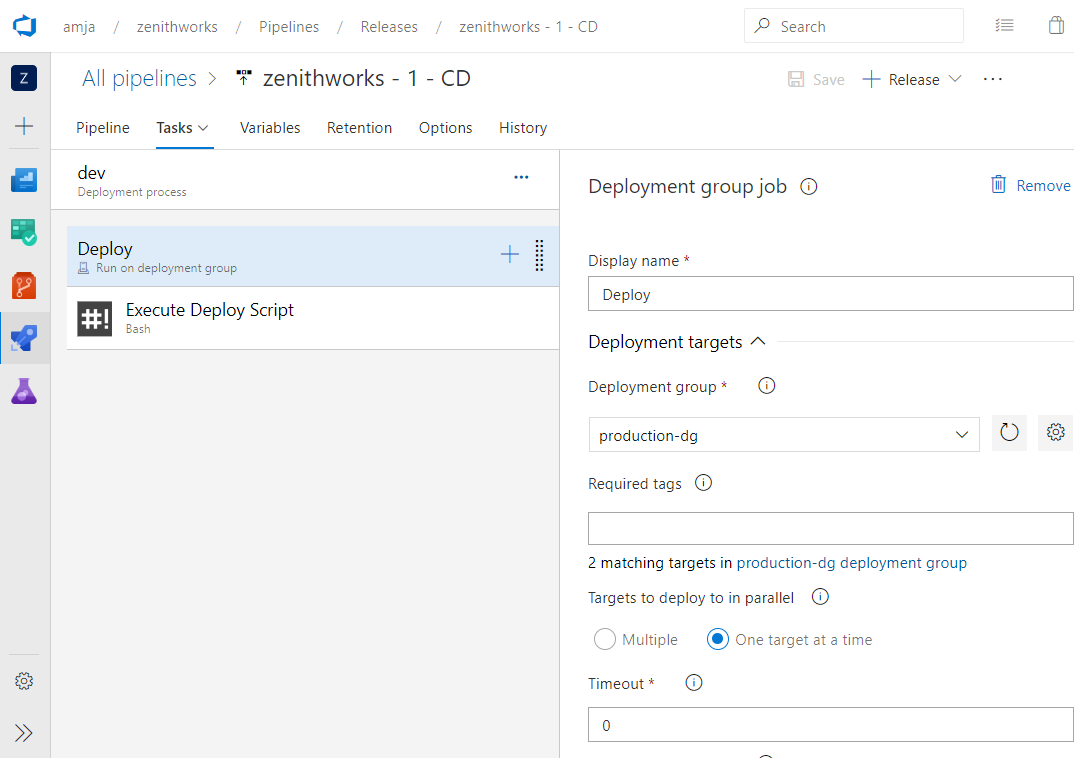
You can specify the number of target machines to deploy to in parallel in each iteration. If you want to deploy to multiple machines, you can specify the number of machines as a percentage by using the slider.
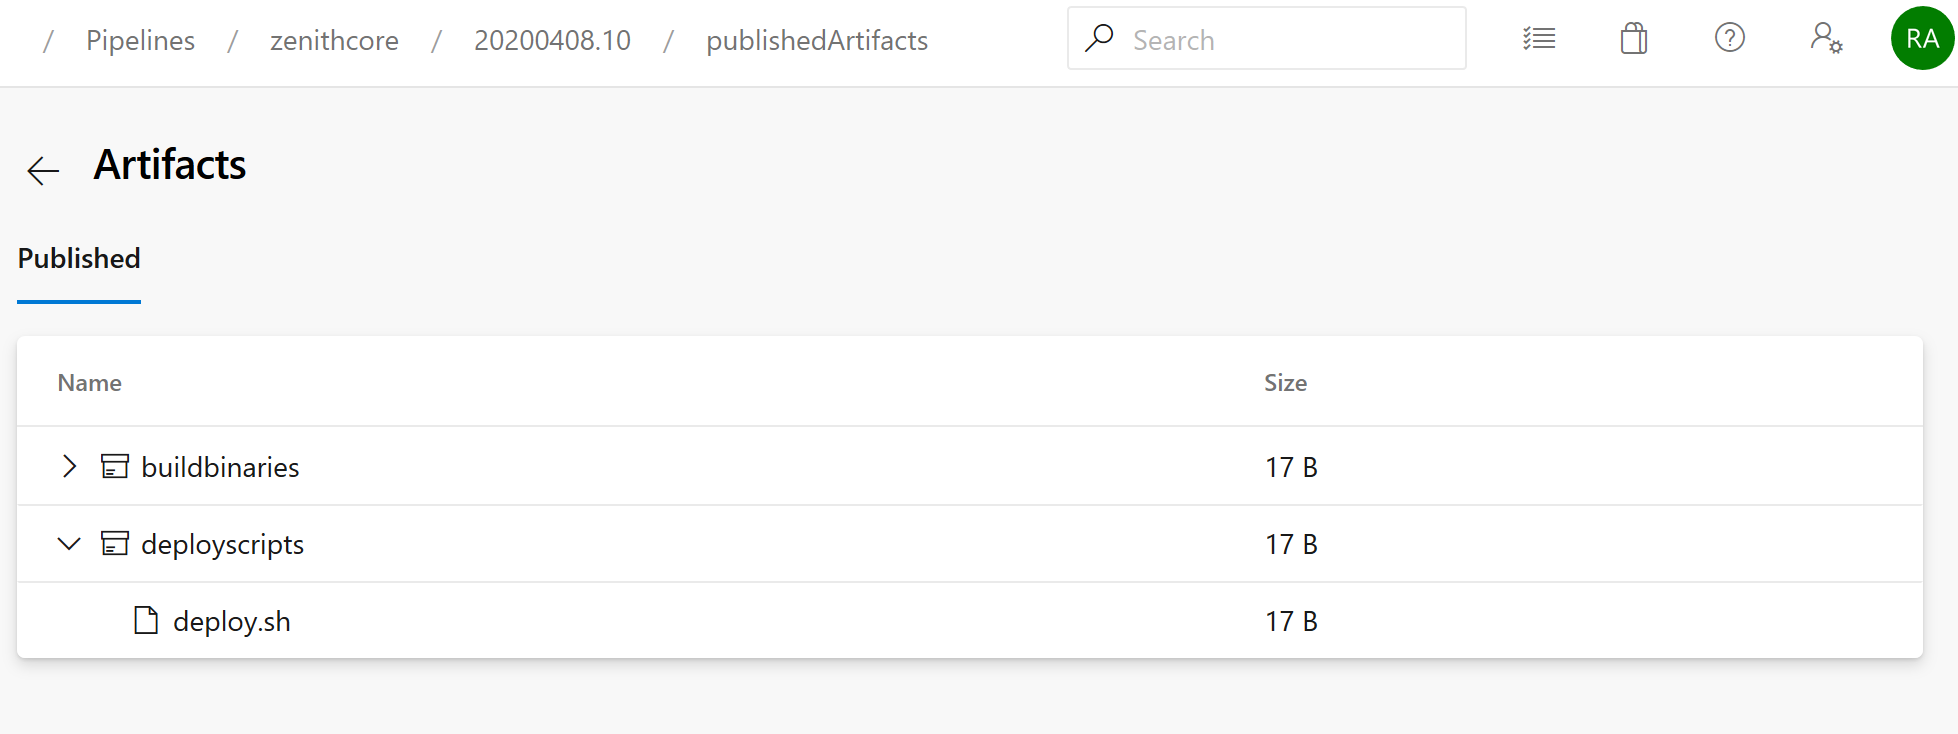
The Execute Deploy Script task will execute the deployment script located in the root folder of the published artifacts.
Resources
Related articles
Retirement
Continuous delivery setting of Virtual Machines will be retired on March 31, 2023. Please switch to directly using Azure DevOps to create customized pipelines for deployment to Azure VMs. Release pipeline Stage Templates and Deployments Groups Azure DevOps' features provide similar experiences.
Migration Steps
There is no migration required as VM CD experience does not store any information itself, it just helps users with their Day 0 getting started experience on Azure and Azure DevOps. Users will still be able to perform all operations from Azure DevOps after retirement. You won't be able to create and view pipelines from the Azure portal anymore.
FAQ
Where can I set up my CD pipeline after this experience is deprecated?
You won't be able to view or create Azure DevOps pipelines from an Azure portal Virtual Machine blade after retirement. You still can go to Azure DevOps portal and view or update pipelines.
Will I lose my earlier configured pipelines?
No. Your pipelines will still be available in Azure DevOps.
How can I configure different deployment strategies?
The current experience uses deployment groups to create deployment strategies. You can use deployment groups or release pipeline Stage Templates to build your pipeline with templates.
Feedback
Coming soon: Throughout 2024 we will be phasing out GitHub Issues as the feedback mechanism for content and replacing it with a new feedback system. For more information see: https://aka.ms/ContentUserFeedback.
Submit and view feedback for