Create a proximity placement group using the Azure portal
Applies to: ✔️ Linux VMs ✔️ Windows VMs
To get VMs as close as possible, achieving the lowest possible latency, you should deploy them within a proximity placement group.
A proximity placement group is a logical grouping used to make sure that Azure compute resources are physically located close to each other. Proximity placement groups are useful for workloads where low latency is a requirement.
Note
Proximity placement groups cannot be used with dedicated hosts.
Intent for proximity placement groups is not supported on Azure portal. Use ARM templates or other client tools like Powershell or CLI to provide intent for proximity placement groups.
If you want to use availability zones together with placement groups, you need to make sure that the VMs in the placement group are also all in the same availability zone.
Create the proximity placement group
Type proximity placement group in the search.
Under Services in the search results, select Proximity placement groups.
In the Proximity placement groups page, select Add.
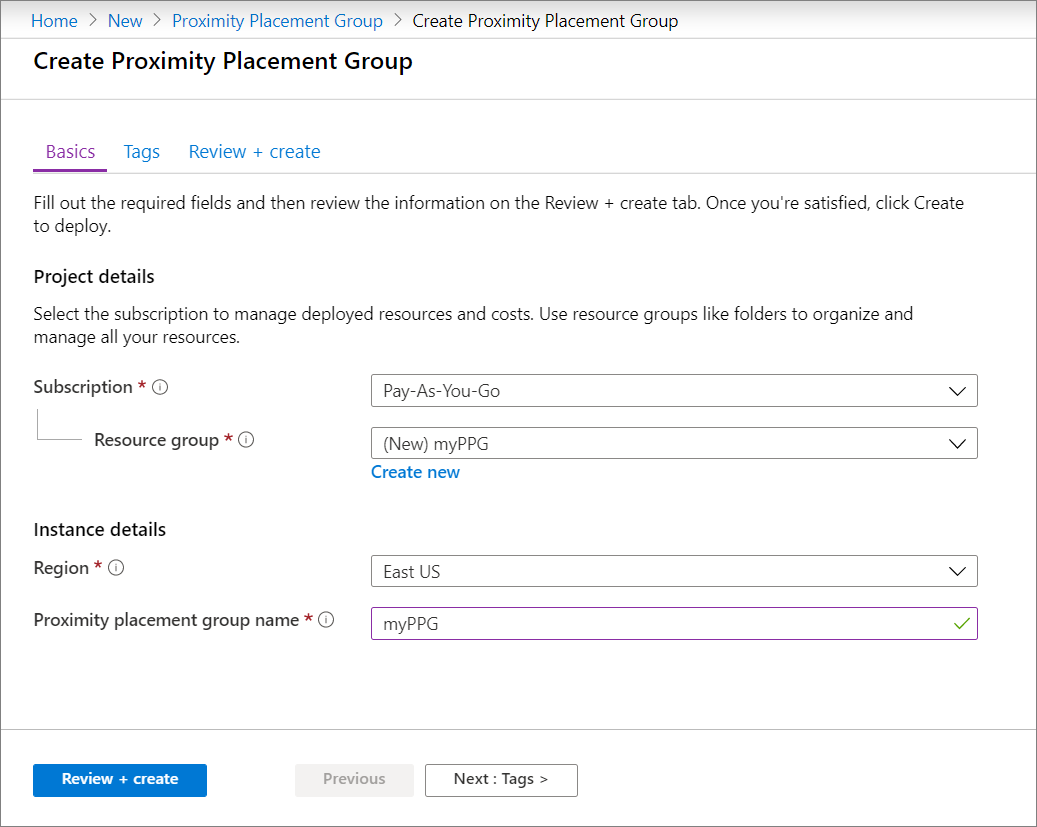
In the Basics tab, under Project details, make sure the correct subscription is selected.
In Resource group either select Create new to create a new group or select an empty resource group that already exists, from the drop-down.
In Region select the location where you want the proximity placement group to be created.
In Proximity placement group name type a name and then select Review + create.
After validation passes, select Create to create the proximity placement group.
Create a VM
While creating a VM in the portal, go to the Advanced tab.
In the Proximity placement group selection, select the correct placement group.

When you are done making all of the other required selections, select Review + create.
After it passes validation, select Create to deploy the VM in the placement group.
Add VMs in an availability set to a proximity placement group
If the VM is part of the Availability set, you need to add the availability set into the placement group, before adding the VMs.
- In the portal search for Availability sets and select your availability set from the results.
- Stop\deallocate each VM in the availability set by selecting the VM, then selecting Stop on the page for the VM, and then select OK to stop the VM.
- On the page for your availability set, make sure all of the VMs have the Status listed as Stopped (deallocated).
- In the left menu, select Configuration.
- Under Proximity placement group, select a placement group from the drop-down, and then select Save.
- Select Overview from the left menu to see the list of VMs again.
- Select each VM in the availability set, and then select Start on the page for each VM.
Add existing VM to placement group
- On the page for the VM, select Stop.
- Once the status of the VM is listed as Stopped (deallocated), select Configuration on the left menu.
- Under Proximity placement group, select a placement group from the drop-down, and then select Save.
- Select Overview from the left menu, then select Start to restart the VM.
Next steps
You can also use the Azure PowerShell to create proximity placement groups.
Feedback
Coming soon: Throughout 2024 we will be phasing out GitHub Issues as the feedback mechanism for content and replacing it with a new feedback system. For more information see: https://aka.ms/ContentUserFeedback.
Submit and view feedback for