Manage a public IP address with a load balancer
A public load balancer is a Layer 4 solution for distributing TCP and UDP traffic to a backend pool. Basic and standard SKUs are available for load balancer. These SKUs correspond with the basic and standard SKUs of a public IP address.
A public IP associated with a load balancer serves as an Internet-facing frontend IP configuration. The frontend is used to access resources in the backend pool. The frontend IP can be used for members of the backend pool to egress to the Internet.
A basic SKU Azure Load Balancer is limited in availability options and feature sets. A standard SKU load balancer and IP address combination is the recommended deployment for production workloads. Standard SKU IP addresses support availability zones in supported regions.
Important
On September 30, 2025, Basic Load Balancer will be retired. For more information, see the official announcement. If you are currently using Basic Load Balancer, make sure to upgrade to Standard Load Balancer prior to the retirement date. This article will help guide you through the upgrade process.
In this article, you learn how to:
- Create a load balancer with an existing public IP address in your subscription.
- Change the current public IP associated to a load balancer.
- Change the frontend configuration of a load balancer from a public IP address to a public IP prefix.
Finally, the article reviews unique aspects of using public IPs and public IP prefixes with a load balancer.
Note
Standard SKU load balancer and public IP are used for the examples in this article. For basic SKU load balancers, the procedures are the same except for the selection of SKU upon creation of the load balancer and public IP resources. Basic load balancers don't support outbound rules or public IP prefixes. These procedures are also valid for a cross-region load balancer. For more information on cross-region load balancer, see Cross-region load balancer.
Prerequisites
- An Azure account with an active subscription. Create one for free.
- Two standard SKU public IP addresses in your subscription. The IP addresses can't be associated with any resources. For more information on creating a standard SKU public IP address, see Create a public IP address using the Azure portal.
- For the purposes of the examples in this article, name the new public IP addresses myStandardPublicIP-1 and myStandardPublicIP-2.
- A public IP prefix in your subscription. For more information on creating a public IP prefix, see Create a public IP address prefix using the Azure portal.
- For the purposes of the example in this article, name the new public IP prefix myPublicIPPrefixOutbound.
Create load balancer using existing public IP
In this section, you create a standard SKU load balancer. You select the IP address you created in the prerequisites as the frontend IP of the load balancer.
Sign in to the Azure portal.
In the search box at the top of the portal, enter Load balancer.
In the search results, select Load balancers.
Select + Create.
In the Basics tab of Create Load balancer, enter or select the following information:
Setting Value Project details Subscription Select your subscription. Resource group Select Create new. Enter myResourceGroupIP. Select OK. Instance details Name Enter myLoadBalancer. Region Select (US) West US 2. SKU Leave the default of Standard. Type Select Public. Tier Leave the default of Regional. Select Next: Frontend IP configuration at the bottom of the page.
In the Front IP configuration, select + Add a frontend IP configuration and then enter or select the following information.
Setting Value Name Enter myFrontend. IP version Select IPv4. IP type Select IP address. Public IP address Select myStandardPublicIP-1. Gateway Load balancer Leave the default of None. Select Review + create, and then select Create.
Note
This is a simple deployment of a load balancer. For advanced configuration and setup, see Quickstart: Create a public load balancer to load balance VMs using the Azure portal
For more information on Azure Load Balancer, see What is Azure Load Balancer?
Change or remove public IP address
In this section, you change the frontend IP address of the load balancer.
An Azure Load Balancer must have an IP address associated with a frontend. A separate public IP address can be utilized as a frontend for ingress and egress traffic.
To change the IP, you associate a new public IP address previously created with the load balancer frontend.
Sign in to the Azure portal.
In the search box at the top of the portal, enter Load balancer.
In the search results, select Load balancers.
In Load Balancers, select myLoadBalancer or the load balancer you wish to change.
In settings of myLoadBalancer, select Frontend IP configuration.
In Frontend IP configuration, select myFrontend or your load balancer frontend.
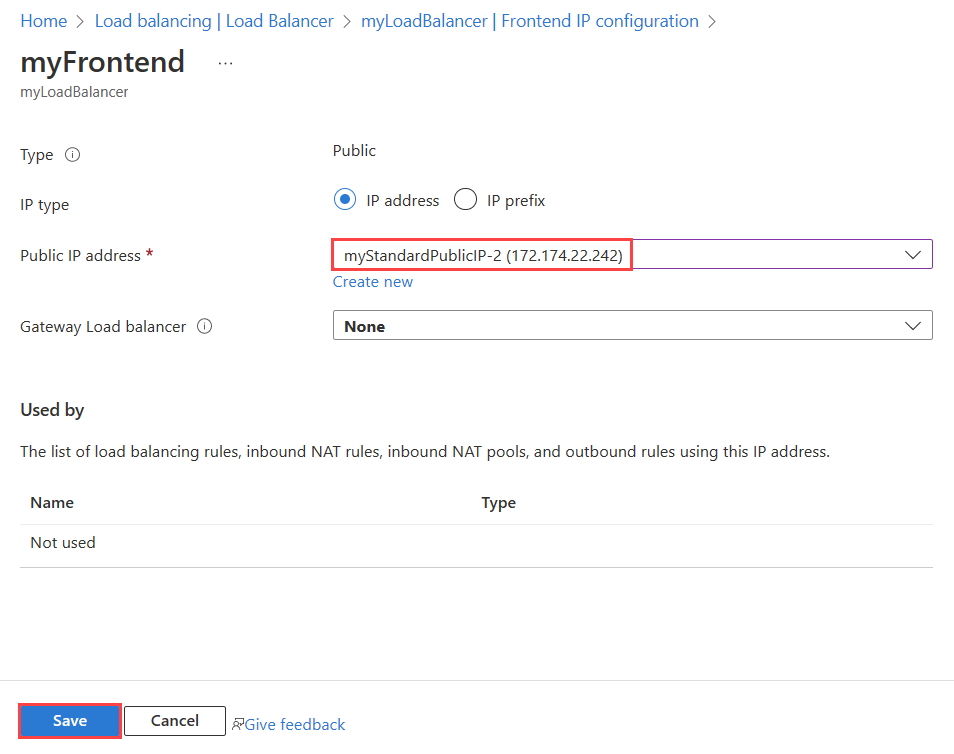
In the load balancer frontend configuration, select myStandardPublicIP-2 in Public IP address.
Select Save.
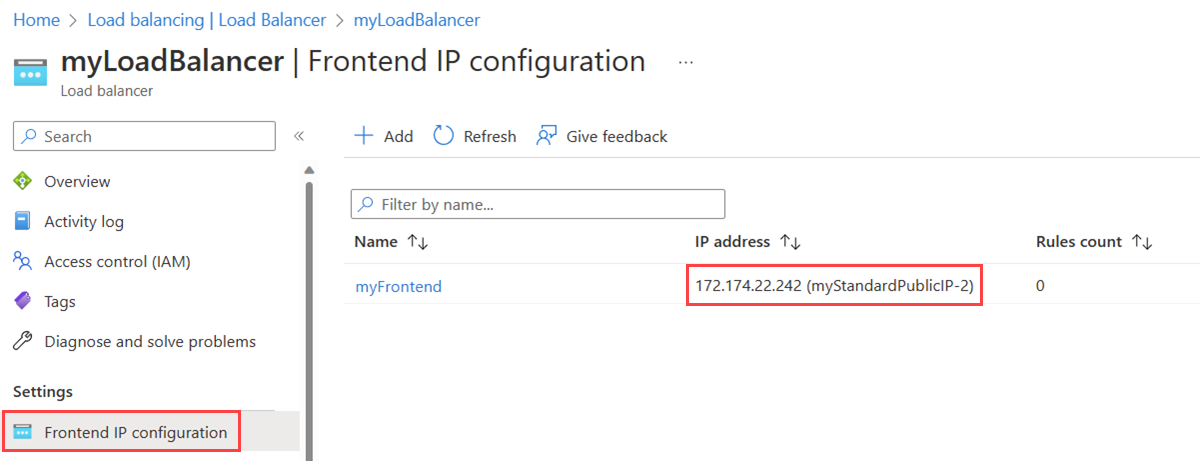
In Frontend IP configuration, verify the load balancer frontend displays the new IP address named myStandardPublicIP-2.
Note
This technique can be utilized when transitioning from a non-zonal frontend to a zone-redundant frontend in regions that support availability zones. See Load Balancer and Availability Zones
Add public IP prefix
Standard load balancer supports outbound rules for Source Network Address Translation (SNAT). SNAT allows egress to the internet for members of the backend pool. Public IP prefixes extend the extensibility of SNAT by allowing multiple IP addresses for outbound connections.
Multiple IPs avoid SNAT port exhaustion. Each Frontend IP provides 64,000 ephemeral ports that the load balancer can use. For more information, see Outbound Rules.
In this section, you change the frontend configuration used for outbound connections to use a public IP prefix.
Sign in to the Azure portal.
In the search box at the top of the portal, enter Load balancer.
In the search results, select Load balancers.
In Load Balancers, select myLoadBalancer or the load balancer you wish to change.
In settings of myLoadBalancer, select Frontend IP configuration.
In Frontend IP configuration, select myFrontend or your load balancer outbound frontend.
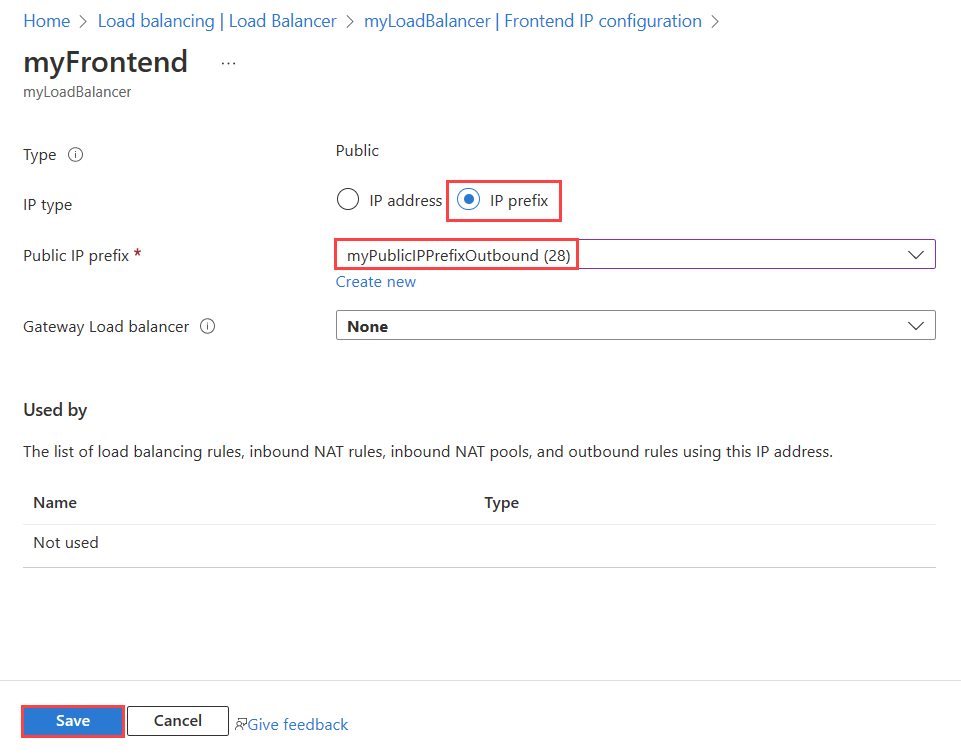
For IP type, select IP prefix.
In Public IP prefix, select the public IP prefix you created previously myPublicIPPrefixOutbound.
Select Save.
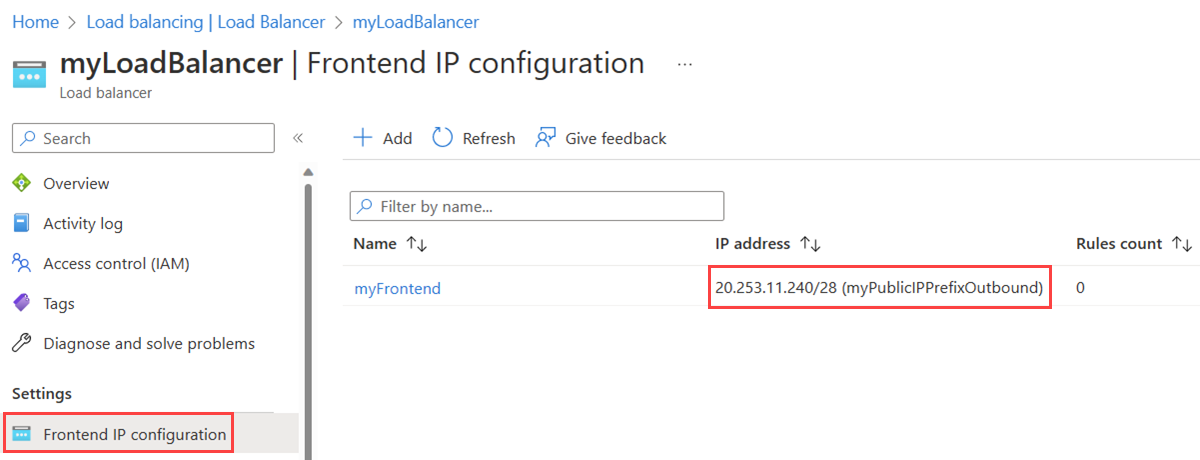
In Frontend IP configuration, verify the load balancer frontend displays the public IP prefix named myPublicIPPrefixOutbound.
More information
Cross-region load balancers are a special type of standard public load balancer that can span multiple regions. The frontend of a cross-region load balancer can only be used with the global tier option of standard SKU public IPs. Traffic sent to the frontend IP of a cross-region load balancer is distributed across the regional public load balancers. The regional frontend IPs are contained in the backend pool of the cross-region load balancer. For more information, see Cross-region load balancer.
By default, a public load balancer can't use multiple load-balancing rules with the same backend port. If a multiple rule configuration to the same backend port is required, then enable the floating IP option for a load-balancing rule. This setting overwrites the destination IP address of the traffic sent to the backend pool. Without floating IP enabled, the destination is the backend pool private IP. With floating IP enabled, the destination IP is the load balancer frontend public IP. The backend instance must have this public IP configured in its network configuration to correctly receive this traffic. A loopback interface with the frontend IP address must be configured in the instance. For more information, see Azure Load Balancer Floating IP configuration.
With a load balancer setup, members of backend pool can often also be assigned instance-level public IPs. With this architecture, sending traffic directly to these IPs bypasses the load balancer.
Caveats
Standard public load balancers can use standard SKU static IPv6 addresses as their frontend public IPs or public IP prefixes. Every deployment must be dual-stack with both IPv4 and IPv6 frontends. NAT64 translation is unavailable. For more information, see Deploy an IPv6 dual stack application in Azure - PowerShell (Basic public load balancers can use basic SKU dynamic IPv6 addresses as their frontend public IPs.).
When multiple frontends are assigned to a public load balancer, there isn't a method to assign flows from particular backend instances to egress on a specific IP. For more information, see Multiple frontends for Azure Load Balancer.
Next steps
In this article, you:
- Created a load balancer using an existing public IP.
- Replaced the IP address in a load balancer frontend configuration.
- Changed an outbound frontend configuration to use a public IP prefix.
For more information about Azure Load Balancer, see What is Azure Load Balancer?
To learn more about public IP addresses in Azure, see Public IP addresses.
Feedback
Coming soon: Throughout 2024 we will be phasing out GitHub Issues as the feedback mechanism for content and replacing it with a new feedback system. For more information see: https://aka.ms/ContentUserFeedback.
Submit and view feedback for