Configure point-to-site VPN clients: certificate authentication - macOS and iOS
This article helps you connect to your Azure virtual network (VNet) using VPN Gateway point-to-site (P2S) and Certificate authentication. There are multiple sets of steps in this article, depending on the tunnel type you selected for your P2S configuration, the operating system, and the VPN client that is used to connect.
Note the following when working with certificate authentication:
For the IKEv2 tunnel type, you can connect using the VPN client that is natively installed on the macOS system.
For the OpenVPN tunnel type, you can use an OpenVPN client.
The Azure VPN Client isn't available for macOS and iOS when using certificate authentication, even if you selected the OpenVPN tunnel type for your P2S configuration.
Before you begin
Before beginning, verify that you are on the correct article. The following table shows the configuration articles available for Azure VPN Gateway P2S VPN clients. Steps differ, depending on the authentication type, tunnel type, and the client OS.
| Authentication | Tunnel type | Generate config files | Configure VPN client |
|---|---|---|---|
| Azure certificate | IKEv2, SSTP | Windows | Native VPN client |
| Azure certificate | OpenVPN | Windows | - OpenVPN client - Azure VPN client |
| Azure certificate | IKEv2, OpenVPN | macOS-iOS | macOS-iOS |
| Azure certificate | IKEv2, OpenVPN | Linux | Linux |
| Microsoft Entra ID | OpenVPN (SSL) | Windows | Windows |
| Microsoft Entra ID | OpenVPN (SSL) | macOS | macOS |
| RADIUS - certificate | - | Article | Article |
| RADIUS - password | - | Article | Article |
| RADIUS - other methods | - | Article | Article |
Important
Starting July 1, 2018, support is being removed for TLS 1.0 and 1.1 from Azure VPN Gateway. VPN Gateway will support only TLS 1.2. Only point-to-site connections are impacted; site-to-site connections won't be affected. If you’re using TLS for point-to-site VPNs on Windows 10 or later clients, you don’t need to take any action. If you're using TLS for point-to-site connections on Windows 7 and Windows 8 clients, see the VPN Gateway FAQ for update instructions.
Generate certificates
For certificate authentication, a client certificate must be installed on each client computer. The client certificate you want to use must be exported with the private key, and must contain all certificates in the certification path. Additionally, for some configurations, you'll also need to install root certificate information.
For information about working with certificates, see Point-to site: Generate certificates - Linux.
Generate VPN client configuration files
All of the necessary configuration settings for the VPN clients are contained in a VPN client profile configuration zip file. You can generate client profile configuration files using PowerShell, or by using the Azure portal. Either method returns the same zip file.
The VPN client profile configuration files that you generate are specific to the P2S VPN gateway configuration for the virtual network. If there are any changes to the P2S VPN configuration after you generate the files, such as changes to the VPN protocol type or authentication type, you need to generate new VPN client profile configuration files and apply the new configuration to all of the VPN clients that you want to connect. For more information about P2S connections, see About point-to-site VPN.
To generate files using the Azure portal:
In the Azure portal, go to the virtual network gateway for the virtual network to which you want to connect.
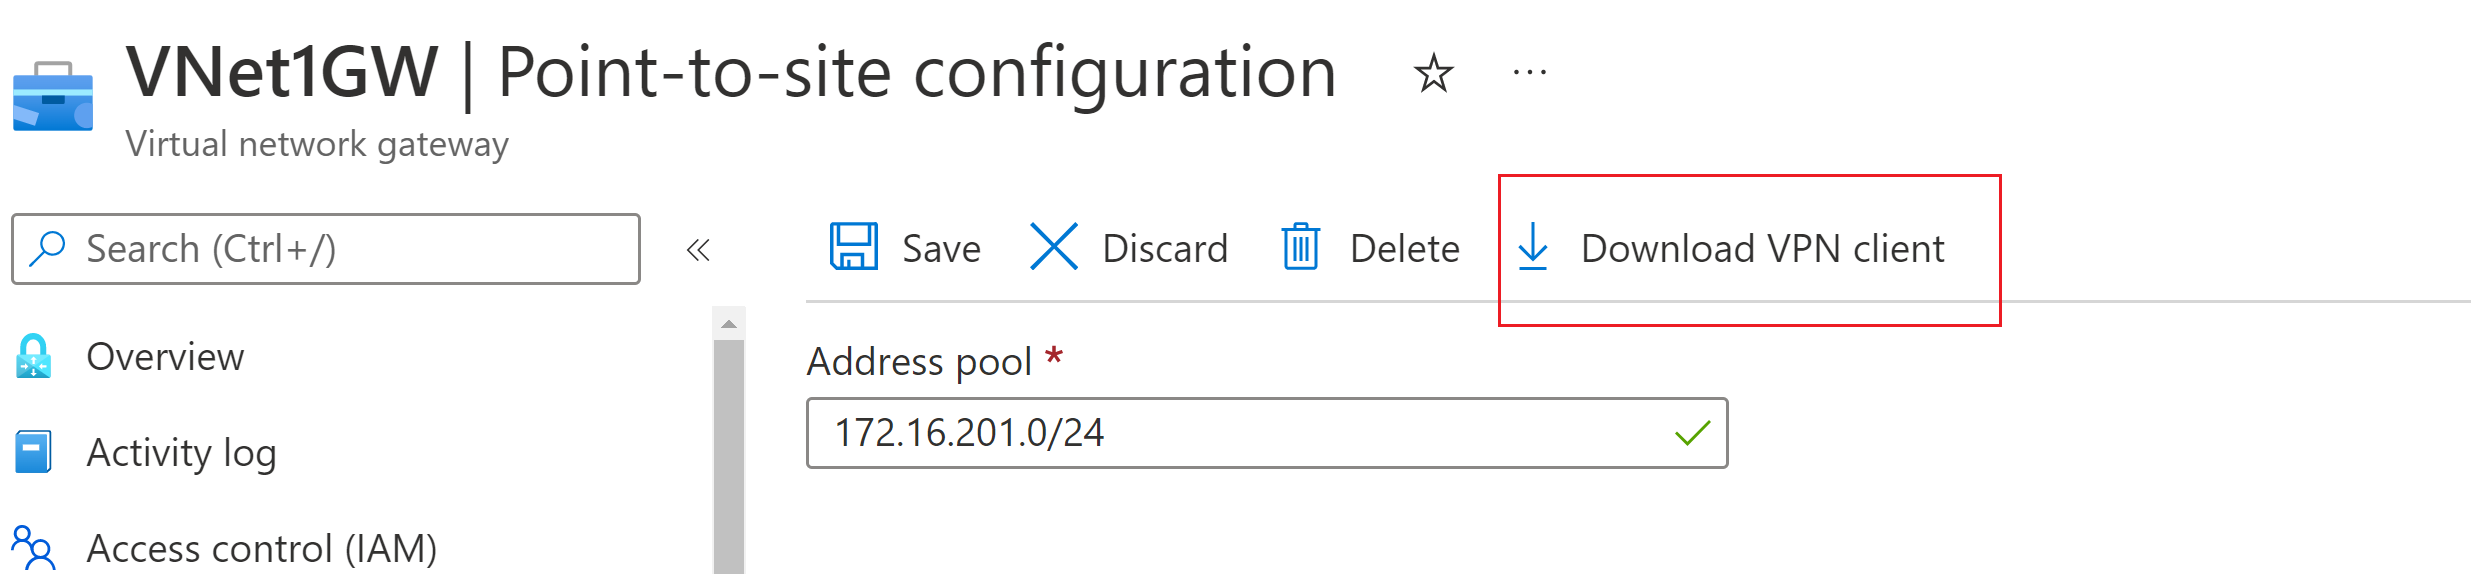
On the virtual network gateway page, select Point-to-site configuration to open the Point-to-site configuration page.
At the top of the Point-to-site configuration page, select Download VPN client. This doesn't download VPN client software, it generates the configuration package used to configure VPN clients. It takes a few minutes for the client configuration package to generate. During this time, you might not see any indications until the packet generates.
Once the configuration package is generated, your browser indicates that a client configuration zip file is available. It's named the same name as your gateway.
Unzip the file to view the folders. You'll use some, or all, of these files to configure your VPN client. The files that are generated correspond to the authentication and tunnel type settings that you configured on the P2S server.

Next, configure the VPN client. Select from the following instructions:
IKEv2: native VPN client - macOS steps
The following sections help you configure the native VPN client that is already installed as part of macOS. This type of connection works over IKEv2 only.
View files
Unzip the file to view the folders. When you configure macOS native clients, you use the files in the Generic folder. The Generic folder is present if IKEv2 was configured on the gateway. You can find all of the information that you need to configure the native VPN client in the Generic folder. If you don't see the Generic folder, check the following items, then generate the zip file again.
- Check the tunnel type for your configuration. It's likely that IKEv2 wasn’t selected as a tunnel type.
- On the VPN gateway, verify that the SKU isn’t Basic. The VPN Gateway Basic SKU doesn’t support IKEv2. Then, select IKEv2 and generate the zip file again to retrieve the Generic folder.
The Generic folder contains the following files.
- VpnSettings.xml, which contains important settings like server address and tunnel type.
- VpnServerRoot.cer, which contains the root certificate required to validate the Azure VPN gateway during P2S connection setup.
Use the following steps to configure the native VPN client on Mac for certificate authentication. These steps must be completed on every Mac that you want to connect to Azure.
Install certificates
Root certificate
- Copy to the root certificate file - VpnServerRoot.cer - to your Mac. Double-click the certificate. Depending on your operating system, the certificate will either automatically install, or you'll see the Add Certificates page.
- If you see the Add Certificates page, for Keychain: click the arrows and select login from the dropdown.
- Click Add to import the file.
Client certificate
The client certificate is used for authentication and is required. Typically, you can just click the client certificate to install. For more information about how to install a client certificate, see Install a client certificate.
Verify certificate install
Verify that both the client and the root certificate are installed.
- Open Keychain Access.
- Go to the Certificates tab.
- Verify that both the client and the root certificate are installed.
Configure VPN client profile
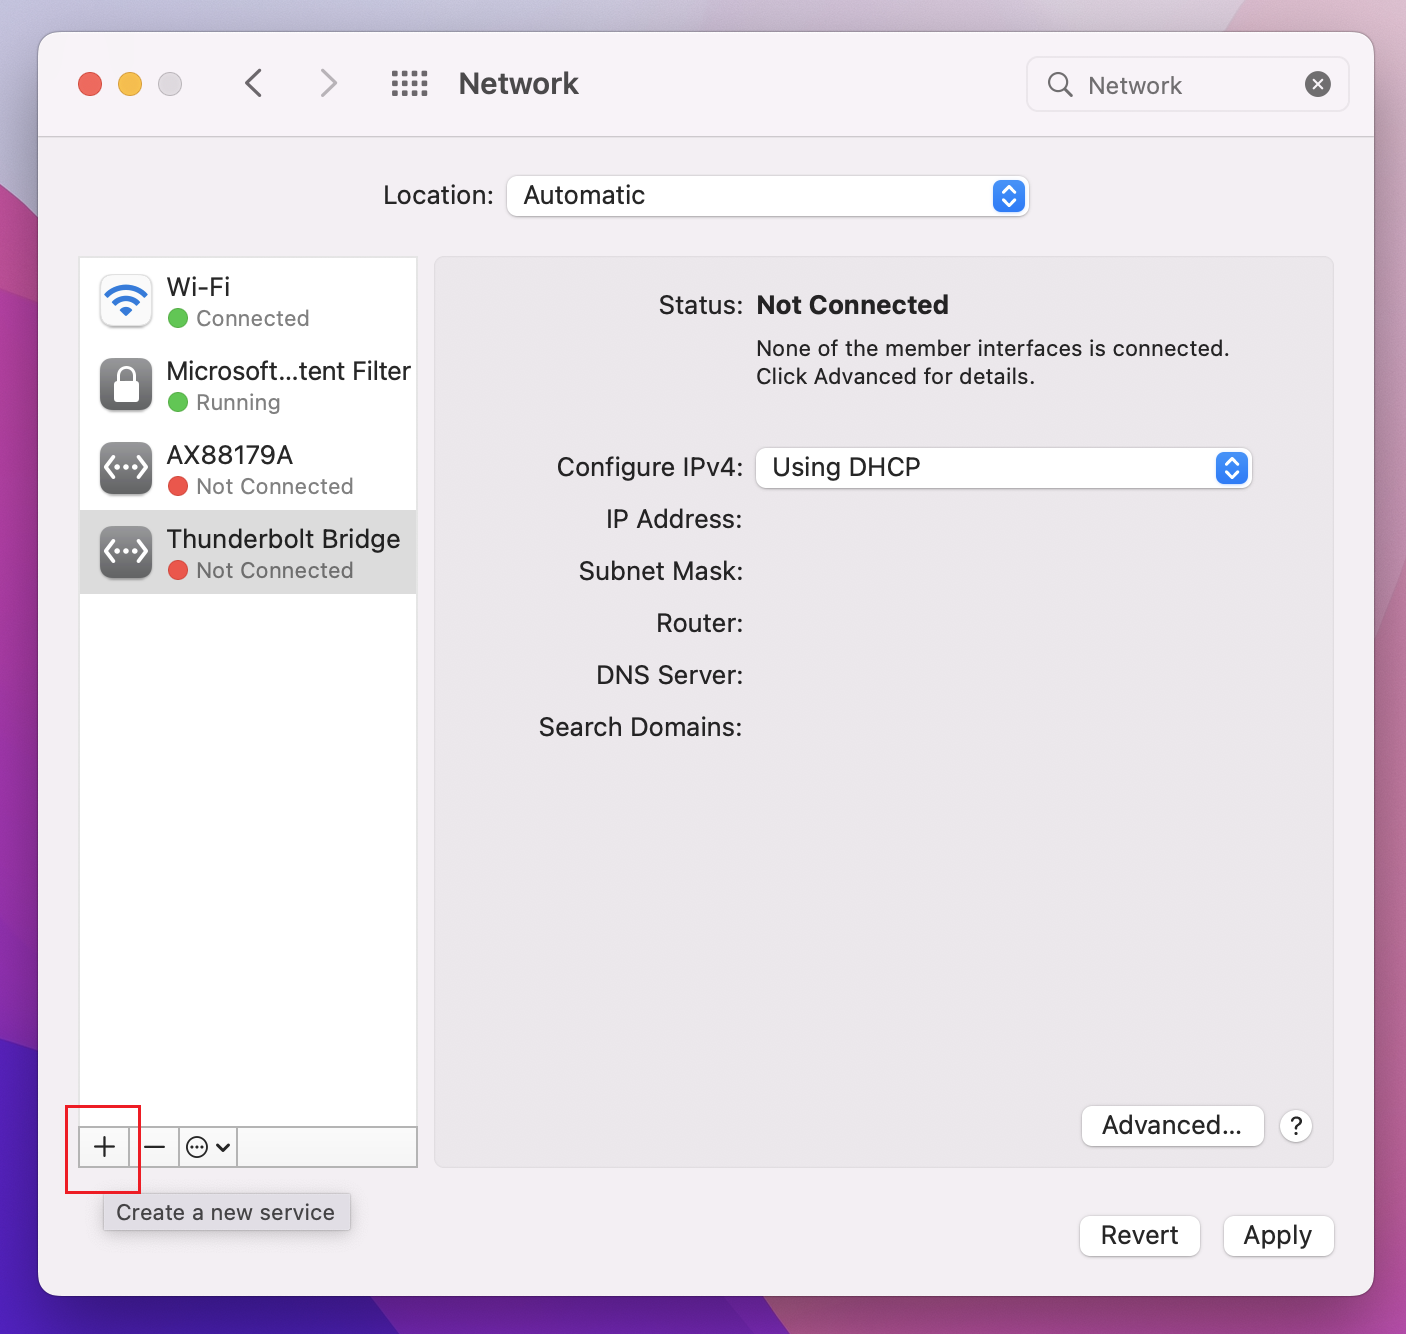
Go to System Preferences -> Network. On the Network page, click '+' to create a new VPN client connection profile for a P2S connection to the Azure virtual network.
On the Select the interface page, click the arrows next to Interface:. From the dropdown, click VPN.
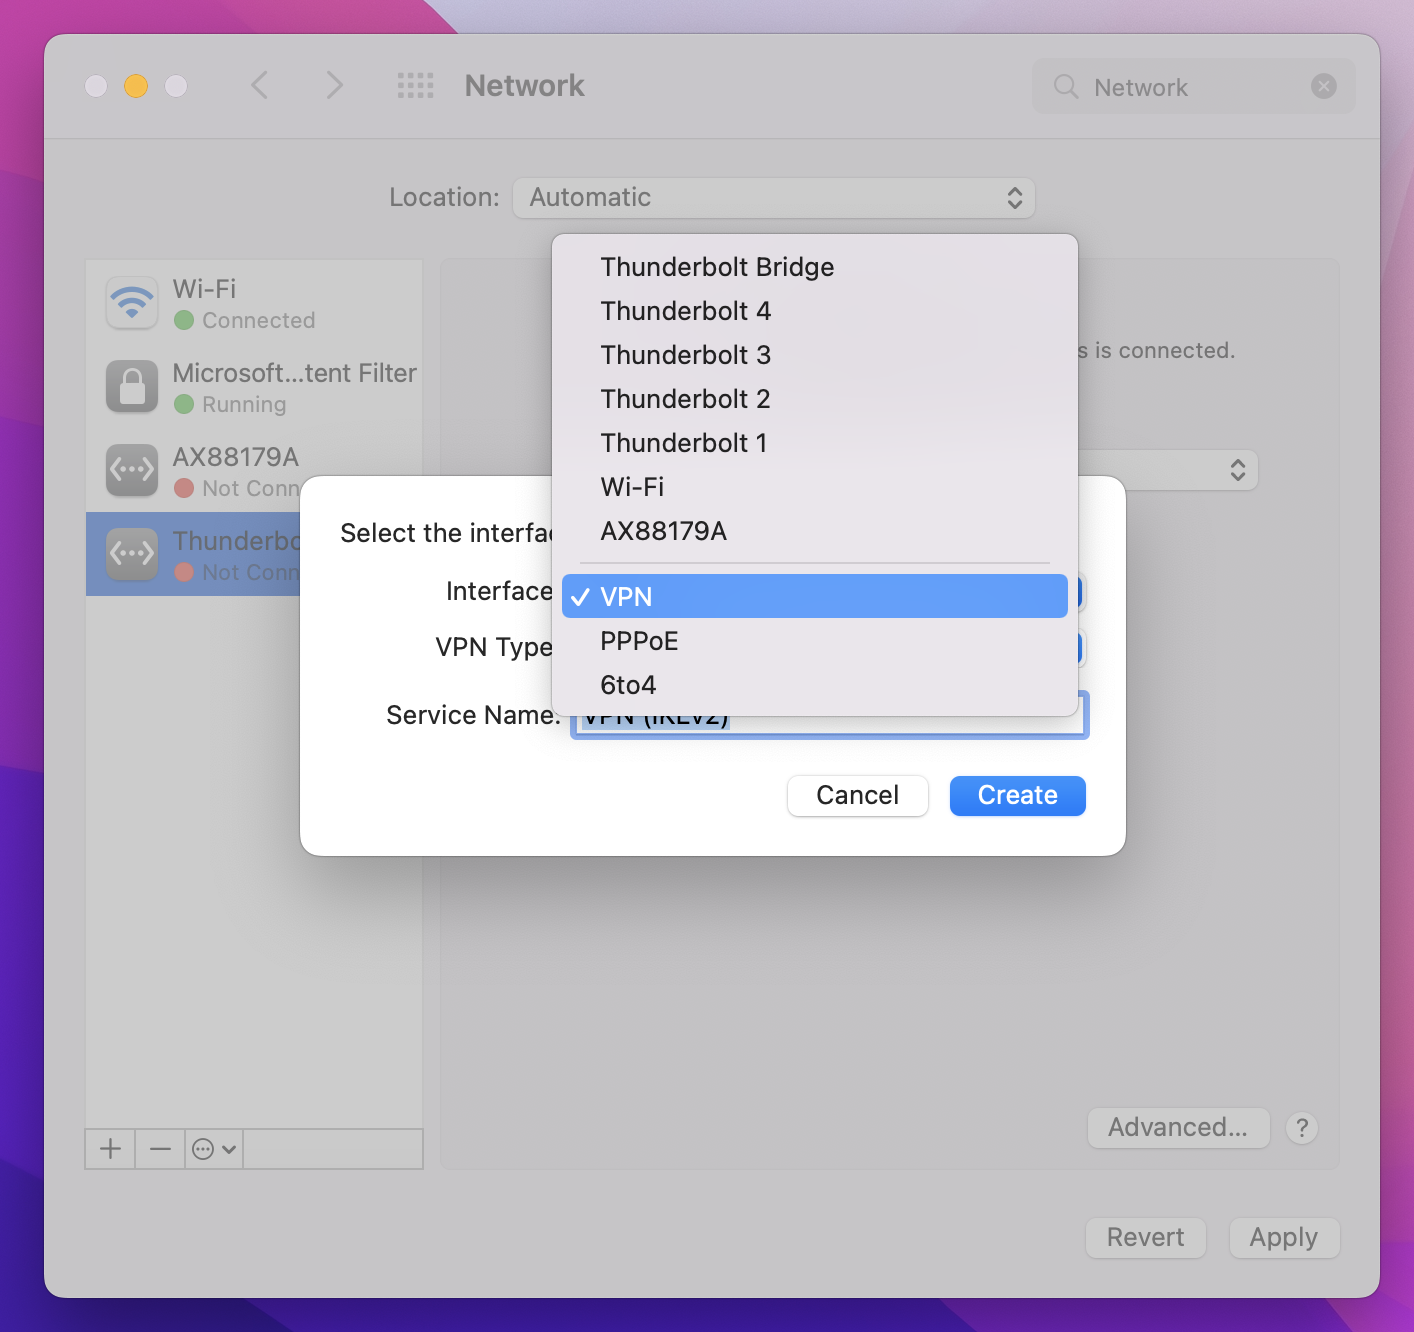
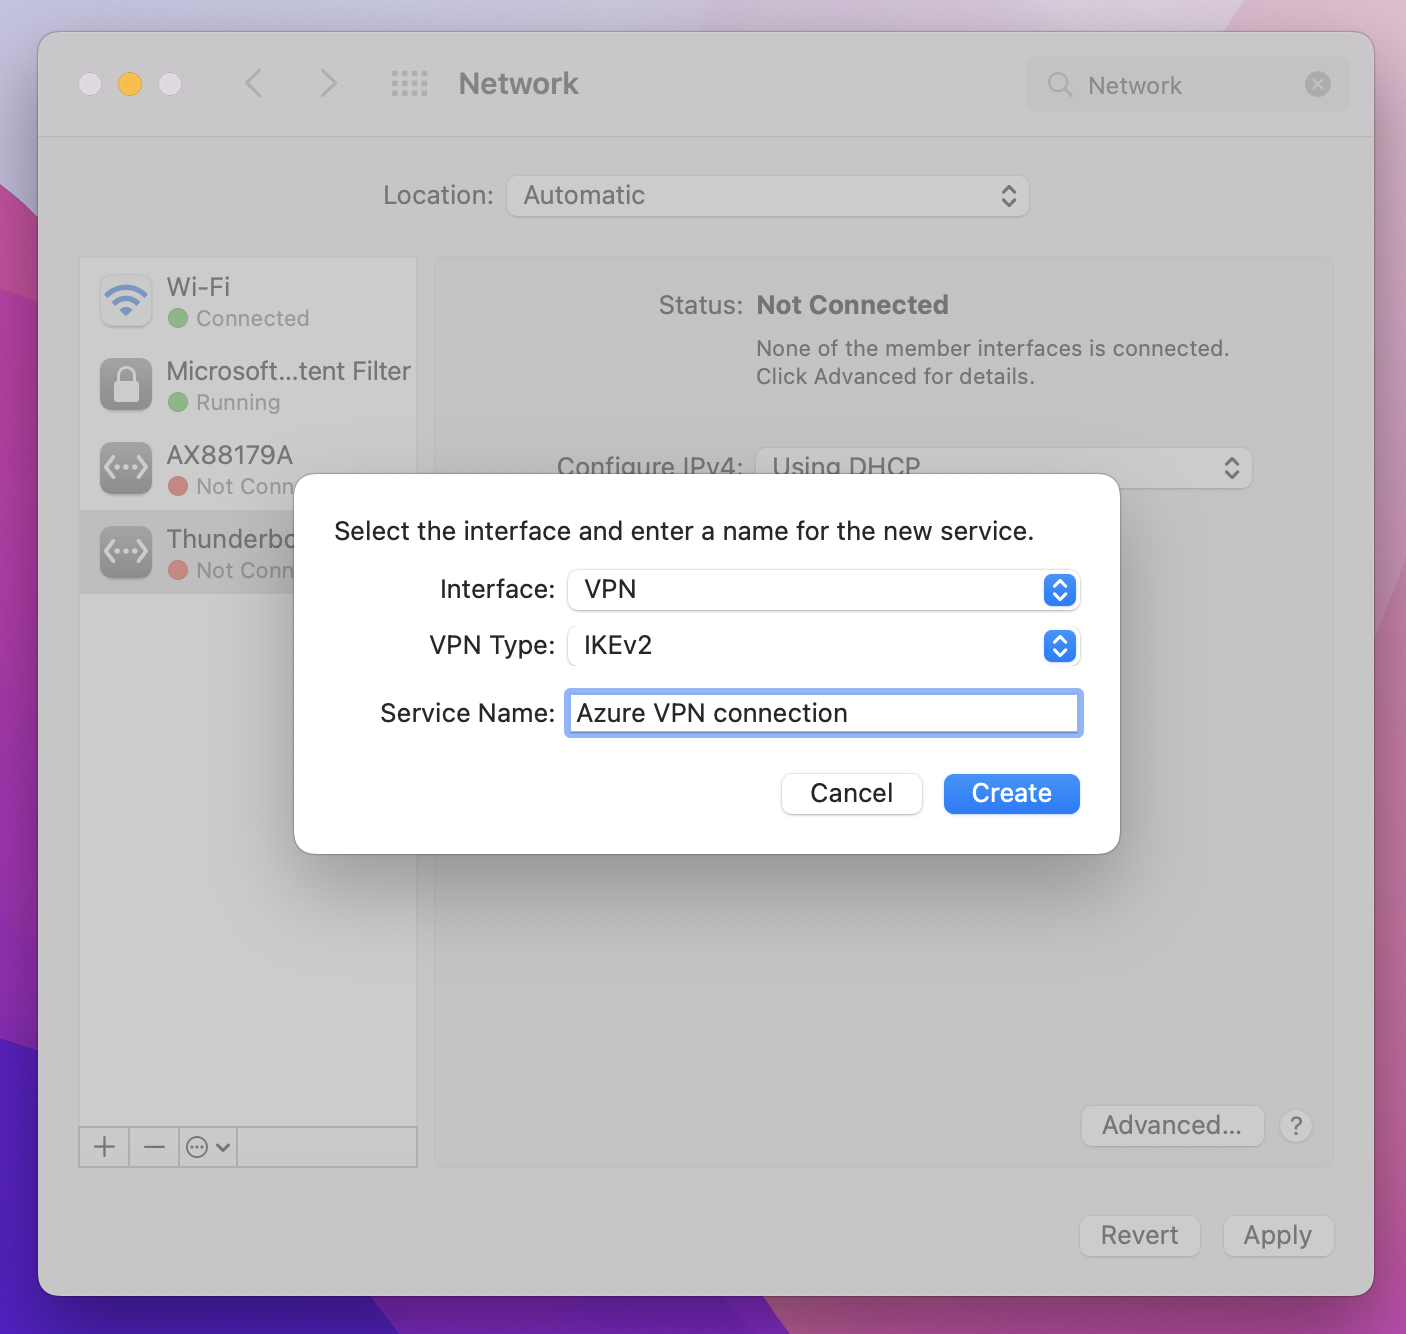
For VPN Type, from the dropdown, click IKEv2. In the Service Name field, specify a friendly name for the profile, then click Create.
Go to the VPN client profile that you downloaded. In the Generic folder, open the VpnSettings.xml file using a text editor. In the example, you can see information about the tunnel type and the server address. Even though there are two VPN types listed, this VPN client will connect over IKEv2. Copy the VpnServer tag value.
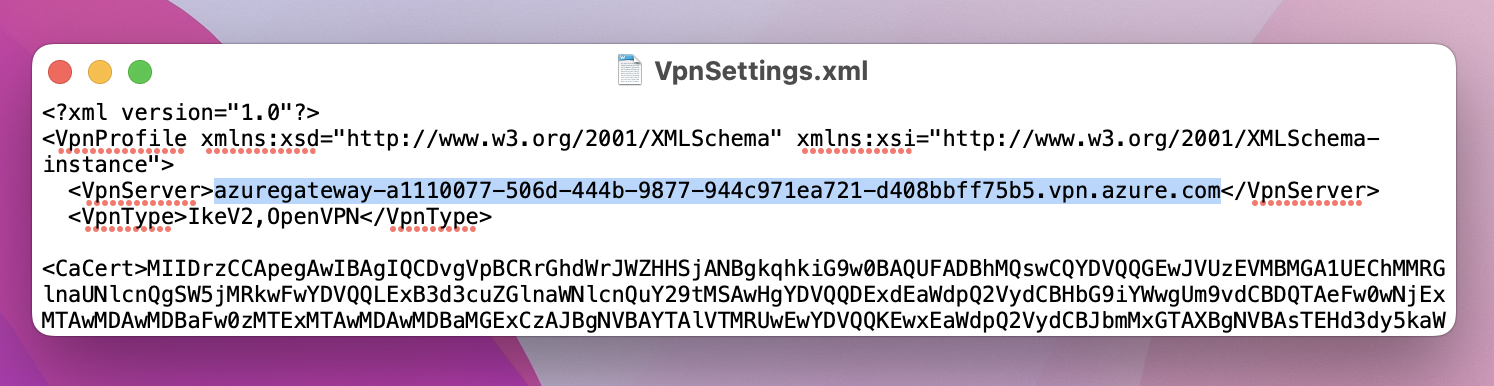
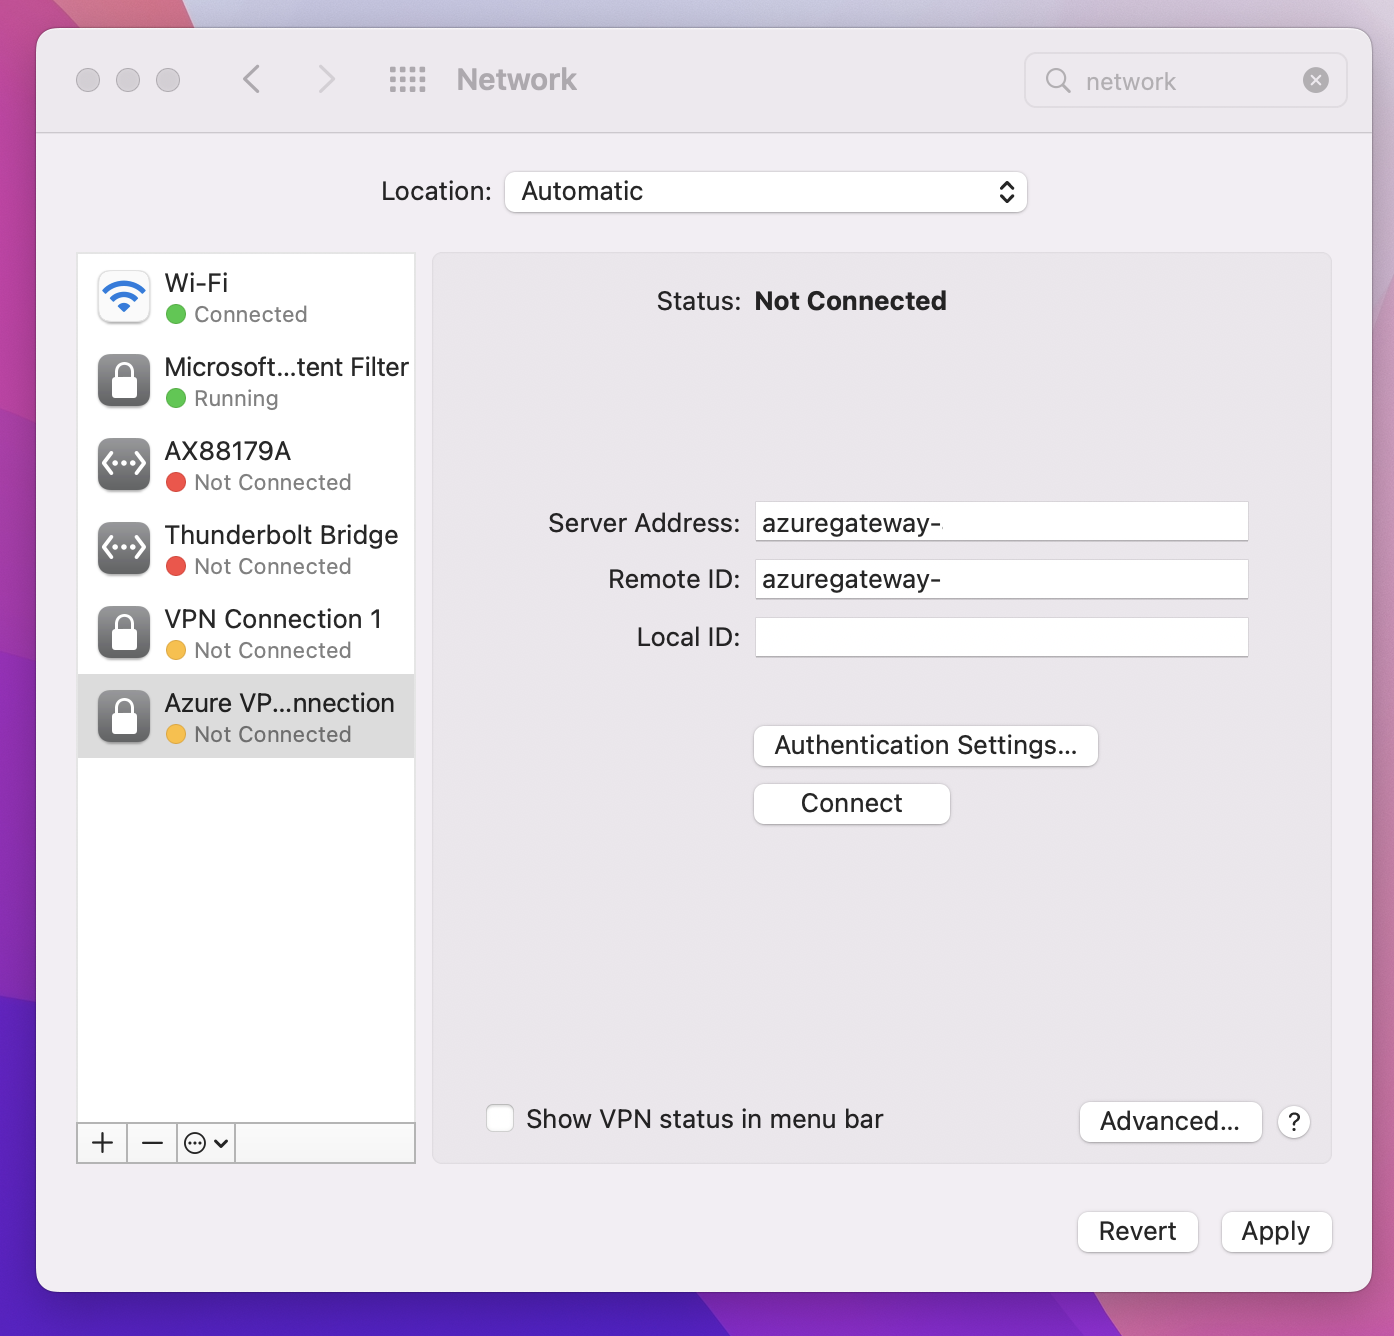
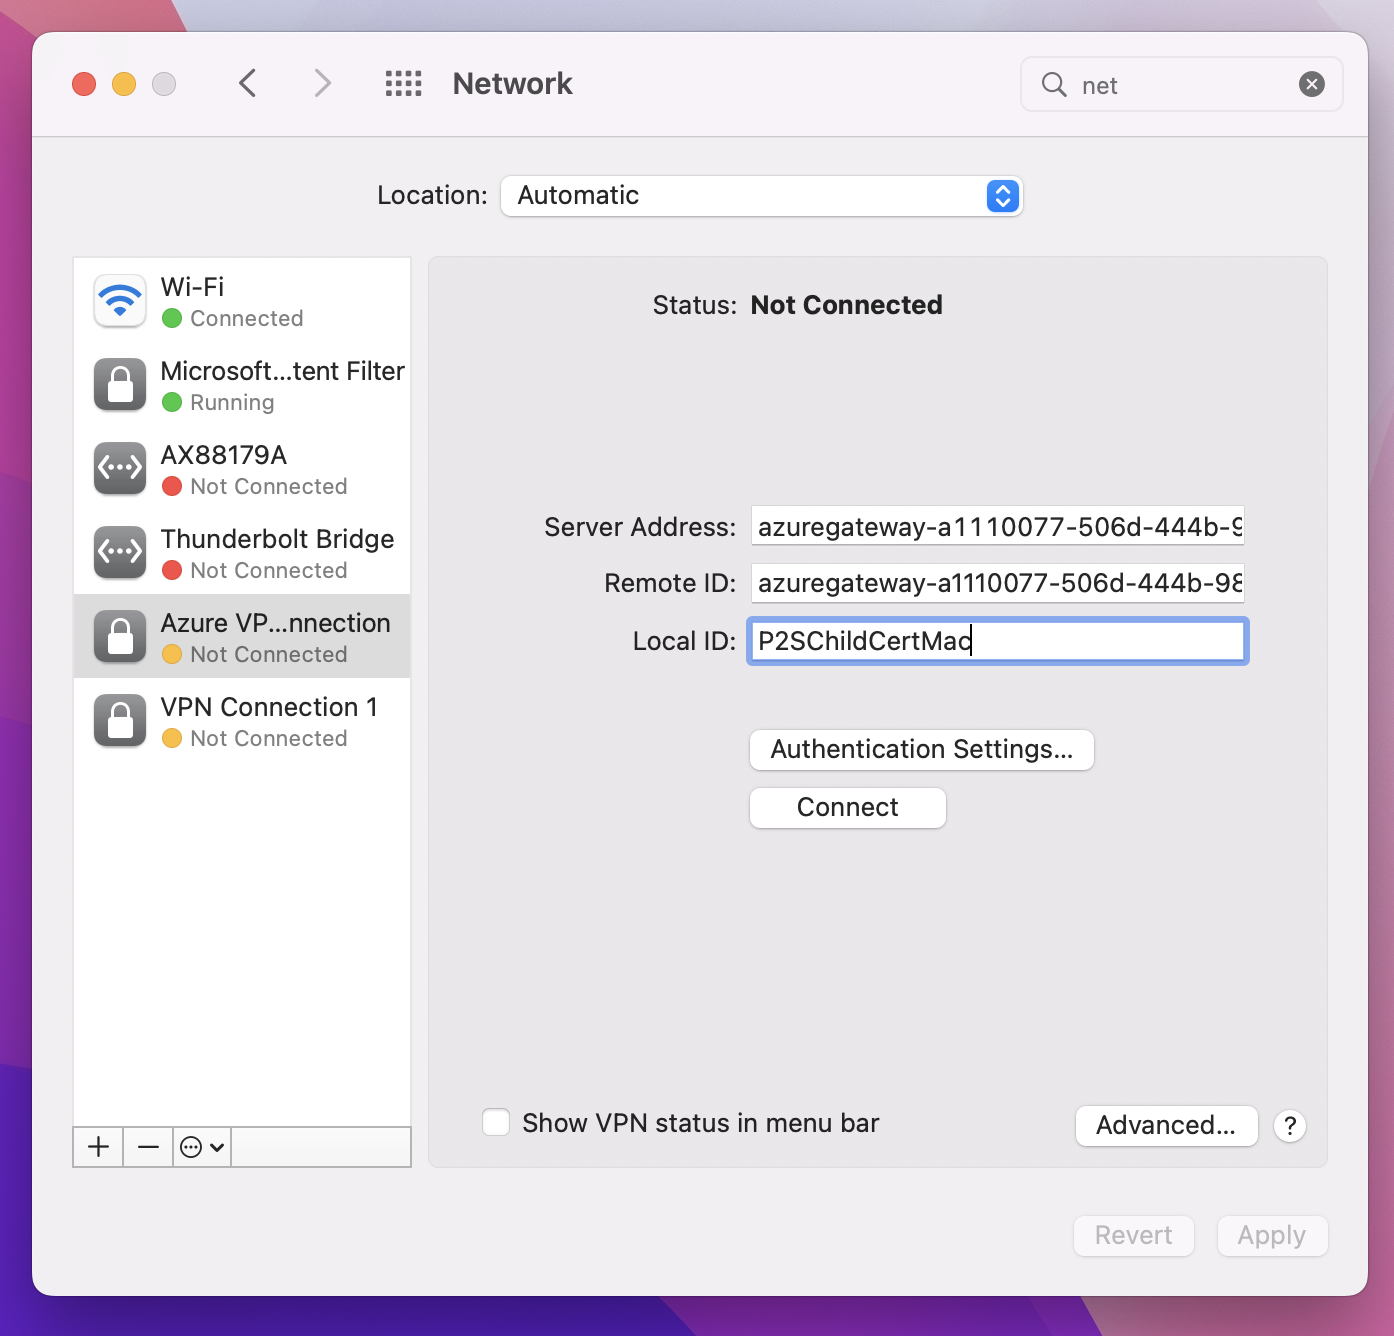
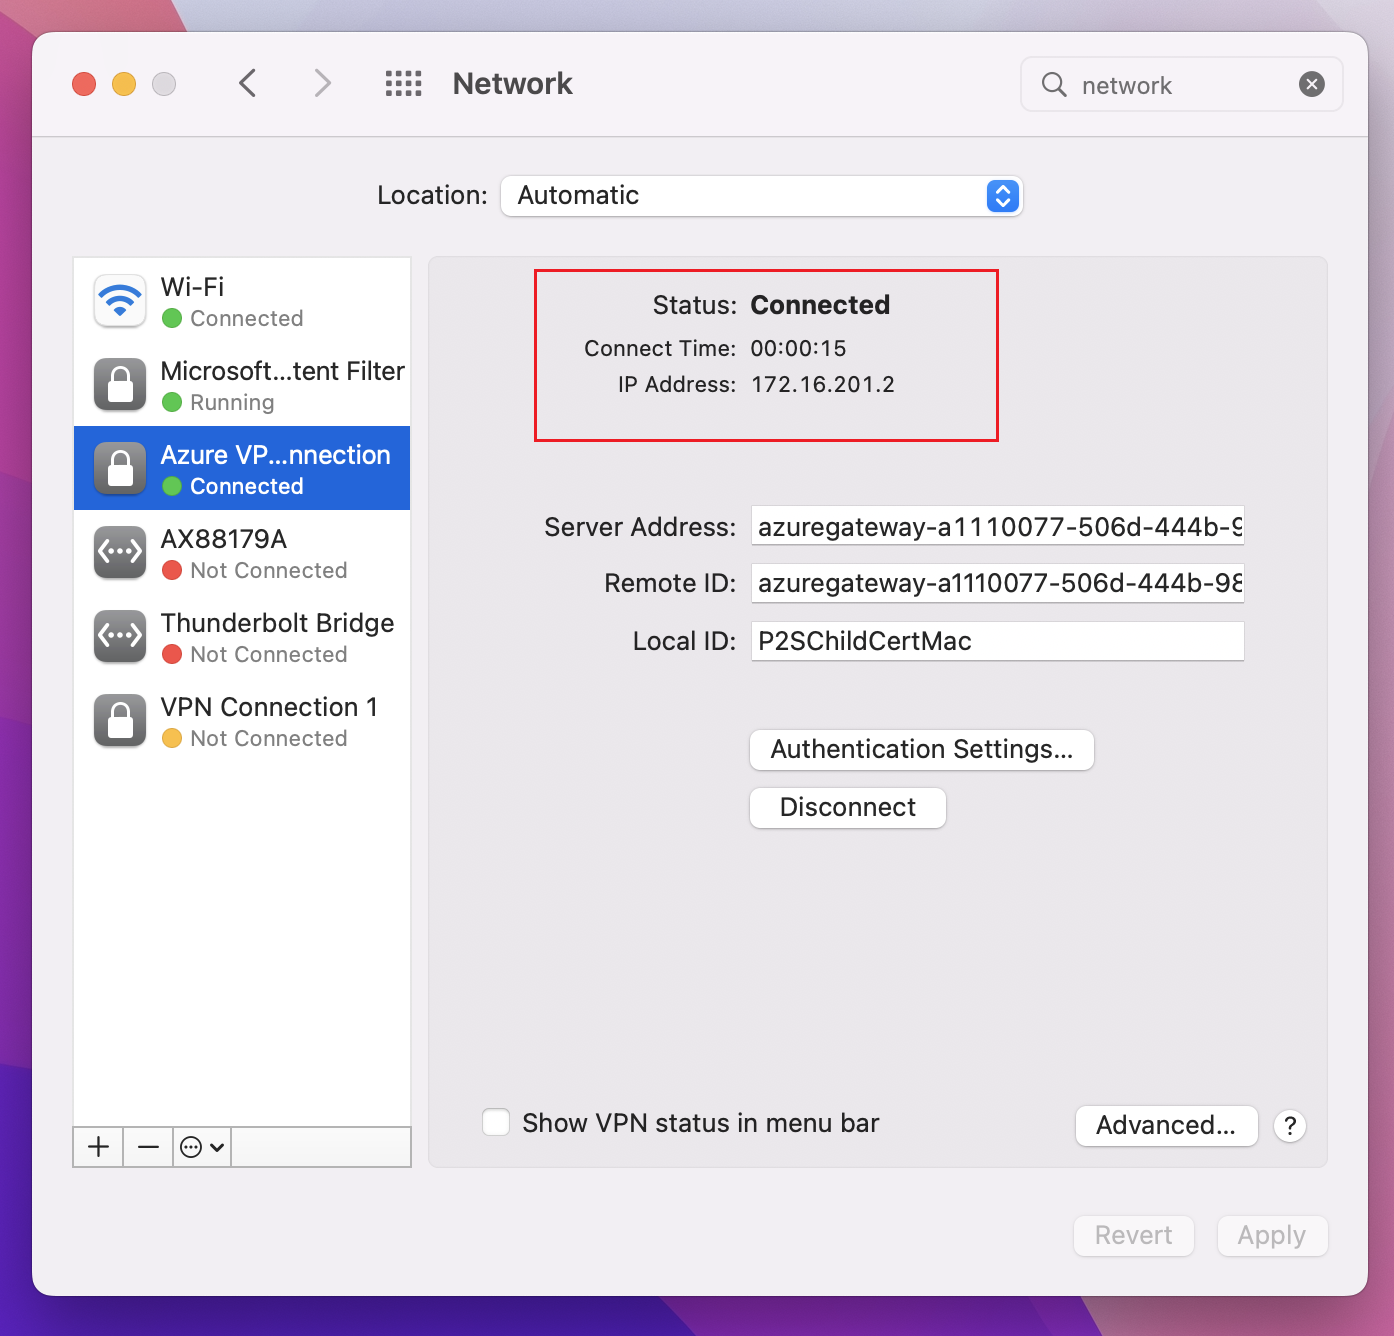
Paste the VpnServer tag value in both the Server Address and Remote ID fields of the profile. Leave Local ID blank. Then, click Authentication Settings....


Configure authentication settings
Configure authentication settings. There are two sets of instructions. Choose the instructions that correspond to your OS version.
Big Sur and later
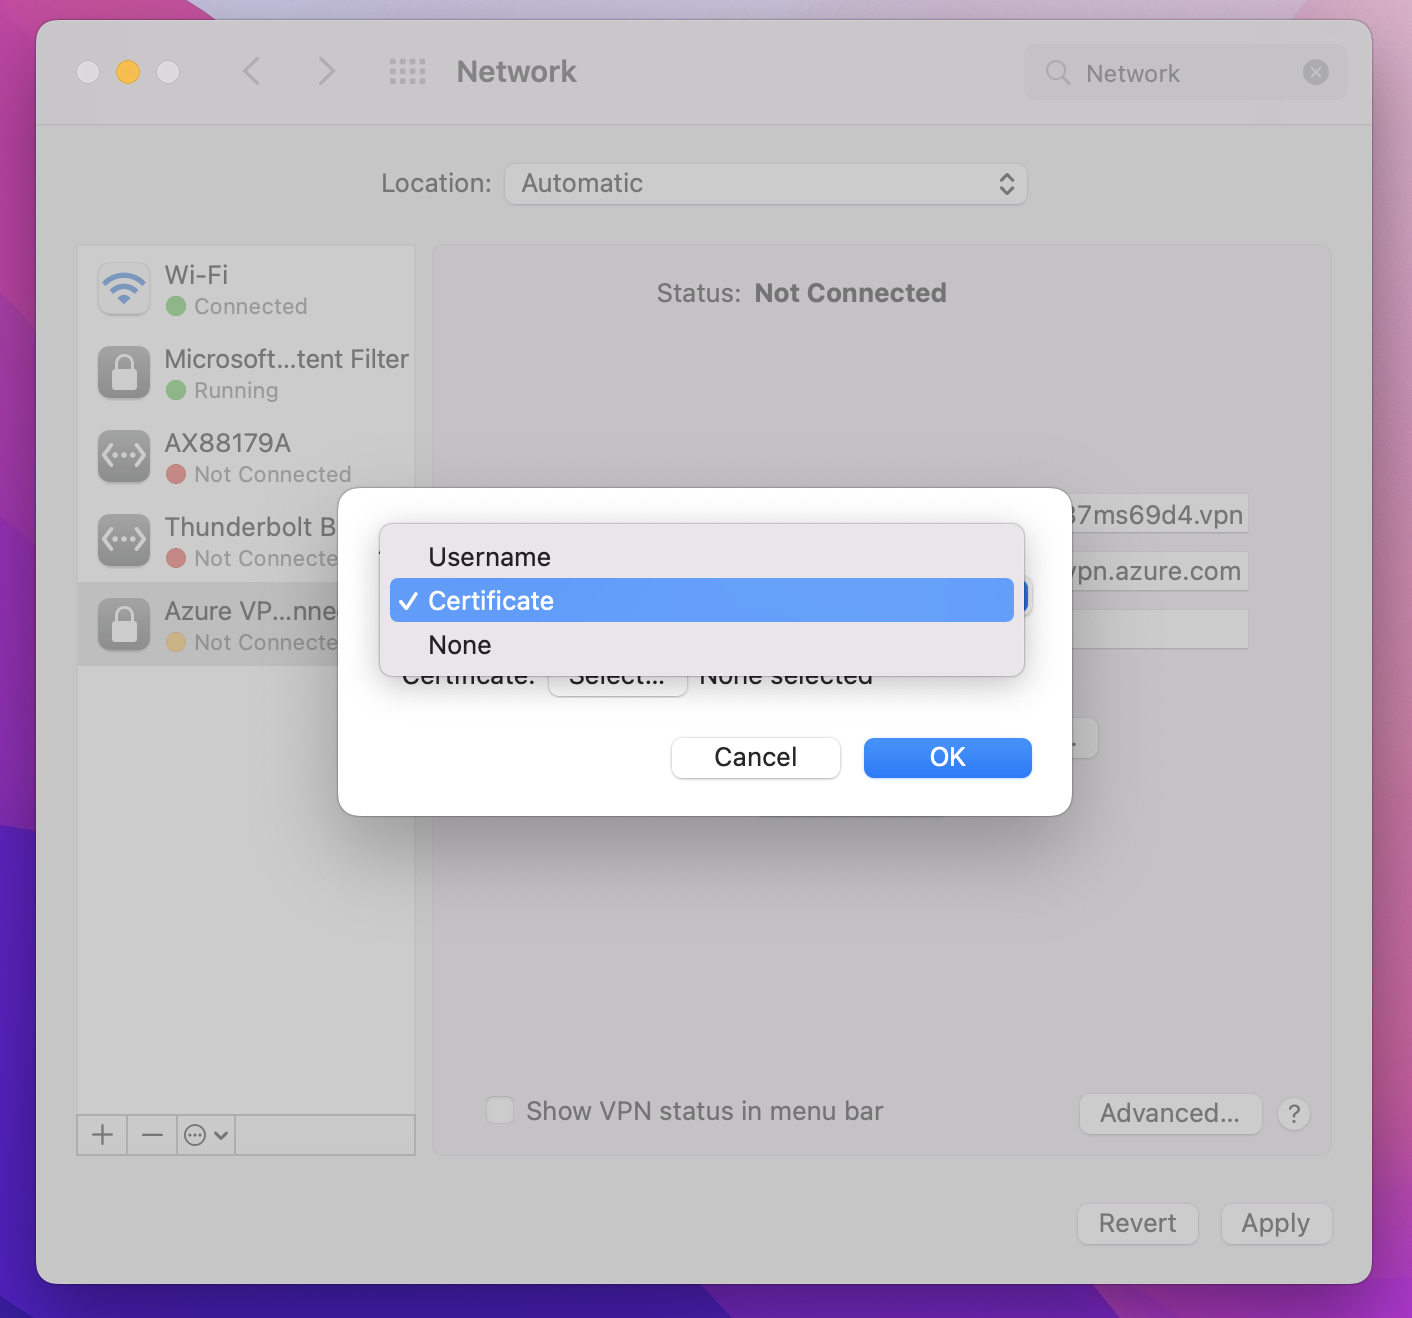
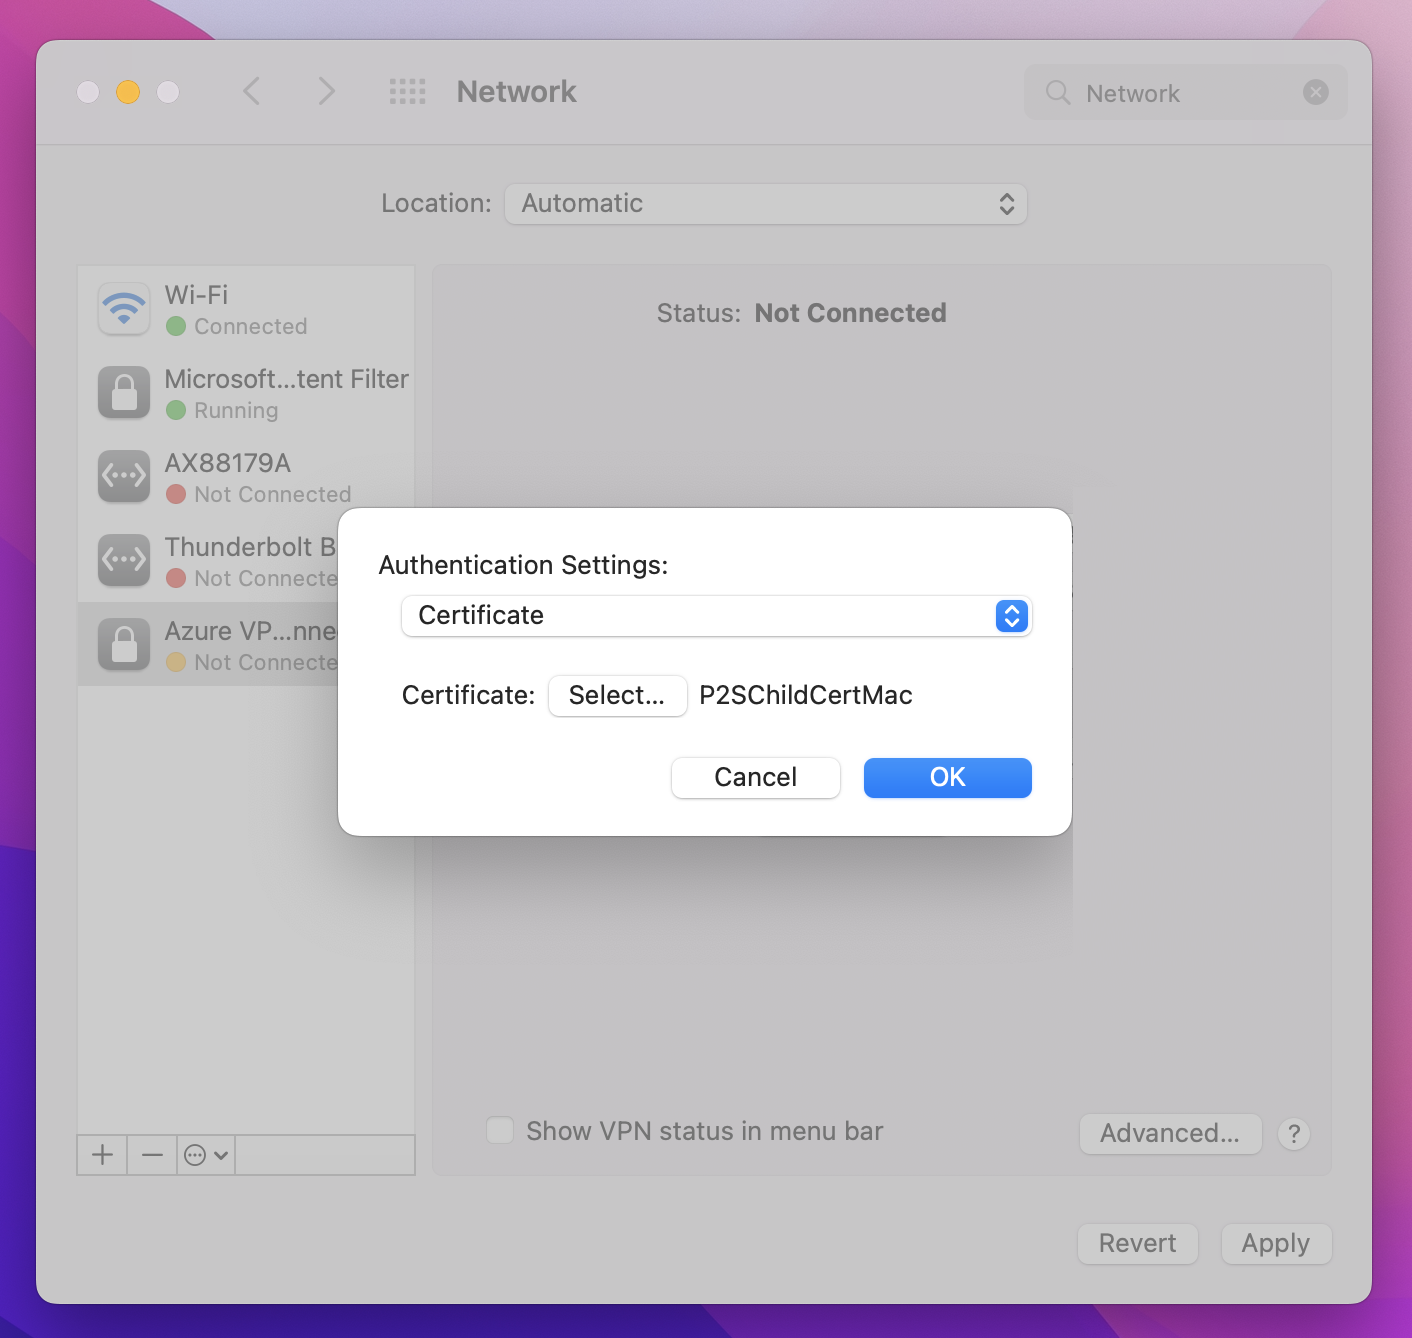
On the Authentication Settings page, for the Authentication settings field, click the arrows to select Certificate.
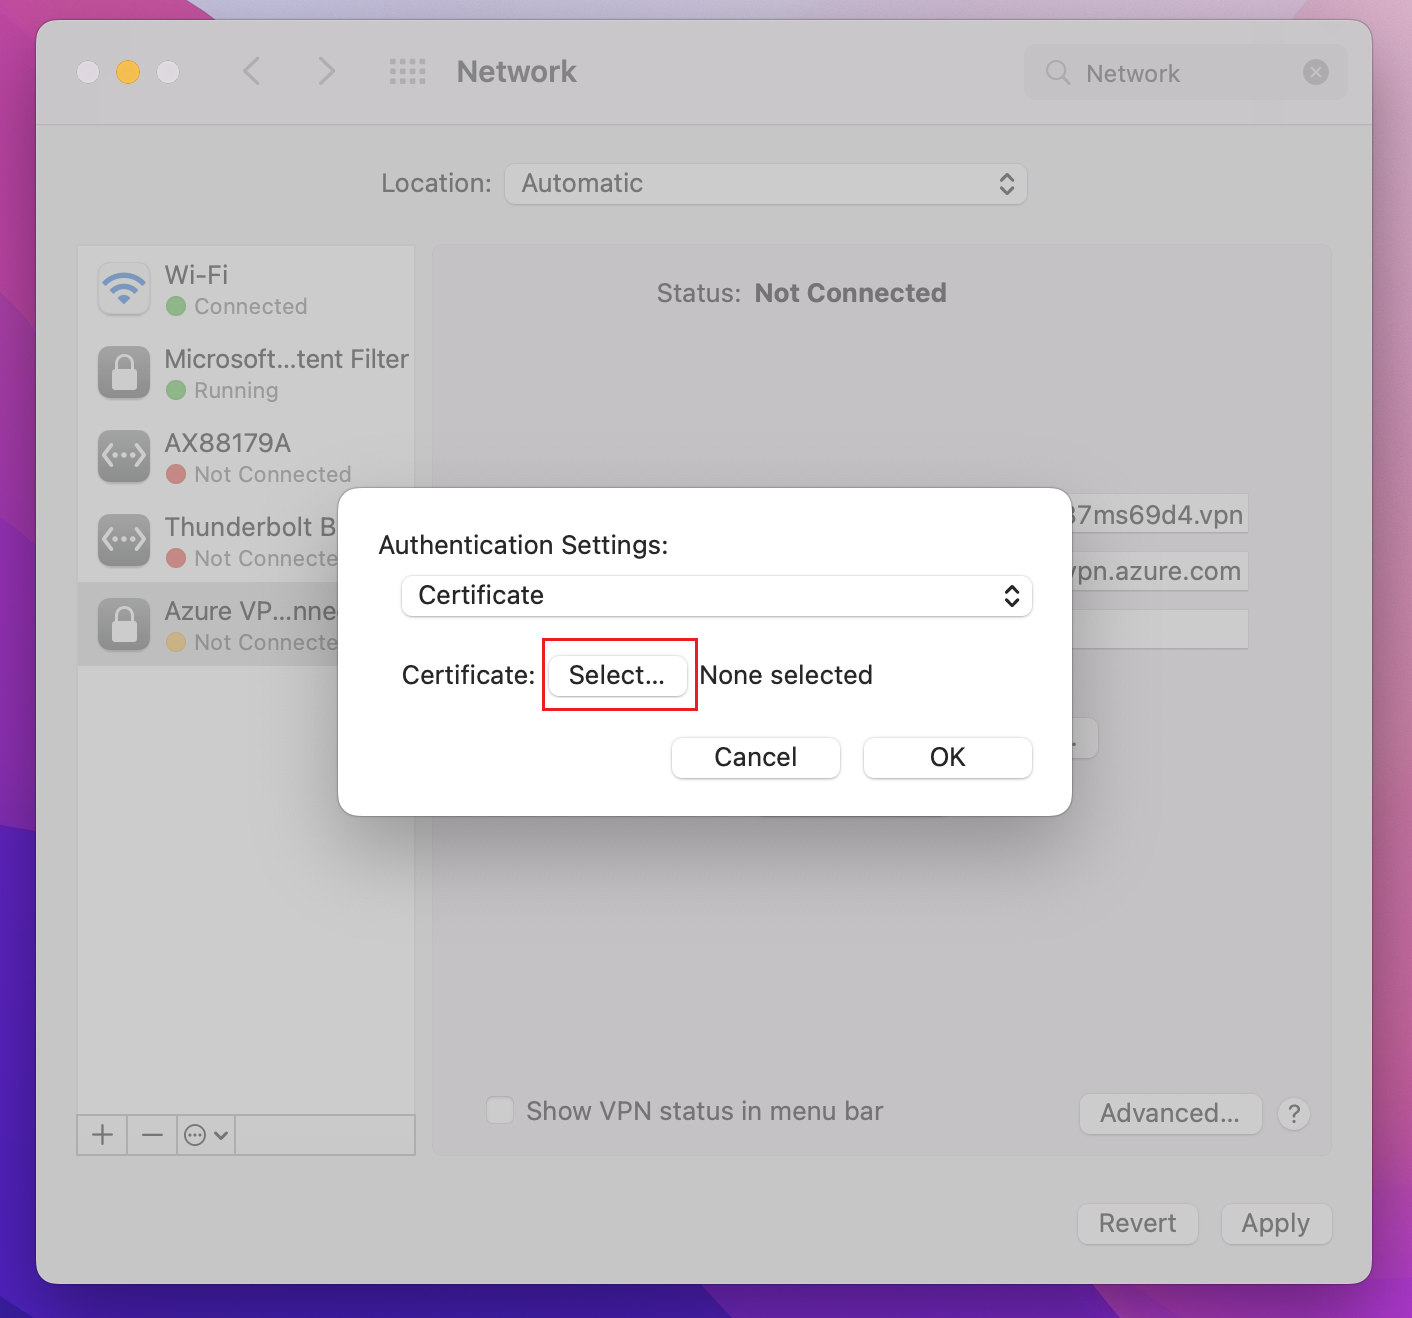
Click Select to open the Choose An Identity page.
The Choose An Identity page displays a list of certificates for you to choose from. If you’re unsure which certificate to use, you can select Show Certificate to see more information about each certificate. Click the proper certificate, then click Continue.
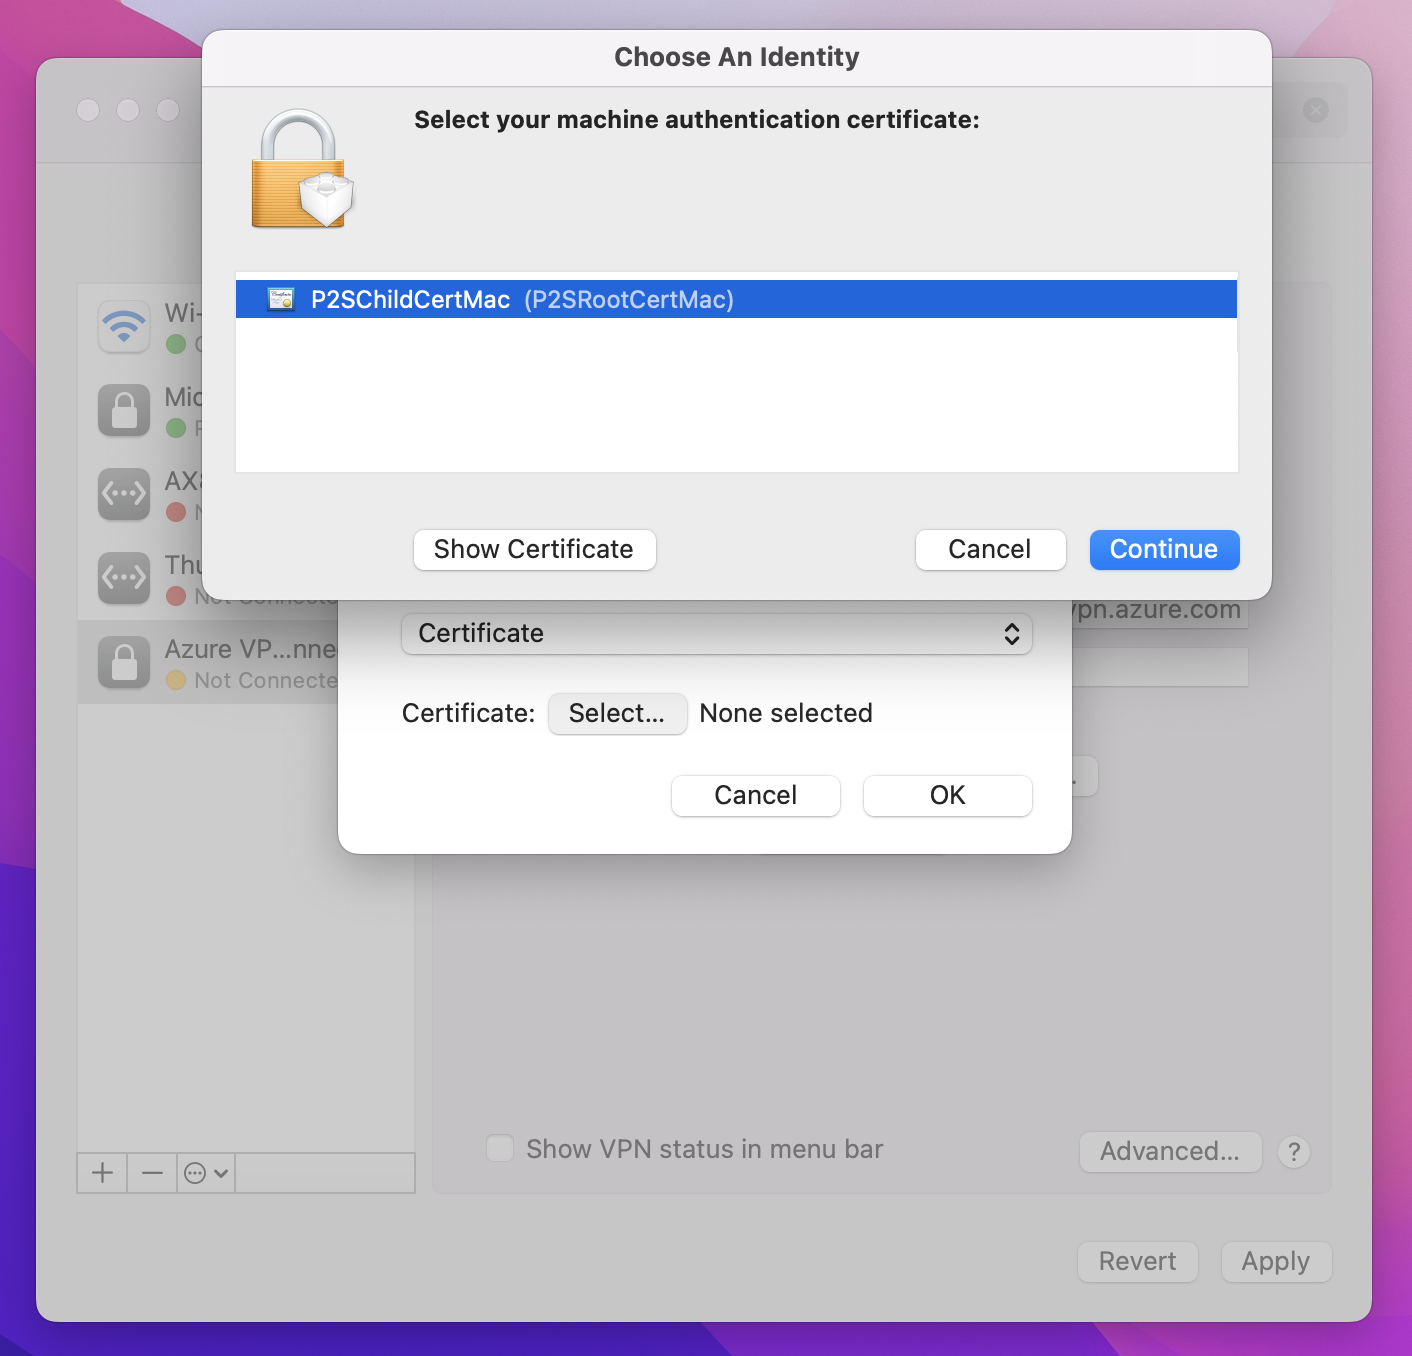
On the Authentication Settings page, verify that the correct certificate is shown, then click OK.


Catalina
If you're using Catalina, use these authentication settings steps:
For Authentication Settings choose None.
Click Certificate, click Select and click the correct client certificate that you installed earlier. Then, click OK.
Specify certificate
In the Local ID field, specify the name of the certificate. In this example, it’s P2SChildCertMac.
Click Apply to save all changes.

Connect
Click Connect to start the P2S connection to the Azure virtual network. You may need to enter your "login" keychain password.
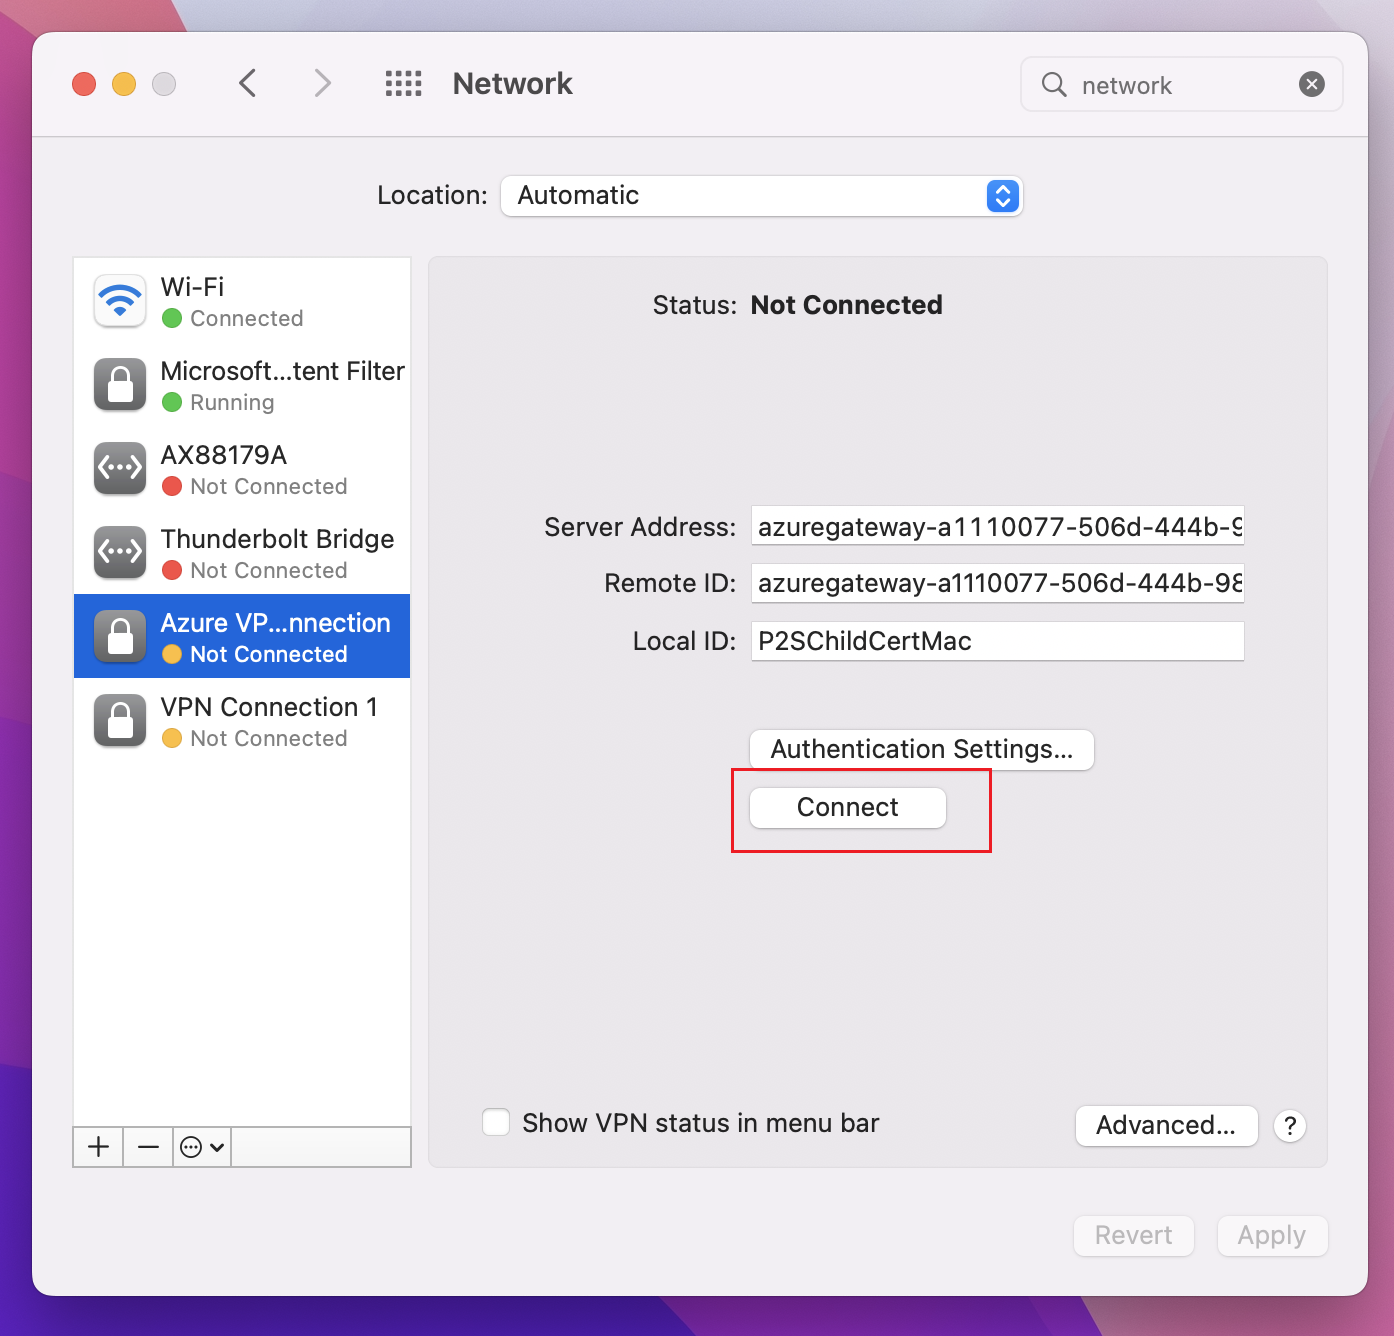
Once the connection has been established, the status shows as Connected and you can view the IP address that was pulled from the VPN client address pool.


OpenVPN: macOS steps
The following example uses TunnelBlick.
Important
Only MacOS 10.13 and above is supported with OpenVPN protocol.
Note
OpenVPN Client version 2.6 is not yet supported.
Download and install an OpenVPN client, such as TunnelBlick.
If you haven't already done so, download the VPN client profile package from the Azure portal.
Unzip the profile. Open the vpnconfig.ovpn configuration file from the OpenVPN folder in a text editor.
Fill in the P2S client certificate section with the P2S client certificate public key in base64. In a PEM formatted certificate, you can open the .cer file and copy over the base64 key between the certificate headers.
Fill in the private key section with the P2S client certificate private key in base64. See Export your private key on the OpenVPN site for information about how to extract a private key.
Don't change any other fields. Use the filled in configuration in client input to connect to the VPN.
Double-click the profile file to create the profile in Tunnelblick.
Launch Tunnelblick from the applications folder.
Click on the Tunnelblick icon in the system tray and pick connect.
OpenVPN: iOS steps
The following example uses OpenVPN Connect from the App store.
Important
Only iOS 11.0 and above is supported with OpenVPN protocol.
Note
OpenVPN Client version 2.6 is not yet supported.
Install the OpenVPN client (version 2.4 or higher) from the App store. Version 2.6 is not yet supported.
If you haven't already done so, download the VPN client profile package from the Azure portal.
Unzip the profile. Open the vpnconfig.ovpn configuration file from the OpenVPN folder in a text editor.
Fill in the P2S client certificate section with the P2S client certificate public key in base64. In a PEM formatted certificate, you can open the .cer file and copy over the base64 key between the certificate headers.
Fill in the private key section with the P2S client certificate private key in base64. See Export your private key on the OpenVPN site for information about how to extract a private key.
Don't change any other fields.
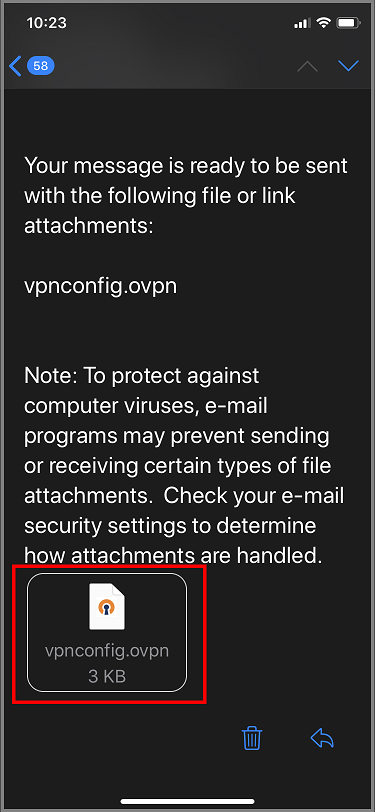
E-mail the profile file (.ovpn) to your email account that is configured in the mail app on your iPhone.
Open the e-mail in the mail app on the iPhone, and tap the attached file.
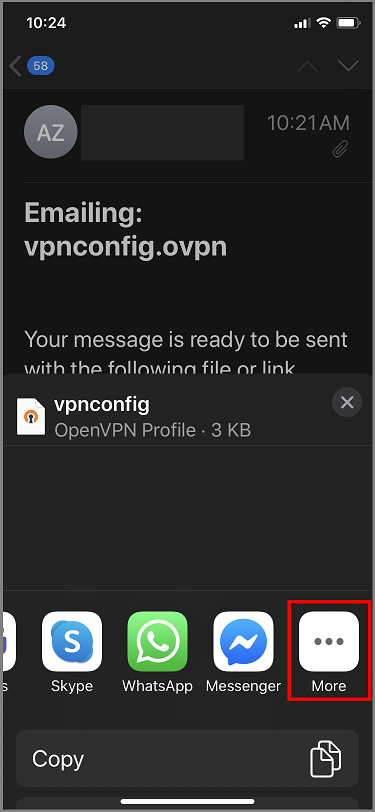
Tap More if you don't see Copy to OpenVPN option.
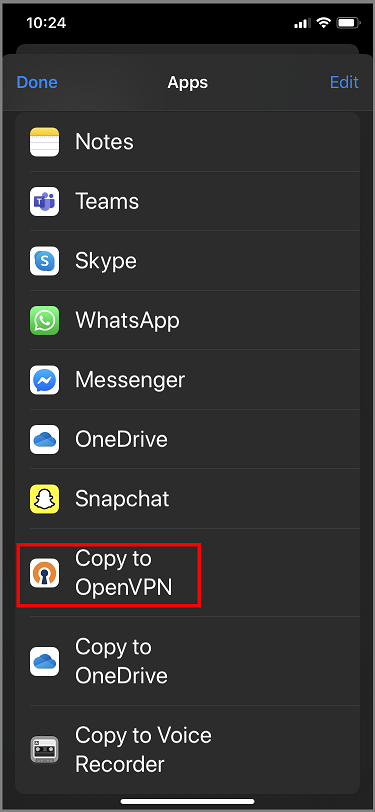
Tap Copy to OpenVPN.
Tap on ADD in the Import Profile page
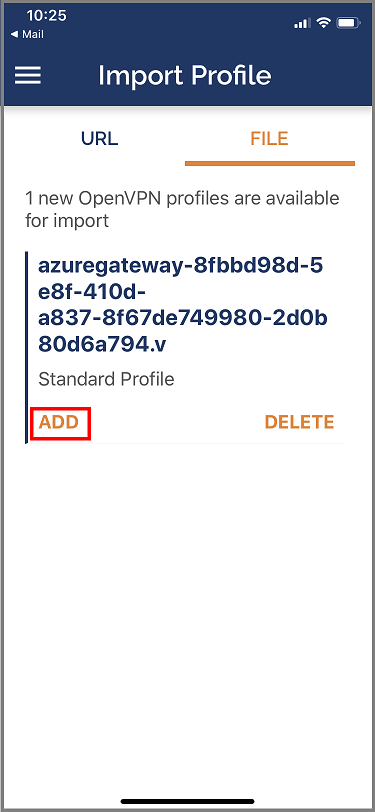
Tap on ADD in the Imported Profile page

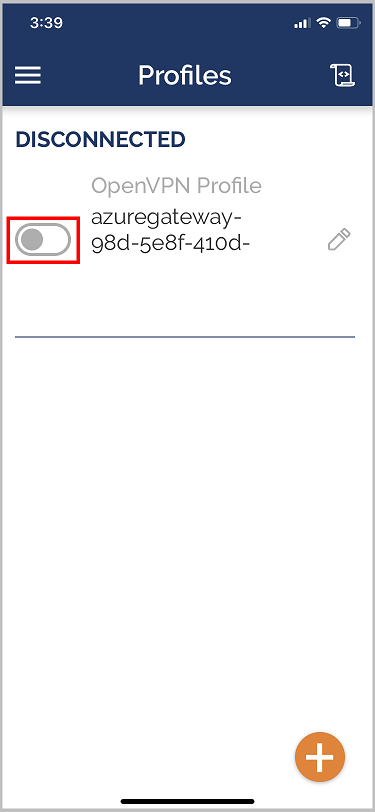
Launch the OpenVPN app and slide the switch in the Profile page right to connect


Next steps
For additional steps, return to the original point-to-site article that you were working from.
Feedback
Coming soon: Throughout 2024 we will be phasing out GitHub Issues as the feedback mechanism for content and replacing it with a new feedback system. For more information see: https://aka.ms/ContentUserFeedback.
Submit and view feedback for