Tutorial: Create a WAF policy on Azure Front Door by using the Azure portal
This tutorial shows you how to create a basic web application firewall (WAF) policy and apply it to a front-end host at Azure Front Door.
In this tutorial, you learn how to:
- Create a WAF policy.
- Associate it with a front-end host.
- Configure WAF rules.
Prerequisites
Create an Azure Front Door instance or an Azure Front Door Standard or Premium profile.
Create a WAF policy
First, create a basic WAF policy with the managed Default Rule Set (DRS) by using the Azure portal.
In the upper-left side of the screen, select Create a resource. Search for WAF, select Web Application Firewall (WAF), and select Create.
On the Basics tab of the Create a WAF policy page, enter or select the following information and accept the defaults for the remaining settings.
Setting Value Policy for Select Global WAF (Front Door). Front door tier Select between Classic, Standard, and Premium tiers. Subscription Select your Azure subscription. Resource group Select your Azure Front Door resource group name. Policy name Enter a unique name for your WAF policy. Policy state Set as Enabled. 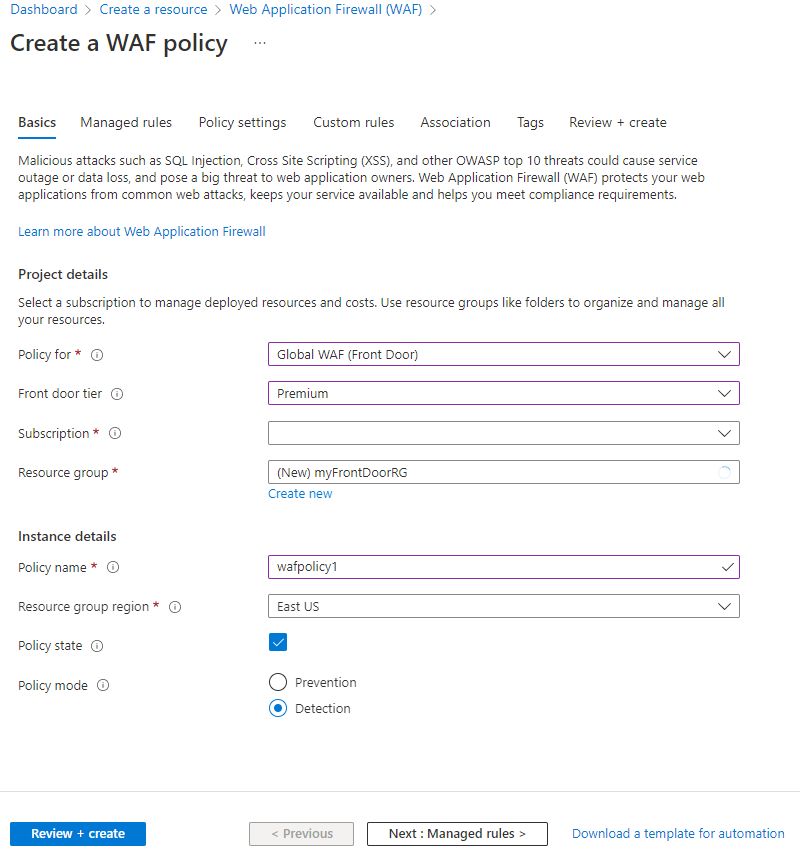
On the Association tab, select Associate a Front door profile, enter the following settings, and select Add.
Setting Value Front door profile Select your Azure Front Door profile name. Domains Select the domains you want to associate the WAF policy to and then select Add. 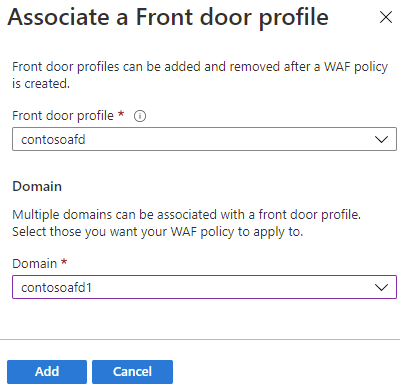
Note
If the domain is associated to a WAF policy, it's shown as grayed out. You must first remove the domain from the associated policy and then re-associate the domain to a new WAF policy.
Select Review + create > Create.
Configure WAF rules (optional)
Follow these steps to configure WAF rules.
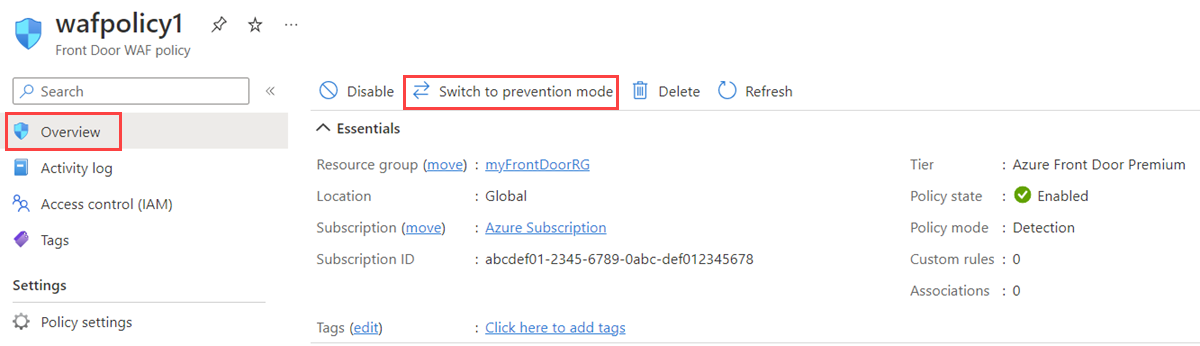
Change mode
When you create a WAF policy, by default, the WAF policy is in Detection mode. In Detection mode, the WAF doesn't block any requests. Instead, requests matching the WAF rules are logged at WAF logs. To see the WAF in action, you can change the mode settings from Detection to Prevention. In Prevention mode, requests that match defined rules are blocked and logged at WAF logs.
Custom rules
To create a custom rule, under the Custom rules section, select Add custom rule to open the custom rule configuration page.
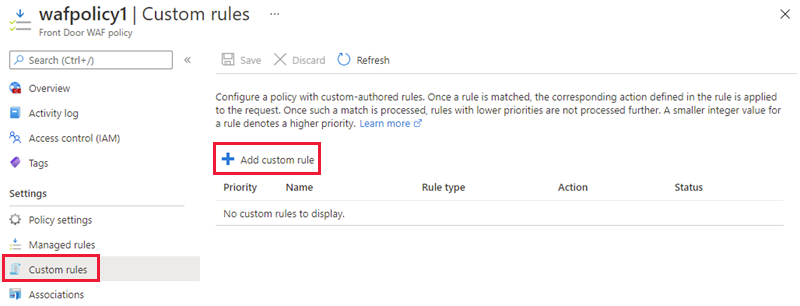
The following example shows how to configure a custom rule to block a request if the query string contains blockme.

Default Rule Set
The Azure-managed Default Rule Set is enabled by default for the Premium and Classic tiers of Azure Front Door. The current DRS for the Premium tier of Azure Front Door is Microsoft_DefaultRuleSet_2.0. Microsoft_DefaultRuleSet_1.1 is the current DRS for the Classic tier of Azure Front Door. On the Managed rules page, select Assign to assign a different DRS.
To disable an individual rule, select the checkbox in front of the rule number and select Disable at the top of the page. To change action types for individual rules within the rule set, select the checkbox in front of the rule number and select Change action at the top of the page.

Note
Managed rules are only supported in the Azure Front Door Premium tier and Azure Front Door Classic tier policies.
Clean up resources
When no longer needed, delete the resource group and all related resources.
Next steps
Feedback
Coming soon: Throughout 2024 we will be phasing out GitHub Issues as the feedback mechanism for content and replacing it with a new feedback system. For more information see: https://aka.ms/ContentUserFeedback.
Submit and view feedback for