Deploy Conditional Access App Control for any web app using Okta as the identity provider (IdP)
You can configure session controls in Microsoft Defender for Cloud Apps to work with any web app and any non-Microsoft IdP. This article describes how to route app sessions from Okta to Defender for Cloud Apps for real-time session controls.
For this article, we'll use the Salesforce app as an example of a web app being configured to use Defender for Cloud Apps session controls.
Prerequisites
Your organization must have the following licenses to use Conditional Access App Control:
- A pre-configured Okta tenant.
- Microsoft Defender for Cloud Apps
An existing Okta single sign-on configuration for the app using the SAML 2.0 authentication protocol
To configure session controls for your app using Okta as the IdP
Use the following steps to route your web app sessions from Okta to Defender for Cloud Apps. For Microsoft Entra configuration steps, see Onboard and deploy Conditional Access App Control for custom apps using Microsoft Entra ID.
Note
You can configure the app's SAML single sign-on information provided by Okta using one of the following methods:
- Option 1: Uploading the app's SAML metadata file.
- Option 2: Manually providing the app's SAML data.
In the following steps, we'll use option 2.
Step 1: Get your app's SAML single sign-on settings
Step 2: Configure Defender for Cloud Apps with your app's SAML information
Step 3: Create a new Okta Custom Application and App Single Sign-On configuration
Step 4: Configure Defender for Cloud Apps with the Okta app's information
Step 5: Complete the configuration of the Okta Custom Application
Step 6: Get the app changes in Defender for Cloud Apps
Step 7: Complete the app changes
Step 8: Complete the configuration in Defender for Cloud Apps
Step 1: Get your app's SAML single sign-on settings
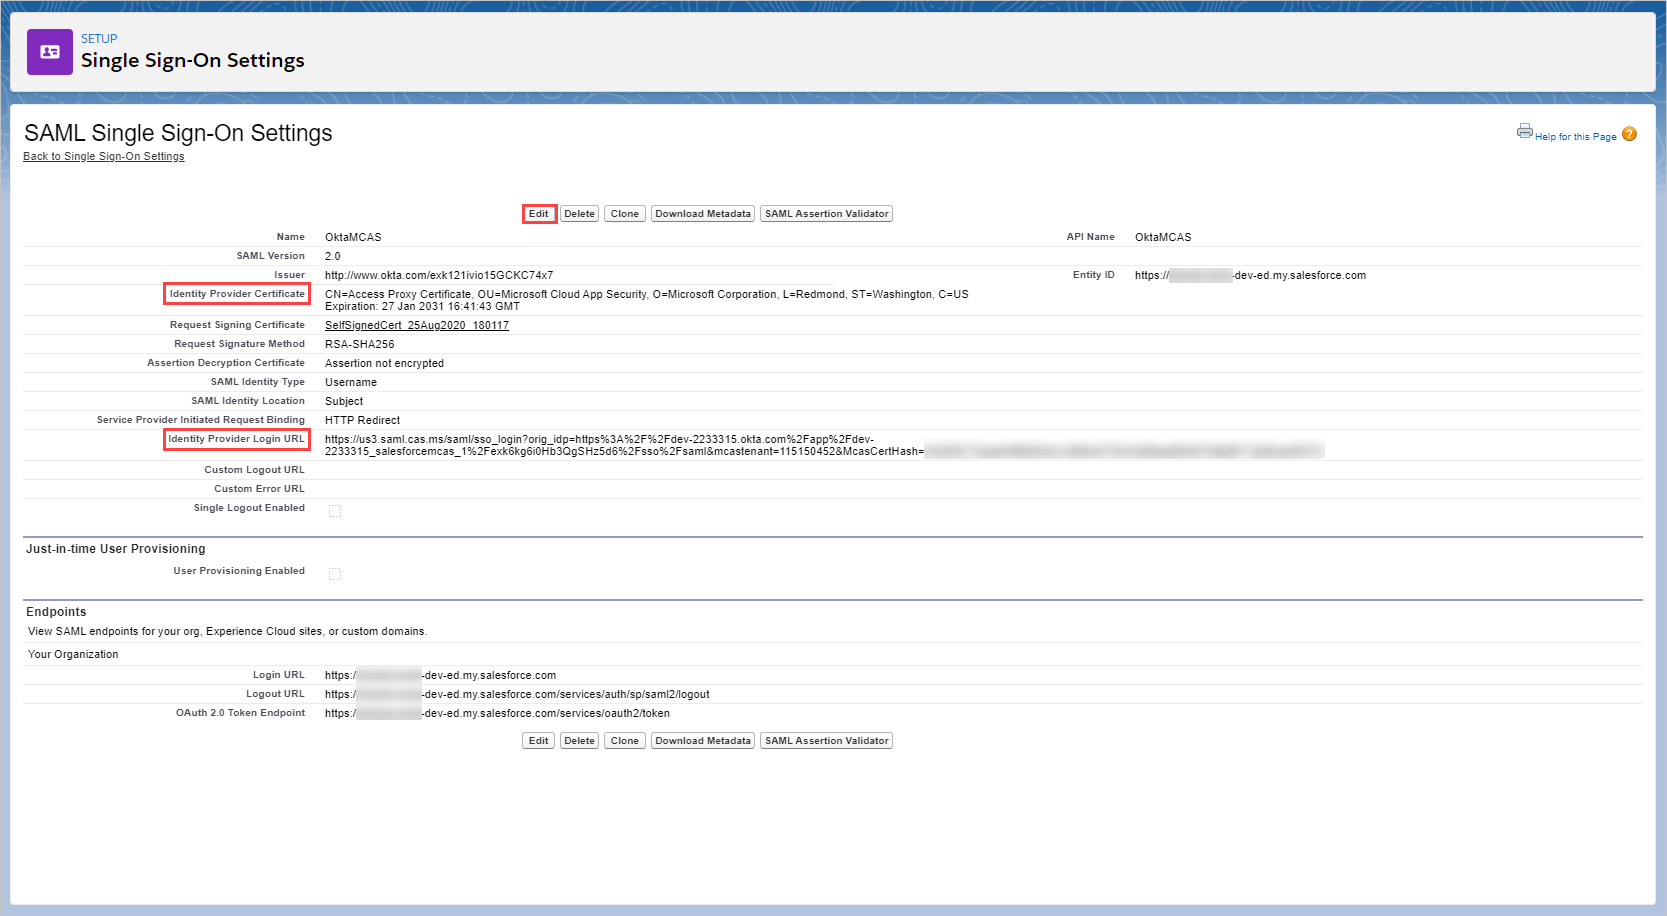
In Salesforce, browse to Setup > Settings > Identity > Single Sign-On Settings.
Under Single Sign-On Settings, click on the name of your existing Okta configuration.
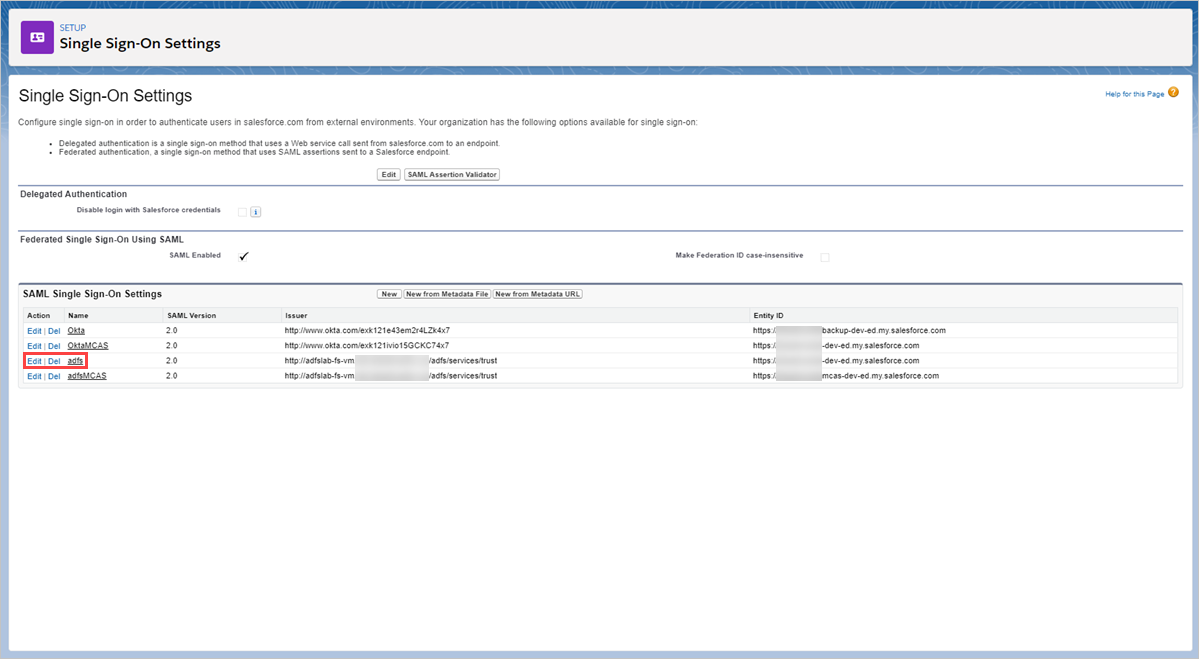
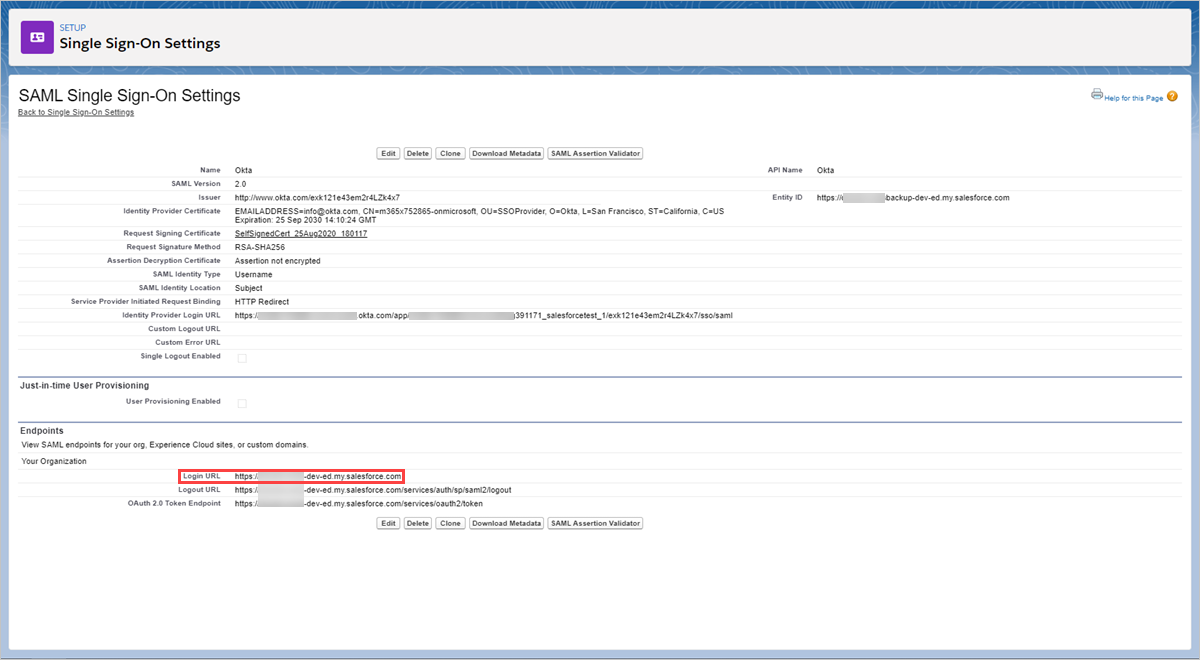
On the SAML Single Sign-On Setting page, make a note of the Salesforce Login URL. You'll need this later when configuring Defender for Cloud Apps.
Note
If your app provides a SAML certificate, download the certificate file.
Step 2: Configure Defender for Cloud Apps with your app's SAML information
In the Microsoft Defender Portal, select Settings. Then choose Cloud Apps.
Under Connected apps, select Conditional Access App Control apps.
Select +Add, and in the pop-up, select the app you want to deploy, and then select Start Wizard.
On the APP INFORMATION page, select Fill in data manually, in the Assertion consumer service URL enter the Salesforce Login URL you noted earlier, and then click Next.
Note
If your app provides a SAML certificate, select Use <app_name> SAML certificate and upload the certificate file.

Step 3: Create a new Okta Custom Application and App Single Sign-On configuration
Note
To limit end-user downtime and preserve your existing known good configuration, we recommend creating a new Custom Application and Single Sign-On configuration. Where this is not possible, skip the relevant steps. For example, if the app you are configuring does not support creating multiple Single Sign-On configurations, then skip the create new single sign-on step.
In the Okta Admin console, under Applications, view the properties of your existing configuration for your app, and make note of the settings.
Click Add Application, and then click Create New App. Apart from the Audience URI (SP Entity ID) value that must be a unique name, configure the new application using the settings you noted earlier. You'll need this application later when configuring Defender for Cloud Apps.
Navigate to Applications, view your existing Okta configuration, and on the Sign On tab, select View Setup Instructions.
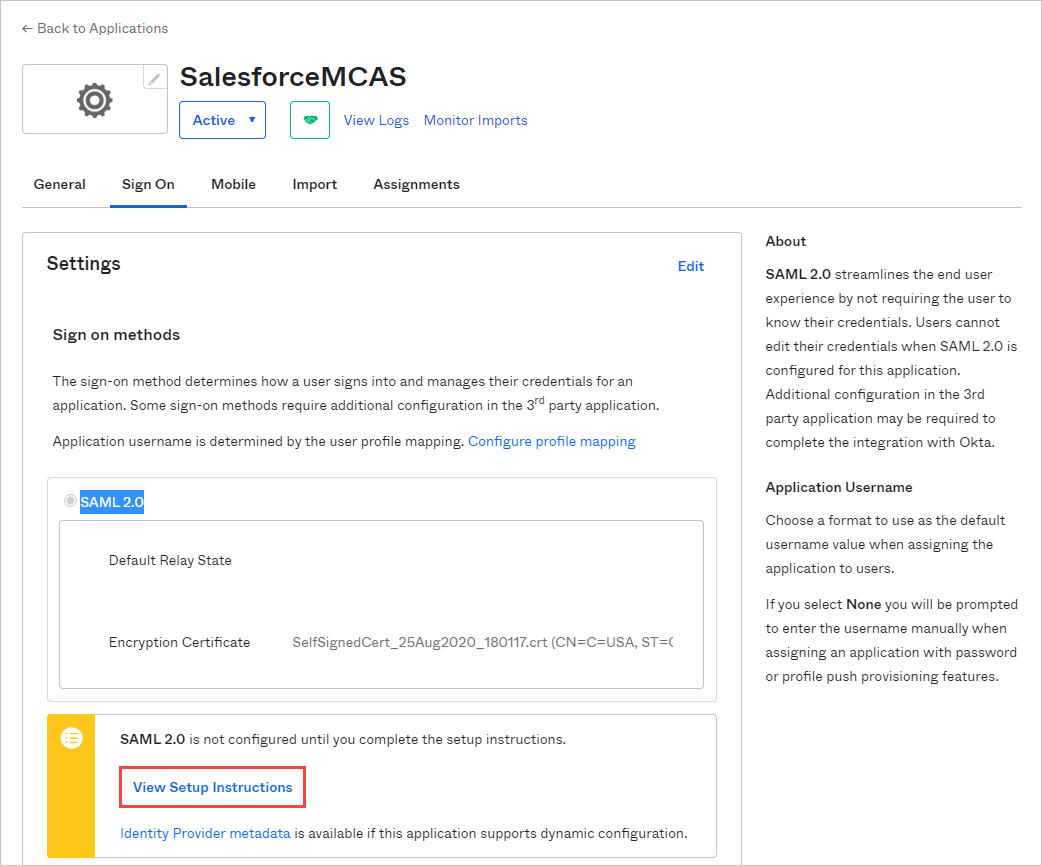
Make a note of the Identity Provider Single Sign-On URL and download the identity provider's Signing Certificate (X.509). You'll need this later.
Back in Salesforce, on the existing Okta single sign-on settings page, make a note of all the settings.
Create a new SAML single sign-on configuration. Apart from the Entity ID value that must match the custom application's Audience URI (SP Entity ID), configure the single sign-on using the settings you noted earlier. You'll need this later when configuring Defender for Cloud Apps.
After saving your new application, navigate to Assignments page and assign the People or Groups that require access to the application.
Step 4: Configure Defender for Cloud Apps with the Okta app's information
Back in the Defender for Cloud Apps IDENTITY PROVIDER page, click Next to proceed.
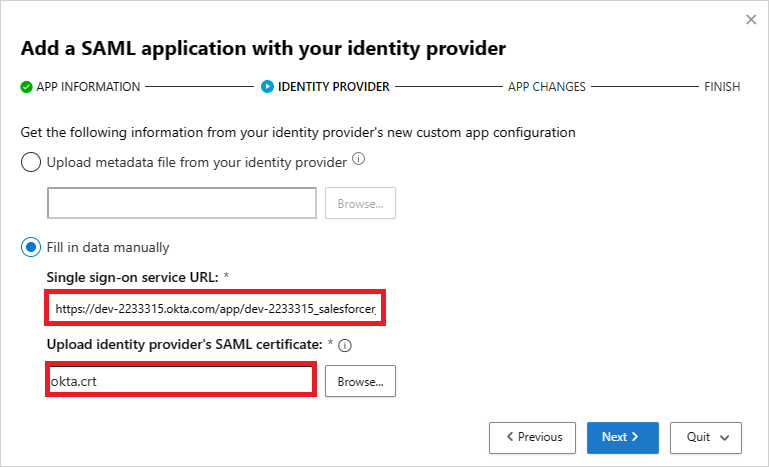
On the next page, select Fill in data manually, do the following, and then click Next.
- For the Single sign-on service URL, enter the Salesforce Login URL you noted earlier.
- Select Upload identity provider's SAML certificate and upload the certificate file you downloaded earlier.
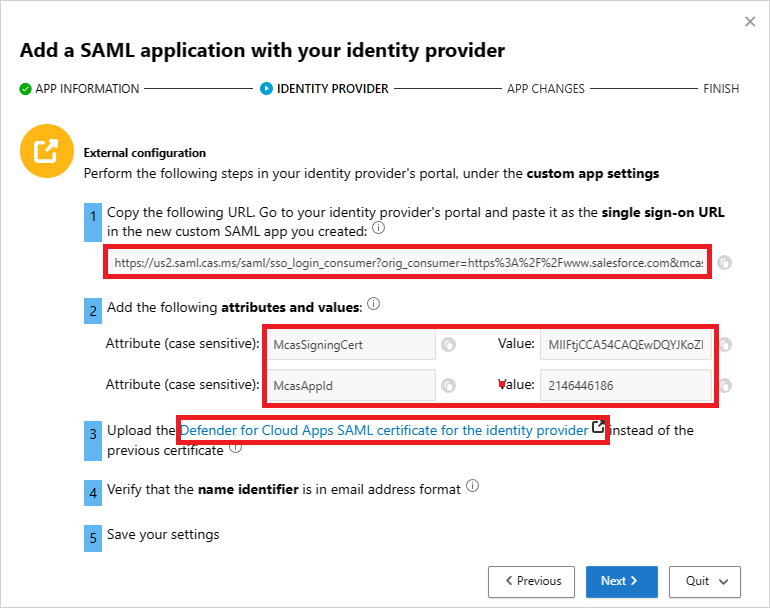
On the next page, make a note of the following information, and then click Next. You'll need the information later.
- Defender for Cloud Apps single sign-on URL
- Defender for Cloud Apps attributes and values
Note
If you see an option to upload the Defender for Cloud Apps SAML certificate for the identity provider, click on the click to download the certificate file. You'll need this later.
Step 5: Complete the configuration of the Okta Custom Application
Back in the Okta Admin console, under Applications, select the custom application you created earlier, and then under General > SAML Settings, click Edit.
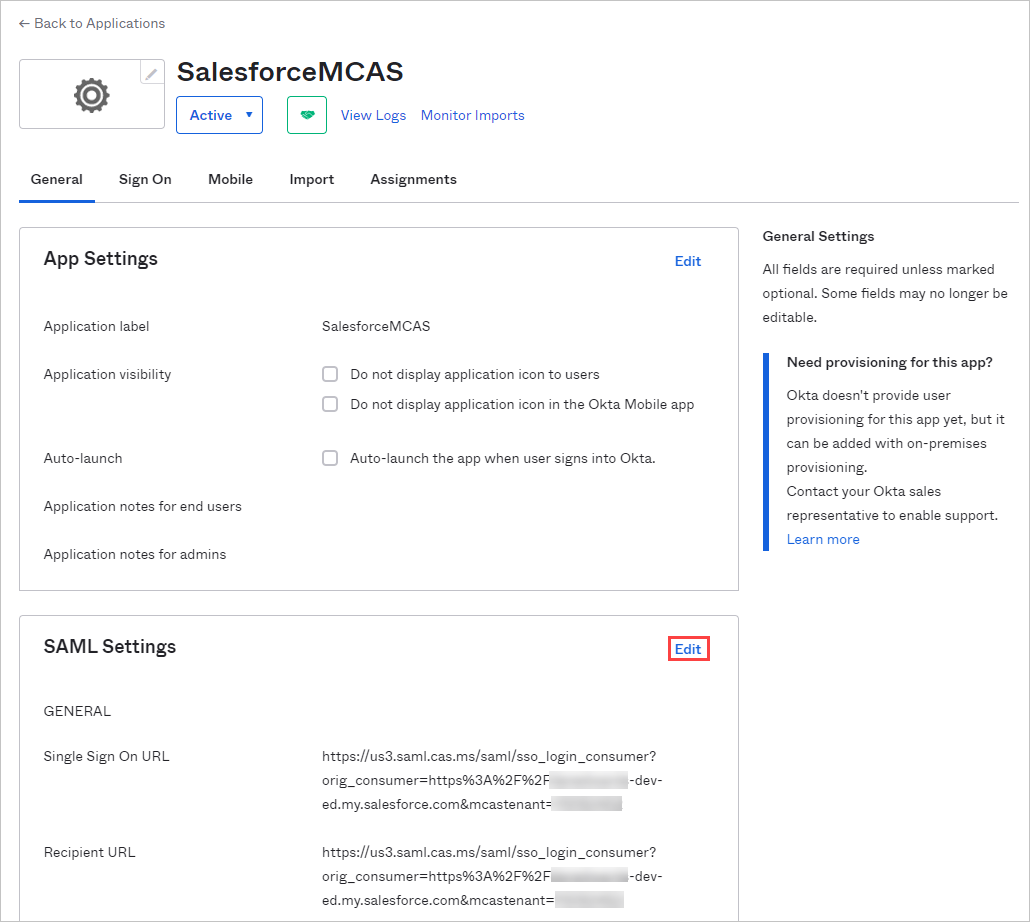
In the Single Sign On URL field, replace the URL with the Defender for Cloud Apps single sign-on URL you noted earlier, and then save your settings.
Under Directory, select Profile Editor, select the custom application you created earlier, and then click Profile. Add attributes using the following information.
Display name Variable name Data type Attribute type McasSigningCert McasSigningCert string Custom McasAppId McasAppId string Custom 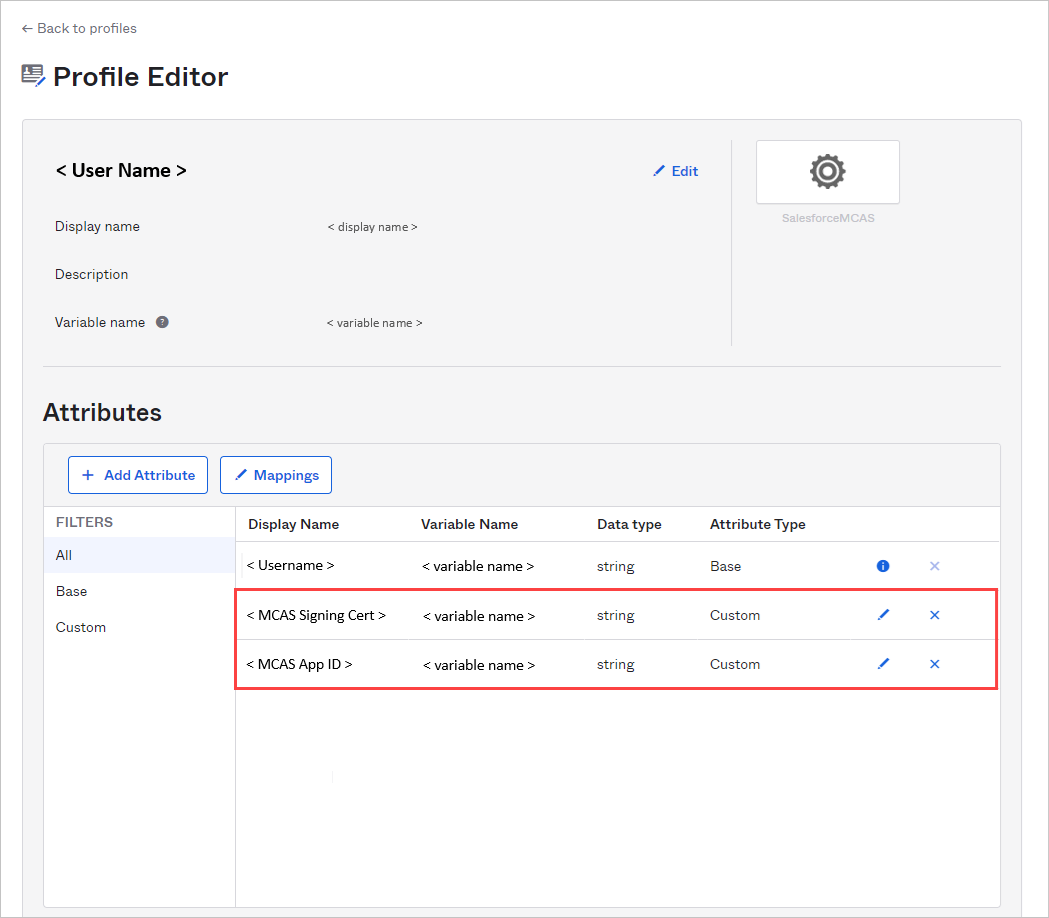
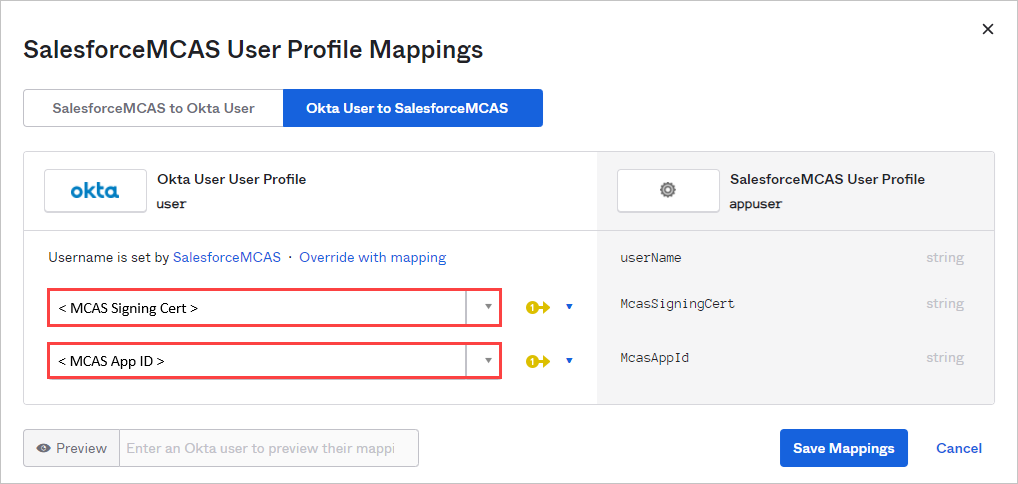
Back on the Profile Editor page, select the custom application you created earlier, click Mappings, and then select Okta User to {custom_app_name}. Map the McasSigningCert and McasAppId attributes to the Defender for Cloud Apps attribute values you noted earlier.
Note
- Make sure you enclose the values in double quotes (")
- Okta limits attributes to 1024 characters. To mitigate this limitation, add the attributes using the Profile Editor as described.
Save your settings.
Step 6: Get the app changes in Defender for Cloud Apps
Back in the Defender for Cloud Apps APP CHANGES page, do the following, but don't click Finish. You'll need the information later.
- Copy the Defender for Cloud Apps SAML Single sign-on URL
- Download the Defender for Cloud Apps SAML certificate
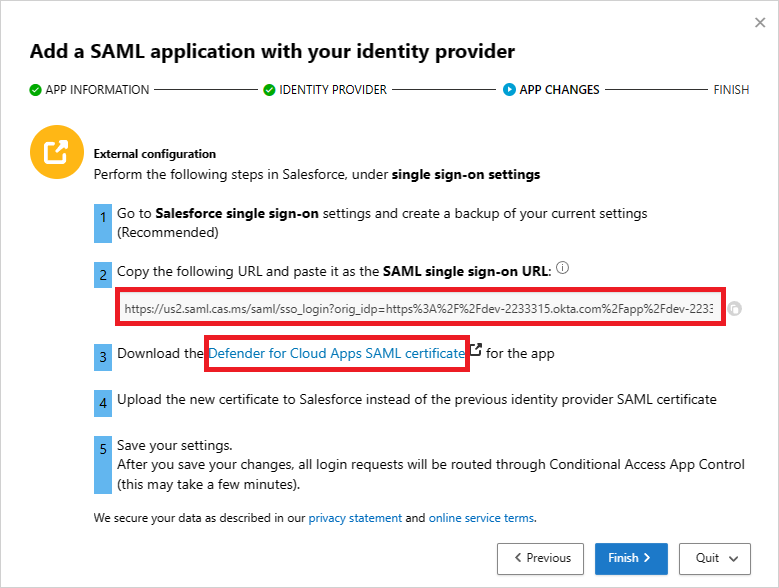
Step 7: Complete the app changes
In Salesforce, browse to Setup > Settings > Identity > Single Sign-On Settings, and do the following:
[Recommended] Create a backup of your current settings.
Replace the Identity Provider Login URL field value with the Defender for Cloud Apps SAML single sign-on URL you noted earlier.
Upload the Defender for Cloud Apps SAML certificate you downloaded earlier.
Click Save.
Note
- After saving your settings, all associated login requests to this app will be routed through Conditional Access App Control.
- The Defender for Cloud Apps SAML certificate is valid for one year. After it expires, a new certificate will need to be generated.
Step 8: Complete the configuration in Defender for Cloud Apps
- Back in the Defender for Cloud Apps APP CHANGES page, click Finish. After completing the wizard, all associated login requests to this app will be routed through Conditional Access App Control.
Next steps
See also
If you run into any problems, we're here to help. To get assistance or support for your product issue, please open a support ticket.
Feedback
Coming soon: Throughout 2024 we will be phasing out GitHub Issues as the feedback mechanism for content and replacing it with a new feedback system. For more information see: https://aka.ms/ContentUserFeedback.
Submit and view feedback for