How to use named and optional arguments in Office programming
Named arguments and optional arguments enhance convenience, flexibility, and readability in C# programming. In addition, these features greatly facilitate access to COM interfaces such as the Microsoft Office automation APIs.
Important
VSTO (Visual Studio Tools for Office) relies on the .NET Framework. COM add-ins can also be written with the .NET Framework. Office Add-ins cannot be created with .NET Core and .NET 5+, the latest versions of .NET. This is because .NET Core/.NET 5+ cannot work together with .NET Framework in the same process and may lead to add-in load failures. You can continue to use .NET Framework to write VSTO and COM add-ins for Office. Microsoft will not be updating VSTO or the COM add-in platform to use .NET Core or .NET 5+. You can take advantage of .NET Core and .NET 5+, including ASP.NET Core, to create the server side of Office Web Add-ins.
In the following example, method ConvertToTable has 16 parameters that represent characteristics of a table, such as number of columns and rows, formatting, borders, fonts, and colors. All 16 parameters are optional, because most of the time you don't want to specify particular values for all of them. However, without named and optional arguments, you must provide a value or a placeholder value. With named and optional arguments, you specify values only for the parameters required for your project.
You must have Microsoft Office Word installed on your computer to complete these procedures.
Note
Your computer might show different names or locations for some of the Visual Studio user interface elements in the following instructions. The Visual Studio edition that you have and the settings that you use determine these elements. For more information, see Personalizing the IDE.
Create a new console application
Start Visual Studio. On the File menu, point to New, and then select Project. In the Templates Categories pane, expand C#, and then select Windows. Look in the top of the Templates pane to make sure that .NET Framework 4 appears in the Target Framework box. In the Templates pane, select Console Application. Type a name for your project in the Name field. Select OK. The new project appears in Solution Explorer.
Add a reference
In Solution Explorer, right-click your project's name and then select Add Reference. The Add Reference dialog box appears. On the .NET page, select Microsoft.Office.Interop.Word in the Component Name list. Select OK.
Add necessary using directives
In Solution Explorer, right-click the Program.cs file and then select View Code. Add the following using directives to the top of the code file:
using Word = Microsoft.Office.Interop.Word;
Display text in a Word document
In the Program class in Program.cs, add the following method to create a Word application and a Word document. The Add method has four optional parameters. This example uses their default values. Therefore, no arguments are necessary in the calling statement.
static void DisplayInWord()
{
    var wordApp = new Word.Application();
    wordApp.Visible = true;
    // docs is a collection of all the Document objects currently
    // open in Word.
    Word.Documents docs = wordApp.Documents;

    // Add a document to the collection and name it doc.
    Word.Document doc = docs.Add();
}
Add the following code at the end of the method to define where to display text in the document, and what text to display:
// Define a range, a contiguous area in the document, by specifying
// a starting and ending character position. Currently, the document
// is empty.
Word.Range range = doc.Range(0, 0);

// Use the InsertAfter method to insert a string at the end of the
// current range.
range.InsertAfter("Testing, testing, testing. . .");
Run the application
Add the following statement to Main:
DisplayInWord();
Press CTRL+F5 to run the project. A Word document appears that contains the specified text.
Change the text to a table
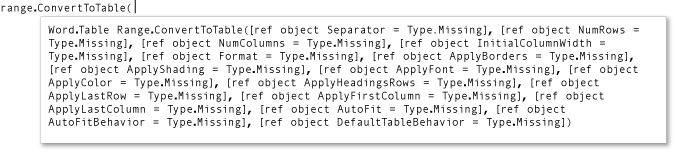
Use the ConvertToTable method to enclose the text in a table. The method has 16 optional parameters. IntelliSense encloses optional parameters in brackets, as shown in the following illustration.
Named and optional arguments enable you to specify values for only the parameters that you want to change. Add the following code to the end of method DisplayInWord to create a table. The argument specifies that the commas in the text string in range separate the cells of the table.
// Convert to a simple table. The table will have a single row with
// three columns.
range.ConvertToTable(Separator: ",");
Press CTRL+F5 to run the project.
Experiment with other parameters
Change the table so that it has one column and three rows, replace the last line in DisplayInWord with the following statement and then type CTRL+F5.
range.ConvertToTable(Separator: ",", AutoFit: true, NumColumns: 1);
Specify a predefined format for the table, replace the last line in DisplayInWord with the following statement and then type CTRL+F5. The format can be any of the WdTableFormat constants.
range.ConvertToTable(Separator: ",", AutoFit: true, NumColumns: 1,
    Format: Word.WdTableFormat.wdTableFormatElegant);
Example
The following code includes the full example:
using System;
using Word = Microsoft.Office.Interop.Word;

namespace OfficeHowTo
{
    class WordProgram
    {
        static void Main(string[] args)
        {
            DisplayInWord();
        }

        static void DisplayInWord()
        {
            var wordApp = new Word.Application();
            wordApp.Visible = true;
            // docs is a collection of all the Document objects currently
            // open in Word.
            Word.Documents docs = wordApp.Documents;

            // Add a document to the collection and name it doc.
            Word.Document doc = docs.Add();

            // Define a range, a contiguous area in the document, by specifying
            // a starting and ending character position. Currently, the document
            // is empty.
            Word.Range range = doc.Range(0, 0);

            // Use the InsertAfter method to insert a string at the end of the
            // current range.
            range.InsertAfter("Testing, testing, testing. . .");

            // You can comment out any or all of the following statements to
            // see the effect of each one in the Word document.

            // Next, use the ConvertToTable method to put the text into a table.
            // The method has 16 optional parameters. You only have to specify
            // values for those you want to change.

            // Convert to a simple table. The table will have a single row with
            // three columns.
            range.ConvertToTable(Separator: ",");

            // Change to a single column with three rows..
            range.ConvertToTable(Separator: ",", AutoFit: true, NumColumns: 1);

            // Format the table.
            range.ConvertToTable(Separator: ",", AutoFit: true, NumColumns: 1,
                Format: Word.WdTableFormat.wdTableFormatElegant);
        }
    }
}
Feedback
Coming soon: Throughout 2024 we will be phasing out GitHub Issues as the feedback mechanism for content and replacing it with a new feedback system. For more information see: https://aka.ms/ContentUserFeedback.
Submit and view feedback for