Schedule work with multiple requirements using requirement group
Requirement groups bundle requirements commonly scheduled together. For example, you may require a pre-inspection, an installation, and a final inspection every time a specific job is performed. With a requirement group, all three requirements can be created with a single template. Each requirement in the template can have different required characteristics, and the work can be scheduled as a single unit. When scheduling using the schedule assistant, resources will be selected that match the characteristics for each requirement.
Create a requirement group template
In Universal Resource Scheduling, open the Settings area. Under Scheduling, select Requirement Group Templates, and then select New.
Enter a Name for the requirement group and Save it. The table shows requirement details with a root requirement named after the template.
Add requirements and fill in the fields in the columns. All requirements within a requirement group must have the same duration. Change the duration of individual bookings after booking the requirement group.
To add more details to a resource requirement, select Open Form.
The All or Any setting allows you to add multiple option for fulfilling a requirement group, which is done by adding subgroups. If the root requirement is set to Any, and each subgroup is set to All, the schedule assistant searches for either all of option 1 or all of option 2.
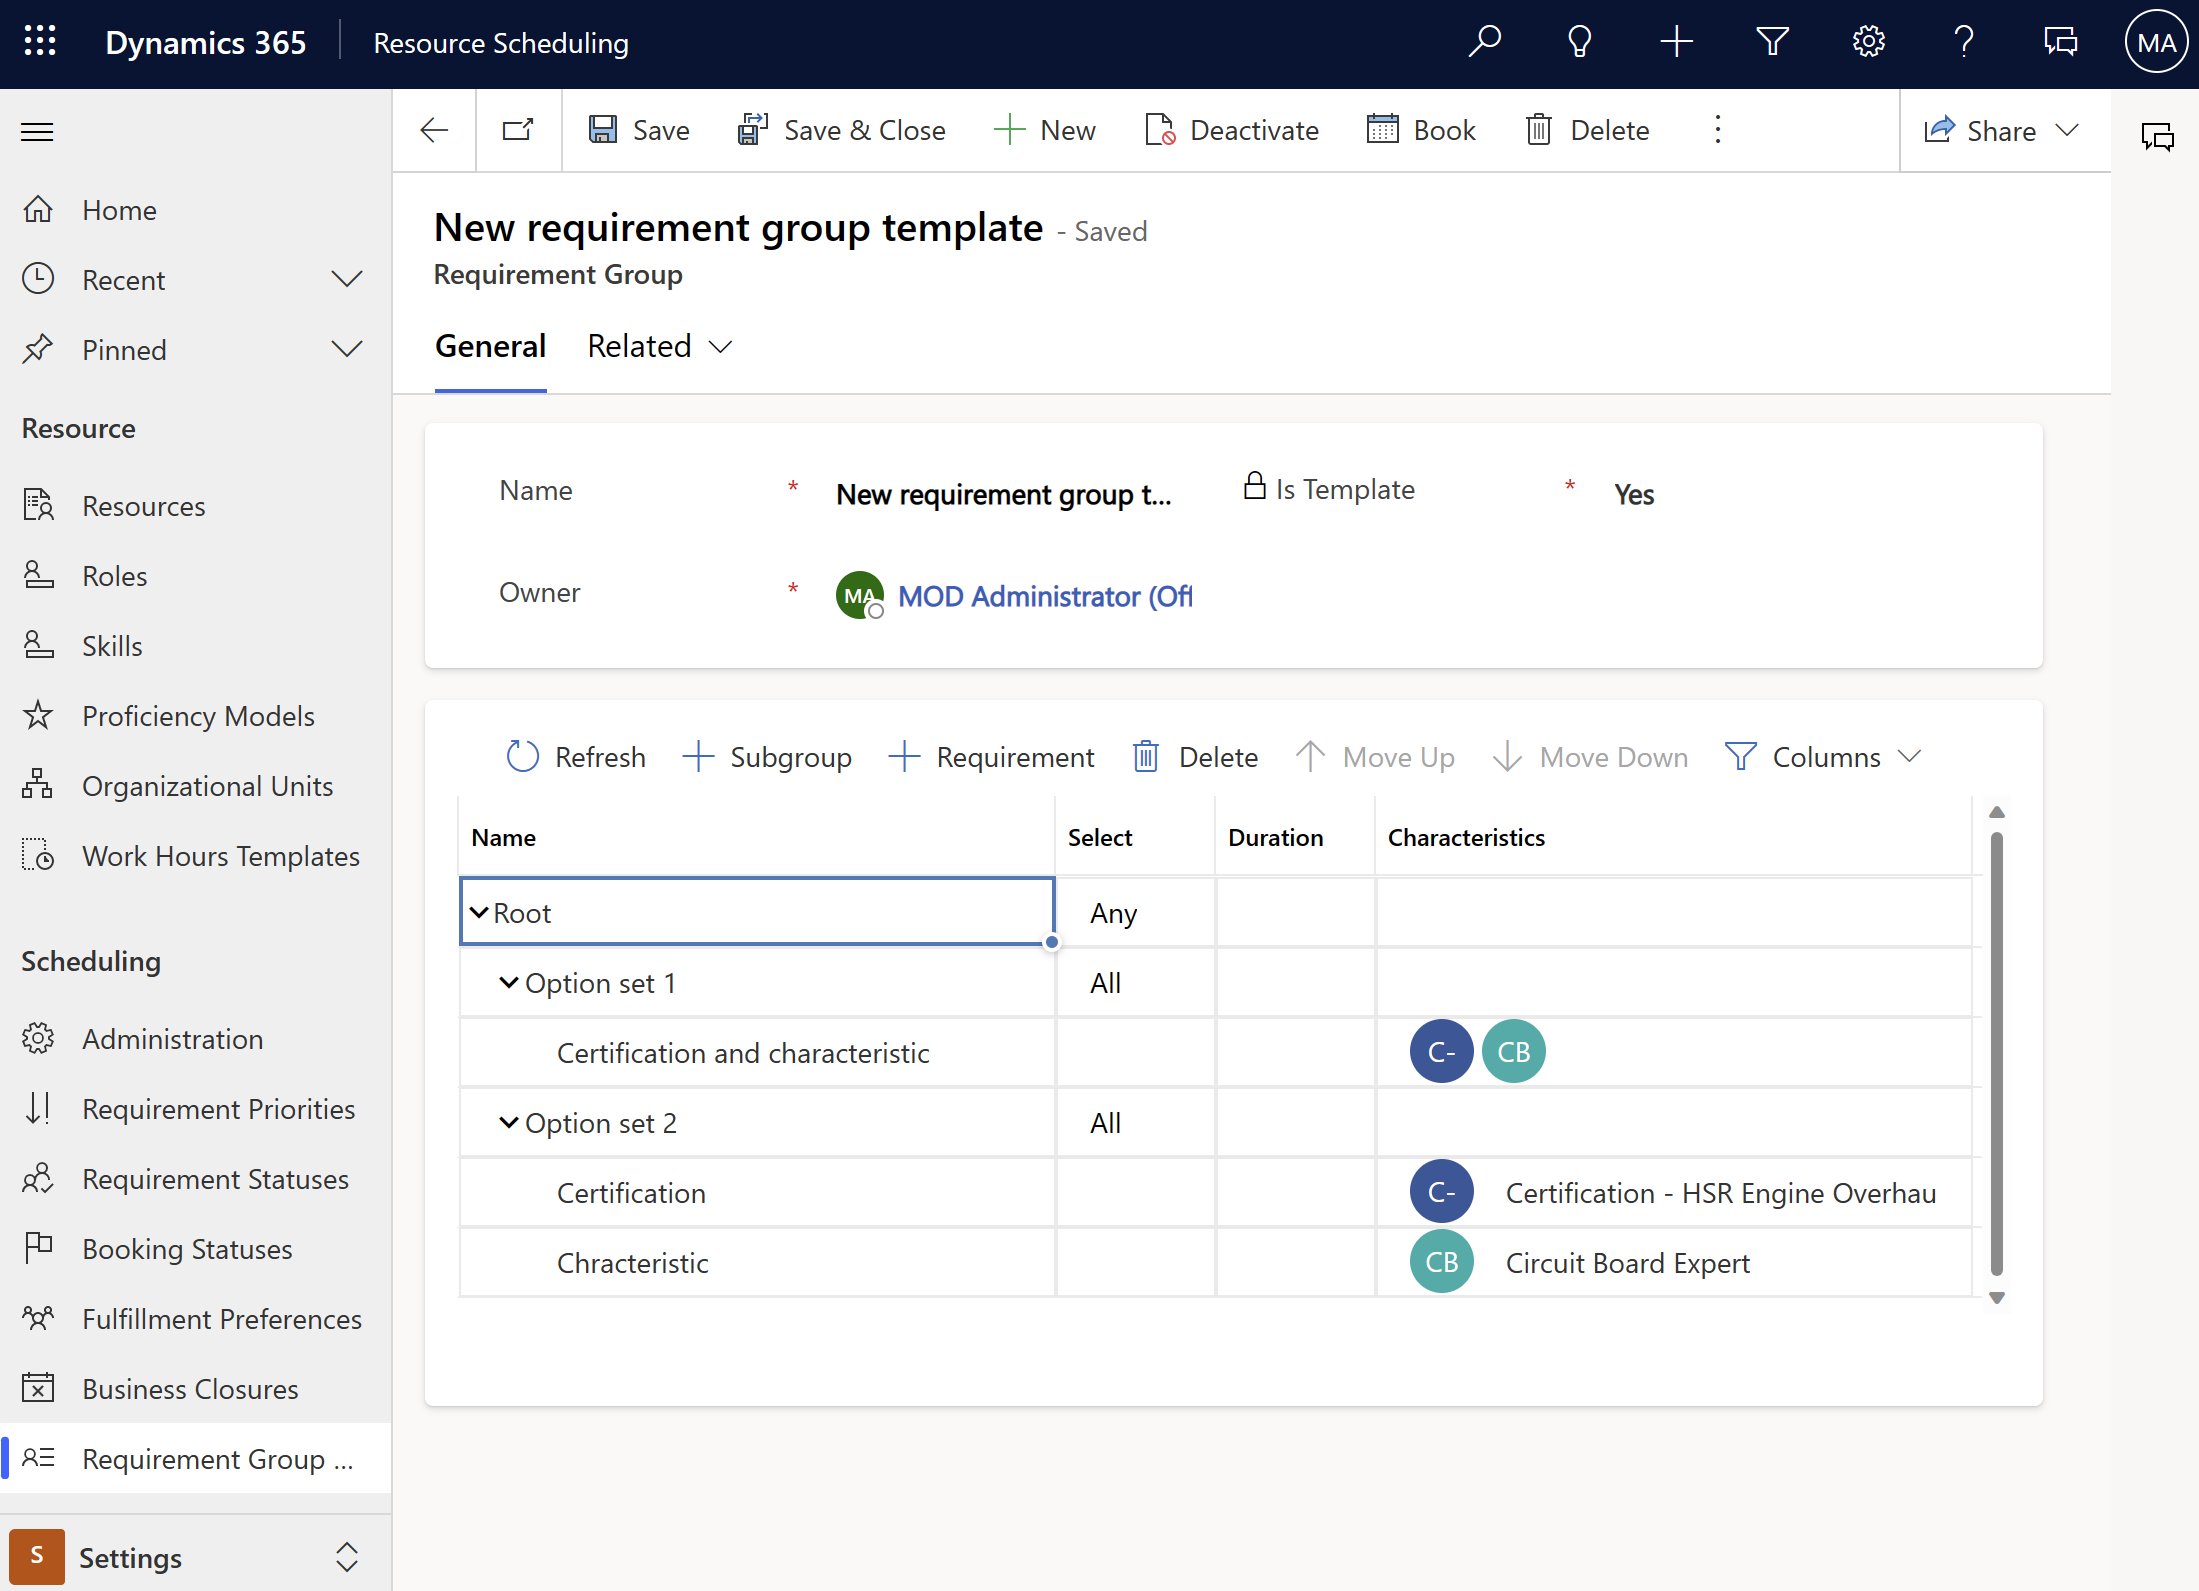
In the Select column on the root requirement, choose the preferred option. The All option means that resources must fulfill all requirements. Any means that the system searches for resources that can fulfill any requirement and that fulfilling one requirement fulfills the entire requirement group.
These settings are especially useful when you add multiple option sets to a requirement group using subgroups. For example, if a job requires a certain skill and a specific certification, one resource can fulfill both requirements (option set 1) or two resources can fulfill one requirement each (option set 2). Any of these combinations would fulfill the requirement group.
Save the requirement group template.
Create a requirement group
In Universal Resource Scheduling, open the Resource Scheduling area. Under Scheduling, select Requirement Groups, and then select New.
Enter a Name.
Optionally, choose an existing Requirement group template from the drop-down list.
Edit the requirements in the requirement group as required.
Book a requirement group
Open a requirement group and select Book to launch the schedule assistant and get available resources that can fulfill the requirement group. By default, it recommends options that require the fewest resources first. You can also sort by Earliest Time First in the left pane.
Booking an option for multiple requirements creates multiple bookings.
Keyboard shortcuts
You can use keyboard shortcuts when creating requirement groups.
| Command | Keys |
|---|---|
| Expand collapsed row | SHIFT ALT + |
| Collapse expanded row | SHIFT ALT - |
| Indent task | SHIFT ALT right arrow |
| Outdent task | SHIFT ALT left arrow |
| Move task up | SHIFT ALT up arrow |
| Move task down | SHIFT ALT down arrow |
| Add new row | SHIFT ALT insert |
| Delete row | SHIFT ALT delete |
| Refresh | SHIFT ALT F5 |
| Edit | SHIFT ALT F2 |
Requirement groups for field service scenarios
Requirement group templates are designed to work with incident types. Associate a requirement group template to an incident type to automatically add requirement groups to work orders. Requirement groups can influence the performance for creating work orders and work order incidents. The degree of influence depends on the number of requirements in a requirement group.
In Field Service, open the Settings area. Under General, select Incident Types.
Select an incident type, open the Related > Requirement Groups tab, and Select New Incident Type Requirement Group.
Note
Incident types with characteristics can't relate to requirement group templates. Associate the characteristics with requirements in the group instead.
Enter a Name and choose a Requirement Group Template to associate the template with the incident type.
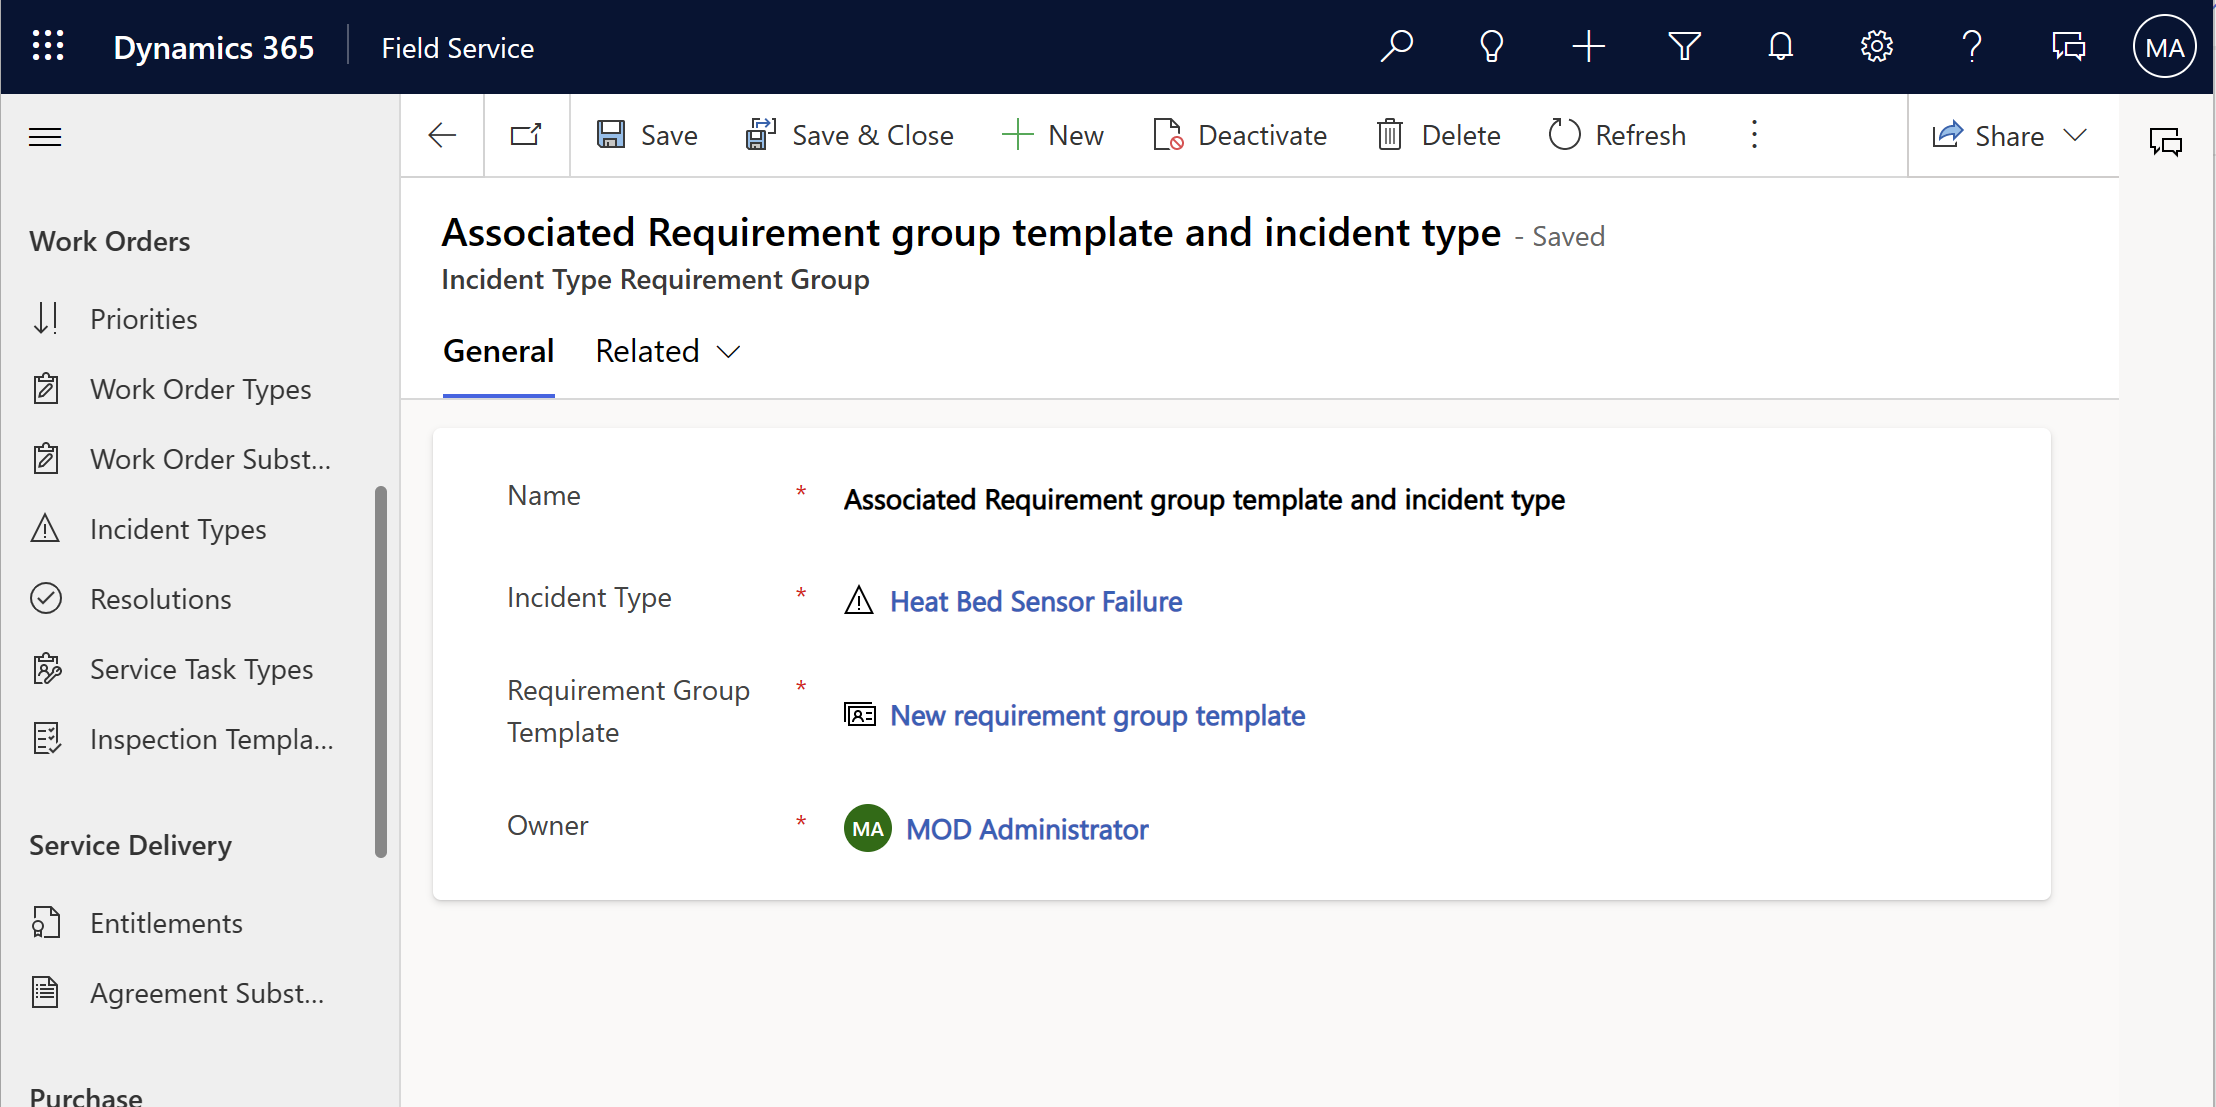
After saving the record, add the incident type to a work order.
You're now all set to book the work order.
Note
When requirement groups perform onsite work, the schedule assistant looks for groups of resources that can arrive at the same time, not resources that can begin traveling at the same time.
Feedback
Coming soon: Throughout 2024 we will be phasing out GitHub Issues as the feedback mechanism for content and replacing it with a new feedback system. For more information see: https://aka.ms/ContentUserFeedback.
Submit and view feedback for