Set up customer activities
Customer activities are actions or events performed by customers. For example, transactions, support call duration, website reviews, purchases, or returns. These activities are contained in one or more data sources. With Dynamics 365 Customer Insights- Data, consolidate your customer activities from these data sources and associate them with customer profiles. These activities appear chronologically in a timeline on the customer profile. Include the timeline in Dynamics 365 apps with the Customer Insights Timeline Integration or the Customer Card Add-in solution.
Prerequisites
- Add data sources that contain activities. Make sure each activity table has at least one field of type Date or Datetime.
- Unify customer data into customer profiles.
Define customer activities
Follow these steps to define all activities at once.
Go to Data > Activities. Select Configure activities.
In the Activity tables step, select Select tables and choose the tables that have activity data. Select Add.
For each table, choose the following information:
- Activity type: Choose from the semantic types, Feedback, Loyalty, SalesOrder, SalesOrderLine, and Subscription. If a semantic activity type isn't relevant for the new activity, choose a non-semantic type, Other, or Create New for a custom type.
- Primary key: The primary key uniquely identifies a record. It shouldn't contain any duplicate values, empty values, or missing values.
Note
The primary key for each row should remain consistent across data source refreshes. If a data source refresh changes the primary key for a row, the system deletes all old rows and inserts all new rows, causing an increase in processing time.

Select Next for the Activity fields step.
For each table that has a semantic activity type, choose Intelligent mapping to use AI models to predict semantics, which saves time and improves accuracy. Intelligent mapping automatically determines the type of data in each column and maps it to the attributes.
Enter the following information for each table:
Activity name: Unique name for your activity.
Timestamp: Field that represents the start time or date of your activity.
Event activity: Field that is the event for this activity.
Web address (optional): Field containing a URL with information about this activity. For example, the transactional system that sources this activity. This URL can be any field from the data source, or it can be constructed as a new field using a Power Query transformation. The URL data will be stored in the Unified Activity table, which can be consumed downstream using APIs.
Additional detail (optional): Field with relevant information for this activity.
Show this activity in the timeline on your customer profile?: Yes to show the activity in the timeline or No to hide it. Optionally, choose an icon to represent the activity on the timeline.
Note
If you select No and hide the activity in the timeline view, the activity will not be returned by the API either.
Map field types for your activity's attributes?: Yes to help the system better understand the relevance of your activity data or No do not map.
If you choose Yes to map your field types, select the appropriate attributes to map your data. Required fields are determined by the selected activity type.
Select Next.
In the Relationships step, select Add relationship and enter the following information for each table. This step connects your activity data to its corresponding customer record.

- Foreign key: Field in your activity table that will be used to establish a relationship with another table.
- To table name: Corresponding source customer table with which your activity table will be in a relationship. You can only relate to source customer tables that are used in the data unification process.
- Relationship name: If a relationship between this activity table and the selected source customer table already exists, the relationship name will be in read-only mode. If no such relationship exists, a new relationship will be created with the name you provide in this box. Relationship names are case sensitive.
Note
Activities can't be configured using inherited relationships.
Select Apply to create the relationship and then select Next.
In the Review step, verify your selections. Go back to any of the previous steps and update the information if necessary.
To save your changes, select Save and close. To save your changes and create the activities, select Create activities.
Manage existing customer activities
Go to Data > Activities to view your saved activities, their source table, the activity type, and if they are included in the customer timeline. You can sort the list of activities by any column or use the search box to find an activity.
Select an activity to rename or delete the activity. To edit activities, select Configure activities.
View activity timelines on customer profiles
If you selected Show this activity in the timeline on your customer profile in the activity configuration, go to Customers and select a customer profile to view the customer's activities in the Activity timeline section.
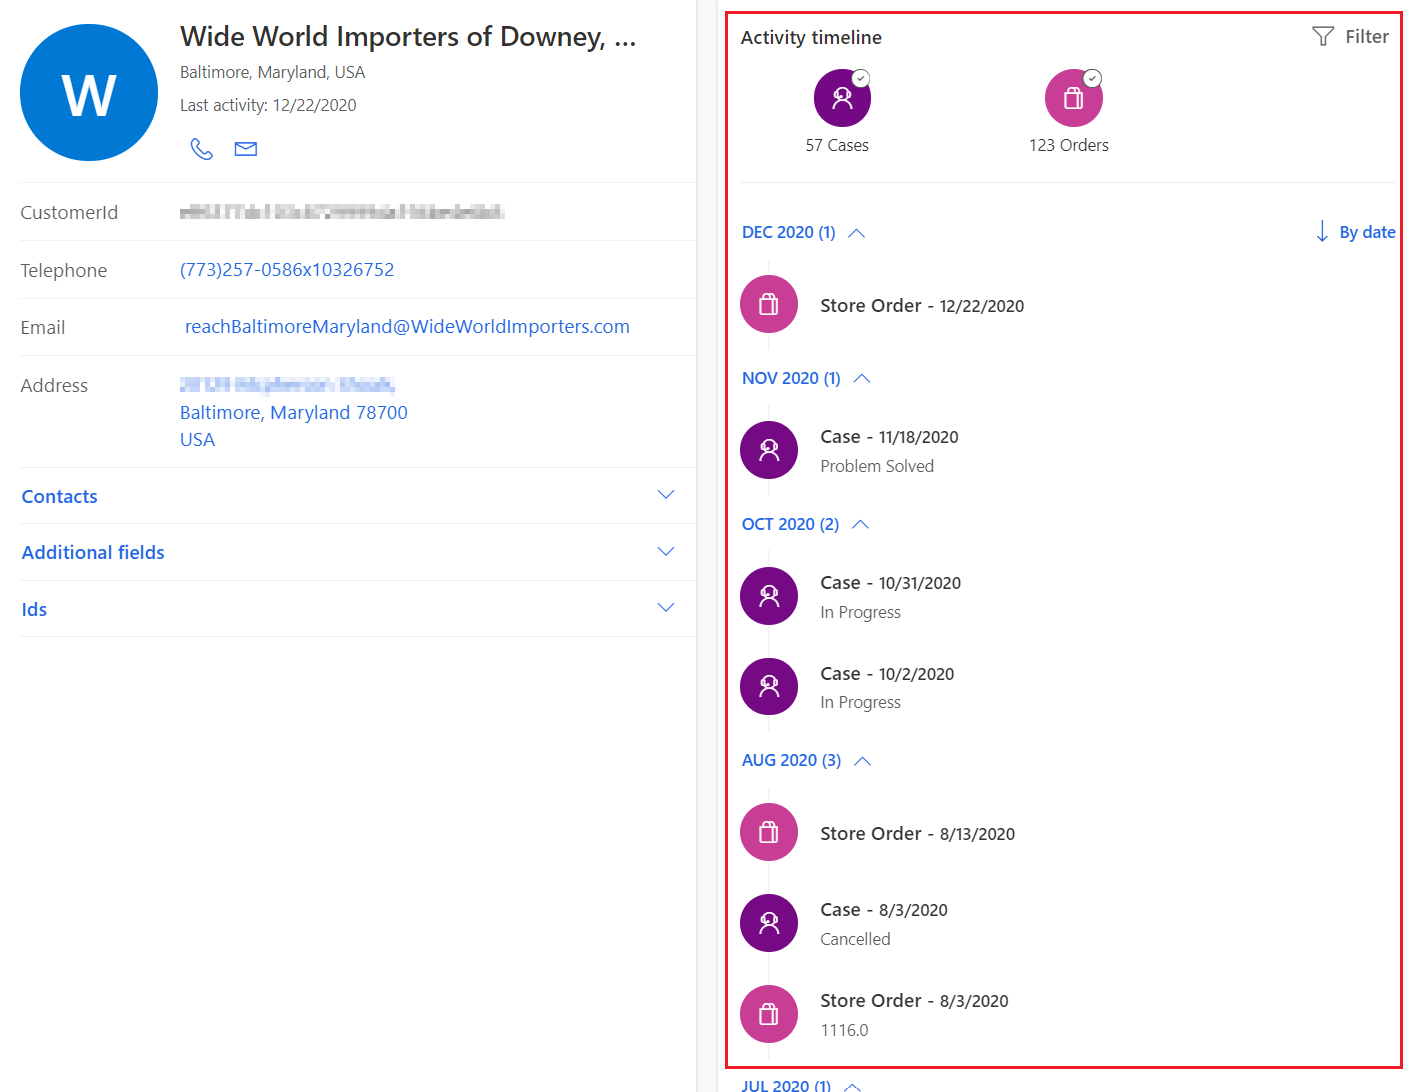
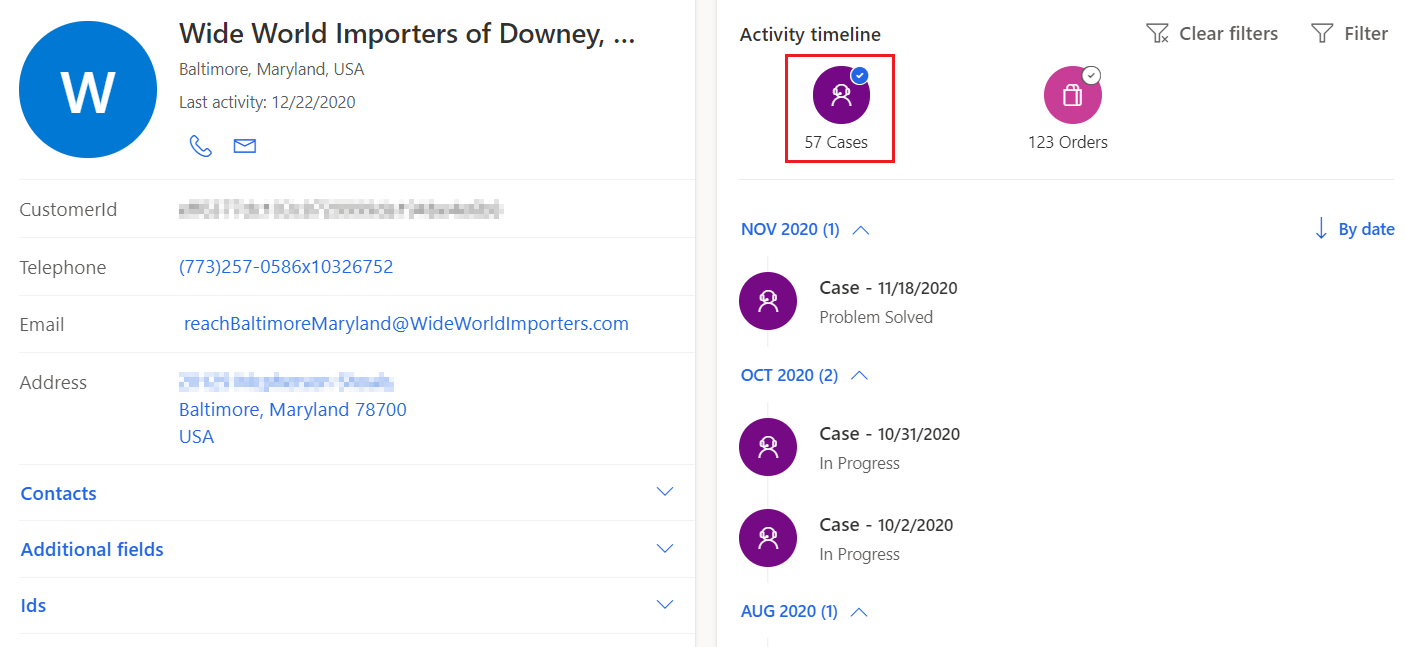
To filter activities in the activity timeline:
Select one or more of the activity icons to refine your results to include the selected types only.
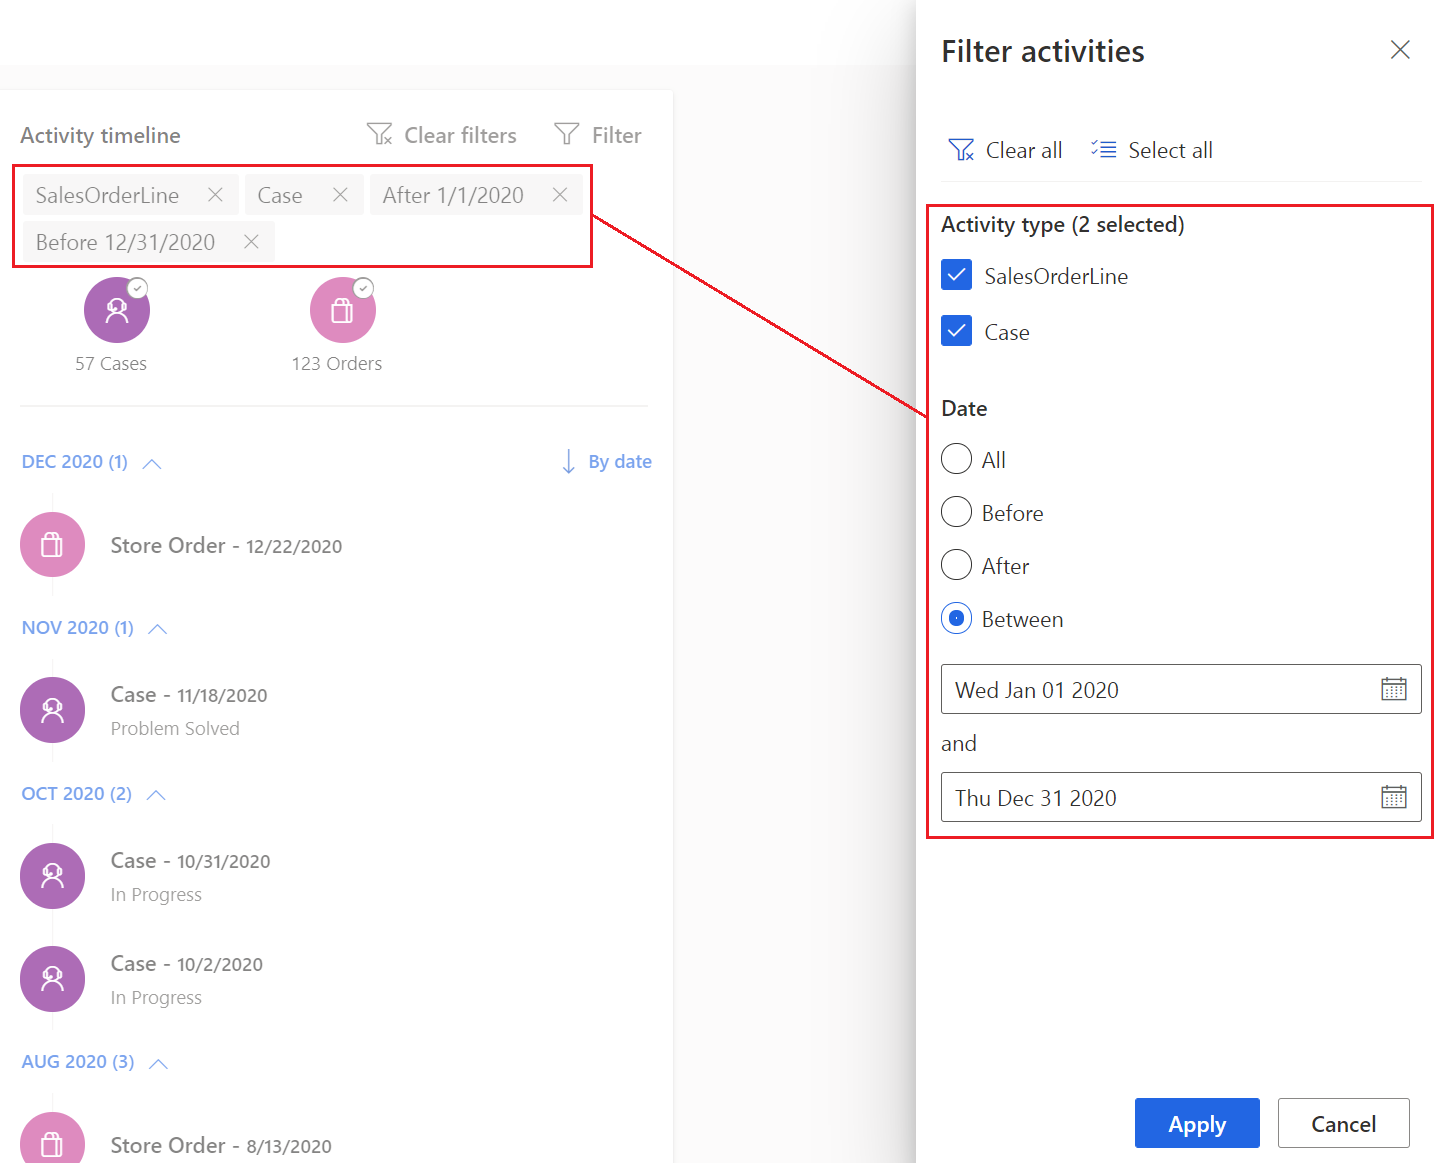
Select Filter to open a filter panel to configure your timeline filters. Filter by ActivityType and/or Date. Select Apply.
Note
Activity filters are removed when you leave a customer profile. You have to apply them each time you open a customer profile.