Set up and manage exports (preview)
[This article is prerelease documentation and is subject to change.]
All exports follow the same general set up and management process. You can also schedule exports. A common use case for exports of segments is to share lists of your customers to advertising services like Google Ads or Meta Ads for marketing purposes. A common use case for the export of full tables, which we call a data-out export, is to share data to Azure Data Lake Gen2, from where organizations can further process these tables with their custom solutions.
Set up a new export
To set up or edit an export, you need the right connections available to you. Connections depend on your user role:
- Administrators have access to all connections. They can also create new connections when setting up an export.
- Contributors can have access to specific connections. They depend on administrators to configure and share connections. The exports list shows contributors whether they can edit or only view an export in the Your permissions column. For more information, go to Allow contributors to use a connection for exports.
- Viewers can only view existing exports—not create them.
Go to Data > Exports.
Select Add export to create a new export.
In the Set up export pane, select which connection to use.
Provide the required details and select Save to create the export. For the required details, review the Dynamics 365 Customer Insights - Data documentation for the specific export.
Manage existing exports
Go to Data > Exports to view the exports, their connection name, connection type, and status. All user roles can view configured exports. You can sort the list of exports by any column or use the search box to find the export you want to manage.
Select an export to view available actions.
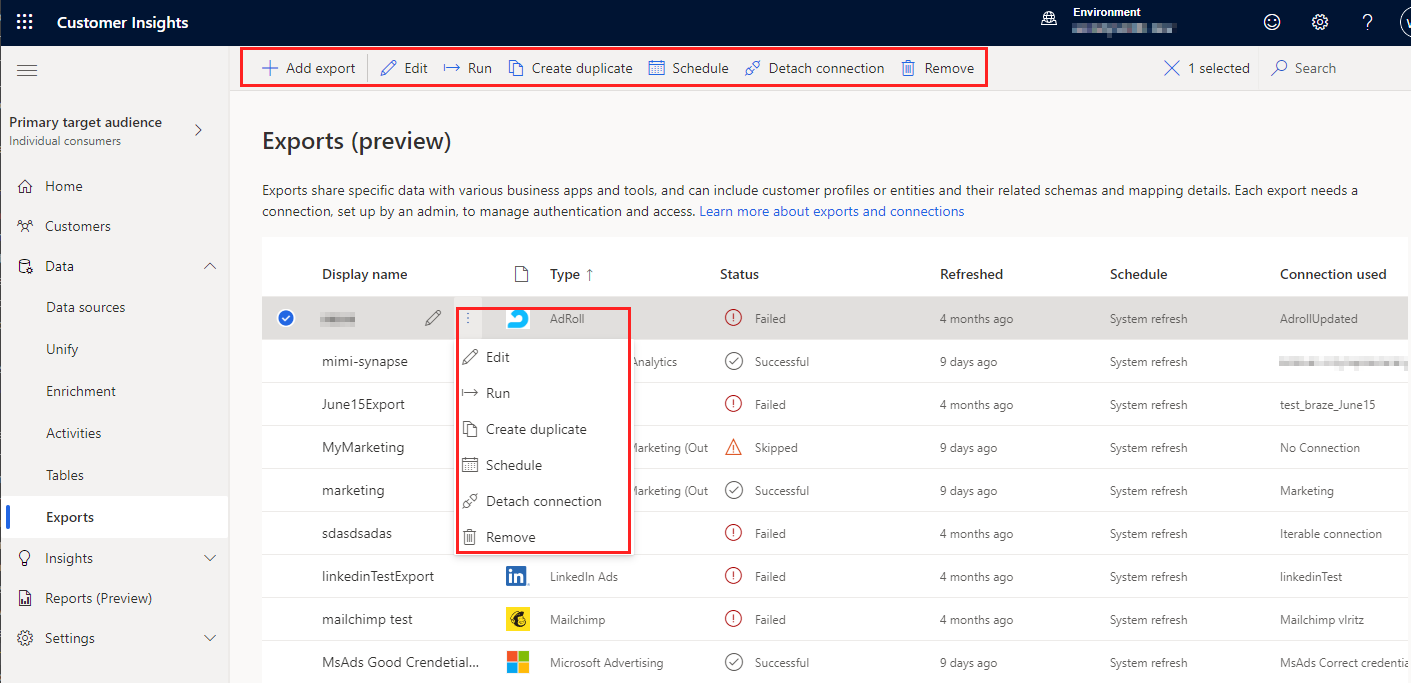
- View or Edit the export. Users without edit permissions select View instead of Edit to see the export details.
- Run the export to export the latest data.
- Create duplicate of an export.
- Schedule the export.
- Detach connection to remove the connection for this export. Detach does not remove the connection, but deactivates the export. The Connection used column displays No Connection.
- Remove the export.
Schedule and run exports
Each export you configure has a refresh schedule. During a refresh, the system looks for new or updated data to include in an export. By default, exports are run as part of every scheduled system refresh. You can customize the refresh schedule or turn it off to run exports manually.
Tip
Minimize the processing time of segment exports with the following best practices:
- Distribute segment tables across multiple exports.
- Avoid scheduling all exports at the same time. Leave 30 minutes or one hour between the scheduled time of each export.
Export schedules depend on the state of your environment. If there are updates in progress on dependencies when a scheduled export should start, the system will first complete the updates and then run the export. The Refreshed column shows when an export was last refreshed.
Schedule exports
Define custom refresh schedules for individual exports or several exports at once. The currently defined schedule is listed in the Schedule column of the export list. The permission to change the schedule is the same as editing and defining exports.
Go to Data > Exports.
Select the export you want to schedule.
Select Schedule.
In the Schedule export pane, set the Schedule run to On to run the export automatically. Set it to Off to refresh it manually.
For automatically refreshed exports, choose a Recurrence value and specify the details for it. The time defined applies to all instances of a recurrence. It's the time when an export should start refreshing.
Select Save.
When editing the schedule for several exports, make a selection under Keep or override schedules:
- Keep individual schedules: Keep the previously defined schedule for the selected exports and only disable or enable them.
- Define new schedule for all selected exports: Override the existing schedules of the selected exports.
Understanding the status of custom-scheduled exports is tricky, because the status on the exports page is only the most recent scheduled system refresh. Exports with a custom schedule frequently show the misleading status Skipped because they don't run during a system refresh. Instead, they refresh per the custom schedule you defined. To see the history for an export, go to Settings > System > Status and review the Export destinations section. To view the details of the last several runs, select the task or process name. At this point, there's no direct indication of custom-scheduled tasks within this history. Learn more about system status.
Run exports on demand
To export data without waiting for a scheduled refresh, go to Data > Exports.
- To run all exports, select Run all in the command bar. Only exports that have an active schedule are run. To run an export that is not active, run a single export.
- To run a single export, select it in the list and select Run in the command bar.
Tip
There are statuses for tasks and processes. Most processes depend on other upstream processes, such as data sources and data profiling refreshes.
Select the status to open the Progress details pane and view the progress of the tasks. To cancel the job, select Cancel job at the bottom of the pane.
Under each task, you can select See details for more progress information, such as processing time, the last processing date, and any applicable errors and warnings associated with the task or process. Select the View system status at the bottom of the panel to see other processes in the system.