Work with tags and columns
Organize lists using tags and columns to find data quickly and easily and view the data the way you want.
Tags and columns are currently supported with Segments and Measures.
Manage tags
A tag is a label that’s used to categorize and organize items such as segments or measures. For example, add a tag to segments that are part of a specific campaign. Then, you can filter by that tag to identify the segments for the campaign quickly and easily.
You can view, add, and remove tags from items. Add tags as you create an item. After creation, manage tags from the list view. An item can have up to 20 tags.
Go to the list view. For example, go to Insights > Segments.
Select one or more items whose tags you want to manage and select Tag.

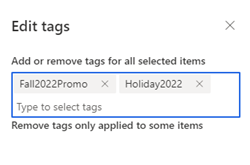
From the Edit tags pane, choose any of the following:
- To add existing tags to the items, type a portion of the name in the Tags box until you see the tag you want. Select the tag.
- To create a tag, type the name in the Tags box and select Create new tag or press Enter. The new tag is added to the items.
- To remove tags, select X next to the tag names.
Select Apply.

Filter on tags
Use tags to filter your list of items.
Go to the list view. For example, go to Insights > Segments.
Select Filter on the top right of the page.
Search and select the tags you want to filter by.
Select Apply. Only records that match the filter tags display. Your filter selection is saved until you log out of this session or switch browsers.
To clear the filter, select Filter and Clear all.
Customize columns
Customize columns to arrange your list of items. You can add or remove columns and change the order of the columns.
Go to the list view. For example, go to Insights > Segments.
Select Columns on the top right of the page.
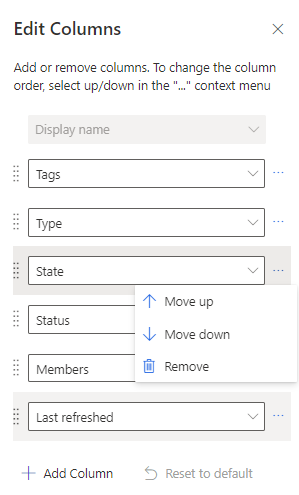
Add, remove, or move the columns.
Select Apply.