Configure the enhanced email template editor page
You can configure the enhanced email template editing experience for apps across your organization. If you need to, you can turn off the enhanced email template page for a specific app. And then, the users of the app see the default email template editor page.
Note
- You must have an active subscription to Dynamics 365 Customer Service Enterprise to use the enhanced email template editor.
- In Customer Service workspace and Customer Service Hub, the enhanced email template dialog is enabled by default as an early access feature.
Enable the enhanced email template editor
In Power Apps, select the environment that contains your solution.
Select Solutions on the left navigation pane, and then select the solution where you want to turn on the enhanced template editing experience. If the item isn’t in the side panel pane, select …More and then select the item you want.
Note
Don't select the default solution to configure the template.
Select Add Existing > More > Setting.
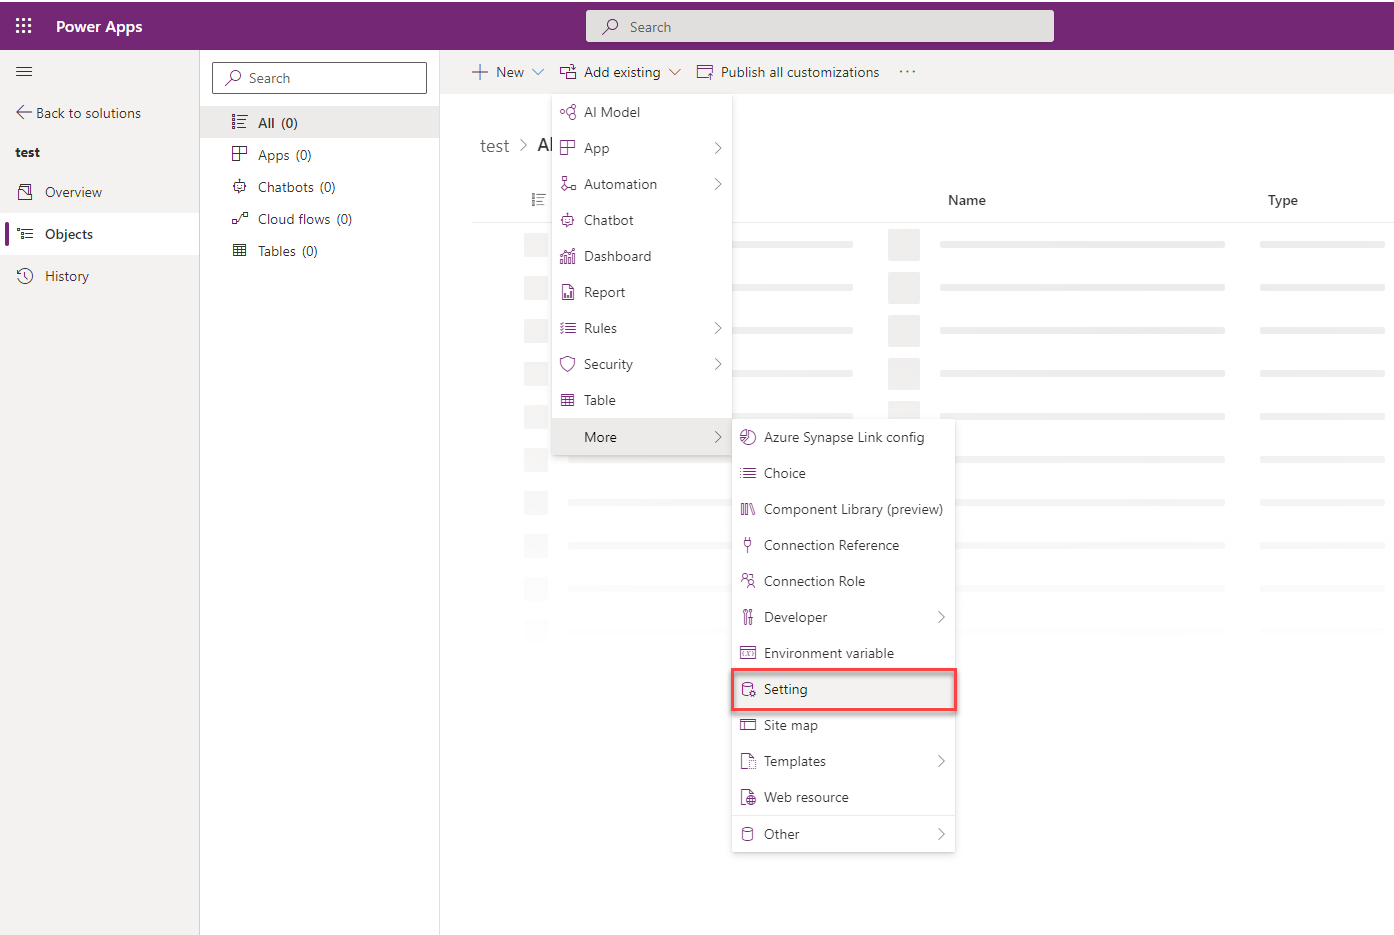
On the Add existing Setting Definition pane, select the Enable the New Email Template Editor option and then select Next.
Select Add on the Selected Setting Definition to add the Enable the New Email Template Editor option to your solution.
Go to Add Existing > App > Model-driven app> Add existing model-driven apps pane.
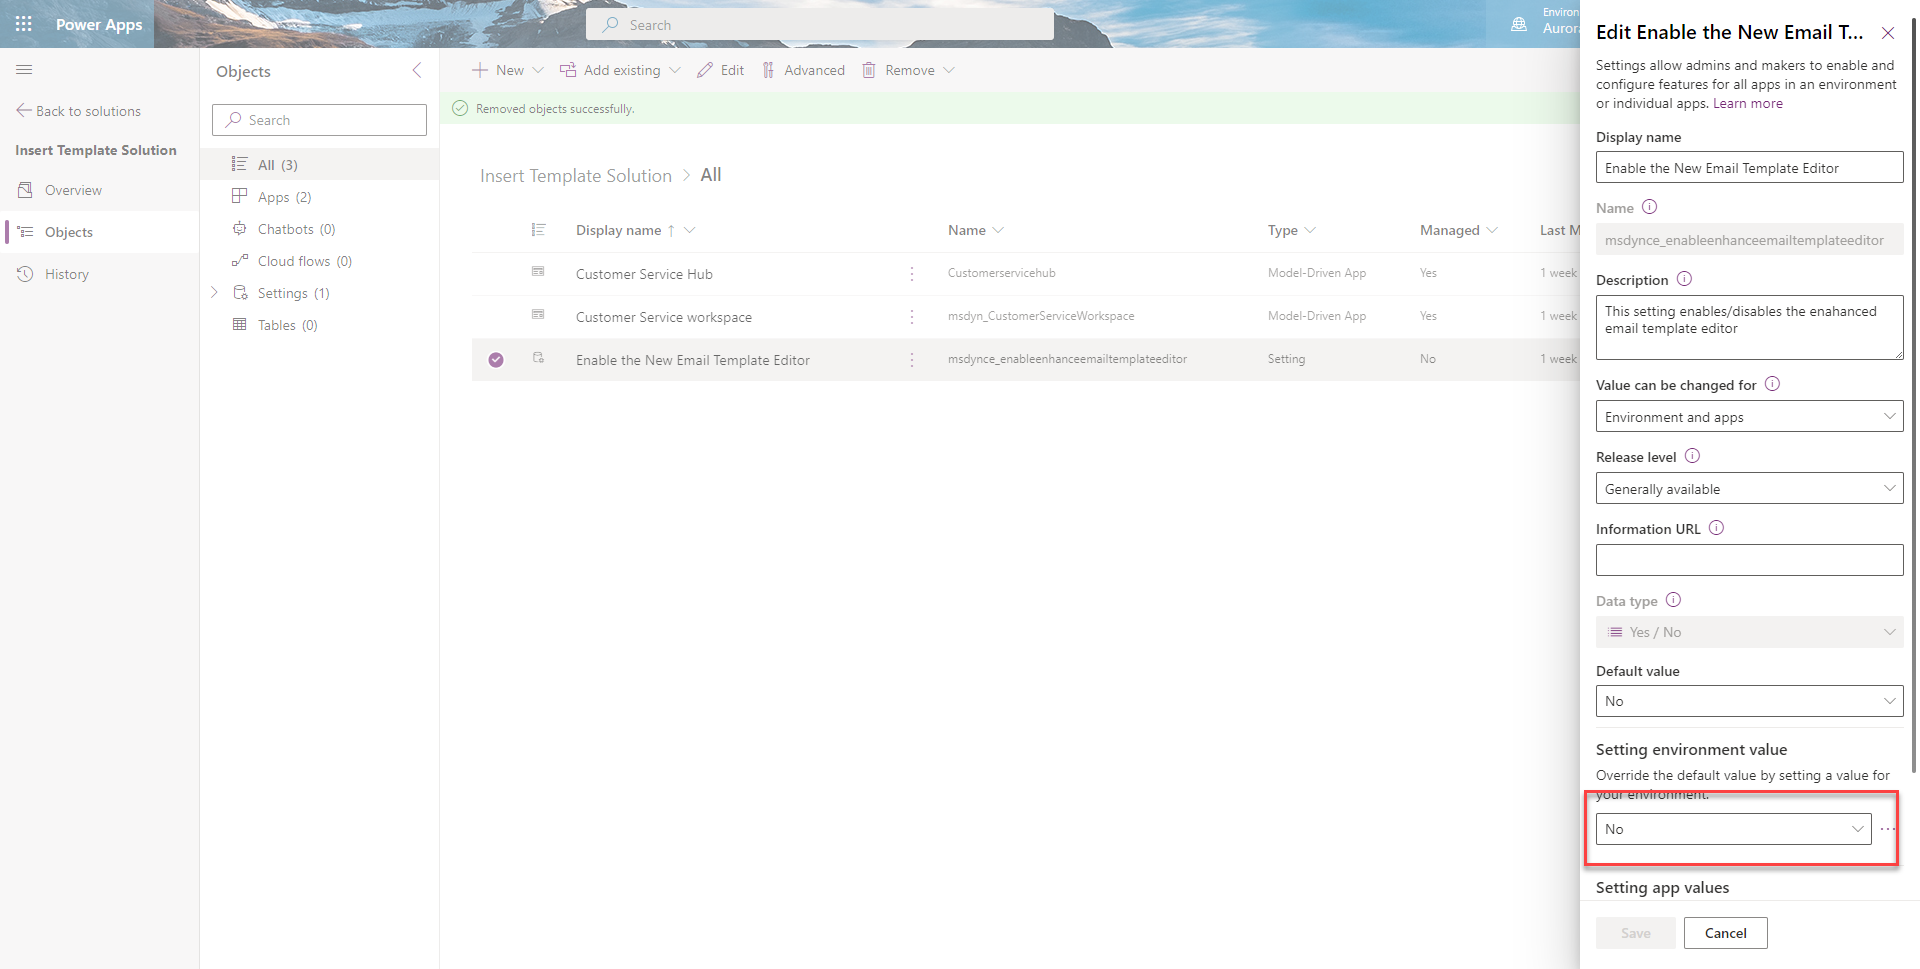
Select the Enable the New Email Template Editor option. The Edit Enable the New Email Template Editor pane appears.
Set the Setting environment value option to Yes on the Edit Enable the New Email Template Editor pane.
Select Publish All Customizations.
Disable the enhanced email template editor for an app
For an app to display the default email template selection dialog, you must disable the enhanced email template selection option. To disable the option for a specific app, you must add the app to the Solution in which you've added the email template selection option. Perform the following steps:
- Open the Power Apps environment.
- Select Solutions on the left navigation pane. If the item isn’t in the side panel pane, select …More and then select the item you want.
- Open the Solution in where you've added the email template selection option.
- Go to Add Existing > App > Model-driven app> Add existing model-driven apps pane. Select the app for which you want to disable the enhanced insert email template selection dialog. The app is added to the solution.
- Select the Enable the New Email Template Editor option in the solution.
- On the Edit Enable the New Email Template Editor, in the Setting app value section, the selected app is displayed.
- Select New app value for the app, and select No for the specified app.
- Select Save and Publish All Customizations.
See also
How to create an email template in model-driven apps
Customize an email template using the template editor
Feedback
Coming soon: Throughout 2024 we will be phasing out GitHub Issues as the feedback mechanism for content and replacing it with a new feedback system. For more information see: https://aka.ms/ContentUserFeedback.
Submit and view feedback for