Note
Access to this page requires authorization. You can try signing in or changing directories.
Access to this page requires authorization. You can try changing directories.
Dynamics 365 Customer Engagement (on-premises) uses online synchronization filters to determine which records to synchronize between Customer Engagement (on-premises) and Exchange (using server-side synchronization). You can modify the existing online synchronization filters or create new filters to synchronize certain types of records. You can also delete, deactivate, or activate filters.
Email is not included in the synchronization filters because email is controlled by when the email is created in Customer Engagement (on-premises), whether the user is on the recipient list or not.
Create or modify online synchronization filters
In the web app, in the upper-right corner of the screen, click the Settings button
 > Options.
In the Set Personal Options dialog box, click the Synchronization tab.
Under Synchronize Dynamics 365 for Customer Engagement apps items with Outlook or Exchange, click the filters link.
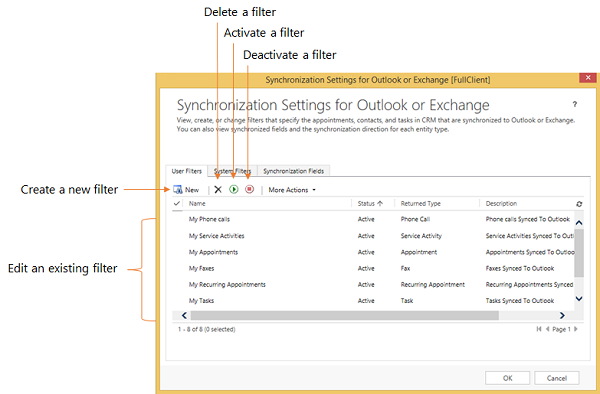
Customer Engagement (on-premises) displays the Synchronization Settings for Outlook or Exchange dialog box with the User Filters tab selected. You can use this tab to create or edit a filter, or to delete, activate, or deactivate a filter.

Note
If you’re a system administrator, you can create or modify organization-wide filters (system filters) through the SDK. More information: Tell me more about system filters
Do one of the following:
To open an existing filter, click the filter.
To create a new filter, click New.
Create or modify filter criteria
You use a criteria row to create or modify criteria in an offline synchronization filter. Each criteria row contains three values: the field to use in the filter (for example, City), an operator (for example, Equals or Contains), and the value to filter on (for example, WA).

Add a criteria row
In the Look for list, select a record type.
Point to Select in the criteria grid, and then select the field to filter on from the list.
Select an operator from the list.
Enter a value to filter on.
Group rows of criteria
For each row you want to group, click the down arrow to the left of the field name, and then click Select Row.
To remove a row from a group, click the down arrow to the left of the field name, and then click Delete. To clear all rows from the criteria grid, click Clear.
Click Group AND or Group OR.
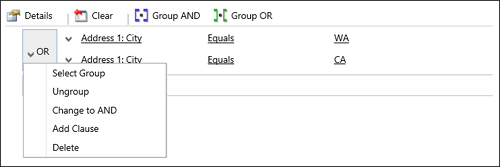
After creating a group, you can click the down arrow next to the And or Or to select from different options. You can select a group, ungroup the group, change a Group AND to a Group OR or vice versa, add a clause, or delete a group.
