Create or edit business units to control access to data
Note
If you have enabled Unified Interface only mode, before using the procedures in this article do the following:
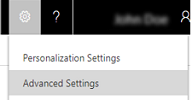
- Select Settings (
 ) on the navigation bar.
 - Select Advanced Settings.

In Dynamics 365 Customer Engagement (on-premises), a business unit is a logical grouping of related business activities.
If your Customer Engagement (on-premises) organization is structured around departments or divisions that have separate products, customers, and marketing lists, you might want to create business units. Business units are mapped to an organization’s departments or divisions. Users can securely access data in their own business unit, but they can’t access data in other business units.
Business units, security roles, and users are linked together in a way that conforms to the Customer Engagement (on-premises) role-based security model. Use business units together with security roles to control data access so people see just the information they need to do their jobs. More information: Security concepts
Keep the following in mind when creating business units:
The organization (also known as the root business unit) is the top level of a Customer Engagement (on-premises) business unit hierarchy. Customer Engagement (on-premises) automatically creates the organization when you install or provision Customer Engagement (on-premises). You can’t change or delete the organization name.
Each business unit can have just one parent business unit.
Each business unit can have multiple child business units.
Customer Engagement (on-premises) security roles and users are associated with a business unit. You must assign every user to one (and only one) business unit.
You can assign a team to just one business unit, but a team can consist of users from one or many business units. Consider using a team if you have a situation where users from different business units need to work together on a shared set of records.
Create a new business unit
Go to Settings > Security.
Choose Business Units.
On the Actions bar, select New.
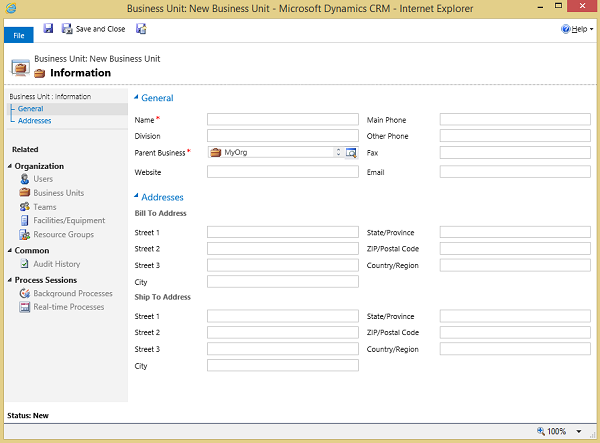
In the Business Unit dialog box, type a name for the new business unit. Customer Engagement (on-premises) automatically fills in the Parent Business field with the name of the root business unit.

If you want to change the parent business unit, select the Lookup button
 , Look Up More Records, and then do one of the following:
Select an existing business unit from the list.
Create a new parent business unit:
Choose New, and then add the information for the new parent business unit in the Business Unit dialog box.
When you’re done adding information, select Save and Close.
In the Look Up Record dialog box, select Add.
In the Business Unit dialog box, fill in any of the other optional fields, such as the Division, Website, contact information, or addresses.
When you’re done making entries, select Save and Close.
Change the settings for a business unit
Go to Settings > Security.
Choose Business Units and then select a business unit name.
In the Business Unit dialog box, do one or more of the following:
Modify the data in one or more fields.
Select a record type under Organization to see a list of related records. For example, select Users to view a list of users in the selected business unit.
When you’re done making changes select Save and Close.
Change the business unit for a record
You can change the business unit for an individual facility, equipment, or user.
Change the business unit for facilities or equipment
Go to Settings > Business Management.
Choose Facilities/Equipment.
Select the Name of a piece of equipment or a facility.
In the Facility/Equipment dialog box, on the Actions menu, choose Change Business Unit.
In the Change Business Unit dialog box, use the Lookup button
 to select a new business unit, and then select OK.
Select Save and Close.
Change the business unit for a user
Important
By changing the business unit for a user, you remove all security role assignments for the user. At least one security role must be assigned to the user in the new business unit. More information: Security roles.
Go to Settings > Security.
Choose Users.
Select a user name.
On the More Commands (…) menu, select Change Business Unit.
In the Change Business Unit dialog box, use the Lookup button
 to select a new business unit, and then select OK.
See also
Set up an organization
Delete a business unit
Assign a business unit a different parent business
Feedback
Coming soon: Throughout 2024 we will be phasing out GitHub Issues as the feedback mechanism for content and replacing it with a new feedback system. For more information see: https://aka.ms/ContentUserFeedback.
Submit and view feedback for