Initialize company data
Important
Some or all of the functionality noted in this article is available as part of a preview release. The content and the functionality are subject to change. For more information about preview releases, see Service update availability.
If you have an existing Microsoft Dataverse instance or finance and operations app instance that has business data, you might want to enable a dual-write connection against it. In this case, you must initialize the Dataverse data or finance and operations app data with company information before you enable dual-write. This initialization process is sometimes referred to as bootstrapping.
This article includes sample scenarios that explain how to use Azure Data Factory to initialize data in Dataverse tables for dual-write. It doesn't cover all tables, error handling scenarios, or lookups. Use this article and template as a reference to set up your own Azure Data Factory pipeline to import data into Dataverse or update data in Dataverse.
High-level scenario
Consider the Customers table in a finance and operations app, and the Account table in Dataverse.
- Use initial write to copy reference and dependent tables, such as Company, Customer groups, and Terms of payment, from the finance and operations app to Dataverse.
- Use the Data management framework to export data from the finance and operations app in comma-separated values (CSV) format. For example, set up an export project in Data management to export customers from each company by using the DataAreaId field in the finance and operations app. This process is a one-time manual process.
- Use Azure Blob Storage to store the CSV files for lookup and transformation. Upload the CSV file for your finance and operations customers into Azure Blob Storage.
- Use Azure Data Factory to initialize data in Dataverse.
The following illustration shows the workflow.

This scenario is based on the following assumptions:
- The source data is in the finance and operations app.
- If an account exists in Dataverse, but it doesn't exist in the finance and operations app, it won't be initialized as part of this flow. Use DIXF or initial sync functionality based on the amount of data stored in Dataverse.
- All account records in the customer engagement apps have a natural key (account number) that matches the finance and operations natural key (CustomerAccount).
- Rows have a one-to-one (1:1) mapping across the apps.
Note
In both finance and operations apps and Dataverse, When a customer record is created, Party record gets created implicitly.
Prerequisites
- Azure subscription – You have contributor access to an existing Azure subscription. If you don't have an Azure subscription, create a free Azure account before you begin.
- Azure storage account – You have an Azure storage account. If you don't have a storage account, follow the steps in Create an Azure storage account to create one.
- Azure data factory – Create an Azure Data Factory resource by following the steps in Create a data factory.
- Finance and operations app – Use the Data management framework to export the data in CSV format. For more information, see Data management overview. In this template, customers are exported by using the CustCustomerV3Entity table.
- Dynamics 365 Dataverse – Use the credentials for the Dataverse admin user to initialize the data.
- Dual-write – Dual-write solutions are installed, and reference data is copied by using initial write.
Deployment steps
Set up an Azure storage account
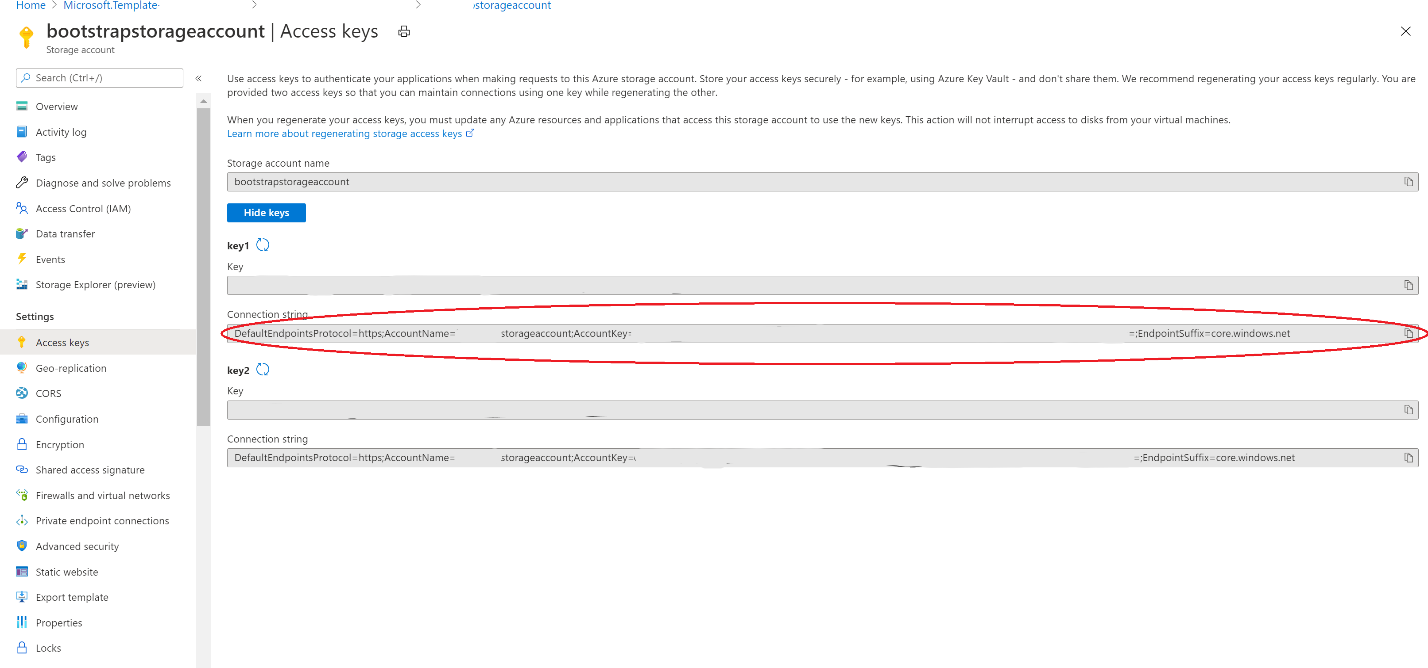
If you don't have an Azure storage account, follow these steps in Create an Azure storage account to create one. In your storage account, create one container that is named ce-data. This container will store all data files. You can change the container in your datasets and pipelines as you require. Go to Access keys, and copy the Connection string value, as shown in the following illustration. This value is required when you import the Azure Data Factory template.
Deploy an Azure Data Factory template
Make a note of the name of the Azure data factory that you created.
Make a note of the connection string for the Azure storage account.
Make a note of the service URI of the Dataverse instance, and the admin user name and password.
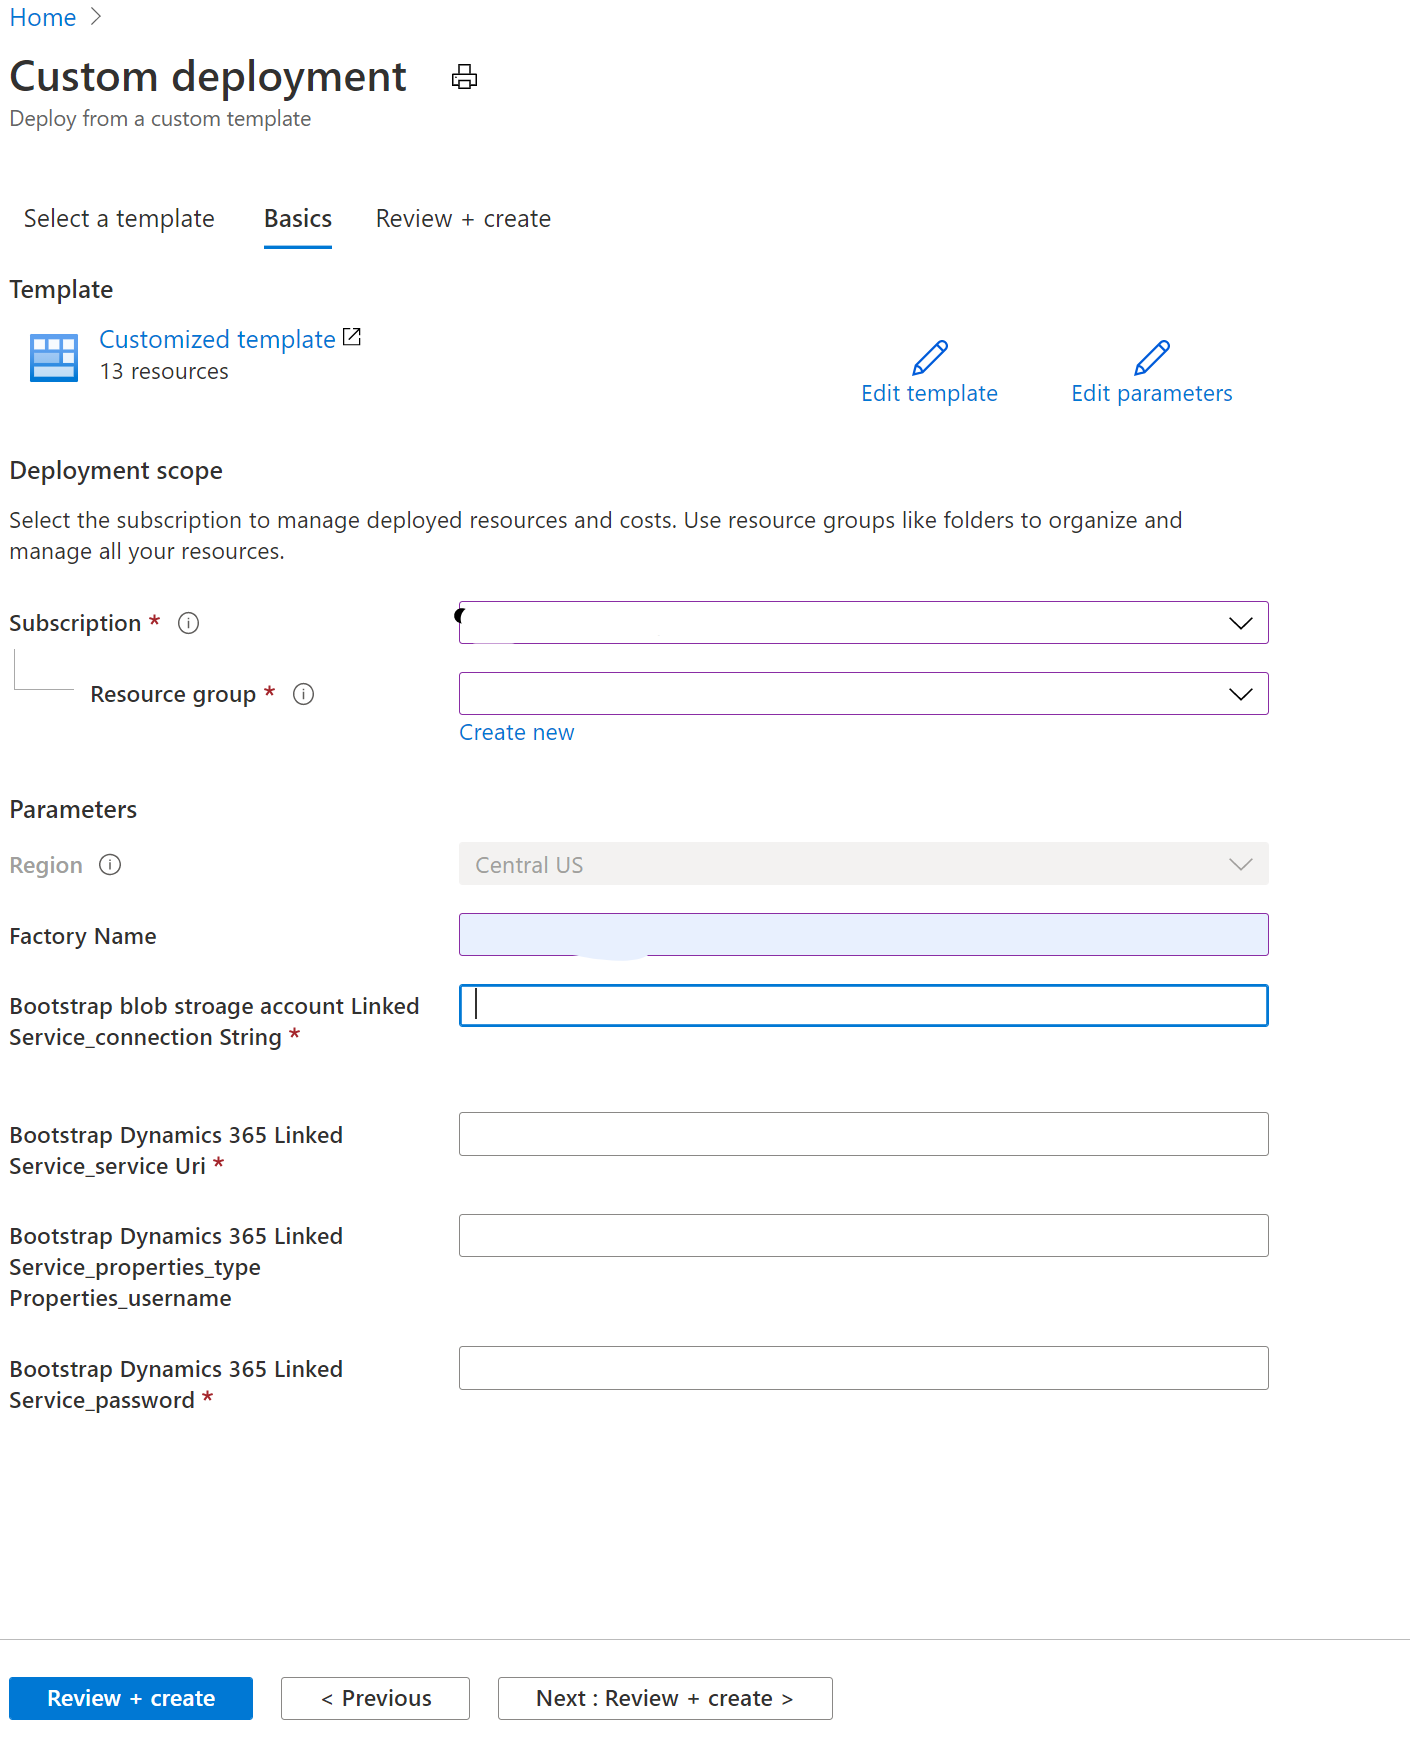
The following table shows the parameters that are required.
Parameter name Description Example value Factory name The name of your data factory BootstrapDataverseDataADF Bootstrap blob storage account Linked Service_connection String The connection string for blob storage The value that you copied when you created the storage account Bootstrap Dynamics 365 Linked Service_service Uri The URI of the Dataverse instance https://contosod365.crm4.dynamics.comBootstrap Dynamics 365 Linked Service_properties_type Properties_username The Dynamics 365 admin user's user ID <adminservice@contoso.onmicrosoft.com>Bootstrap Dynamics 365 Linked Service_password The Dynamics 365 admin user's password ******** Download the Azure Resource Manager (ARM) template file to your local directory.
In the Azure portal, go to Custom deployment.
Select Build your own template in the editor.
Select Load file, and find and select the ARM template file that you downloaded earlier. Then select Save.
Provide the required parameters, select Review, and then select Create.
After deployment, you will see Pipelines, Datasets, and Data flows sections in the list pane.

Run the process
In the finance and operations app, use the Data management framework to export data in CSV format. For more information, see Data management overview. In this template, customer data was exported from the CustCustomerV3Entity table. Set up CustCustomerV3Entity, and remove the FullPrimaryAddress field map from the mapping. Add the DataAreaId field to the CSV file. Rename the exported file 01-CustomersV3Export-Customers V3.csv, and upload it to the Azure storage account that you named ce-data.
Download the sample customer file.
Run BootstrapAccountsPipeline from Azure Data Factory.
Feedback
Coming soon: Throughout 2024 we will be phasing out GitHub Issues as the feedback mechanism for content and replacing it with a new feedback system. For more information see: https://aka.ms/ContentUserFeedback.
Submit and view feedback for