Build an outbound marketing approvals feature using Power Automate
Note
Dynamics 365 Marketing and Dynamics 365 Customer Insights are now Customer Insights - Journeys and Customer Insights - Data. For more information, see Dynamics 365 Customer Insights FAQs
New Customer Insights - Journeys customers receive real-time journeys features only. For more information, see Default real-time journeys installation.
Important
This article only applies to outbound marketing.
By integrating your approvals feature with Power Automate, you can implement features such as these:
- Automatically generate and send request-for-approval emails to approvers.
- Include active approve and reject buttons in request-for-approval emails.
- Easy customization of the approval steps, using a framework that most administrators will be able to understand and adjust for themselves.
To set up an approval workflow in Power Automate:
Sign in to Power Automate with your Dynamics 365 Customer Insights - Journeys credentials.
Select the Solutions tab from the left pane and then from the list of available solutions, select Sample Approval.
Select New and then select Flow.
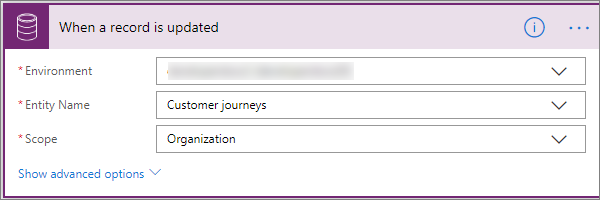
Enter the Flow Name in the upper left corner, select the Triggers tab, search for When a record is updated, and then select it.
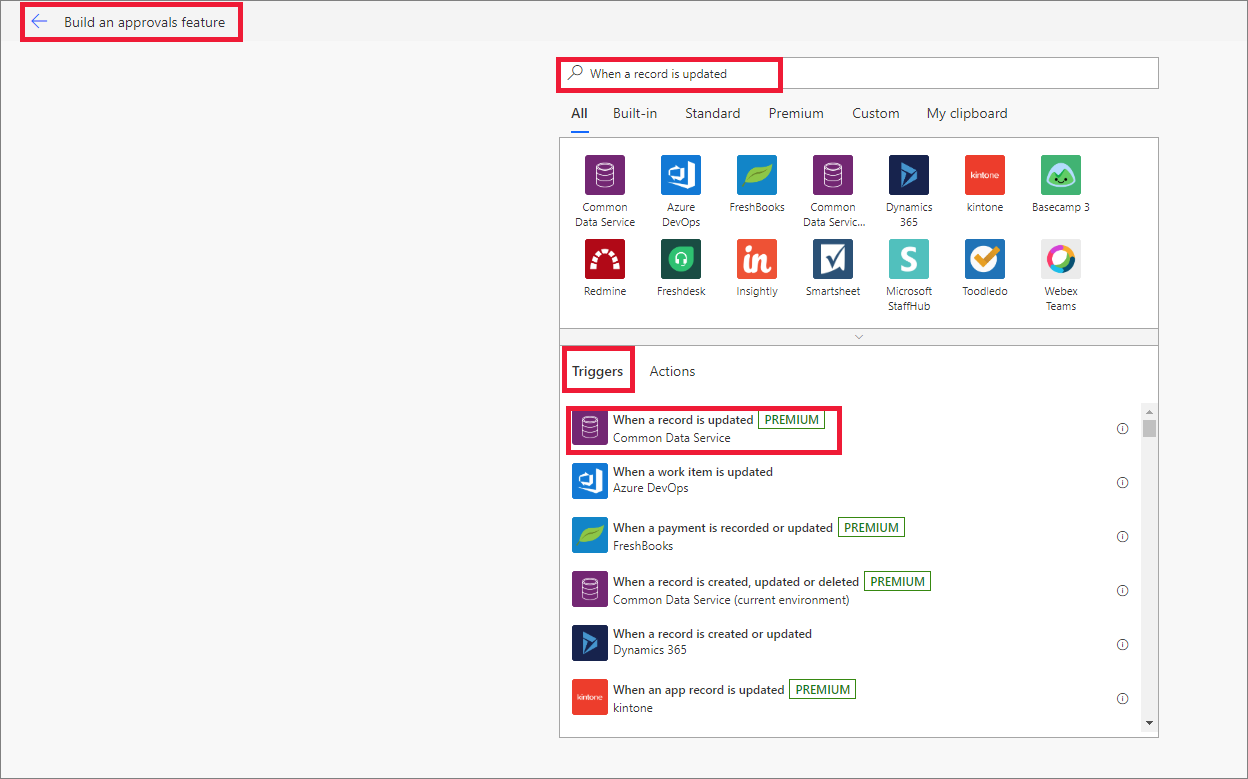
Enter the following values in the required fields and select New step.
- Environment: Select the environment.
- Entity Name: Select the customer journey entity.
- Scope: Set the scope to Organization.
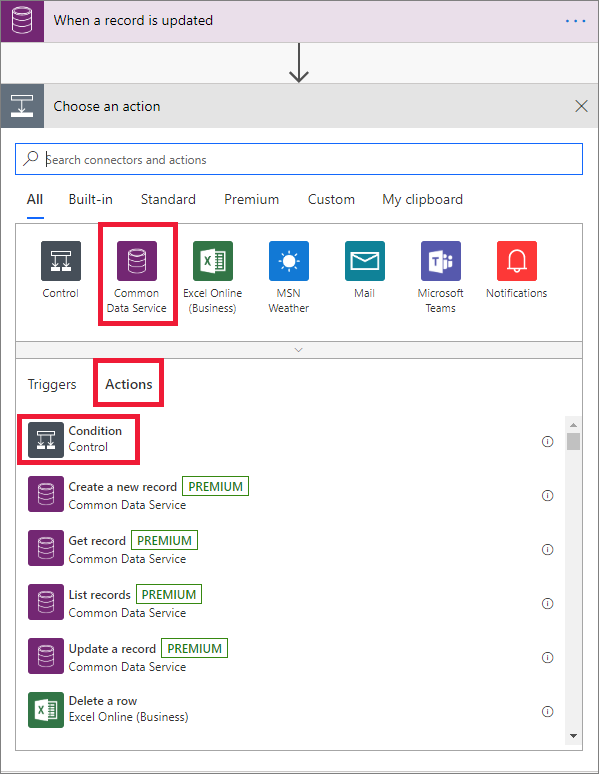
In the Choose an action step, search for Common Data Service and select Condition from the Actions tab.
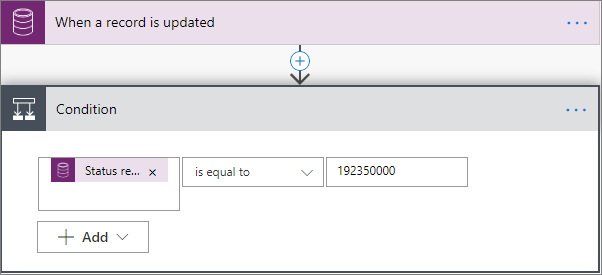
In the Condition section, enter the condition parameters as shown here.
Note
The value of the Approval requested should be entered in the value parameter.
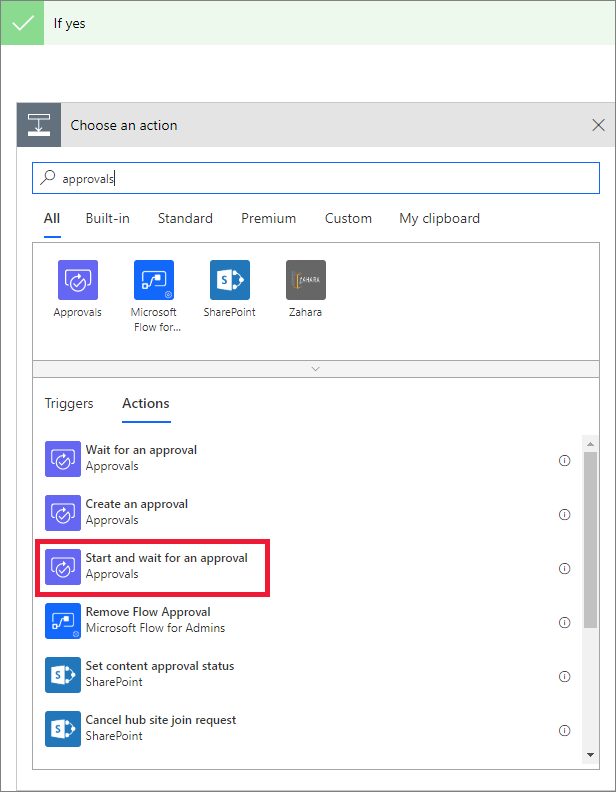
Select Add an action in the If yes tab, search for approvals, and then select Start and wait for an approval from the list.
In the Start and wait for an approval tab, select Approve/Reject - First to respond for Approval type. Then enter the following details:
Title: Enter a title of your choice.
Assigned to: Enter the email address of the approver.
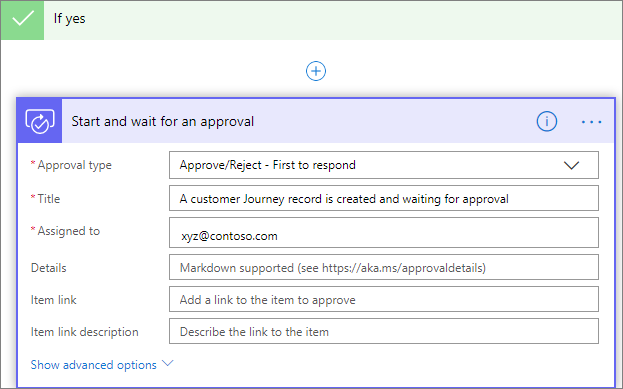
Select Add an action to add one more action to the Start and wait for an approval tab, select Condition from the Actions tab.
Enter the condition parameter values as shown below.
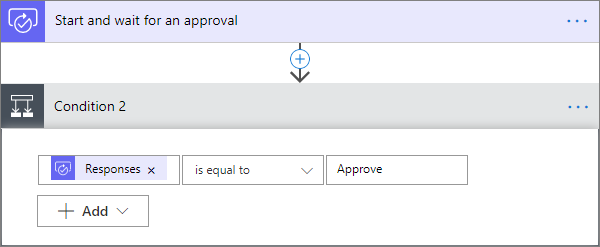
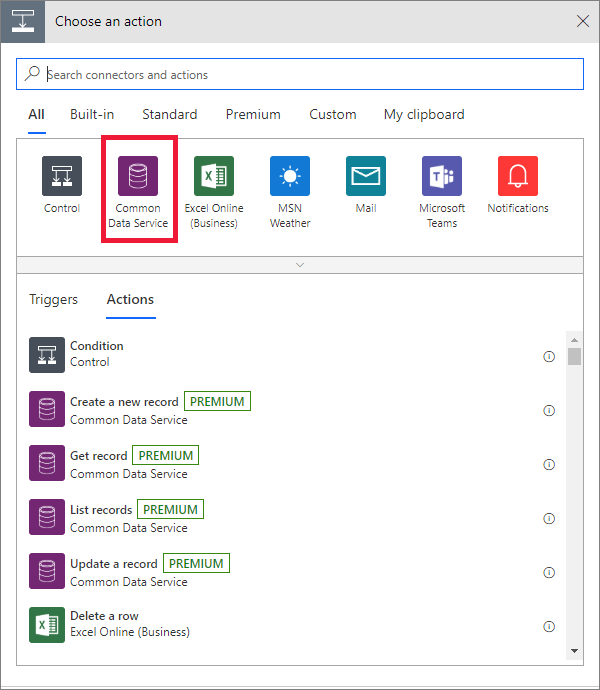
Select Add an action in the If yes tab, select Common Data Service, and then select Update a record.
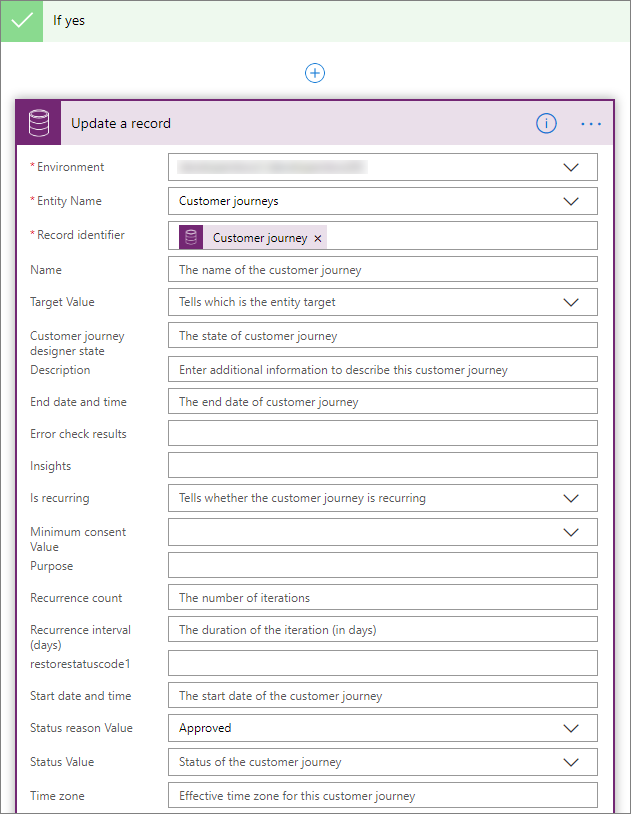
Enter the details as shown here:
Environment: Select the environment. It should be the same as the one you selected earlier.
Entity Name: Select customer journey entity from the list.
Record identifier: Set the customer journey ID.
Select Show advanced options and set the Status reason value to Approved.
In the If no tab, select Add an action, select Common Data Service, and then select Get record from Actions tab.
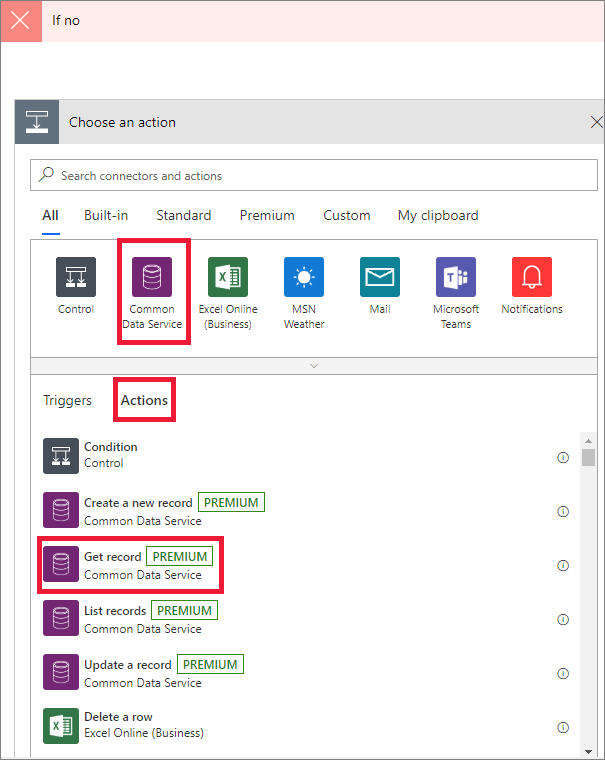
Enter the details in the required fields as shown below.
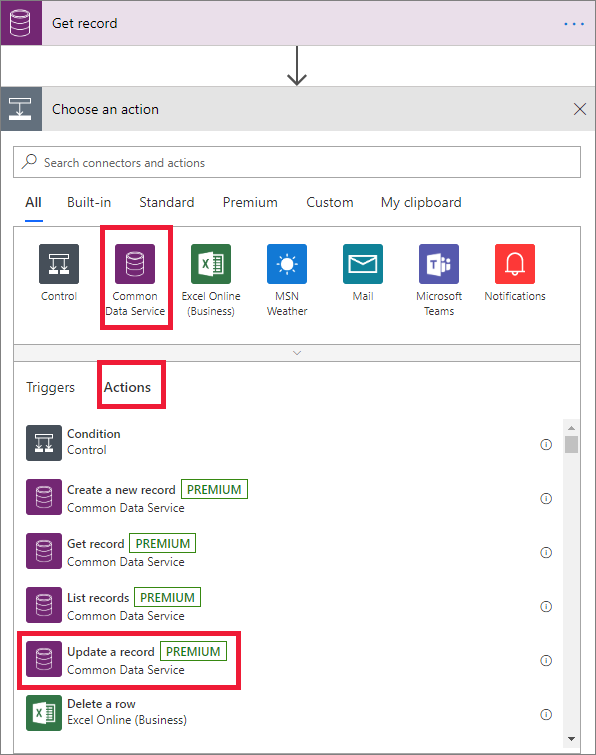
Select Add an action, select Common Data Service, and then select Update a record from the Actions tab.
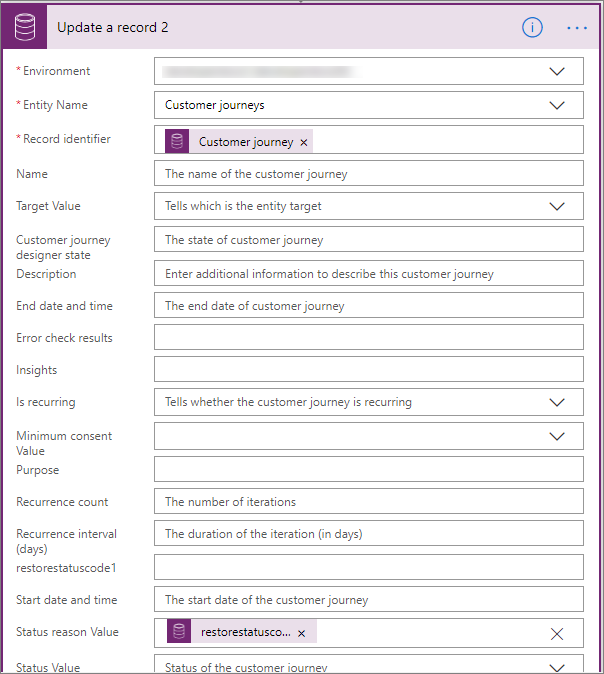
Enter the values as shown below.
Select Save and then select Flow Checker to verify if there are any errors in the flow.