Create segments and connect them to sequences
Work assignment is a feature of Dynamics 365 Sales that helps you automate your sales team's activities. You can use work assignment to create segments of records based on conditions and connect them to sequences that perform actions on those records.
A segment is a group of records that meet criteria that you define. For example, you can create a segment of leads that come from a certain source, such as your website or trade shows. A sequence is a set of actions that are performed automatically on the records in a segment, such as sending emails, making calls, or creating tasks. For example, you can create a sequence that sends a welcome email to new leads and then schedules a follow-up call.
In this article, you'll learn how to create and activate segments in work assignment and connect them to sequences.
Segments and assignment rules are part of the work assignment feature. Work assignment is available in sales accelerator version 9.1.23074.10021 and is rolling out in phases in different regions. Learn more about work assignment.
License and role requirements
| Requirement type | You must have |
|---|---|
| License | Dynamics 365 Sales Premium, Dynamics 365 Sales Enterprise or Microsoft Relationship Sales |
| Security roles | System Administrator, Sequence Manager, or Sales Manager |
Create and activate a segment
You can assign only active records to segments. For example, when a lead is qualified, it becomes a read-only record and creates an opportunity record. Since the lead is no longer active, it can't be connected to a segment.
Your organization can have up to 250 active segments at one time. A segment can have any number of assignment rules, but only 10 rules can be active at one time. If you need more, contact Microsoft Support.
Sign in to your Sales Hub app.
In the lower-left corner of the page, select Change area > Sales Insights settings.
Under Sales accelerator, select Work assignment.
Select a Record type.
The lead and opportunity record types are available by default. The list also includes other record types that are selected in the sales accelerator configuration.
Select + New segment.
Enter a Name and, optionally, a Description of the segment.
Enter the segment's Priority.
The priority determines which segment records are assigned to when they meet the criteria for more than one. The segment with the highest priority takes precedence. By default, the priority is initially set to the priority of the last segment that was created. The default, out-of-the-box segment always has the lowest priority.
Set a priority for every segment. You can change the priority of a segment at any time.
Select Next to open the segment condition builder page.
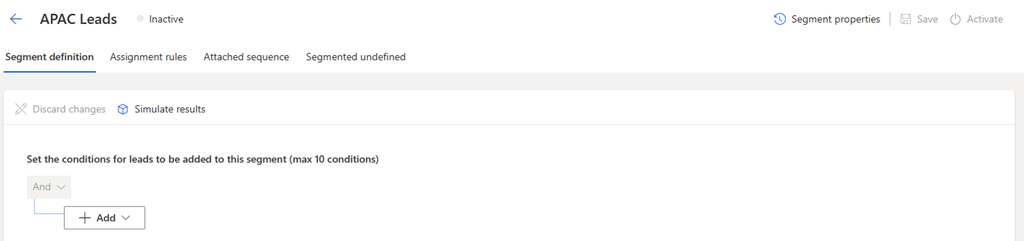
On this page, define the conditions that are used to evaluate records for assignment to the segment. You can add up to 10 conditions in a segment, including conditions that are based on groups and related entities. If you need more, contact Microsoft Support. Read our recommendations for adding conditions.
Select Add, and then use the following options to build the conditions of the segment:
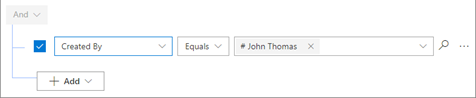
Add row: Add a condition. Select an attribute, an operator, and a value; for example, Created by Equals John Thomas.
Add more conditions as needed, for a total of 10, to further filter the records that should be assigned to the segment.
Add group: Add a group of conditions to filter records using multiple attributes that are combined by And or Or. If you select And, leads must meet all the conditions in the group. If you select Or, leads can meet any condition in the group.
Add related entity: Add a condition that's based on the attributes of related tables. Select an attribute in the Related Entity list, then select Contains data or Does not contain data, and then define the condition.

(Optional) When you've finished defining the conditions, select Simulate results to view a list of records that satisfy the conditions.
These results are simulated. They might not reflect the actual records that the segment can be applied to.
Select Save, and then select Activate.
Note
All segments that are related to a primary entity (such as lead or opportunity) run every time you update the attributes of the primary entity that are added to the conditions.
Recommendations for adding conditions
A segment can have up to 10 conditions at one time. To optimize the performance and efficiency of segments, follow these recommendations when you add conditions:
Distribute the segments: Create multiple segments with fewer conditions rather than one segment with many conditions. You can connect multiple segments to the same or different sequences and assignment rules. This helps improve the speed and accuracy of connecting sequences and assignment rules to records.
Create rollup attributes: Use rollup attributes to avoid performance issues when you add conditions that involve related tables. Rollup attributes are calculated fields that aggregate values from related records. For example, you can create a rollup attribute that counts the number of contacts that are associated with a lead. Learn how to define rollup attributes.
Use the expression builder only: Always use the expression builder to define or update the segments. Don't update segments through Dataverse, the underlying data platform of Dynamics 365. It might cause unexpected behavior that affects the records that are related to the segment and the subsequent automations, such as connecting sequences and assignment rules.
Can't find the options in your app?
There are three possibilities:
- You don't have the necessary license or role.
- Your administrator hasn't turned on the feature.
- Your organization is using a custom app. Check with your administrator for exact steps. The steps described in this article are specific to the out-of-the-box Sales Hub and Sales Professional apps.
Next steps
See also
Feedback
Coming soon: Throughout 2024 we will be phasing out GitHub Issues as the feedback mechanism for content and replacing it with a new feedback system. For more information see: https://aka.ms/ContentUserFeedback.
Submit and view feedback for