Assign an address book policy to users in Exchange Online
Address book policies (ABPs) allow you to segment users into specific groups to give them customized global address lists (GALs) in Outlook and Outlook on the web (formerly known as Outlook Web App). For more information about ABPs, see Address book policies in Exchange Online.
Users aren't automatically assigned an ABP when you create mailboxes. If you don't assign an ABP to a mailbox, the GAL for your entire organization is visible to the user in Outlook and Outlook on the web. Furthermore, a user that's assigned an ABP needs to exist in the GAL that's specified for the ABP.
To identify your virtual organizations for ABPs, we recommend that you use the CustomAttribute1 to CustomAttribute15 attributes on mailboxes, contacts, and groups, because these attributes are the most widely available and manageable for all recipient types.
To assign ABPs to mailboxes, you select the ABP in Exchange admin center (EAC), or specify the ABP in Exchange Online PowerShell.
What do you need to know before you begin?
Estimated time to complete: Less than 5 minutes.
By default, the Address List role isn't assigned to any role groups in Exchange Online. To use any cmdlets or features that require the Address List role, you need to add the role to a role group. For more information, see Modify role groups.
To open the Exchange admin center (EAC), see Exchange admin center in Exchange Online. To connect to Exchange Online PowerShell, see Connect to Exchange Online PowerShell.
For information about keyboard shortcuts that may apply to the procedures in this topic, see Keyboard shortcuts for the Exchange admin center.
Use the EAC to assign an ABP to a mailbox
In the EAC, click Recipients > Mailboxes.
In the list of mailboxes, find the mailbox that you want to modify. You can:
Scroll through the list of mailboxes.
Click Search
 and enter part of the user's name, email address, or alias.
Click on Filter icon for more filter options.
On the Manage mailboxes page, select an individual mailbox by clicking anywhere in the row including the button option that appears in the blank area next to the Display name column.
On the User mailbox page that opens, click Mailbox > Manage mailbox policies.
In the Manage mailbox policies page, click the drop-down arrow in Address book policy, and select the ADP that you want to apply.
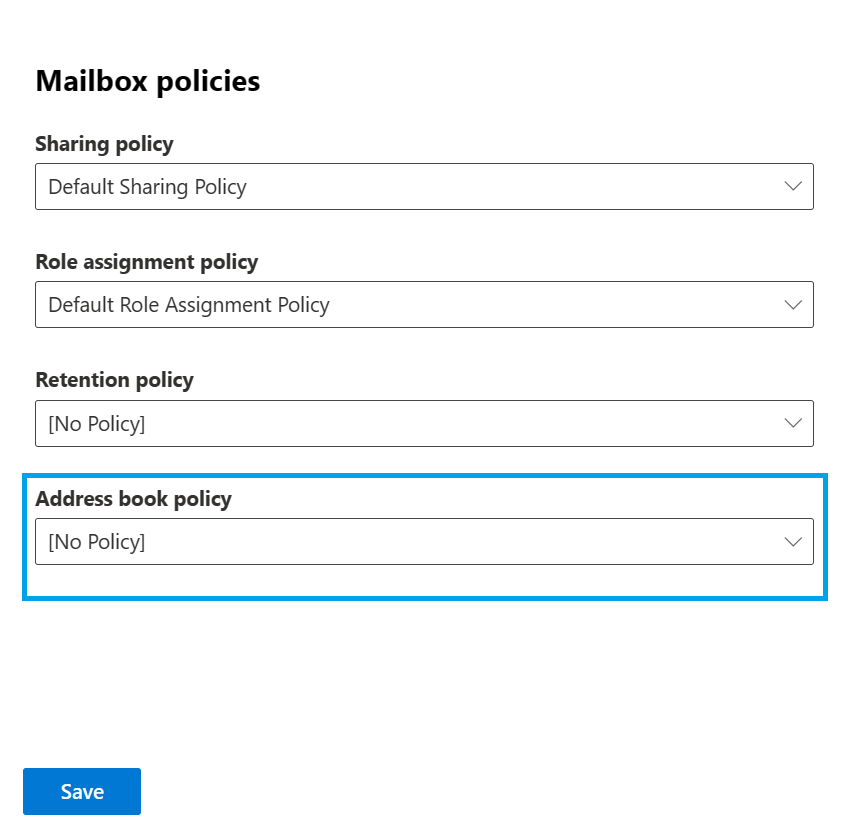
When you're finished, click Save.
Use the EAC to assign an ABP to multiple mailboxes
In the EAC, click Recipients > Mailboxes.
On the Manage mailboxes page, select the mailboxes and click Mailbox policies.
In the Mailbox policies details pane, click the drop-down arrow in Address book policy, and select the ADP that you want to apply.
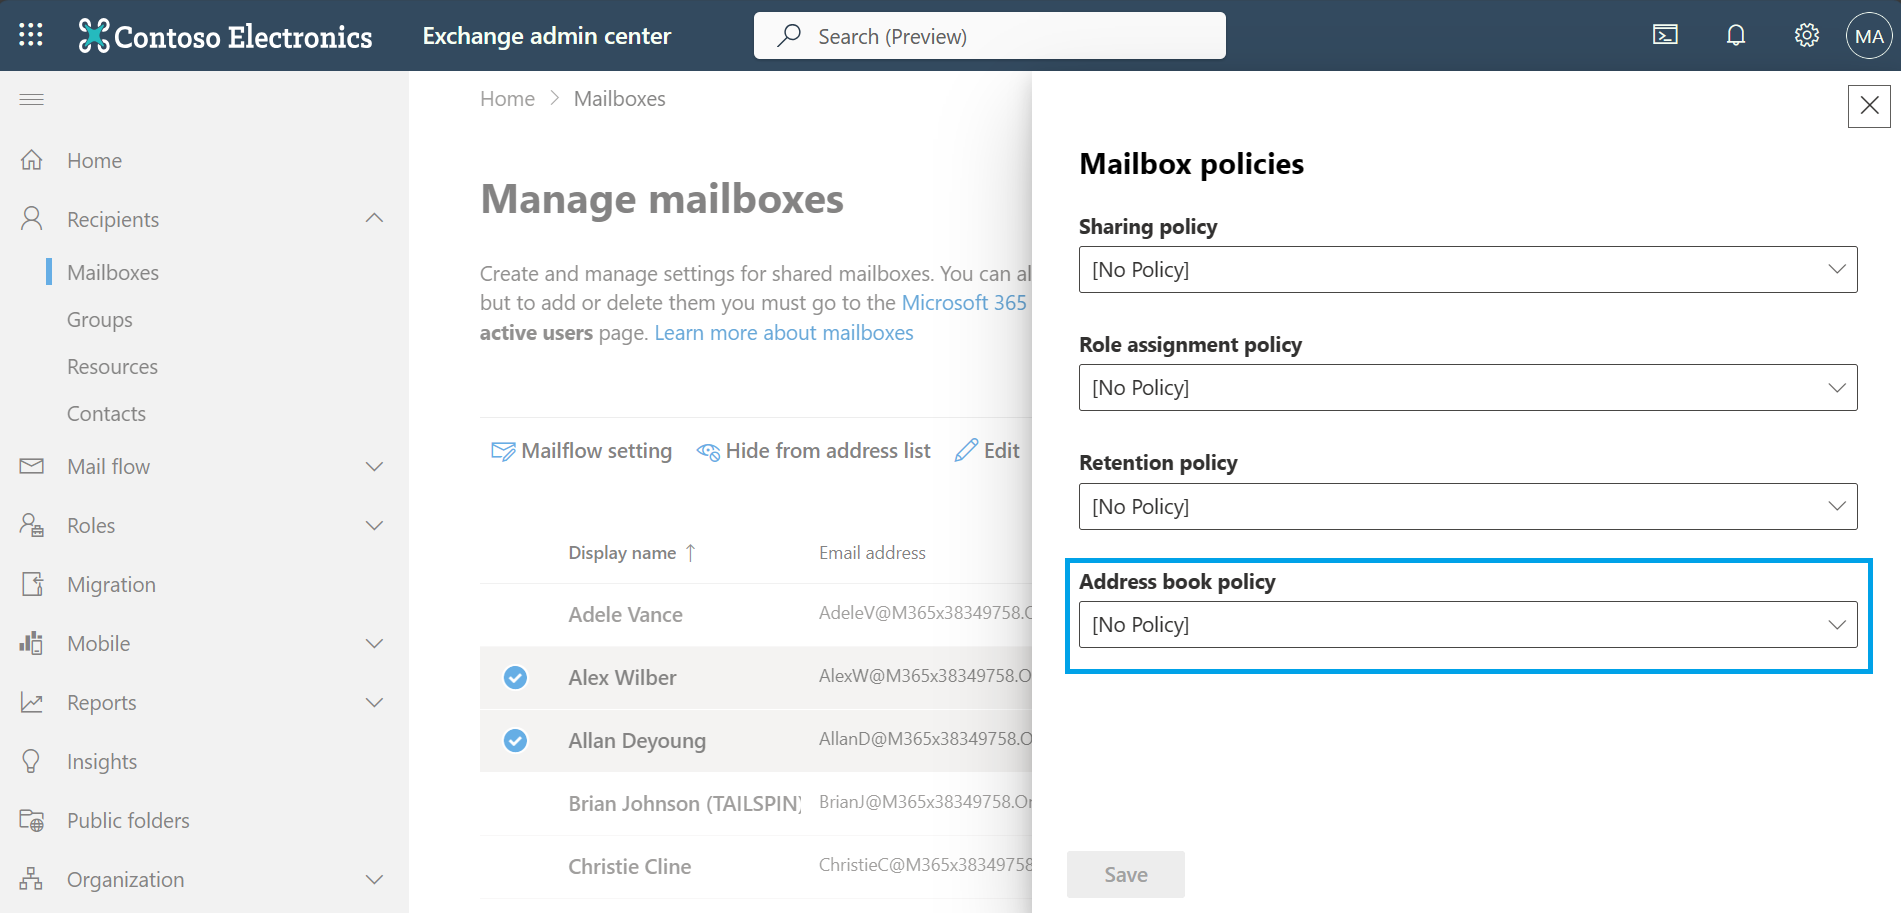
Click Save.
Use Exchange Online PowerShell to assign an ABP to mailbox users
There are three basic methods you can use to apply an ABP to mailboxes:
Individual mailboxes: Use the following syntax:
Set-Mailbox -Identity <MailboxIdentity> -AddressBookPolicy <ABPIdentity>This example assigns the ABP named All Fabrikam to the mailbox joe@fabrikam.com.
Set-Mailbox -Identity joe@fabrikam.com -AddressBookPolicy "All Fabrikam"Filter mailboxes by attributes: This method uses the unique filterable attribute that defines the virtual organization (for example, the CustomAttribute1 through CustomAttribute15 attribute value).
The syntax uses the following two commands (one to identify the mailboxes, and the other to apply the ABP to the mailboxes):
$<VariableName> = Get-Mailbox -ResultSize unlimited -Filter <Filter>$<VariableName> | foreach {Set-Mailbox -Identity $_.MicrosoftOnlineServicesID -AddressBookPolicy <ABPIdentity>}This example assigns the ABP named All Fabrikam to all mailbox users whose CustomAttribute15 value is
FAB.$Fabrikam = Get-Mailbox -Filter "CustomAttribute15 -eq 'FAB'"$Fabrikam | foreach {Set-Mailbox -Identity $_.MicrosoftOnlineServicesID -AddressBookPolicy "All Fabrikam"}Use a list of specific mailboxes: This method requires a text file to identify the mailboxes. Values that don't contain spaces (for example, the user account) work best. The text file must contain one user account on each line like this:
akol@contoso.com
tjohnston@contoso.com
kakers@contoso.comThe syntax uses the following two commands (one to identify the user accounts, and the other to apply the policy to those users):
$<VariableName> = Get-Content "<text file>"$<VariableName> | foreach {Set-Mailbox -Identity $_.MicrosoftOnlineServicesID -AddressBookPolicy <ABPIdentity>}This example assigns the ABP policy named All Fabrikam to the mailboxes specified in the file C:\My Documents\Fabrikam.txt.
$Fab = Get-Content "C:\My Documents\Fabrikam.txt"$Fab | foreach {Set-Mailbox -Identity $_.MicrosoftOnlineServicesID -AddressBookPolicy "All Fabrikam"}
For detailed syntax and parameter information, see Set-Mailbox and Get-Mailbox.
How do you know this worked?
To verify that you've successfully applied an ABP to a mailbox, use any of the following steps:
In the EAC, go to Recipients > Mailboxes, In the properties of the mailbox window that opens, click Manage mailbox policies, and verify the ABP in the Address book policy field.
In Exchange Online PowerShell, replace <MailboxIdentity> with the name, alias, email address, or account name of the mailbox, and run the following command to verify the value of the AddressBookPolicy property:
Get-Mailbox -Identity "<MailboxIdentity>" | Format-List AddressBookPolicyIn Exchange Online PowerShell, run the following command to verify the value of the AddressBookPolicy property:
Get-Mailbox -ResultSize unlimited | Format-Table Name,AddressBookPolicy -Auto
More information
To remove the ABP assignment from a mailbox, you select the value [No Policy] in the EAC, or use the value $null for the AddressBookPolicy parameter in Exchange Online PowerShell.