3D Object Manipulation - Scene Preparation
This tutorial serves as a preparation for the 3D Object Manipulation tutorial. In this tutorial, we will use existing Unity features to create a mouse-controlled cursor capable of moving objects in the 3D scene. In the 3D Object Manipulation tutorial, we will replace the mouse input device for hand gestures and motions.
If you wish to focus only on learning how to use gestures with Unity, feel free to skip ahead to the 3D Object Manipulation tutorial.
This tutorial will take approximately 30 minutes to complete.
Download the Final Result
The final Unity project obtained in this tutorial can be found in our open-source samples repository on GitHub. After you clone the repository, follow these steps to run the application:
- Launch Unity, in the Projects tab select Open.
- Browse to the Unity\Tutorials\3D Object Manipulation - Scene Preparation directory within the cloned repository.
- Press the play button (or Ctrl+P) to run the scene.
Prerequisites
This tutorial assumes you have basic familiarity with the C# programming language and some experience with the Unity environment. We assume you know how to create Unity projects, scenes, game objects and scripts.
We recommend that you complete the Introduction tutorial before starting this tutorial.
Step 1 - Create the Cursor Game Object
If you've completed the introduction tutorial, open the project you've created in that tutorial and press Ctrl+N to create a new scene. Otherwise, create a new Unity project and import the Project Prague toolkit for Unity (refer to step 1 in the introduction tutorial for instructions).
Press Ctrl+S to save the scene, naming it 3D Object Manipulation.
Create an empty game object and name it Cursor. Create a corresponding C# script with the same name. To associate the game object with the script, go to the game object's Inspector view and drag the script to the blank area below the Add Component button (refer to step 3 in the introduction tutorial to read about associating a script with a game object).
Open the Cursor script in Visual Studio (double click the script icon in the Project window) and replace its contents with the following code:
Warning
It looks like the sample you are looking for has moved! Rest assured we are working on resolving this.
As you can see, none of the Cursor methods are implemented. For now, they contain place-holders and comments.
To make the cursor follow the mouse pointer, replace the GetCursorScreenPosition() method in Cursor.cs with the following contents:
Warning
It looks like the sample you are looking for has moved! Rest assured we are working on resolving this.
To draw the cursor in the correct position every time the screen is refreshed, replace the contents of OnGUI() method in Cursor.cs with:
Warning
It looks like the sample you are looking for has moved! Rest assured we are working on resolving this.
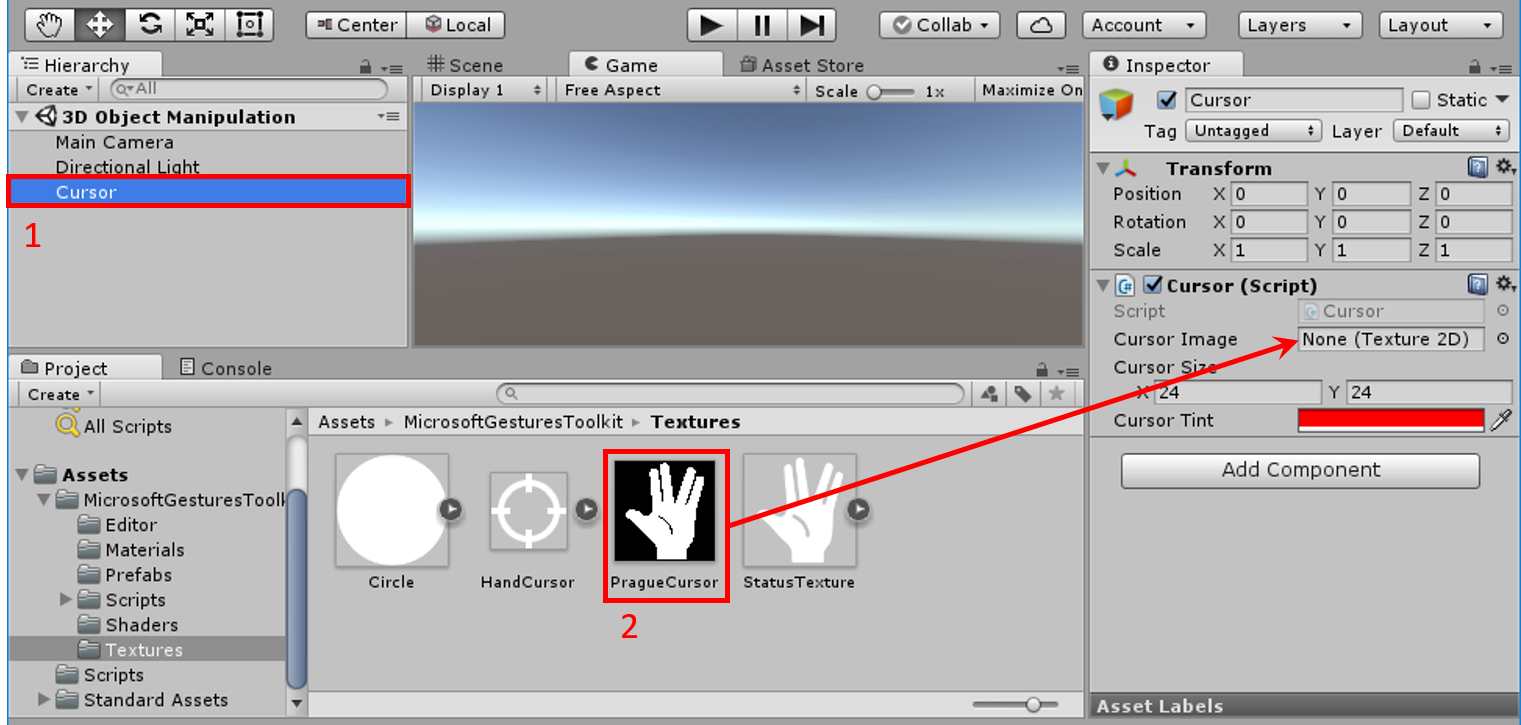
We will use the PragueCursor.png texture, provided with the Project Prague toolkit for Unity, as our cursor image. Select the Cursor game object in the Hierarchy window, locate the PragueCursor.png under MicrosoftGesturesToolkit/Textures in the Project window and drag-and-drop it to the Cursor Image box in the Inspector window:
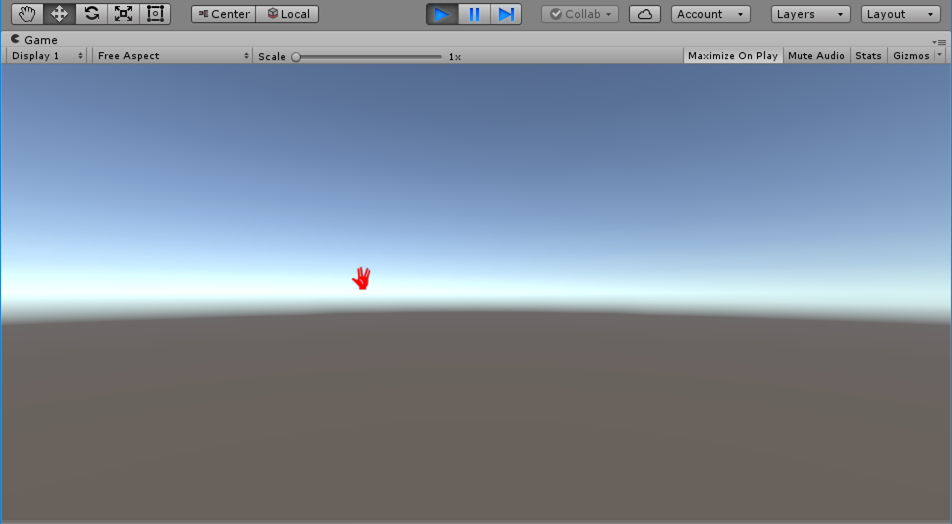
Play the scene now. Whenever the mouse pointer is within the scene borders, you will see a red cursor following it:
Step 2 - Highlight Object under Cursor
We would like to use our cursor to move objects in the scene. In order to recognize which object is currently under the cursor, we will highlight that object's outline.
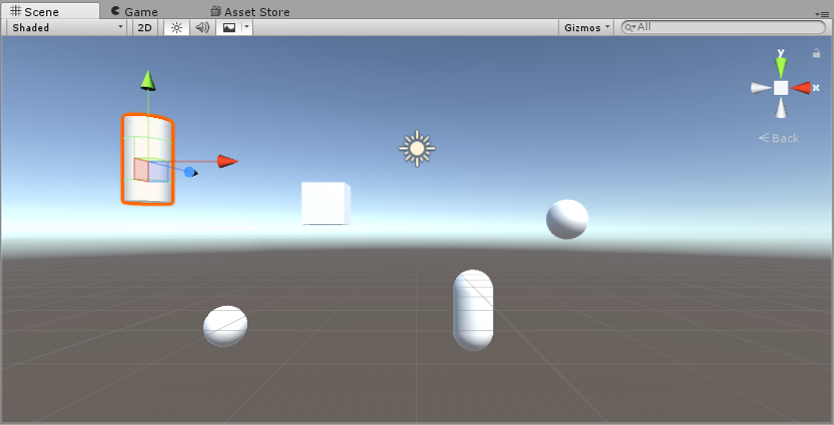
Start by filling the scene with several primitive objects. For convenience, we recommend you attain the viewpoint of the the Main Camera before adding any new primitives to the scene: Select the Main Camera in the Hierarchy window, go to the GameObject menu and select Align View to Selected.
To instantiate new primitives, go to the GameObject menu again, select 3D Object and pick one of the primitives in the sub-menu (Cube, Sphere, etc.). Repeat this process several times, moving each new primitive to a different location in the scene:
Tip
To move an object, click on it, press w and then drag it using the Move gizmo.
Add a private member to the Cursor class. We will use this member to store the game object currently under the cursor. We will refer to this object as "the hovered object":
Warning
It looks like the sample you are looking for has moved! Rest assured we are working on resolving this.
Also add the following public members. We will soon be using them to implement the highlighting feature.
Warning
It looks like the sample you are looking for has moved! Rest assured we are working on resolving this.
To identify which object is currently under the cursor, replace the contents of the GetHoveredObject() method with the following implementation:
Warning
It looks like the sample you are looking for has moved! Rest assured we are working on resolving this.
To highlight the hovered object, replace the contents of Update() with the following:
Warning
It looks like the sample you are looking for has moved! Rest assured we are working on resolving this.
Save all changes to the Cursor.cs script.
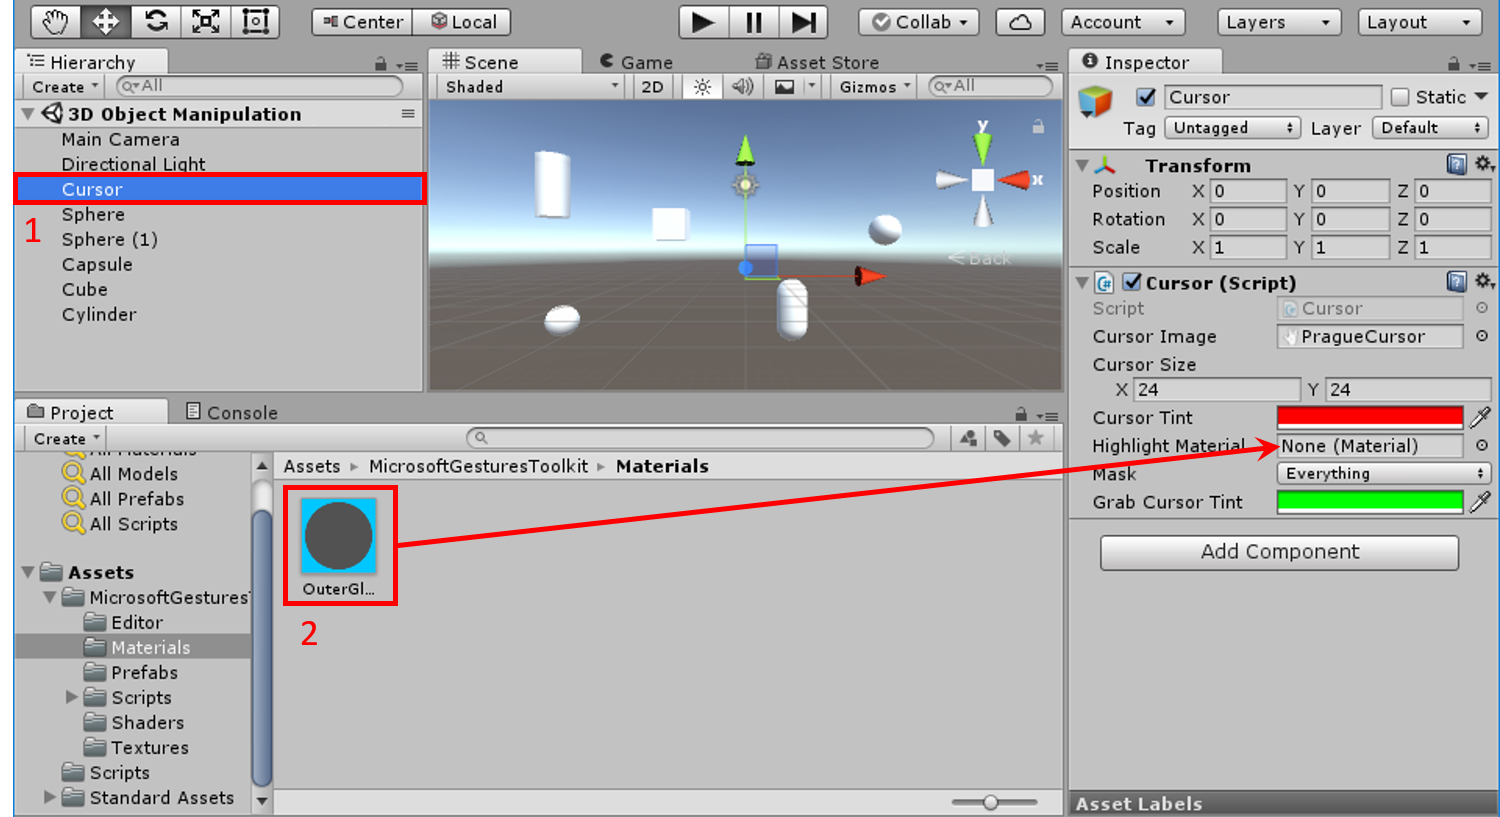
Select the Cursor game object in the Hierarchy window. Locate the OuterGlow.mat material under MicrosoftGesturesToolkit/Materials in the Project window. Drag and drop OuterGlow.mat into the Highlight Material box in the Inspector window:
Play the scene and move the cursor across the screen. Every time an object is under the cursor, its outline will glow with a bluish aura:
Step 3 - Move Highlighted Object
On this step we will enable our cursor to "grab" an object and move it in space.
In the Cursor.cs script, prepare the following private members:
Warning
It looks like the sample you are looking for has moved! Rest assured we are working on resolving this.
And the following public Member:
Warning
It looks like the sample you are looking for has moved! Rest assured we are working on resolving this.
Replace the OnGUI() method contents with the following:
Warning
It looks like the sample you are looking for has moved! Rest assured we are working on resolving this.
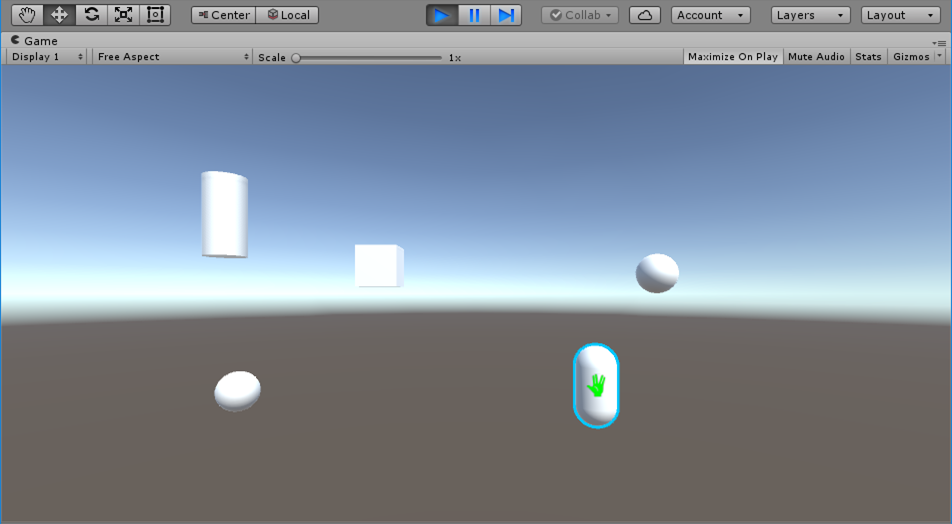
This will cause the cursor to change color to GrabCursorTint when it enters "grab mode".
We are now ready to implement the StartGrab() and StopGrab() methods:
Warning
It looks like the sample you are looking for has moved! Rest assured we are working on resolving this.
In the Update() method, we would like to add the following functionality:
- Enter (leave) grab mode whenever the left mouse button is pressed (released) while an object is being hovered.
- When in grab mode - the hovered object should follow the cursor.
To achieve this, modify the Update() method as follows:
Warning
It looks like the sample you are looking for has moved! Rest assured we are working on resolving this.
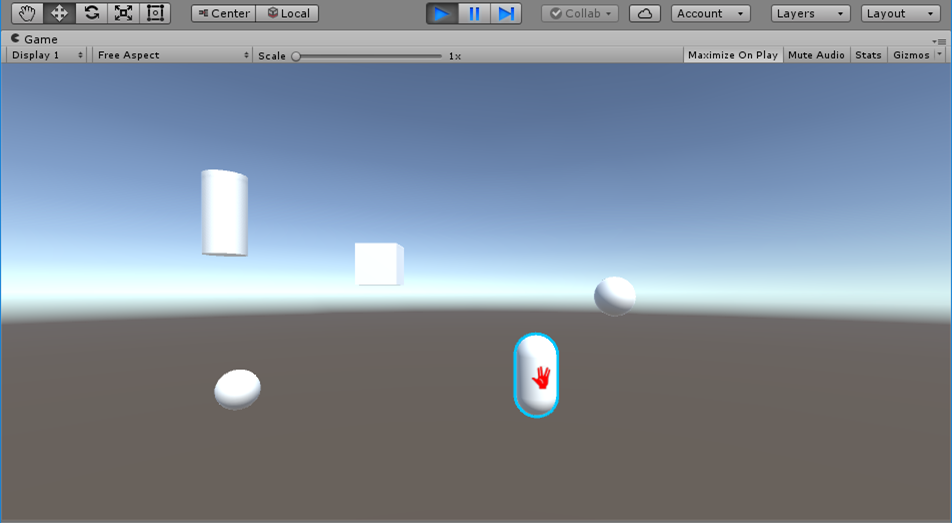
Run the scene now, hover over an object and move it by pressing the left mouse button and dragging. Note that the color of the cursor changes when you enter grab mode:
We will use the scroll wheel to control the movement of the grabbed object in the depth dimension.
Replace the contents of GetCursorDistanceScalingFactor() with the following:
Warning
It looks like the sample you are looking for has moved! Rest assured we are working on resolving this.
Try running the scene now. You should be able to move the grabbed object in all three dimensions, using the scroll wheel to move it in the radial direction - to or away from the camera.