Note
Access to this page requires authorization. You can try signing in or changing directories.
Access to this page requires authorization. You can try changing directories.
This article provides the steps for deploying Volunteer Engagement.
Important
Before starting the deployment process, ensure that the base language of the environment you're deploying to matches the language version of Volunteer Engagement that you want to install. Volunteer Engagement supports only English and French languages by default. If you're installing the English version, make sure the base language of the environment is English.
Similarly, if you're installing the French version, make sure the base language of the environment is French. After the solution installs, you can add languages by following the steps in Enable multiple-language website support | Microsoft Learn and importing the metadata translations to get the metadata translated for the newly activated languages.
Perform a new installation
Follow these instructions to perform a new installation of Volunteer Engagement.
Turn off enhanced data model in Power Platform
Before you install Volunteer Engagement, make sure the enhanced data model setting is off for the Power Platform environment where you plan to install it.
In Power Platform admin center, select Environments.
On the Environments page, select the environment.
Under Resources, select Power Pages sites.
On the top menu bar, set the Switch to enhanced data model toggle to Off.
On the Are you sure you want to disable? popup, select the Disable button.
Set up a blank portal
Before you download Volunteer Engagement, you must create a blank portal in your environment.
In Power Apps, on the left pane select Create.
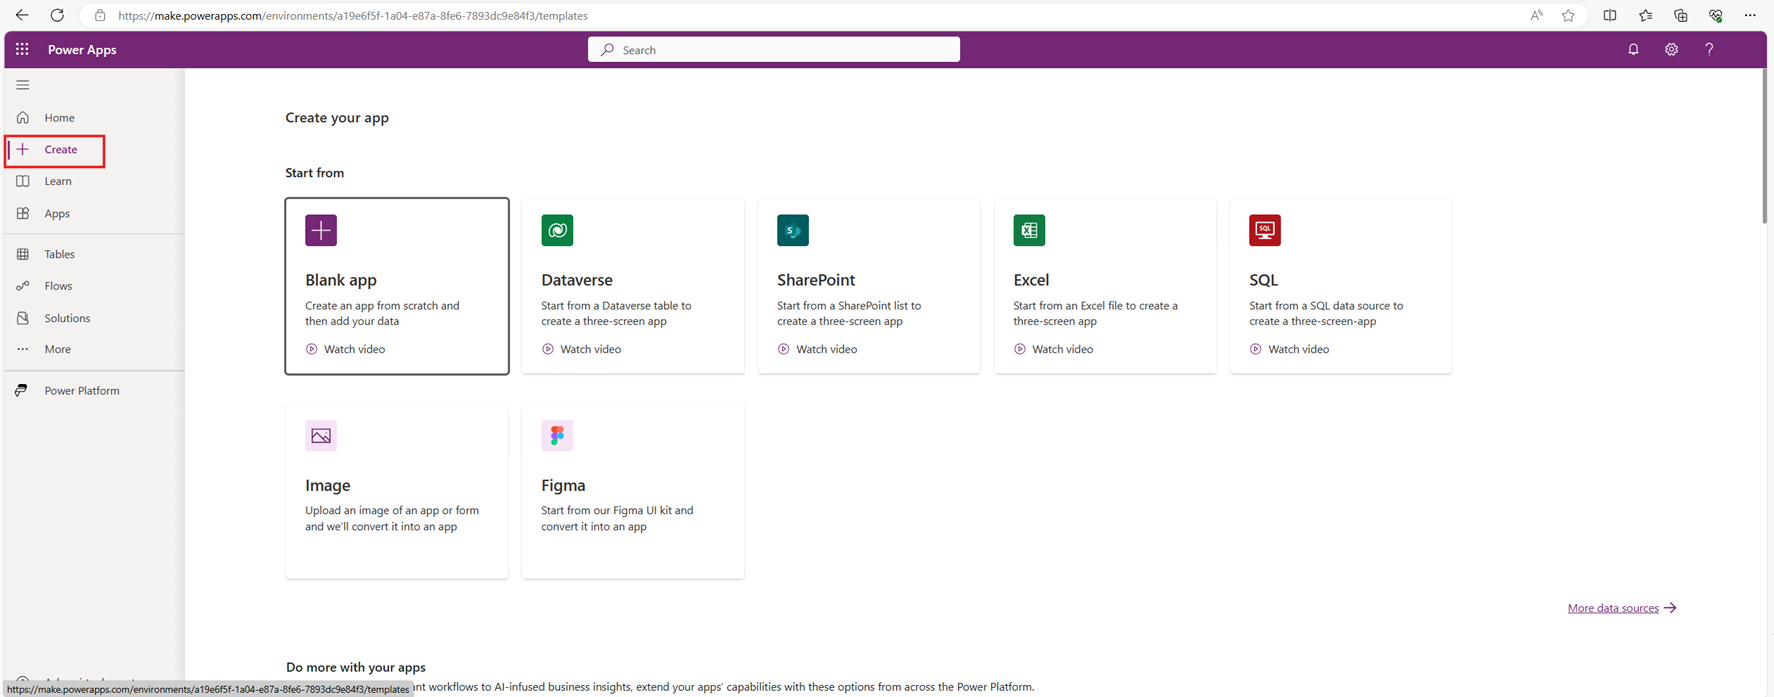
Select Create in Power Pages.

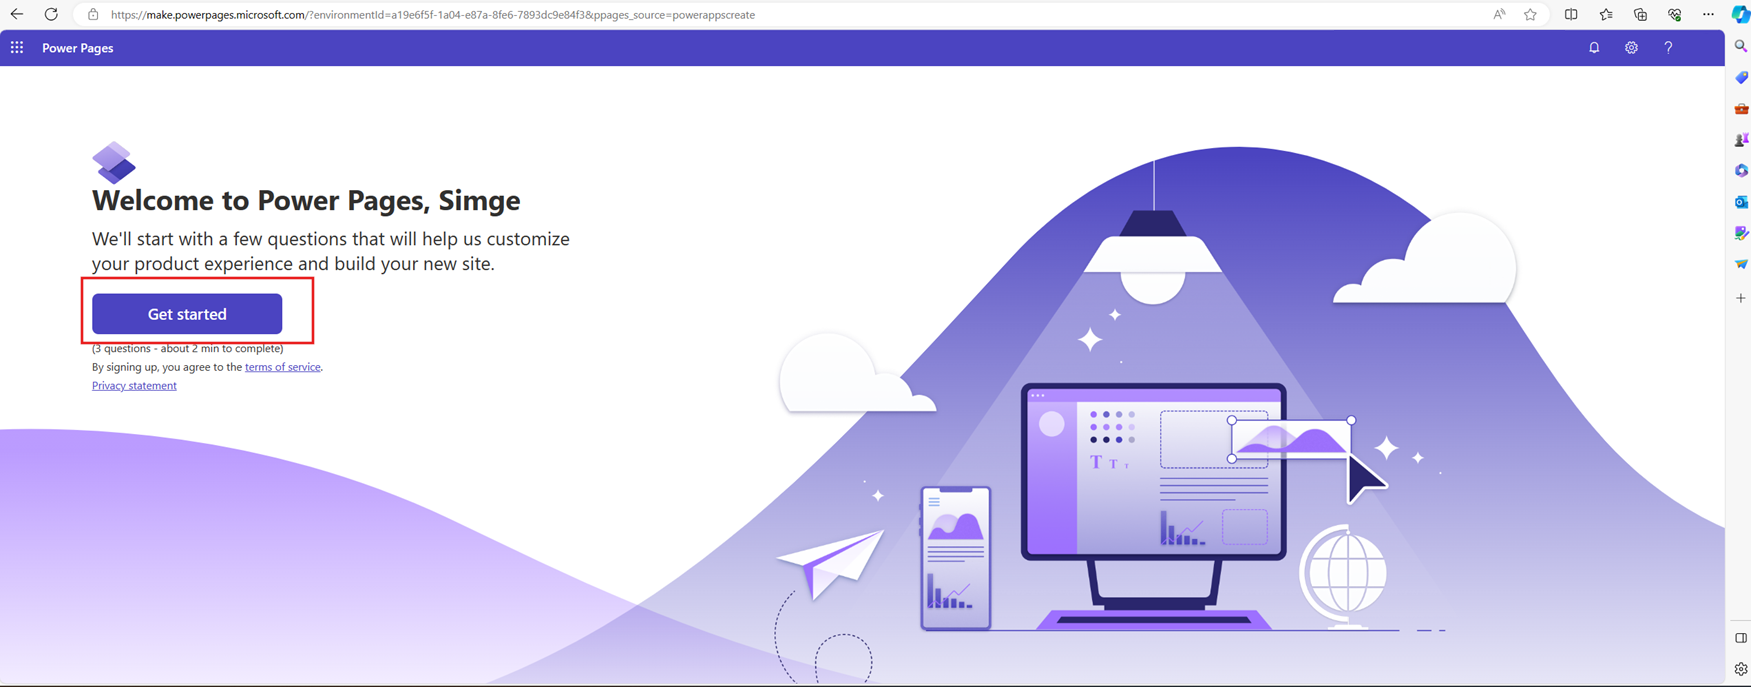
On the opened tab, select Get Started.
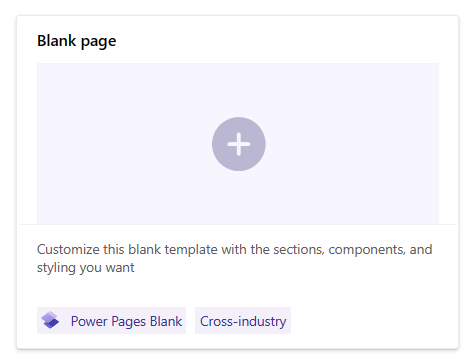
Select your experience type.

Select Blank Page.
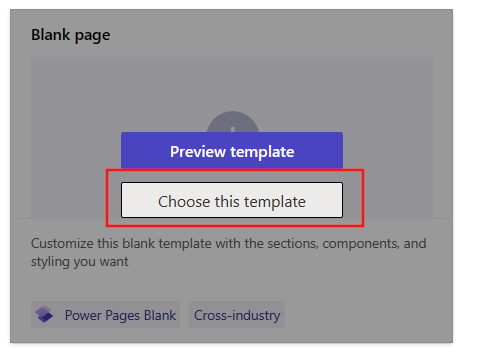
Select the Blank page template.
In the Name field, enter Volunteer Engagement. In the Address field, enter the URL you want your volunteers to visit to use your portal.
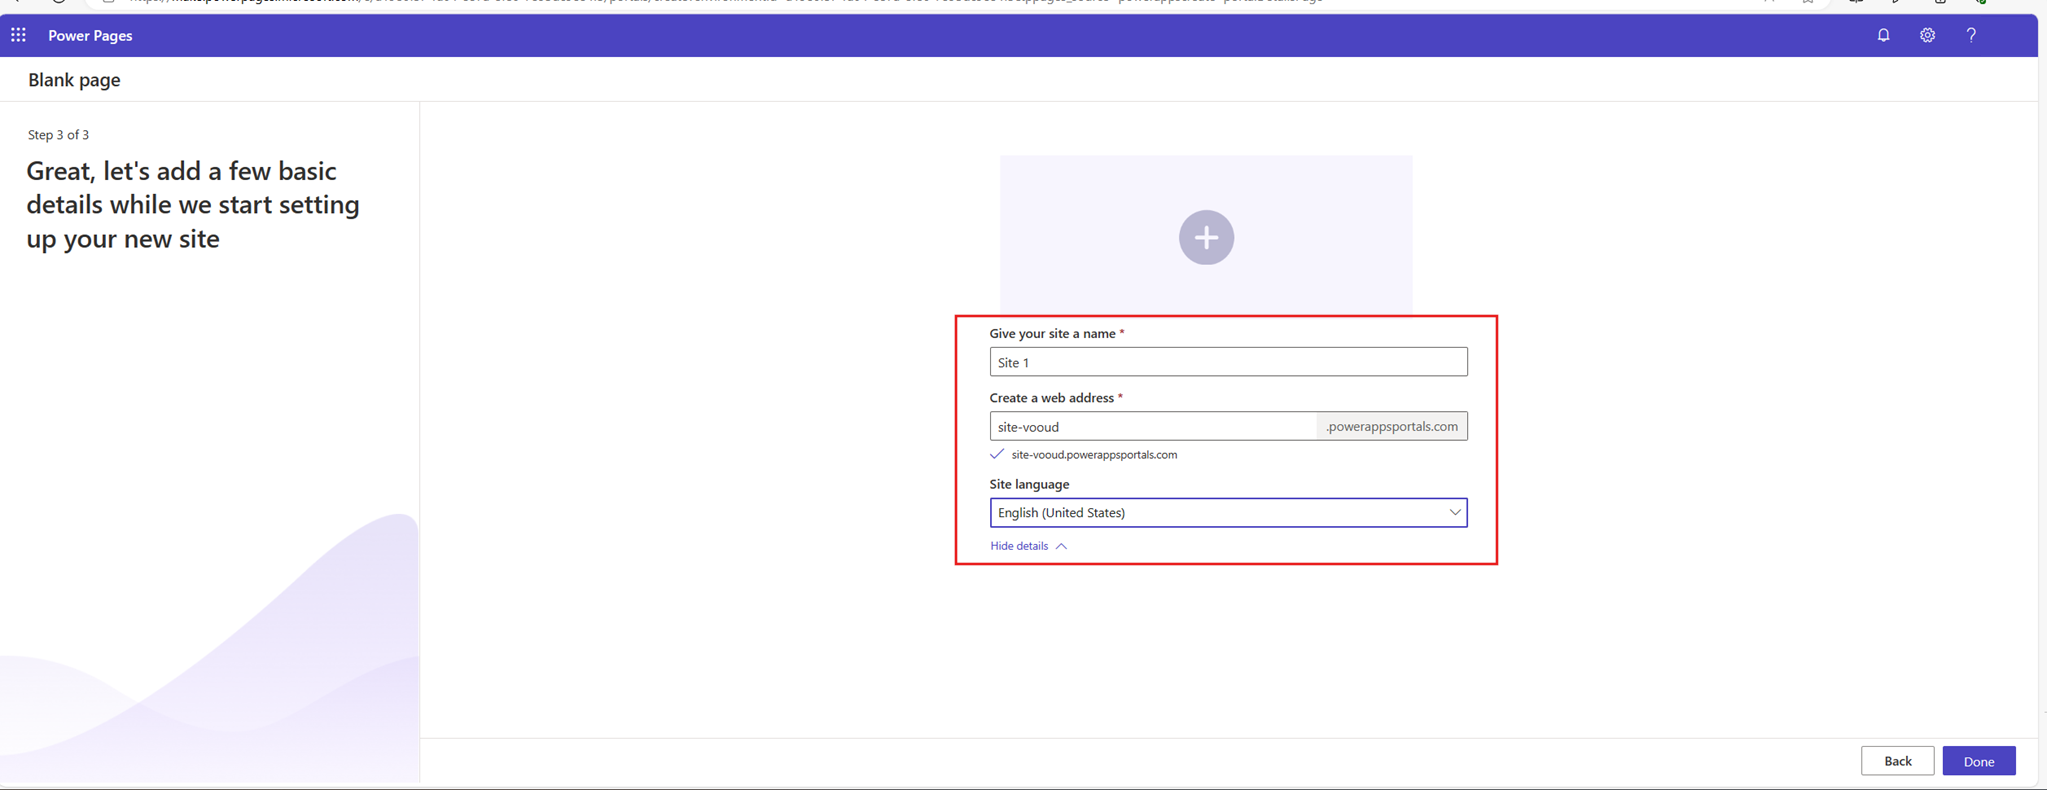
In the Site Language field, select the language you want for the blank portal.
Note
Volunteer Engagement supports only English and French for now. If you want to install the French version of Volunteer Engagement, the base language of your environment needs to be French. You also need to select French as the language for your blank portal. If you want to install the English version of Volunteer Engagement, the base language of your environment needs to be English. You also need to select English as the language for your blank portal. You can activate more languages for your webpage later, as explained in Enable multiple-language website support. Keep these considerations in mind:
- If you activate new languages after the website is provisioned, you can import the metadata translations to get the metadata translated for the newly activated languages.
- You also need to update the language text for any custom labels on Dataverse tables and columns to appear on forms and lists in portal web pages.
- Make sure the languages you want to use are enabled in your environment.


Enable English language in your environment
Always make sure the languages you want to use are enabled in your environment. The following procedure shows how to enable the English language in your environment. The process is similar for other languages.
In the Power Platform admin center, select an environment.
Go to Settings > Product > Languages. A list of language packs installed in your environment display, with a checkbox next to each.
Select the checkbox next to each language pack that you want to turn on. Clear the checkbox next to each language that you want to turn off.
Select Apply.
Select OK on any confirmation dialog boxes that open.
Note
It takes an hour or more to turn languages on or off.
Select Close to close the Language Settings dialog box.
Note
If your environment’s base language is already English, then English doesn't appear on the list in the following image.


Deploy Volunteer Engagement from AppSource
After your new blank portal is ready, you can deploy Volunteer Engagement from AppSource.
Prerequisites
You must be a Microsoft Power Platform admin, or a tenant admin to deploy Volunteer Engagement.
You must set up a Dataverse environment. If you don't have a Dataverse environment with a database, you need to create one.
Sign in to Power Platform admin center.
Create a Dataverse environment with a database.
Select your environment from the environment list, and in the Details section, see the link under Environment URL.
Deploy Volunteer Engagement
Go to Volunteer Engagement in AppSource and select Get it Now.
You can also find the solution by typing its name in the search field in AppSource.
Confirm your details in the dialog box that opens and select Get it now.
The dialog box updates and then redirects you to the solution in the Power Platform admin center.
Select the environment to which you want to deploy the solution.
Select the two checkboxes to agree to the Privacy Statement and Legal Terms. Then select Install.
You are redirected to the Dynamics 365 apps page of the environment you selected in the previous step. The app you selected for installation shows a status of "Installing...".
The status changes to "Installed" when the installation is complete.
Configure Volunteer Engagement
After you deploy Volunteer Engagement, complete the following postdeployment configuration steps.
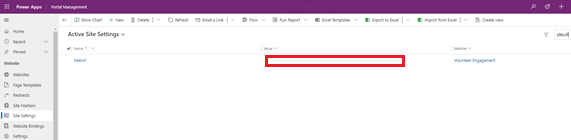
Open Portal Management and go to Site Settings.
Ensure that the SiteUrl setting matches the URL that you used for your Volunteer Engagement portal during deployment, for example volunteerengagement.powerappsportal.com.
Update website bindings
The first time you import the portal into your environment, update the website binding.
Go to Power Platform admin center.
Expand Resources on the left pane and select Power Page sites.
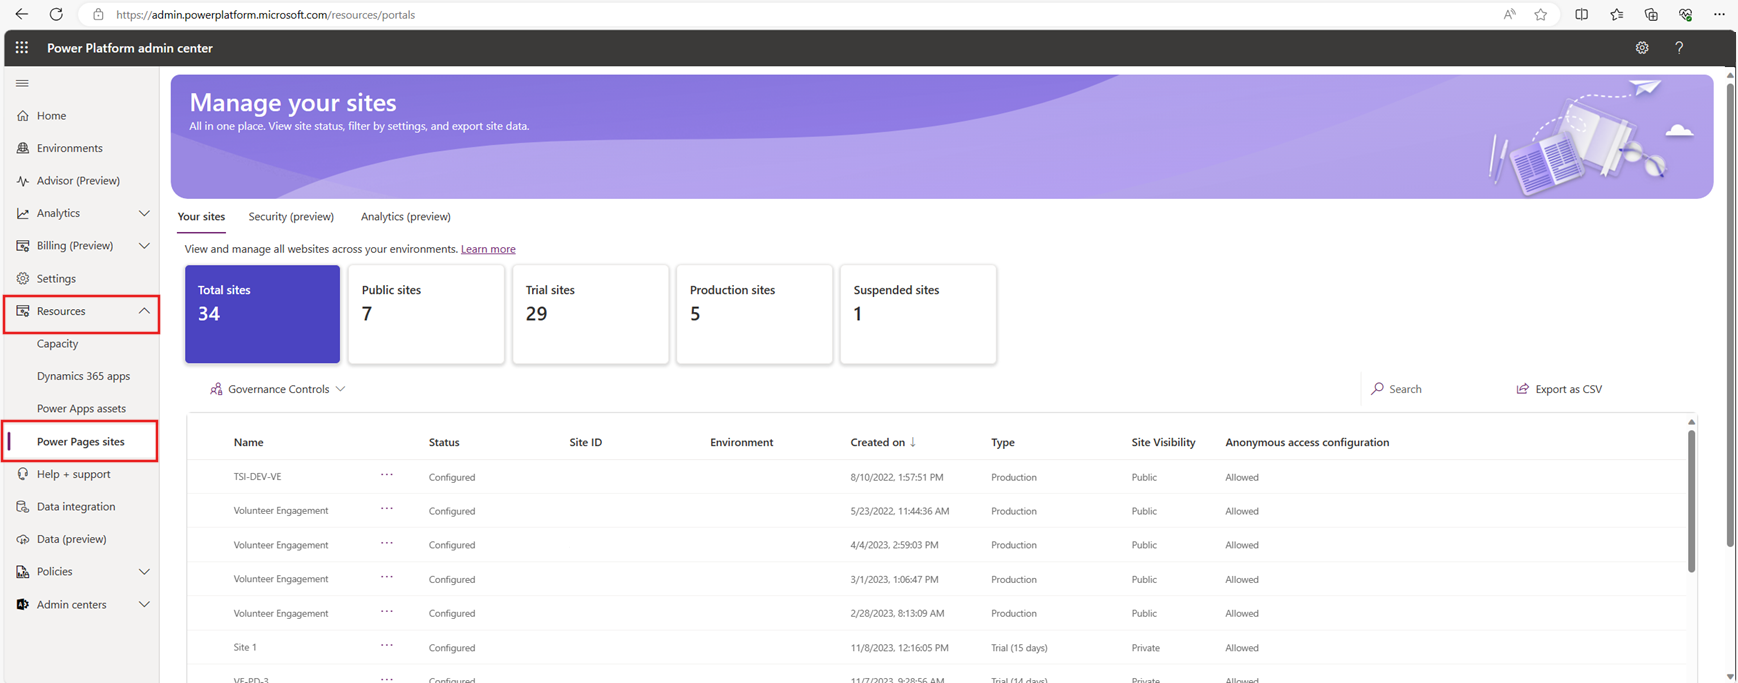
Find Volunteer Engagement, select the ellipses, then select Manage.

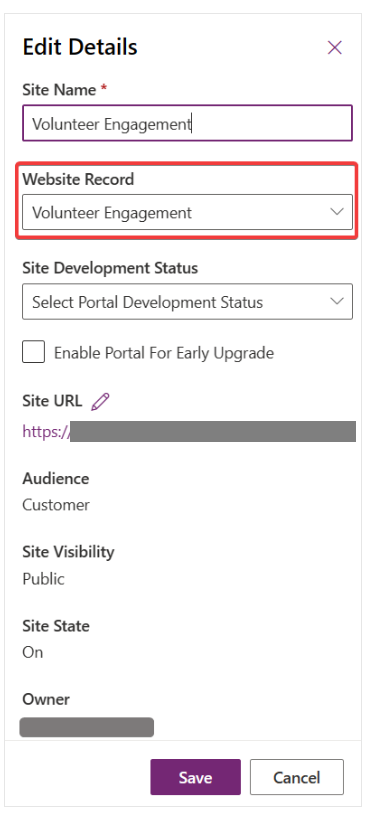
To update the portal binding, select the Edit button in the Site Details section.

Select the dropdown for Website Record, select Volunteer Engagement, then select Save.
Verify your portal is ready
Open Power Apps and select your environment on the upper right section.
Select the URL of the Volunteer Engagement record to open your new Volunteer Engagement portal.
Note
Volunteer Engagement app data is set up in Volunteer Management, as required by Volunteer Engagement.
Tip
You can access an open source version of Volunteer Engagement on GitHub.