Govern and control using private Azure Marketplace
Private Azure Marketplace lets administrators govern which Microsoft partner solutions people across an organization can deploy. It does this by allowing a person to deploy only offers that the marketplace administrator approves.
Follow these steps to create and enable a private Azure Marketplace:
- Assign the marketplace admin role to the person who manages the private marketplace.
- Create the private Azure Marketplace.
- Customize and create collections.
Note
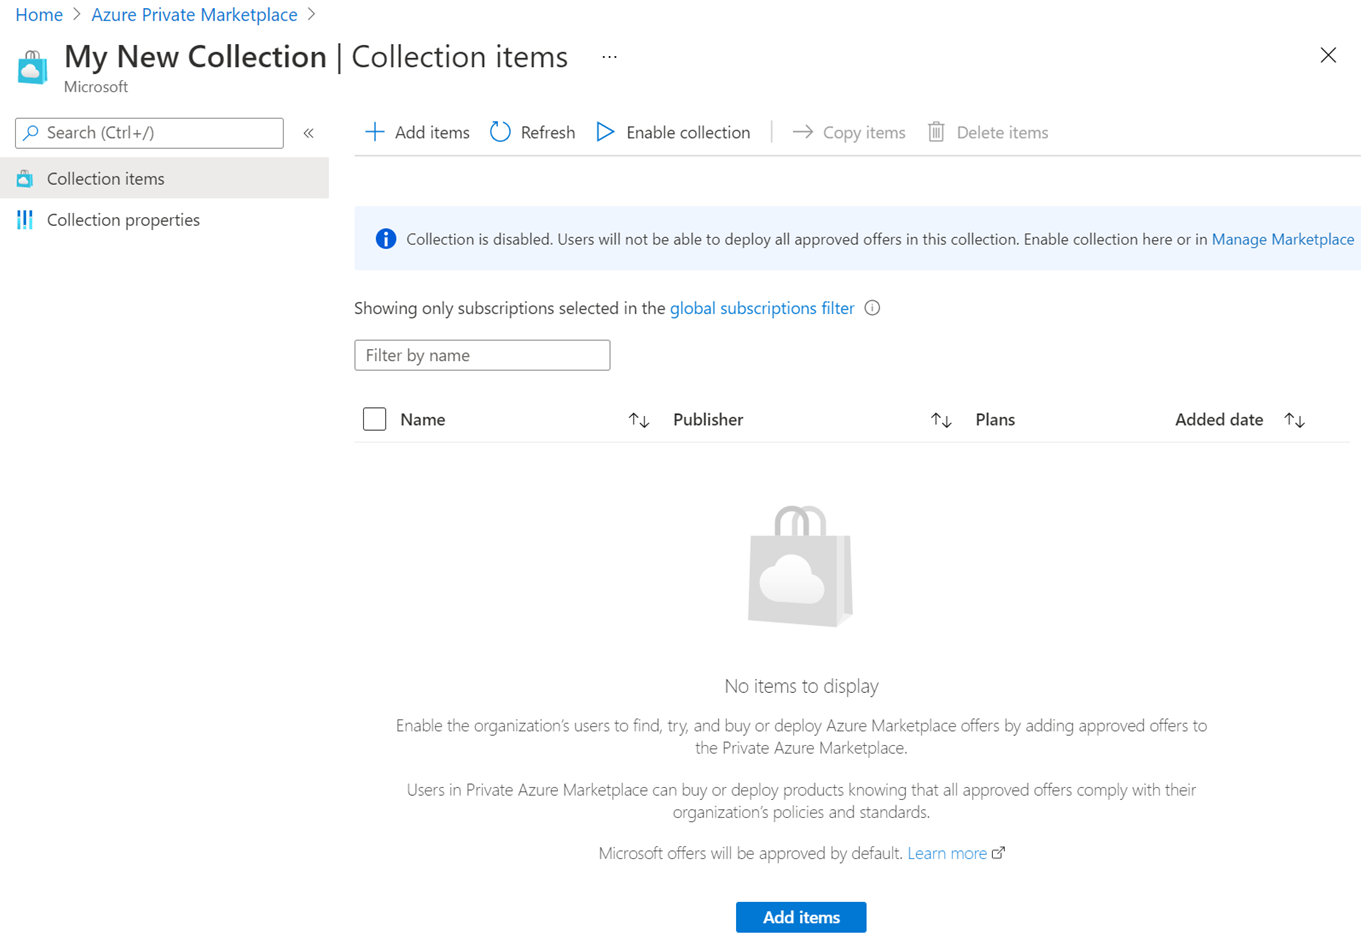
- After you've created private Azure Marketplace, you start with a disabled and empty private marketplace and one collection where you can add approved solutions and plans
- Private Azure Marketplace is at a tenant level. Once enabled, it sets the policy for all users under the tenant. You can manage the approved list on a subscription level using collections.
- All Microsoft solutions and Endorsed Linux distributions are automatically added to private Azure Marketplace by default.
Private Azure Marketplace value and benefits
Private Azure Marketplace is a service that enables IT administrators to add a governance layer at the Azure tenant level to control which offers from Microsoft partners (ISVs) users can deploy and purchase. Only offers approved by the private Azure Marketplace administrator can be deployed inside the Azure tenant.
Private Azure Marketplace lets administrators govern which Microsoft partner applications users can purchase and deploy. Users can search across the entire Azure Marketplace catalog but can only purchase and deploy approved solutions.
Note
All applications published by Microsoft and endorsed Linux distributors are approved by default and can always be purchased and deployed. Only applications sold by Microsoft partners or Independent Software Vendors (ISVs) can be controlled using private Azure Marketplace.
| Benefit | Azure Marketplace | Private Azure Marketplace |
|---|---|---|
| Discover applications from Microsoft and Microsoft partners (ISVs) | Yes | Yes |
| Control deployment of cloud applications from Microsoft partners (ISVs) including endorsed Linux distributions | Limited | Yes |
| Control deployment of cloud applications from Microsoft partners (ISVs) at the plan (SKU) level, including current and future product plans | No | Yes |
| Create custom collections of applications available to specific subscriptions | No | Yes |
| Users can request the marketplace administrator to approve applications for deployment | No | Yes |
Assign the Marketplace admin role
The tenant Global administrator must assign the Marketplace admin role to the private Azure Marketplace admin who will manage the private store.
Important
Access to private Azure Marketplace management is only available to IT admins with the Marketplace admin role assigned.
Prerequisites
These prerequisites are required before you can assign the Marketplace Admin role to a user on the tenant scope:
- You have access to a Global administrator user.
- The tenant has at least one subscription (can be any type).
- The Global administrator user is assigned the Contributor role or higher for the chosen subscription.
Assign the Marketplace admin role with access control (IAM)
Sign in to the Azure portal.
Select All services and then Marketplace.
Select Private Marketplace from the menu on the left.
Select Access control (IAM) to assign the Marketplace admin role.
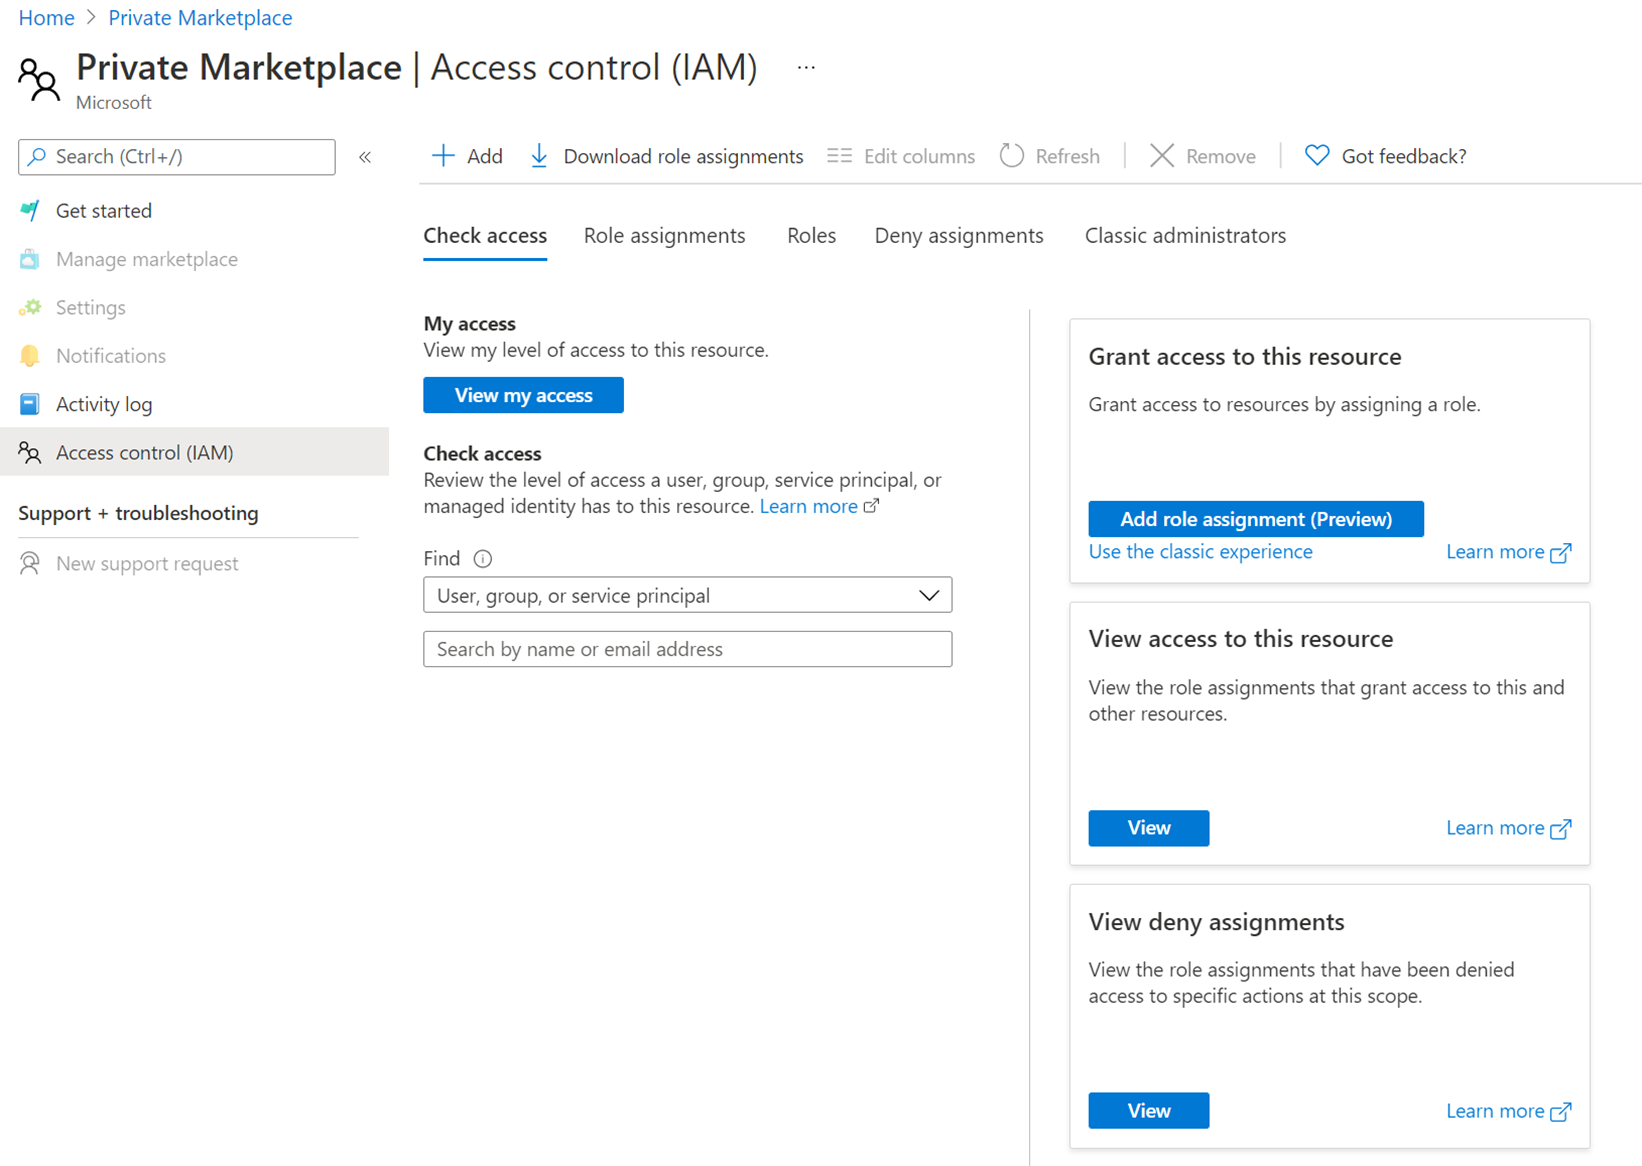
Select + Add > Add role assignment.
Under Role, choose Marketplace Admin.
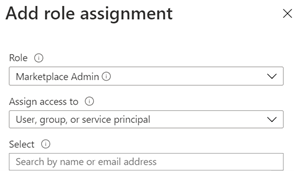
Select the desired user from the dropdown list, then select Done.


Assign the Marketplace admin role with PowerShell
Use the following PowerShell script to assign the Marketplace Admin role; it requires the following parameters:
- TenantId: The ID of the tenant in scope (Marketplace admin role is assignable on the tenant scope).
- SubscriptionId: A subscription of which the global admin has Contributor role or higher assigned.
- GlobalAdminUsername: The username of the global admin.
- UsernameToAssignRoleFor: The user name to which the Marketplace admin role will be assigned.
Note
For guest users invited to the tenant, it can take up to 48 hours until their account is available for assigning the Marketplace Admin role. For more information, see Properties of a Microsoft Entra B2B collaboration user.
For information about the cmdlets contained in the Az.Portal PowerShell module, see Microsoft Azure PowerShell: Portal Dashboard cmdlets.
Create private Azure Marketplace
Sign in to the Azure portal.
Select All services and then Marketplace.
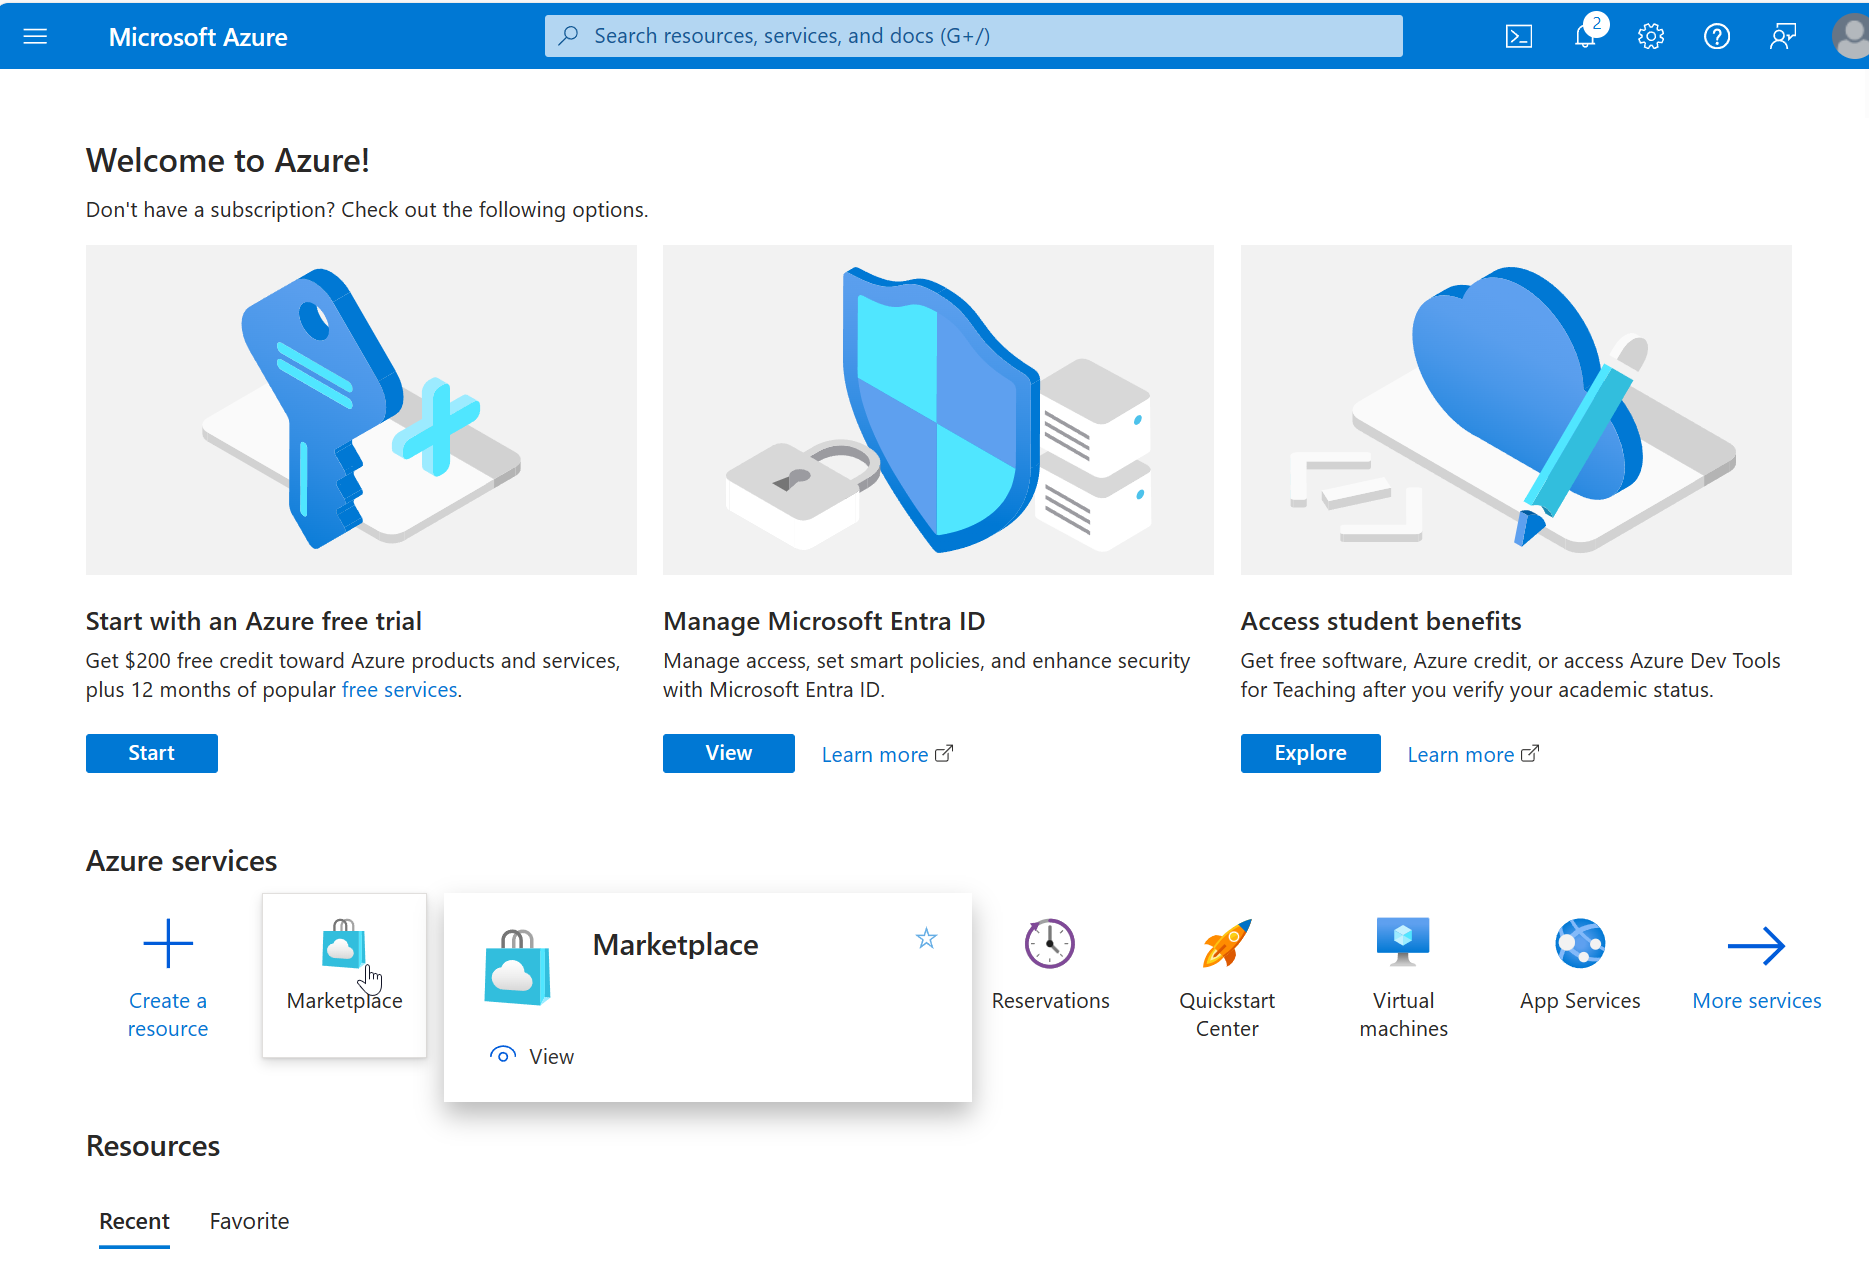
Select Private Marketplace from the left-nav menu.
Select Get Started to create private Azure Marketplace (you only have to do this once).
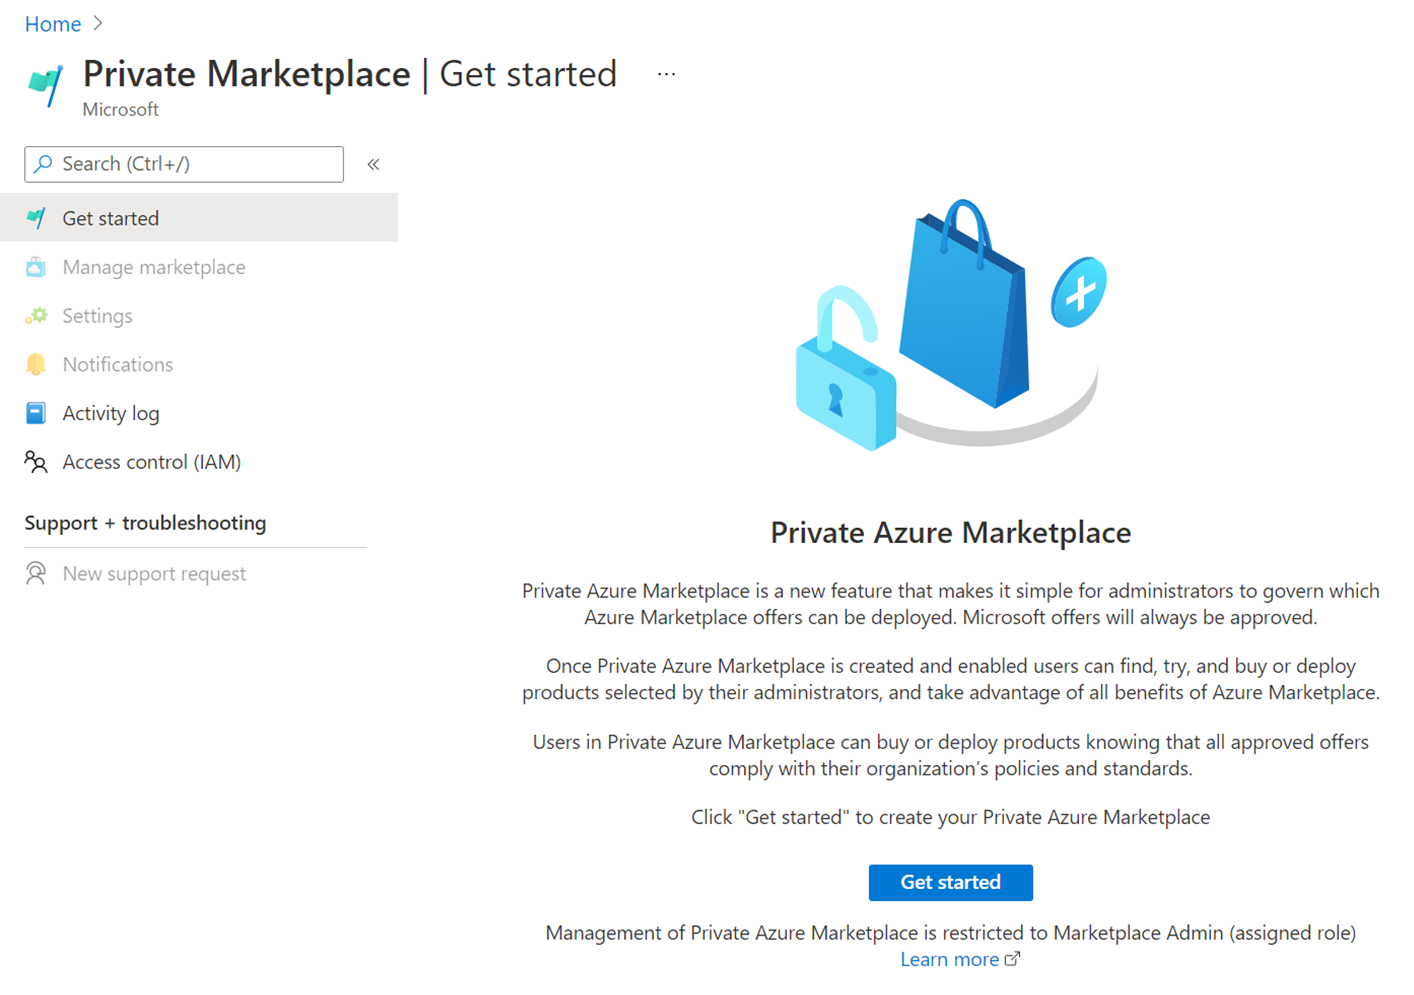
If private Azure Marketplace already exists for this tenant, Manage Marketplace is selected by default.
Once completed you'll have a disabled private Azure Marketplace with one Default Collection.
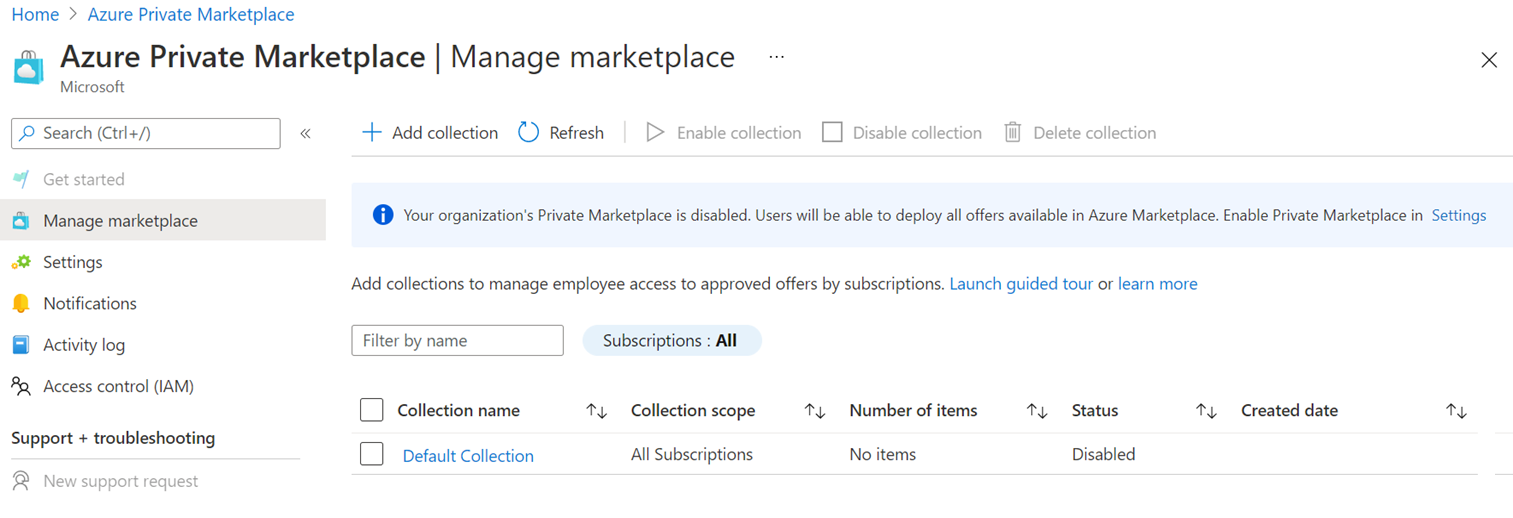


Note
- Default Collection is a system-generated collection set with the scope of all the subscriptions under the same tenant.
- The name and scope of the Default Collection can't be changed, and the collection can't be deleted.
Collections overview
A collection is a list of approved products in private Azure Marketplace, created by the marketplace administrator, that is available across different subscriptions throughout an organization. Collections are flexible and can include one or many approved plans associated with a solution. Collections provide marketplace administrators with a way to govern and control marketplace solutions at the subscription level when private Azure Marketplace is enabled.
After a private Azure Marketplace is created, a default collection is created. The default collection is a system-generated collection set with the scope of all the subscriptions under the same tenant. The name and scope of the Default Collection can't be changed, and the collection can't be deleted.

Add collection items from gallery
An item is a combination of an offer and a plan. You can search for and add items on the collection page.
Select the collection name to manage that collection.
Select Add items.
Browse the Gallery or use the search field to find the item you want.
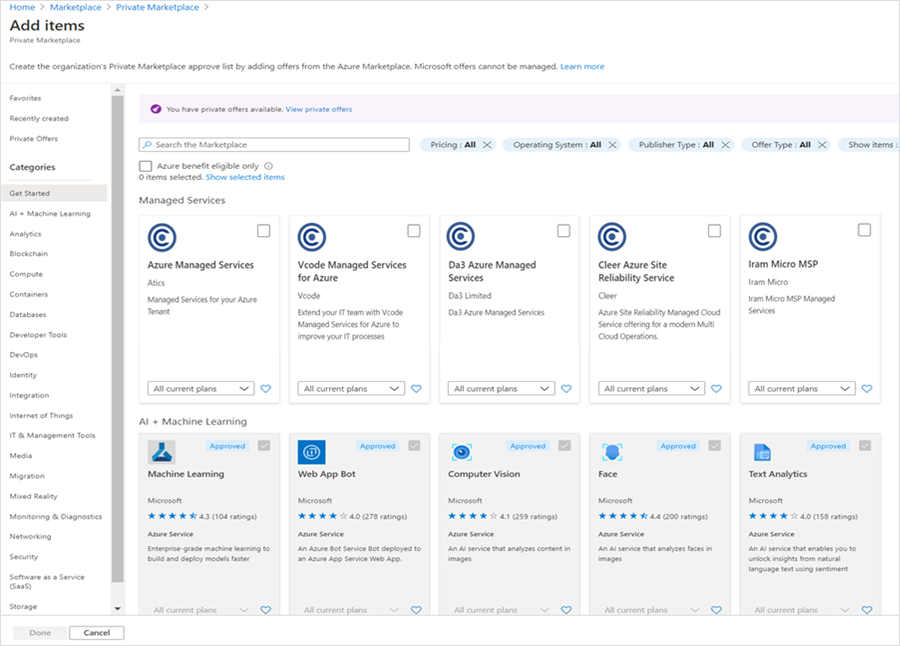
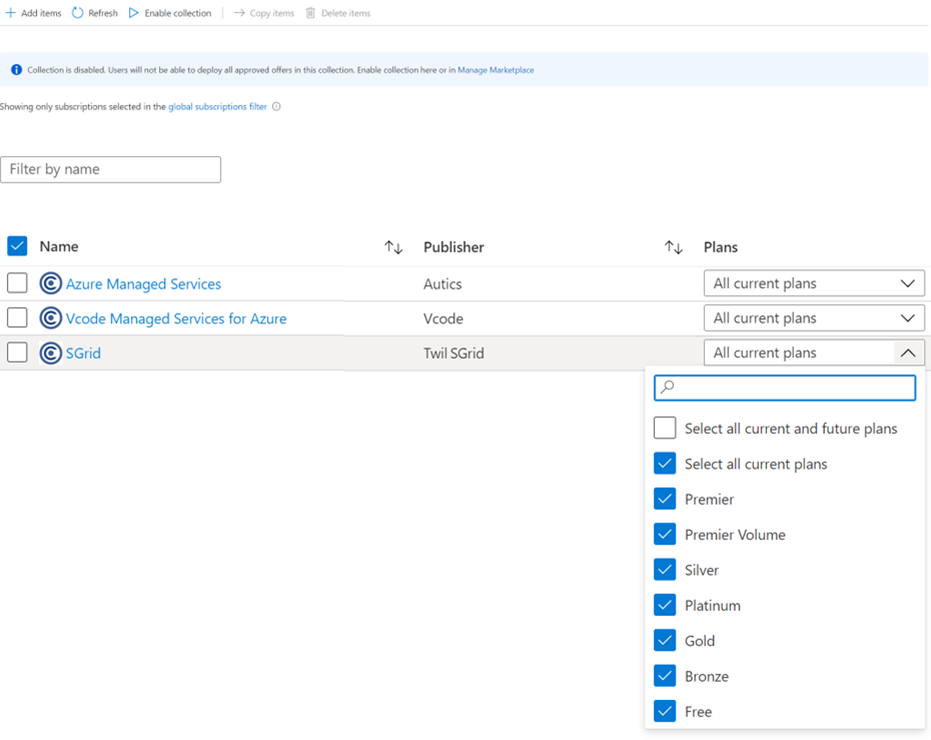
As default, when adding a new offer, all current plans are added to the approved list. To modify the plan selection before adding the selected items, select the drop-down menu in the offer and update the required plans.
Select Done at the bottom-left after you've made your selections.


Note
Add Items to the Marketplace is available for non-Microsoft offers only. Microsoft solutions (including Endorsed Linux Distributions) are tagged as "Approved by default" and can't be managed in Private Marketplace.
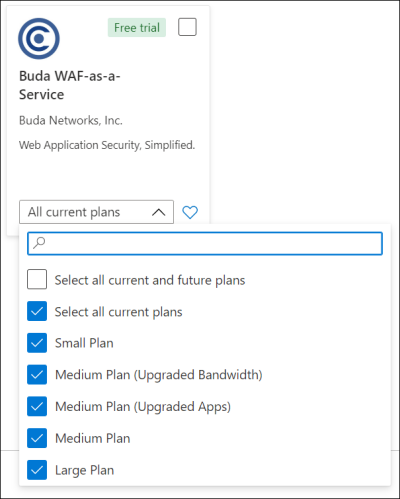
Edit item plans
Edit an item's plans on the collection page.
In the Plans column, review the available plans from the dropdown menu for that item.
Select or clear the check boxes to choose which plans to make available to your users.
Note
Each offer needs at least one plan selected for the update to occur. To remove all plans related to an offer, delete the entire offer (see next section).

Delete items
On the collection page, check the box next to the offer name and select Delete items.

Copy items from one collection to another
On manage collection page (private marketplace --> manage marketplace, select the collection you want to copy from).
Check the box next to the offer name and select Copy items.

In the right pane, select the destination collection (if needed, create a new collection by selecting Create new collection).
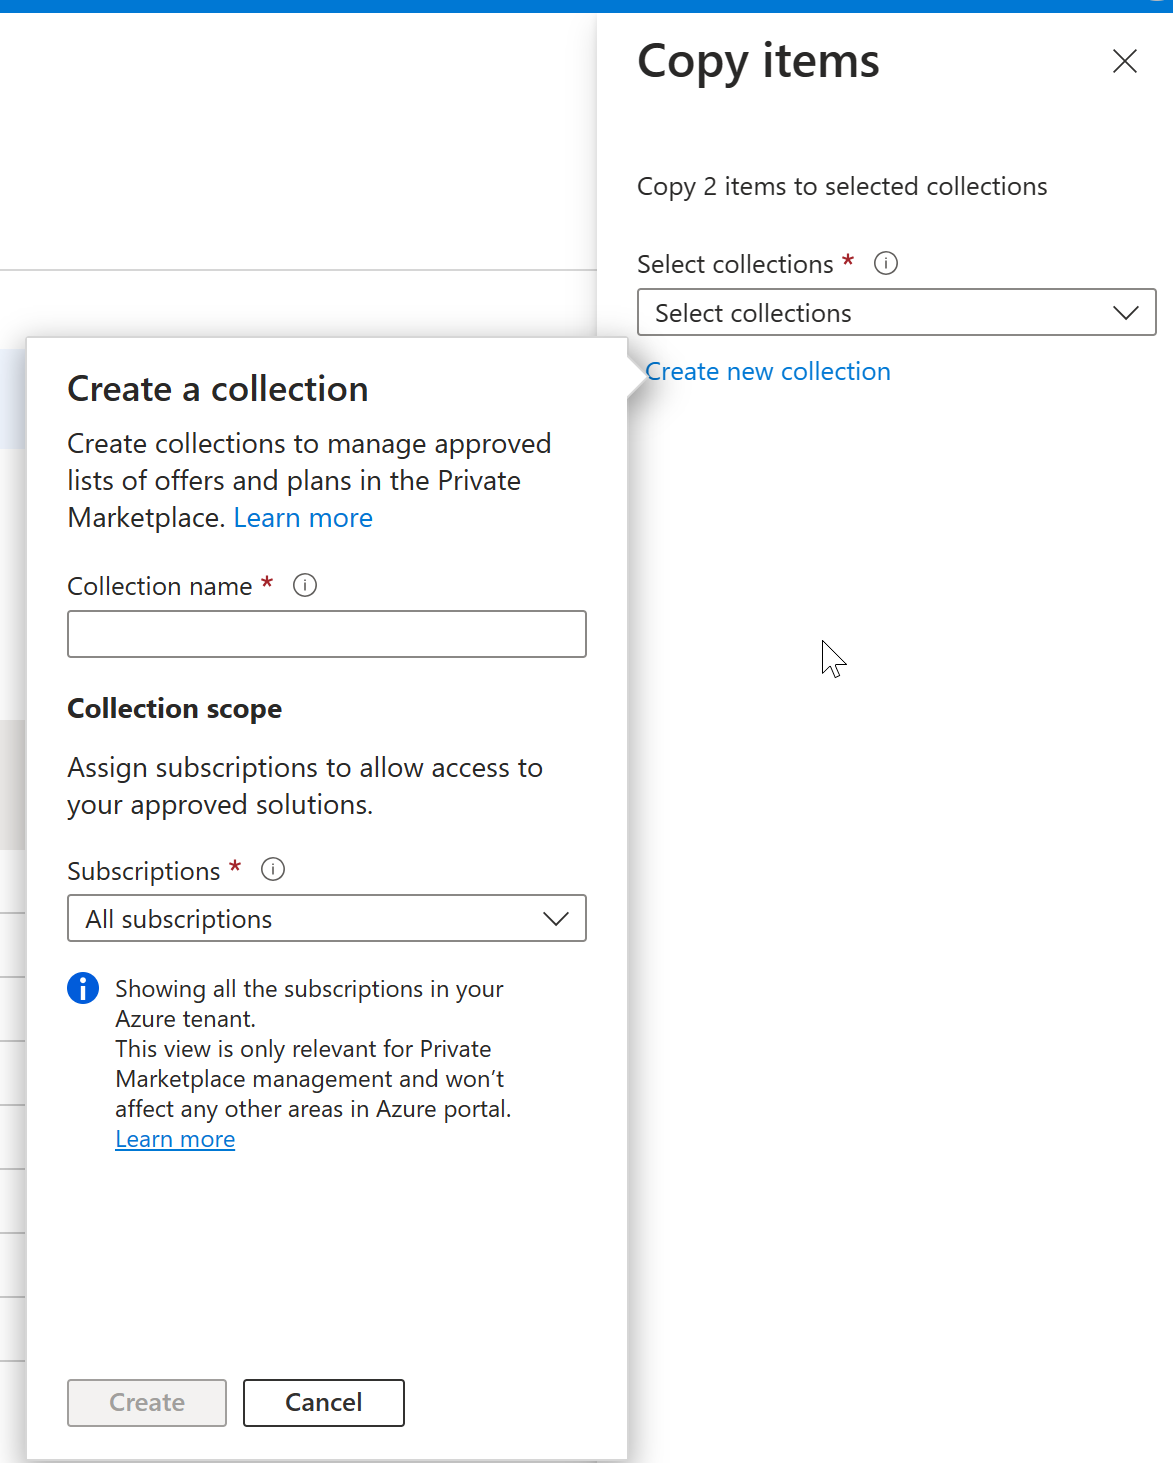
Select Copy.


Enable/disable a collection
The Manage collection page displays a banner showing the current state of the collection:


On the Manage Marketplace page, select the collection and use the top action bar to enable or disable the collection.


Enable/disable private Azure Marketplace
The Manage Marketplace page displays one of these banners showing the current state of private Azure Marketplace:


To enable or disable private Azure Marketplace:
- Select Settings from the left-nav menu.
- Select the radio button for the desired status.
- Select Apply on the bottom of the page.
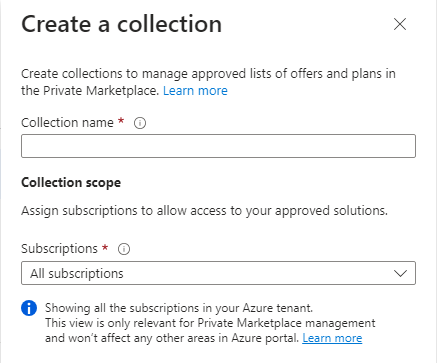
Add new collection
With collections, Marketplace Admin (assigned role) can create multiple lists of approved items which are available for different subscriptions throughout their organization.
Select Add collection.
Name your collection.
Select subscriptions from the drop-down menu.
Select Create at the bottom (not shown below) after you've made your selections.
This creates a new empty and disabled Private collection. Select a collection name to manage it.


Update collection properties
Select the name of the collection you want to manage.
Select Collection properties from the left-nav menu.
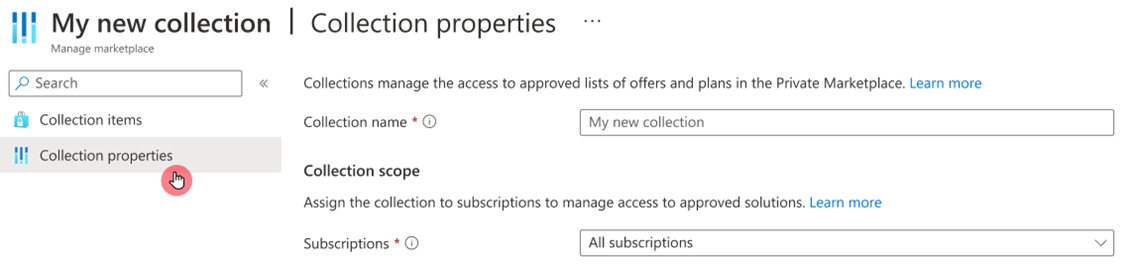
Update the name and selected subscriptions as needed.
Select Apply (not shown).

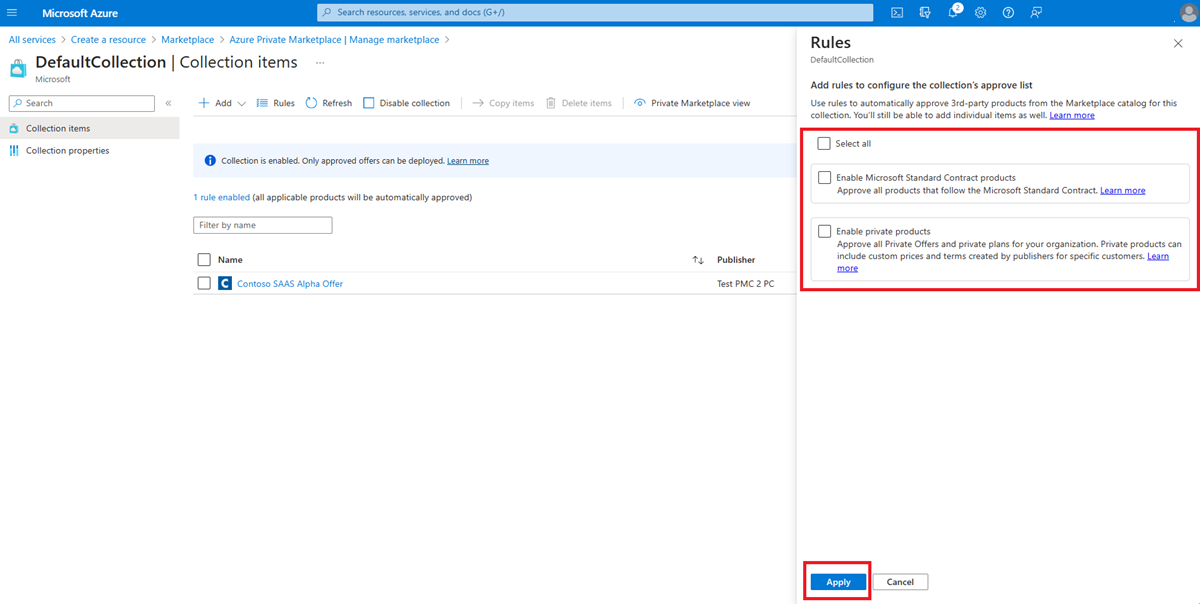
Collection rules
You can add rules to configure the approved list of solutions for a collection. Rules enable automatic approval of Microsoft partner solutions for any or all the following conditions:
- Enable Microsoft standard contract products: automatically approve all products that follow the Microsoft standard contract. When the rule is enabled for a collection, all products under the Microsoft standard contract are automatically approved for purchase.
- Enable private products: approve all private offers and private plans for your organization. When adding a rule to enable private products to a collection, all private offers and private plans are automatically available for purchase. Alternatively, during the purchase process, the person purchasing the private plan can request the plan be added by the marketplace administrator.
To enable any or all these rules, follow these steps:
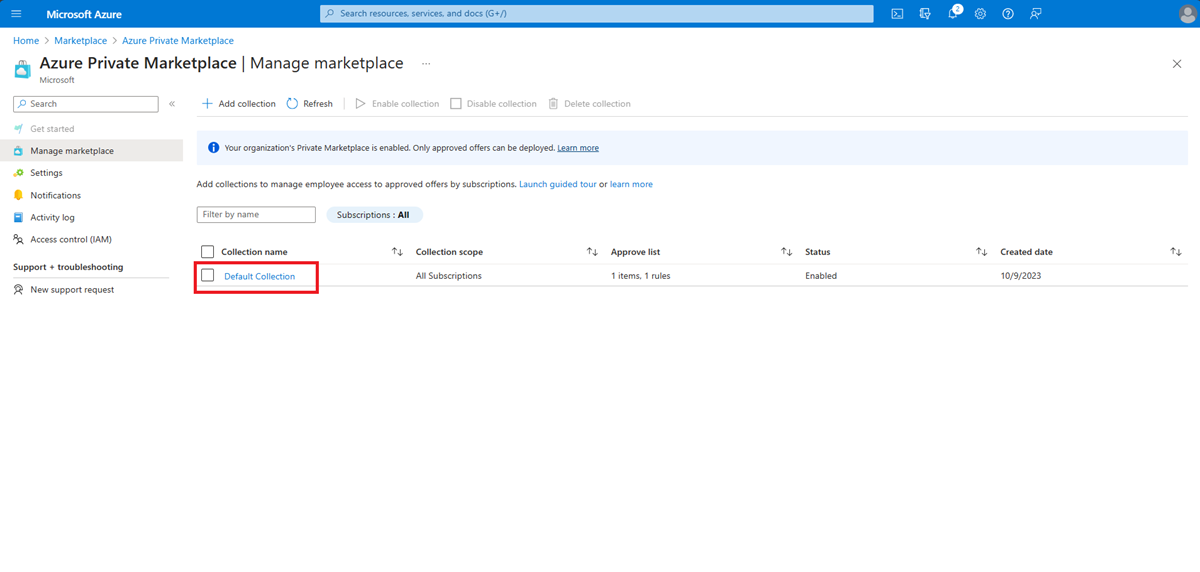
The marketplace administrator accesses the marketplace in the Azure portal and selects Private marketplace:

Select Manage marketplace:

Select a collection you wish to enable a rule for. There can be multiple collections in your tenant.
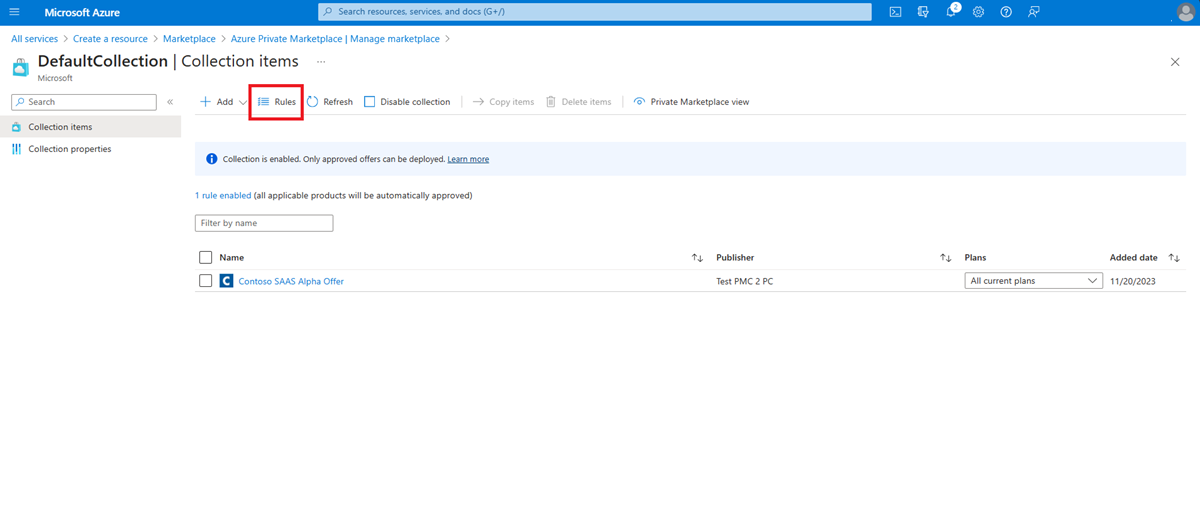
Select on Rules:
Select the rule you want to enable for the collection and select apply:


Delete a collection
On the Manage Marketplace page, check the box next to the collection name and select Delete collection.

Note
Default Collection is a system-generated collection and can't be deleted.
Private Azure Marketplace notification center
Notification Center consists of three types of notifications and allows the Marketplace admin to take actions based on the notification:
- Approval requests from users for items that aren't in the approved list (see Request to add offers or plans below).
- New plan notifications for offers that already have one or more plans in the approved list.
- Removed plan notifications for items that are in the approved list but were removed from the global Azure Marketplace.
To access the notification center:
Select Notifications from the left-nav menu.

Select an ellipsis menu on the right for more actions.

For plan requests, Show requests opens the approval request form where you can review all user requests for the specific offer.
Select Approve or Reject.
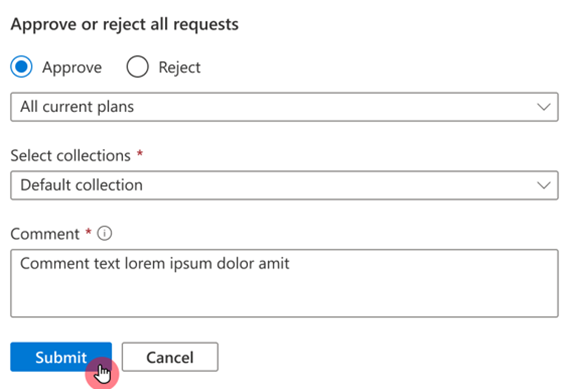
Select the plan to approve from the drop-down menu.
Select the collection to add the offers/plans to.
Add a comment and select Submit.


Notifications settings
Marketplace Admin (assigned role) can enable email notifications from private Azure Marketplace for the list of notifications mentioned above.
To enable notifications:
- Select Settings from the left-nav menu.
- To send notification to the Marketplace Admin group select the checkbox next to the "Send all marketplace admins".
- To send notifications to a Microsoft Entra group select Add recipients (only Microsoft 365 groups can receive email notifications).
- Select the desired Microsoft Entra group from the list, then select Add.
For more information about creating and managing Microsoft Entra groups, refer to How to manage groups.
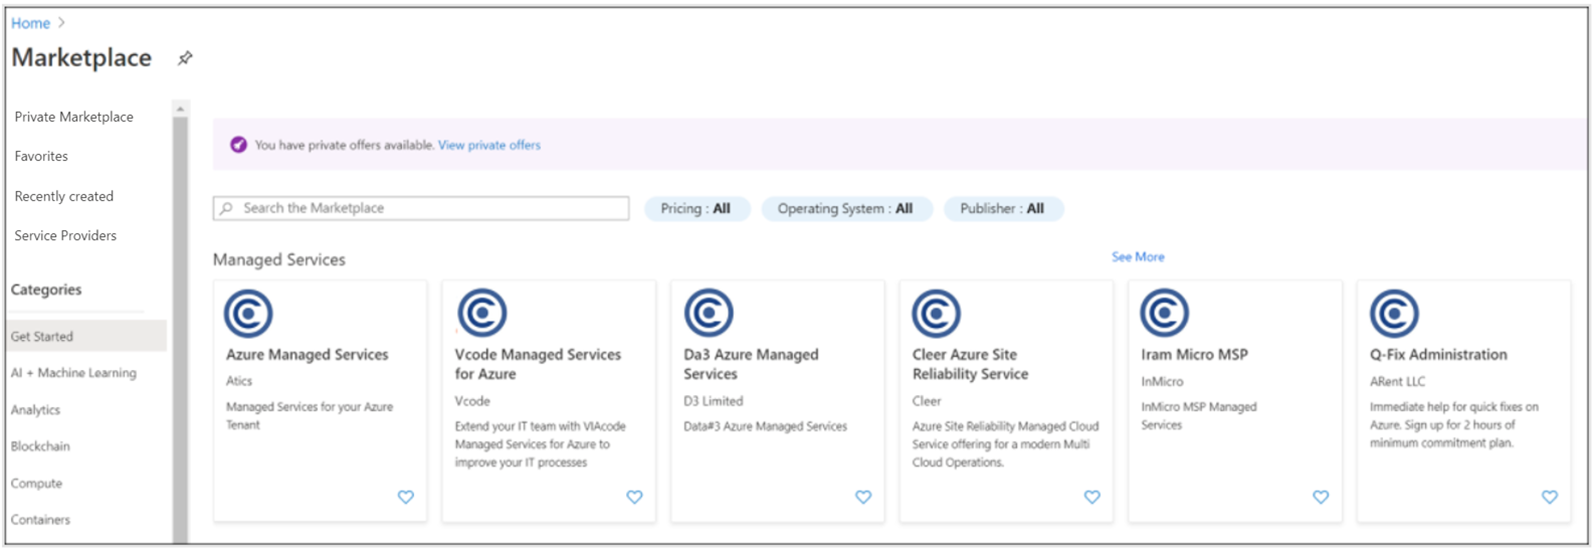
Browsing private Azure Marketplace (user experience)
When private Azure Marketplace is enabled, users see which plans the Marketplace admin approved.
- A green Approved notice indicates a Partner (non-Microsoft) offer that is approved.
- A blue Approved notice indicates a Microsoft offer (including Endorsed Linux distributions) that is approved.
Users can filter between offers that are and aren't approved:

Purchase in private Azure Marketplace
Private Azure Marketplace is a service that enables IT administrators to add a governance layer at the tenant level to control which offers from Microsoft partners or ISVs (Independent software vendors) users can deploy and purchase. Only offers approved by the private Azure Marketplace administrator that comply with an organization's policies can be deployed inside a tenant.
Private Azure Marketplace lets IT administrators govern and control solutions that can be purchased. This article explains how to purchase a solution when private Azure Marketplace has been enabled.
Purchased approved solutions
When private Azure Marketplace is enabled, only Microsoft partner solutions approved by the marketplace administrator can be purchased. Offers published by Microsoft, including all endorsed Linux distributions, can always be deployed. Users can search the marketplace catalog but can only purchase approved solutions. Approved solutions for purchase displays an approved badge.
A green approved badge indicates a solution from a Microsoft partner that is approved for purchase and deployment.
A blue approved badge indicates a Microsoft offer and Endorsed Linux distributions approved for purchase and deployment.
There are three scenarios for purchasing approved solutions when private Azure Marketplace is enabled:
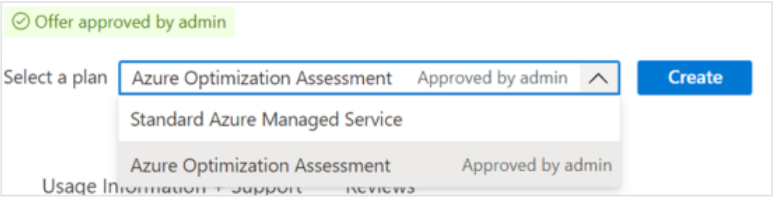
When a user selects a combination of approved plan and approved subscription, the Create button is enabled:
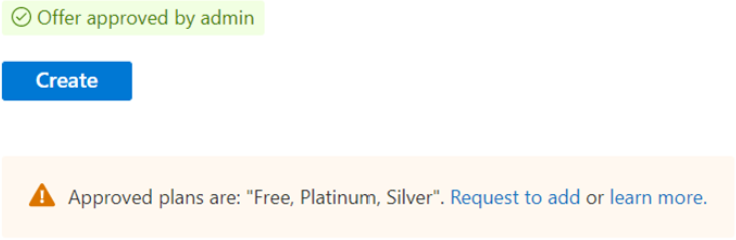
If a product plan selection doesn't appear in the product details page but the admin approved one or more plans, a banner notes which plans are approved and the Create button is enabled:
When a user selects a nonapproved plan or subscription, a banner notes the plan as not approved for the selected subscription and the Create button is disabled. The user can request to add the plan to the approved list of solutions.


Request to add offers or plans
You can request to add an offer or plan not approved for purchase by the marketplace administrator.
Select Request to add in the banner to open the Access request form.
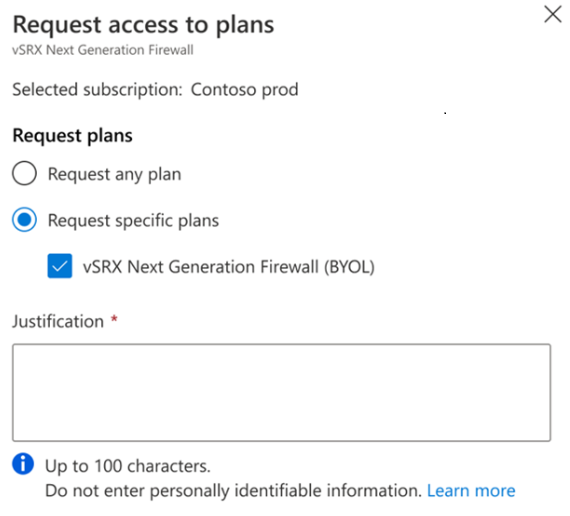
Select which plans to add to the request (Any Plan tells the Marketplace admin that you don't prefer a specific plan within an offer).
Add a Justification and select Request to submit your request.
An indication for a pending request appears in the Access request form with an option to Withdraw request.
Once the administrator approves the solution, the solution is available for purchase.

Contact support
- For Azure Marketplace support, visit Microsoft Q&A.