Windows Autopilot motherboard replacement scenario guidance
This document offers guidance for Windows Autopilot device repair scenarios that Microsoft partners can use in motherboard replacement situations, and other servicing scenarios.
Repairing Autopilot enrolled devices is complex, as it tries to balance OEM requirements with Windows Autopilot requirements. Specifically, OEM requirements include strict uniqueness across motherboards, MAC addresses, etc. Windows Autopilot requires strict uniqueness at the hardware hash level for each device to enable successful registration. The hardware hash doesn't always accommodate all the OEM hardware component requirements. These requirements are sometimes at odds, which can cause issues with some repair scenarios. The hardware hash is also known as the hardware ID.
If a motherboard is replaced on an Autopilot registered device, then the following process is recommended:
Reregister the device with Windows Autopilot.
Each of these steps is described in the following sections.
Deregister the Autopilot device from the Autopilot program
Before the device arrives at the repair facility, the entity that registered the device must deregister it.
If the IT Admin registered the device, they likely did so via Intune, Microsoft 365 admin center, or a legacy portal such as Microsoft Store for Business (MSfB). If so, they should deregister the device from Intune or Microsoft 365 admin center because devices registered in Intune don't show up in Microsoft Partner Center (MPC).
If the OEM or CSP partner registered the device, they likely did so via the Microsoft Partner Center (MPC). In that case, they should deregister the device from MPC, which also removes it from the customer IT Admin's Intune account.
The below steps describe what an IT Admin would go through to deregister a device from Intune and the steps an OEM or CSP would go through to deregister a device from MPC.
To avoid problems, an OEM or CSP should register Autopilot devices whenever possible. If the customer registers the devices, OEMs or CSPs can't deregister them if, for example, a customer leasing a device goes out of business before deregistering it themselves.
If a customer grants an OEM permission to register devices on their behalf using the automated consent process, an OEM can use the API to deregister devices they didn't register themselves. This deregistration only removes those devices from the Autopilot program. It doesn't unenroll them from Intune or disjoin them from Microsoft Entra ID. Only the customer can unenroll the device from Intune or disjoin the device from Microsoft Entra ID.
Deregister a device
Whenever a device permanently leaves an organization, whether it's for a repair or the end of the device life cycle, the device should always be deregistered from Autopilot.
Below we describe the steps an admin would go through to deregister a device from Intune and Autopilot.
Delete from Intune
Before a device is deregistered from Autopilot, it first has to be deleted from Intune. To delete an Autopilot device from Intune:
Sign in to the Microsoft Intune admin center.
In the Home screen, select Devices in the left pane.
In the Devices | Overview screen, under By platform, select Windows.
Under Device name, find the device that needs to be deleted and then select the device. If necessary, use the Search box.
In the properties screen for the device, make a note of the serial number listed under Serial number.
After making a note of the serial number of the device, select Delete in the toolbar at the top of the page.
A warning dialog box appears to confirm the deletion of the device from Intune. Select Yes to confirm deleting the device.
Deregister from Autopilot using Intune
Once the device has been deleted from Intune, it can then be deregistered from Autopilot. To deregister a device from Autopilot:
Make sure the device has been deleted from Intune as described in the Delete from Intune section.
Sign in to the Microsoft Intune admin center.
In the Home screen, select Devices in the left pane.
In the Devices | Overview screen, under By platform, select Windows.
In the Windows | Windows enrollment screen, select Windows enrollment
Under Windows Autopilot Deployment Program, select Devices.
In the Windows Autopilot devices screen that opens, under Serial number, find the device that needs to be deregistered by its serial number as determined in the Delete from Intune section. If necessary, use the Search by serial number box.
Select the device by selecting the checkbox next to the device.
Select the extended menu icon (
…) on the far right end of the line containing the device. A menu appears with the option Unassign user.- If the Unassign user option is available and not greyed out, then select it. A warning dialog box appears confirming to unassign the user from the device. Select OK to confirm unassigning the device from the user.
- If the Unassign user option isn't available and greyed out, then move on to the next step.
With the device still selected, select Delete in the toolbar at the top of the page.
A warning dialog box appears to confirm the deletion of the device from Autopilot. Select Yes to confirm deleting the device.
The deregistration process may take some time. The process can be accelerated by selecting the Sync button in the toolbar at the top of the page.
Every few minutes select Refresh in the toolbar at the top of the page until the device is no longer present.
Important
For Microsoft Entra join devices, no additional steps are necessary to remove the device from Intune and Autopilot. Unneeded steps include manually deleting the device from Microsoft Entra ID. Manually deleting the device from Microsoft Entra ID may cause unexpected problems, issues, and behavior. If needed, the device will be automatically removed from Microsoft Entra ID after these steps are followed.
For Microsoft Entra hybrid join devices, delete the computer object from the on-premises Active Directory Domain Services (AD DS) environment. Deleting the computer object from the on-premises AD DS ensures that the computer object isn't resynced back to Microsoft Entra ID. After the computer object is deleted from the on-premises AD DS environment, no additional steps are necessary to remove the device from Intune and Autopilot. Unneeded steps include manually deleting the device from Microsoft Entra ID. Manually deleting the device from Microsoft Entra ID may cause unexpected problems, issues, and behavior. If needed, the device will be automatically removed from Microsoft Entra ID after these steps are followed.
The above steps deregister the device from Autopilot, unenroll the device from Intune, and disjoin the device from Microsoft Entra ID. It may appear that only deregistering the device from Autopilot is needed. However, there are barriers in Intune that require all the above steps to avoid problems with lost or unrecoverable devices. To prevent the possibility of orphaned devices in the Autopilot database, Intune, or Microsoft Entra ID, it's best to complete all the steps. If a device gets into an unrecoverable state, you can contact the appropriate Microsoft support alias for assistance.
Deregister from Autopilot using Microsoft 365 admin center
The device can be deregistered from Autopilot in Microsoft 365 admin center if using Microsoft 365 admin center instead of Intune. To deregister an Autopilot device from the Microsoft 365 admin center:
- Sign into to the Microsoft 365 admin center
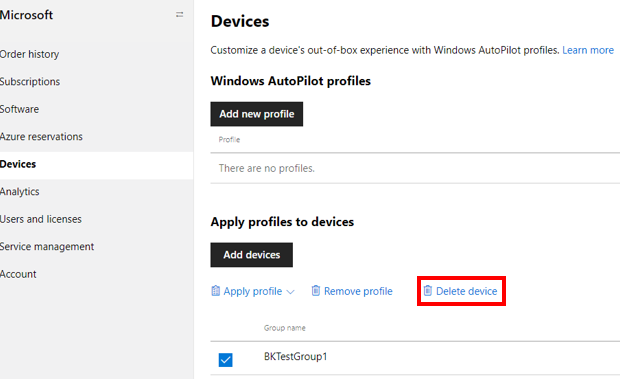
- Navigate to Devices > Autopilot.
- Select the device to be deregistered and then select Delete device.
Deregister from Autopilot in Microsoft Partner Center (MPC)
To deregister an Autopilot device from the Microsoft Partner Center (MPC), a CSP would:
Log into the Microsoft Partner Center (MPC).
Navigate to Customer > Devices.
Select the device to be deregistered and then select Delete device.
Partners deregistering a device from Autopilot in Microsoft Partner Center (MPC) only deregisters the device from Autopilot. It doesn't perform any of the following actions:
- Unenroll the device from the MDM (Intune)
- Disjoin the device from Microsoft Entra ID
For the reasons listed above, the OEM or CSP should work with the customer IT administrators to have the device fully removed by following the steps in the Deregister a device section.
An OEM or CSP that has integrated the OEM Direct APIs can also deregister a device with the AutopilotDeviceRegistration API. Make sure the TenantID and TenantDomain fields are left blank.
Note
If an admin registered a device via another portal other than the Microsoft Partner Center (MPC) such as Intune or Microsoft 365 admin center, the device doesn't show up in Microsoft Partner Center (MPC). For a partner to register a device in the Microsoft Partner Center (MPC), the devices first needs to be deregistered using the steps outlined in the Deregister a device section.
Because the repair facility doesn't have the user's sign-in credentials, they have to reimage the device as part of the repair process. The customer should do three things before sending the device to the facility:
- Copy all important data off the device.
- Let the repair facility know which version of Windows they should reinstall after the repair.
- If applicable, let the repair facility know which version of Office they should reinstall after the repair.
Replace the motherboard
Technicians replace the motherboard or other hardware on the broken device. A replacement Digital Product Key (DPK) is injected.
Repair and key replacement processes vary between facilities. Sometimes repair facilities receive motherboard spare parts from OEMs that have replacement DPKs already injected, but sometimes not. Sometimes repair facilities receive fully functional BIOS tools from OEMs, but sometimes not. The quality of the data in the BIOS after a motherboard replacement varies. To ensure the repaired device are still Autopilot capable following its repair, check to make sure the new post-repair BIOS can successfully gather and populate the following information at a minimum:
- DiskSerialNumber.
- SmbiosSystemSerialNumber.
- SmbiosSystemManufacturer.
- SmbiosSystemProductName.
- SmbiosUuid.
- TPM EKPub.
- MacAddress.
- ProductKeyID.
- OSType.
For simplicity, and because processes vary between repair facilities, additional steps often used in a motherboard replacement are excluded, such as:
- Verify that the device is still functional.
- Disable or suspend BitLocker.
- Repair the Boot Configuration Data (BCD).
- Repair and verify the network driver operation.
Capture a new Autopilot device ID (4K HH) from the device
Repair technicians must sign in to the repaired device to capture the new device ID. If the repair technician doesn't have access to the customer's sign-in credentials, they have to reimage the device to gain access:
The repair technician creates a WinPE bootable USB drive.
The repair technician boots the device to WinPE.
The repair technician applies a new Windows image to the device.
Ideally, the same Windows version that was originally on the device should be reimaged onto the device. Some coordination is required between the repair facility and customer to capture this information at the time the device arrives for repair. Such coordination might include the customer sending the repair facility a customized image (.ppk file) via a USB stick, for example.
The repair technician boots the device into the new Windows image.
Once on the desktop, the repair technician captures the new device ID (4K HH) off the device using either the OA3 Tool or the PowerShell script.
Those repair facilities with access to the OA3 Tool (which is part of the ADK) can use the tool to capture the 4K Hardware Hash (4K HH).
Instead, the WindowsAutopilotInfo PowerShell script can be used to capture the 4K HH.
Note
Other methods in addition to Windows PowerShell are also available to capture the hardware hash. For more information, see Collect the hardware hash.
To use the WindowsAutopilotInfo PowerShell script, follow these steps:
Install the script from the PowerShell Gallery or from the command line.
Navigate to the script directory and run it on the device when the device is either in Full OS or Audit Mode. See the following example.
md c:\HWID Set-Location c:\HWID Set-ExecutionPolicy -Scope Process -ExecutionPolicy Unrestricted -Force Install-Script -Name Get-WindowsAutopilotInfo -Force Get-WindowsAutopilotInfo.ps1 -OutputFile AutopilotHWID.csv- If you're prompted to install the NuGet package, choose Yes.
- If after installing the script you get an error that
Get-WindowsAutopilotInfo.ps1isn't found, verify thatC:\Program Files\WindowsPowerShell\Scriptsis present in yourPATHvariable. - If the
Install-Scriptcmdlet fails, verify that you have the default PowerShell repository registered (Get-PSRepository) or register the default repository with the following command:
Register-PSRepository -Default -VerboseNote
The
Get-WindowsAutopilotInfoscript was updated in July of 2023 to use the Microsoft Graph PowerShell modules instead of the deprecated AzureAD Graph PowerShell modules. Make sure you're using the latest version of the script. The Microsoft Graph PowerShell modules may require approval of additional permissions in Microsoft Entra ID when they're first used. For more information, see AzureAD and Important: Azure AD Graph Retirement and PowerShell Module Deprecation.
The script creates a .csv file that contains the device information, including the complete 4K HH. Save this file so that you can access it later. The service facility uses this 4K HH to reregister device as described in the following sections. Be sure to use the -OutputFile parameter when saving the file, which ensures that file formatting is correct. Don't attempt to pipe the command output to a file manually.
Note
If the repair facility can't run the OA3 tool or PowerShell script to capture the new 4K HH, then the OEM or CSP partners must do it for them. Without some entity capturing the new 4K HH, there's no way to reregister this device as an Autopilot device.
Reregister the repaired device using the new device ID
If an OEM can't reregister the device, there are two options:
- The repair facility or CSP can reregister the device using MPC.
- The customer IT Admin should reregister the device via Intune (or MSfB).
Both ways of reregistering a device are shown in the following sections.
Reregister from Intune
To reregister an Autopilot device from Intune, an IT Admin would:
Sign in to Intune.
Navigate to Device enrollment > Windows enrollment > Devices > Import.
Select the Import button to upload a csv file containing the device ID of the device to be reregistered. The device ID was the 4K HH captured by the PowerShell script or OA3 tool described in the section Capture a new Autopilot device ID (4K HH) from the device.
Reregister from the Microsoft Partner Center (MPC)
To reregister an Autopilot device from the Microsoft Partner Center MPC, an OEM or CSP would:
Sign in to the Microsoft Partner Center (MPC).
Navigate to the Customer > Devices page.
Select Add devices to upload the csv file.
When a repaired device is reregistering through MPC, the uploaded csv file must contain the 4K HH for the device, and not just the PKID or Tuple (SerialNumber + OEMName + ModelName). If only the PKID or Tuple was used, the Autopilot service would be unable to find a match in the Autopilot database. No match would be found because no 4K HH info was previously submitted for this essentially "new" device and the upload fails, likely returning a ZtdDeviceNotFound error. For this reason, only upload the 4K HH. Don't upload the Tuple or PKID.
When including the 4K HH in the csv file, you don't also need to include the PKID or Tuple. Those columns might be left blank, as shown in the following example:

Reset the device
The repair facility must reset the image back to a pre-OOBE state before returning it to the customer. This reset is needed because the device was required to be in Full OS or Audit Mode to capture the 4K HH. One way to reset the image is by using the built-in reset feature in Windows.
To use the reset feature in Windows on a device:
Windows 10:
Go to Settings > Update & Security > Recovery.
Select Get started.
In the Reset this PC window:
Under Choose an option, select Remove everything.
Under How would you like to reinstall Windows?, select either option.
Under Additional settings, select the Next button.
Under Ready to reset this PC, select the Reset button.
Windows 11:
Go to Settings > System > Recovery.
Under Recovery options, select the Reset PC button next to Reset this PC.
In the Reset this PC window:
Under Choose an option, select Remove everything.
Under How would you like to reinstall Windows?, select either option.
Under Additional settings, select the Next button.
Under Ready to reset this PC, select the Reset button.
However, the repair facility most likely doesn't have access to Windows because they lack the user credentials to sign in. In this case, they need to use other means to reimage the device, such as the Deployment Image Servicing and Management (DISM) tool:
Return the repaired device to the customer
The repaired device can now be returned to the customer. The device is auto-enrolled into the Autopilot program on first boot-up during OOBE.
Important
If the repair facility didn't reimage the device, they could be sending it back in a potentially broken state. For example, there's no way to log into the device because it's dissociated from the only known user account.
A device can be registered for Autopilot before being powered-on. However, the device isn't actually deployed to Autopilot until it goes through OOBE. Therefore, resetting the device back to a pre-OOBE state is a required step.
Fix pending and Attention required
If the profiles status of a device shows Fix pending, Autopilot is in the process of attempting to register the device. If the profile status of a device shows Fix pending for an extended period of time and doesn't switch to Assigned, or if the profile status of the device switches to Attention required, then:
- Manually deregister the device using the steps in the Deregister a device section.
- Reregister the device.
For more information, see Troubleshoot Autopilot device import and enrollment: Autopilot profile not applied after reimaging to an older OS version.
Specific repair scenarios
This section covers the most common repair scenarios, and their impact on Autopilot enablement.
Note
- The scenarios were tested using Intune only. No other MDMs were tested.
- In most test scenarios, the repaired and reregistered device needed to go through OOBE again for Autopilot to be enabled.
- Motherboard replacement scenarios often result in lost data. Repair centers or customers should be reminded to back up data before repair.
- When a repair facility can't write device info into the BIOS of the repaired device, new processes need to be created to successfully enable Autopilot.
- Repaired device should have the Product Key (DPK) preinjected in the BIOS before capturing the new 4K HH (device ID).
For the Supported column in the following table:
- Yes: the device can be reenabled for Autopilot.
- No: the device can't be reenabled for Autopilot.
| Scenario | Supported | Microsoft Recommendation |
|---|---|---|
| Motherboard Replacement in general | Yes | The recommended course of action for motherboard replacement scenarios is: 1. Autopilot device is deregistered from the Autopilot program. 2. The motherboard is replaced. 3. The device is reimaged (with BIOS info and DPK reinjected). 1 4. A new Autopilot device ID (4K HH) is captured off the device. 5. The repaired device is reregistered for the Autopilot program using the new device ID. 6. The repaired device is reset to boot to OOBE. 7. The repaired device is shipped back to the customer. 1 It's not necessary to reimage the device if the repair technician has access to the customer's sign-in credentials. It's technically possible to successfully re-enable motherboard replacement and Autopilot without keys or certain BIOS info (serial #, model name, etc.) However, doing so is only recommended for testing/educational purposes. |
| Motherboard replacement when motherboard has a TPM chip enabled and only one onboard network card that also gets replaced | Yes | 1. Deregister damaged device. 2. Replace motherboard. 3. To gain access, reimage device or sign-in using customer's credentials. 4. Write device info into BIOS. 5. Capture new 4K HH. 6. Reregister repaired device. 7. Reset device back to OOBE. 8. Go through Autopilot OOBE (customer). 9. Autopilot successfully enabled. |
| Motherboard replacement when motherboard has an enabled TPM chip enabled and a second network interface that isn't replaced along with the motherboard | No | This scenario breaks the Autopilot experience. The resulting Device ID won't be stable until after TPM attestation is complete. Even then registration might give incorrect results because of ambiguity with MAC Address resolution. Therefore, this scenario isn't recommended. |
| Motherboard replacement where the NIC card, HDD, and WLAN all remain the same after the repair | Yes | 1. Deregister damaged device. 2. Replace motherboard with a new Replacement Digital Product Key (RDPK) preinjected in BIOS. 3. To gain access, reimage device or sign-in using customer's credentials. 4. Write old device info into BIOS (same s/n, model, etc.) 2 5. Capture new 4K HH. 6. Reregister repaired device. 7. Reset device back to OOBE. 8. Go through Autopilot OOBE (customer). 9. Autopilot successfully enabled. 2 For this and later scenarios, rewriting old device info wouldn't include the TPM 2.0 endorsement key, as the associated private key is locked to the TPM device. |
| Motherboard replacement where the NIC card remains the same, but the HDD and WLAN are replaced | Yes | 1. Deregister damaged device. 2. Replace motherboard (with new RDPK preinjected in BIOS). 3. Insert new HDD and WLAN. 4. Write old device info into BIOS (same s/n, model, etc.) 5. Capture new 4K HH. 6. Reregister repaired device. 7. Reset device back to OOBE. 8. Go through Autopilot OOBE (customer). 9. Autopilot successfully enabled. |
| Motherboard replacement where the NIC card and WLAN remains the same, but the HDD is replaced | Yes | 1. Deregister damaged device. 2. Replace motherboard (with new RDPK preinjected in BIOS). 3. Insert new HDD. 4. Write old device info into BIOS (same s/n, model, etc.) 5. Capture new 4K HH. 6. Reregister repaired device. 7. Reset device back to OOBE. 8. Go through Autopilot OOBE (customer). 9. Autopilot successfully enabled. |
| Motherboard replacement where only the motherboard is replaced. All other parts remain same. The new motherboard was taken from a previously used device that has never been enabled for Autopilot. | Yes | 1. Deregister damaged device. 2. Replace motherboard (with new RDPK preinjected in BIOS). 3. To gain access, reimage device or sign-in using customer's credentials. 4. Write old device info into BIOS (same s/n, model, etc.) 5. Capture new 4K HH. 6. Reregister repaired device. 7. Reset device back to OOBE. 8. Go through Autopilot OOBE (customer). 9. Autopilot successfully enabled. |
| Motherboard replacement where only the motherboard is replaced. All other parts remain same. The new motherboard was taken from a previously used device that has been Autopilot-enabled before. | Yes | 1. Deregister old device which motherboard is taken from. 2. Deregister damaged device that needs to be repaired. 3. Replace motherboard in repair device with motherboard from other Autopilot device (with new RDPK preinjected in BIOS). 4. To gain access, reimage device or sign-in using customer's credentials. 5. Write old device info into BIOS (same s/n, model, etc.) 6. Capture new 4K HH. 7. Reregister repaired device. 8. Reset device back to OOBE. 9. Go through Autopilot OOBE (customer). 10. Autopilot successfully enabled. The repaired device can also be used successfully as a normal, non-Autopilot device. |
| BIOS info excluded from motherboard replacement device | No | Repair facility doesn't have BIOS tool to write device info into BIOS after Motherboard replacement. 1. Deregister damaged device. 2. Replace motherboard (BIOS does NOT contain device info). 3. Reimage and write DPK into image. 4. Capture new 4K HH. 5. Reregister repaired device. 6. Create Autopilot profile for device. 7. Go through Autopilot OOBE (customer). 8. Autopilot FAILS to recognize repaired device. |
| Motherboard replacement when there's no TPM | Yes | Enabling Autopilot devices without a TPM isn't recommended. However, it's possible to enable an Autopilot device that doesn't have a TPM via user-driven mode. Pre-provision and self-deploying modes aren't supported without a TPM. When using user-driven mode, you would: 1. Deregister damaged device. 2. Replace motherboard. 3. To gain access, reimage device or sign-in using customer's credentials. 4. Write old device info into BIOS (same s/n, model, etc.) 5. Capture new 4K HH. 6. Reregister repaired device. 7. Reset device back to OOBE. 8. Go through Autopilot OOBE (customer). 9. Autopilot successfully enabled. |
| New DPK written into image on repaired Autopilot device with a new motherboard | Yes | Repair facility replaces normal motherboard on damaged device. motherboard doesn't contain any DPK in the BIOS. Repair facility writes DPK into image after motherboard replacement. 1. Deregister damaged device. 2. Replace motherboard - BIOS does NOT contain DPK info. 3. To gain access, reimage device or sign-in using customer's credentials. 4. Write device info into BIOS (same s/n, model, etc.) 5. Capture new 4K HH. 6. Reset or reimage device to pre-OOBE and write DPK into image. 7. Reregister repaired device. 8. Go through Autopilot OOBE. 9. Autopilot successfully enabled. |
| New Repair Product Key (RDPK) | Yes | Using a motherboard with a new RDPK preinjected results in a successful Autopilot refurbishment scenario. 1. Deregister damaged device. 2. Replace motherboard (with new RDPK preinjected in BIOS). 3. Reimage or rest image to pre-OOBE. 4. Write device info into BIOS. 5. Capture new 4K HH. 6. Reregister repaired device. 7. Reimage or reset image to pre-OOBE. 8. Go through Autopilot OOBE. 9. Autopilot successfully enabled. |
| No Repair Product Key (RDPK) injected | No | This scenario violates Microsoft policy and breaks the Windows Autopilot experience. |
| Reimage damaged Autopilot device that wasn't deregistered before repair | Yes, but the device is still associated with previous tenant ID, so should only be returned to same customer. | 1. Reimage damaged device. 2. Write DPK into image. 3. Go through Autopilot OOBE. 4. Autopilot successfully enabled to same tenant ID as before. |
| Disk replacement from a non-Autopilot device to an Autopilot device | Yes | 1. Don't deregister damaged device before repair. 2. Replace HDD on damaged device. 3. Reimage or reset image back to OOBE. 4. Go through Autopilot OOBE (customer). 5. Autopilot successfully enabled (repaired device recognized as its previous self). |
| Disk replacement from one Autopilot device to another Autopilot device | Maybe | If the device from which the HDD is taken was itself previously deregistered from Autopilot, then that HDD can be used in a repair device. The newly repaired device won't have the proper Autopilot experience if the HDD wasn't previously deregistered from Autopilot before being used in the repaired device. Assuming the used HDD was previously deregistered (before being used in this repair): 1. Deregister damaged device. 2. Replace HDD on damaged device using an HDD from another deregistered Autopilot device. 3. Reimage or rest the repaired device back to a pre-OOBE state. 4. Go through Autopilot OOBE (customer). 5. Autopilot successfully enabled. |
| Non-OEM add-in network card replacement | No | Any scenario where a network card is used other than the OEM on-board NIC breaks the Autopilot experience. These scenarios include the following scenarios: • From a non-Autopilot device to an Autopilot device. • From one Autopilot device to another Autopilot device. • From an Autopilot device to a non-Autopilot device. These scenarios aren't recommended. |
| Memory replacement | Yes | Replacing the memory on a damaged device doesn't negatively affect the Autopilot experience on the device. No deregistration/reregistration is needed. The repair technician simply needs to replace the memory. |
| GPU replacement | Yes | Replacing one or more GPUs on a damaged device doesn't negatively affect the Autopilot experience on that device. No deregistration/reregistration is needed. The repair technician simply needs to replace the GPU. |
Important
When parts are scavenged from another Autopilot device, Microsoft recommends to unregister the scavenged device from Autopilot, scavenge it, and then never register the scavenged device again for Autopilot. Reusing parts in this way might cause two active devices to end up with the same ID with no possibility of distinguishing between the two.
The following parts can be replaced without compromising Autopilot enablement or requiring special additional repair steps:
- Memory (RAM or ROM)
- Power Supply
- Video Card
- Card Reader
- Sound card
- Expansion card
- Microphone
- Webcam
- Fan
- Heat sink
- CMOS battery
Other repair scenarios not yet tested and verified include:
- Daughterboard replacement
- CPU replacement
- Wifi replacement
- Ethernet replacement
FAQ
| Question | Answer |
|---|---|
| What to do if you see another customer's welcome page? | If you continue seeing another customer's welcome page on a replacement device or refurbished motherboard, a ticket needs to be raised to Microsoft to fix the device ownership. You can open a ticket through the Microsoft Intune admin center by selecting the Help and Support option outlined here. If you don't have access to Microsoft Intune, you can submit a ticket through Microsoft Store for Business by selecting Manage > Support and selecting Technical Support. You can also submit a ticket through your Microsoft Volume Licensing Center agreement, instructions outlined here. Title all tickets Autopilot Deregistration Request to streamline requests. |
| We have a tool that programs product information into the BIOS after the motherboard replacement. Do we still need to submit a CBR report for the device to be Autopilot-capable? | No. Not if the in-house tool writes the minimum necessary information into the BIOS that the Autopilot program looks for to identify the device, as described earlier in this document. |
| What if only some components are replaced rather than the full motherboard? | It's true that some limited repairs don't prevent the Autopilot algorithm from successfully matching the post-repair device with the pre-repair device. However, Microsoft recommends to always go through the motherboard replacement steps described in the previous sections to ensure success. |
| How does a repair technician gain access to a broken device if they don't have the customer's sign-in credentials? | The technician has to reimage the device and use their own credentials during the repair process. |
Related content
Feedback
Coming soon: Throughout 2024 we will be phasing out GitHub Issues as the feedback mechanism for content and replacing it with a new feedback system. For more information see: https://aka.ms/ContentUserFeedback.
Submit and view feedback for